
A sturdy handmade tote that actually stands up on its own? Yes, please. This botanical granny tote makes the perfect market bag, everyday carryall, or thoughtful handmade gift for someone who appreciates functional beauty. The design uses basic single crochet for the body and classic granny square construction for the decorative panels, so you get impressive results without complicated techniques.
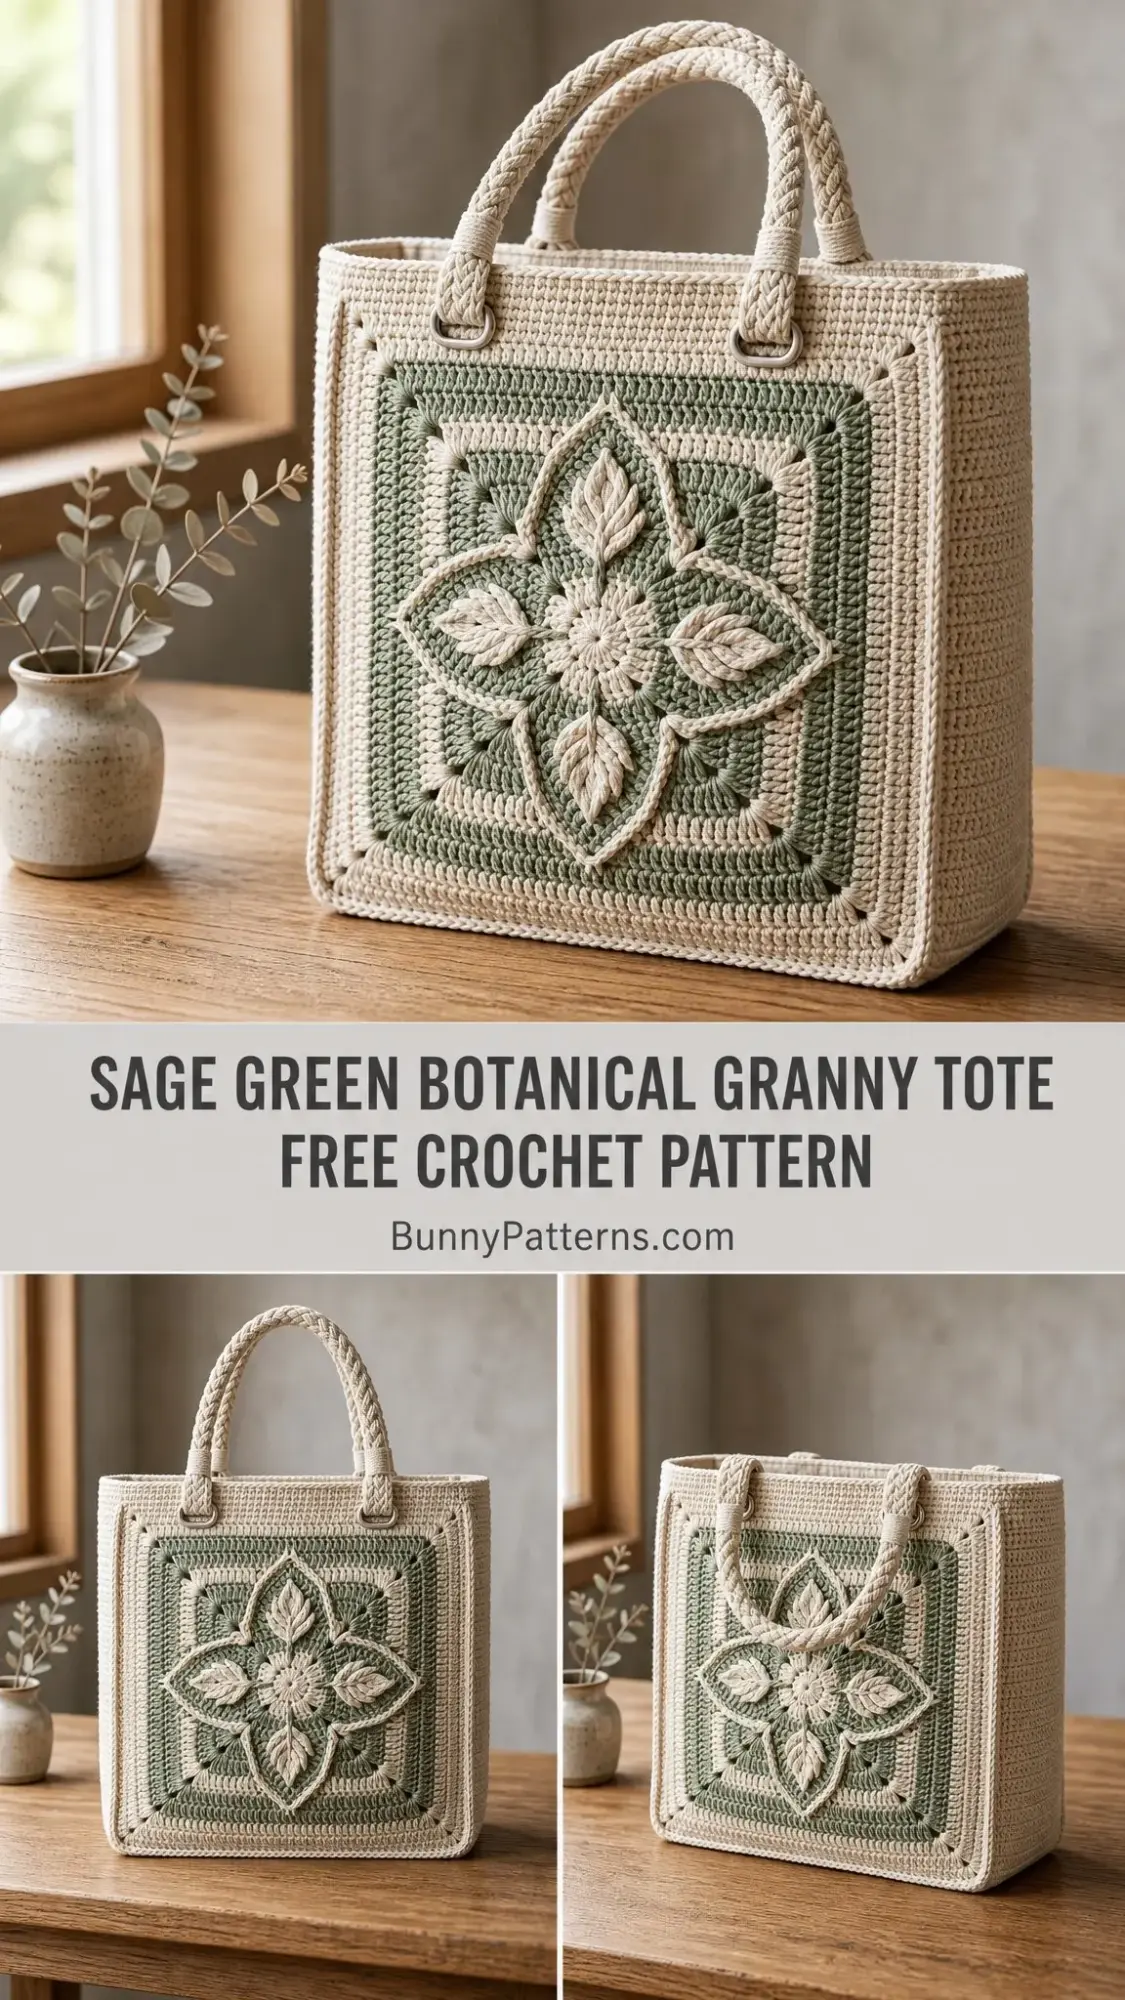
The combination of cream and sage green feels fresh and modern while still honoring traditional crochet aesthetics. Whether you need a bag for farmers market runs or want to craft something special for a friend who loves botanical motifs, this project delivers.
I designed this tote with structure in mind. Cotton yarn plus dense single crochet stitches means this bag holds its shape beautifully. The raised flower and leaf details on the applique panels add visual interest without sacrificing practicality. Let me walk you through every step.
Why This Botanical Tote Works So Well
The genius of this design lies in its construction. You are building a firm, boxy base that will not collapse when you set it down. The body is worked in tight single crochet (sc) stitches, which creates a dense fabric with minimal stretch. Then you add those gorgeous botanical granny square panels as appliques on the front and back.
This approach gives you the best of both worlds. The structural integrity of a solid fabric bag with the decorative charm of granny square motifs. The raised flower center and leaf clusters are worked directly onto the sage green background using front post stitches, creating dimensional texture you can actually feel.
The braided handles threaded through D-rings add durability and a polished, professional look. This is a bag you will reach for again and again.
Skill Level and Time Commitment
I would rate this project as advanced beginner to intermediate. The main bag body is straightforward repetitive single crochet worked in joined rounds. If you can chain, single crochet, and work in the round, you can handle the body with no problem.
The botanical applique requires a bit more experience. You will need comfort with working granny squares from the center out, making color changes, and creating raised stitches using front post techniques. Nothing here is scary, but it does require attention to the pattern.
Time estimate: Plan for approximately 18 to 25 hours total. The body works up in about 6 to 8 hours. Each botanical square takes 4 to 6 hours due to the detailed motif work. Assembly and handles add another 2 to 3 hours. This is a weekend project if you have dedicated crafting time, or a satisfying week-long endeavor worked in shorter sessions.
Finished Measurements
Your completed tote will measure approximately:
Materials You Will Need
Yarn
Color A (Cream/Natural): approximately 650 yards (594 m) of worsted weight cotton yarn
Color B (Sage Green): approximately 300 yards (274 m) of worsted weight cotton yarn
Recommended Yarn Brands
Lion Brand 24/7 Cotton in Ecru and Sage works beautifully. This mercerized cotton gives excellent stitch definition and body.
Paintbox Yarns Cotton Aran in Vanilla Cream and Pistachio Green is slightly heavier than standard worsted and creates a wonderfully dense fabric.
WeCrochet Dishie in Cream and Fern is durable, smooth, and shows texture stitches gorgeously.
Important note: Stick with 100 percent cotton yarn. Avoid acrylic blends as they will not hold the structured boxy shape this design requires.
Hooks
Additional Supplies
Gauge
Getting gauge right matters for this project. The finished dimensions and how well your applique fits on the panels depend on consistent gauge throughout.
For the bag body with H-8 (5.0 mm) hook and Color A in single crochet:
For the applique square with G-6 (4.0 mm) hook:
Make a 5-inch by 5-inch swatch in single crochet, wash and dry it, then measure. Adjust hook size up or down as needed before starting.
Abbreviations and Stitch Definitions
Let me explain every stitch you will use. I am defining these in US crochet terms.
ch = chain
sl st = slip stitch
sc = single crochet (insert hook in stitch, yarn over and pull up a loop, yarn over and pull through both loops on hook)
dc = double crochet (yarn over, insert hook in stitch, yarn over and pull up a loop, yarn over and pull through 2 loops, yarn over and pull through remaining 2 loops)
hdc = half double crochet
tr = treble crochet
MR = magic ring (adjustable loop for starting rounds)
FPdc = front post double crochet (yarn over, insert hook from front to back to front around the post of the stitch below, complete as a regular dc; this creates a raised stitch that sits in front of the fabric)
BPdc = back post double crochet (same technique but insert hook from back to front to back)
FPtr = front post treble crochet (yarn over twice, work around the post from front to back to front, complete as regular treble)
sc2tog = single crochet 2 together (a decrease; insert hook in first stitch and pull up a loop, insert hook in next stitch and pull up a loop, yarn over and pull through all 3 loops)
ch-sp = chain space
st(s) = stitch(es)
rnd = round
rep = repeat
sk = skip
RS = right side
Special Stitches
Shell Stitch: Work 5 dc all into the same stitch or space. This creates a fan-shaped shell.
Puff Stitch: (Yarn over, insert hook into stitch, yarn over and pull up a loop to approximately 1/2 inch height) 4 times in the same stitch. You will have 9 loops on hook. Yarn over and draw through all 9 loops. Chain 1 to close and secure.
Raised Leaf: Chain 1 (does not count as stitch), then work (sc, hdc, dc, tr, dc, hdc, sc) all into the same stitch or space. The center treble sits at the tip of the leaf.
Reverse sc (Crab Stitch): Work single crochet from left to right instead of right to left. Insert hook into stitch to the right of your hook, yarn over, pull up a loop, yarn over and draw through both loops.
Pattern Notes Before You Begin
1. The bag body is worked in joined rounds. Begin each round with chain 1, which does NOT count as a stitch. Mark the first actual stitch with a stitch marker.
2. The bottom is worked flat as a rectangle. Then you pick up stitches around the entire perimeter and work the sides upward in the round.
3. Make two botanical squares separately, then sew them onto the front and back panels.
4. D-rings attach at the top corners using small crocheted tabs. Handles thread through the D-rings.
5. The right side faces outward throughout bag construction.
6. Stitch counts appear in parentheses at the end of each instruction.
Bag Bottom Instructions
Work flat with Color A and H-8 hook.
Foundation: Ch 53.
Row 1: Sc in 2nd ch from hook and in each ch across. Turn. (52 sc)
Rows 2 through 18: Ch 1, sc in each st across. Turn. (52 sc)
Do not fasten off.
Checkpoint: Your bottom panel should measure approximately 13 inches wide by 4 inches tall. If measurements are off, check your gauge and adjust hook size.
Bag Sides Instructions
Continue from the bottom panel without fastening off. You will now work around the entire perimeter.
Set-up Round: Rotate work to pick up stitches along the short right edge. Ch 1, sc evenly along the right short edge working 1 sc per row end (18 sc), sc across the starting chain edge working into the other side of the foundation chain (52 sc), sc evenly along the left short edge (18 sc), sc across the top of Row 18 (52 sc). Join with sl st to first sc. (140 sc)
Place stitch markers at all four corners:
The long sides (52 stitches each) form your front and back panels. The short sides (18 stitches each) form the side gussets.
Rounds 1 through 36: Ch 1, sc in each st around. Join with sl st to first sc. (140 sc)
After Round 36, your side walls measure approximately 8 inches, giving a total bag height of 12 inches including the bottom.
Do not fasten off.
Top Edging
Round 37 (Crab Stitch): Do not turn. Working from left to right (opposite direction), ch 1, reverse sc in each st around. Join with sl st to first reverse sc. (140 reverse sc)
Fasten off. Weave in end.
D-Ring Tabs (Make 4)
Each tab wraps around a D-ring and attaches at the handle positions.
Position tabs at stitches 22, 68, 92, and 137 (3 stitches in from each corner on the front and back panels).
With Color A and H-8 hook, ch 8.
Row 1: Sc in 2nd ch from hook and in each ch across. (7 sc)
Rows 2 through 4: Ch 1, turn. Sc in each st across. (7 sc)
Fold the tab around a D-ring, aligning both edges. Whip stitch the tab to the inside of the bag at the marked position, sewing through both tab layers and the top two rounds of the bag body.
Repeat for all four tabs.
Handles
Option 1 (Purchased Rope): Thread a 22-inch length of natural cotton rope through both D-rings on the front panel. Fold each end back 2 inches and stitch securely. Repeat for back panel.
Option 2 (Crocheted Braided Handle, Make 2): With Color A and H-8 hook, make three chains of 70 chains each. Slip stitch in each chain to create three firm cords. Braid together and secure ends. Thread through D-rings and sew ends to handle cord. Repeat for back panel.
Each handle should have approximately 9 inches of drop.
Botanical Granny Square Applique (Make 2)
Part 1: Square Background
Work with Color B (sage) and G-6 hook unless otherwise noted.
Round 1: With Color B, make a magic ring. Ch 3 (counts as first dc), work 2 dc in ring, ch 2, (3 dc in ring, ch 2) 3 times. Join with sl st to top of beg ch-3. Tighten magic ring. (4 groups of 3 dc, 4 ch-2 corner spaces)
Round 2: Join Color A in any ch-2 corner sp. Ch 3, (2 dc, ch 2, 3 dc) in same corner sp. Ch 1. (3 dc, ch 2, 3 dc) in each remaining corner sp. Ch 1 between each corner group. Join with sl st to top of beg ch-3. Fasten off Color A. (8 groups of 3 dc, 4 ch-2 corners, 4 ch-1 side spaces)
Round 3: Join Color B in any ch-2 corner sp. Ch 3, (2 dc, ch 2, 3 dc) in same corner sp. Ch 1, 3 dc in ch-1 side sp, ch 1, (3 dc, ch 2, 3 dc) in corner sp, ch 1, 3 dc in ch-1 side sp, ch 1. Rep around. Join with sl st to top of beg ch-3. Fasten off. (12 groups of 3 dc, 4 ch-2 corners, 8 ch-1 side spaces)
Rounds 4 through 8: Continue the granny square pattern, alternating Color A and Color B each round. Each round adds one 3-dc group per side.
Round 9: Join Color B in any ch-2 corner sp. Ch 1, 3 sc in corner sp, sc in each dc and 1 sc in each ch-1 sp across each side, 3 sc in each corner sp. Join with sl st to first sc. Target: (144 sc)
Round 10: Join Color A in any corner center stitch. Ch 3, (2 dc, ch 2, 3 dc) in same corner sc. Sk 1 sc, dc in each sc across to 1 sc before next corner, sk 1 sc, (3 dc, ch 2, 3 dc) in corner sc. Rep around. Join with sl st to top of beg ch-3. Fasten off.
Block square to 9 inches by 9 inches before adding the raised motif.
Part 2: Raised Botanical Motif
Work in Color A directly onto the completed sage square using surface stitches.
Flower Center: Join yarn at the absolute center. Work a puff stitch. Then work 8 FPtr stitches evenly spaced around the center, with ch 1 between each. Join with sl st.
Outer Petal Layer: Work (sl st, ch 2, 3 dc, ch 2, sl st) into each ch-1 space. (8 petal fans)
Compass Petals (Make 4): Work one petal extending toward each side midpoint using FPdc and FPtr stitches, decreasing to a point.
Corner Leaf Clusters (Make 4): Work two raised leaves at each corner, angled toward the corner point.
Assembly
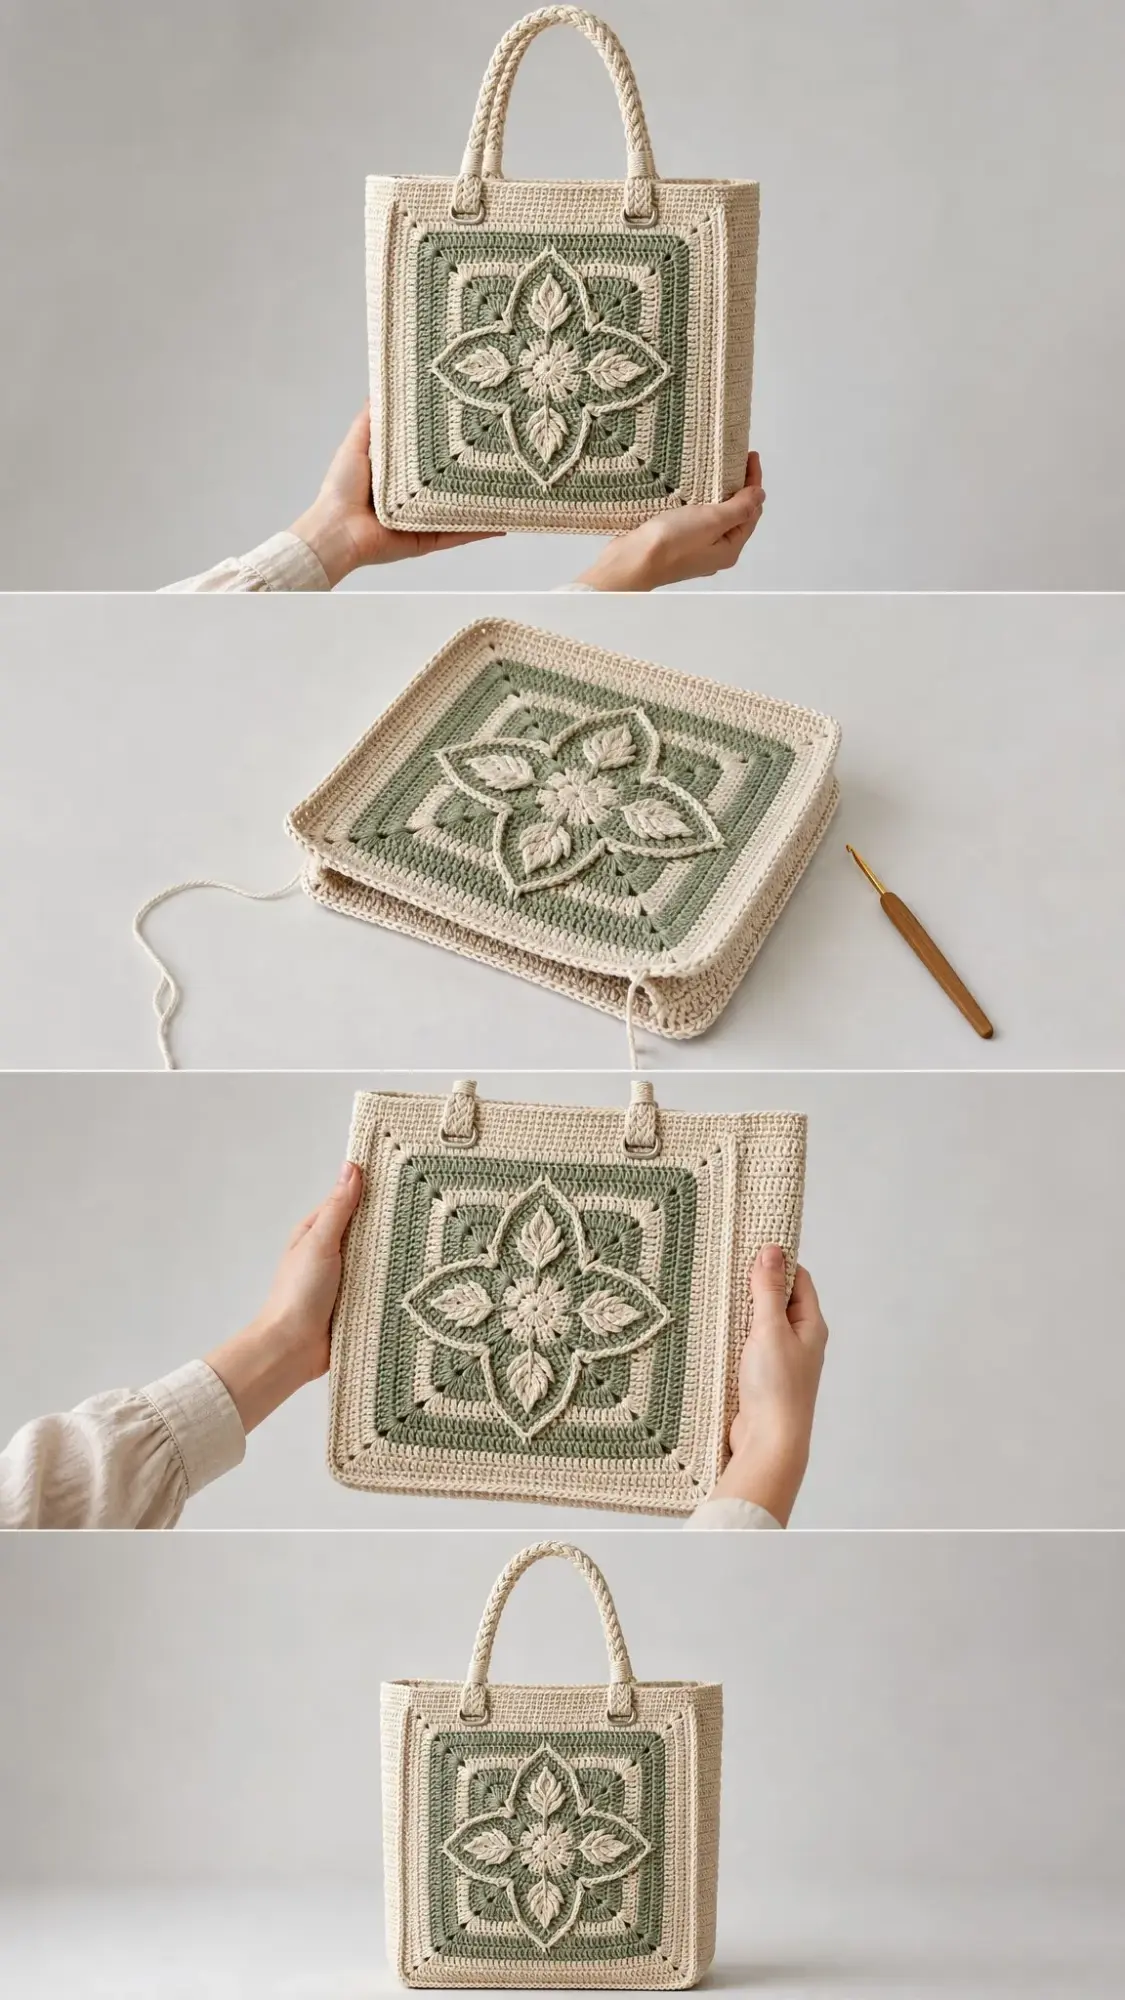
Center each botanical square on the front and back panels of your bag. The square should have approximately 2 inches of cream bag body visible on all sides. Pin in place and whip stitch around the entire perimeter using Color A.
Weave in all remaining ends.
If using a bottom insert, slip it inside the bag before adding a lining.
Care Instructions
Hand wash in cool water with mild detergent. Reshape while damp and lay flat to dry. Cotton may shrink slightly with heat, so avoid the dryer. Store flat or stuffed with tissue to maintain shape.
Final Thoughts on This Botanical Tote Crochet Pattern
This sage green botanical granny tote combines traditional granny square charm with modern functionality. The structured cotton body holds up to real-world use while those dimensional flower and leaf details make it a conversation starter wherever you go.
Take your time with the raised motif sections. They look intricate but break down into manageable steps when you work through them round by round. The finished result is absolutely worth the effort.
Thank you so much for choosing this pattern for your next project. I genuinely hope you love making it as much as I loved designing it. If you give this botanical tote a try, I would love to see your finished bag! Tag me on Instagram or share a photo in my Facebook group.
If this pattern caught your eye, go ahead and save it to your Pinterest boards so you can find it easily when you are ready to start. And please drop a comment below if you make one. I always love hearing how your projects turn out and seeing the color combinations you choose!
You Might Also Like
- Berry Blossom Lace Cardigan Free Crochet Pattern
- Dusty Rose Cable Cuff Slipper Boots Free Crochet Pattern
- Dusty Rose Lace Panel Crochet Sweater Free Pattern
- Sage Green Minimalist Backpack Free Crochet Pattern