
Go grab that gorgeous DK weight cotton you have been saving for something special. This is the project it has been waiting for.
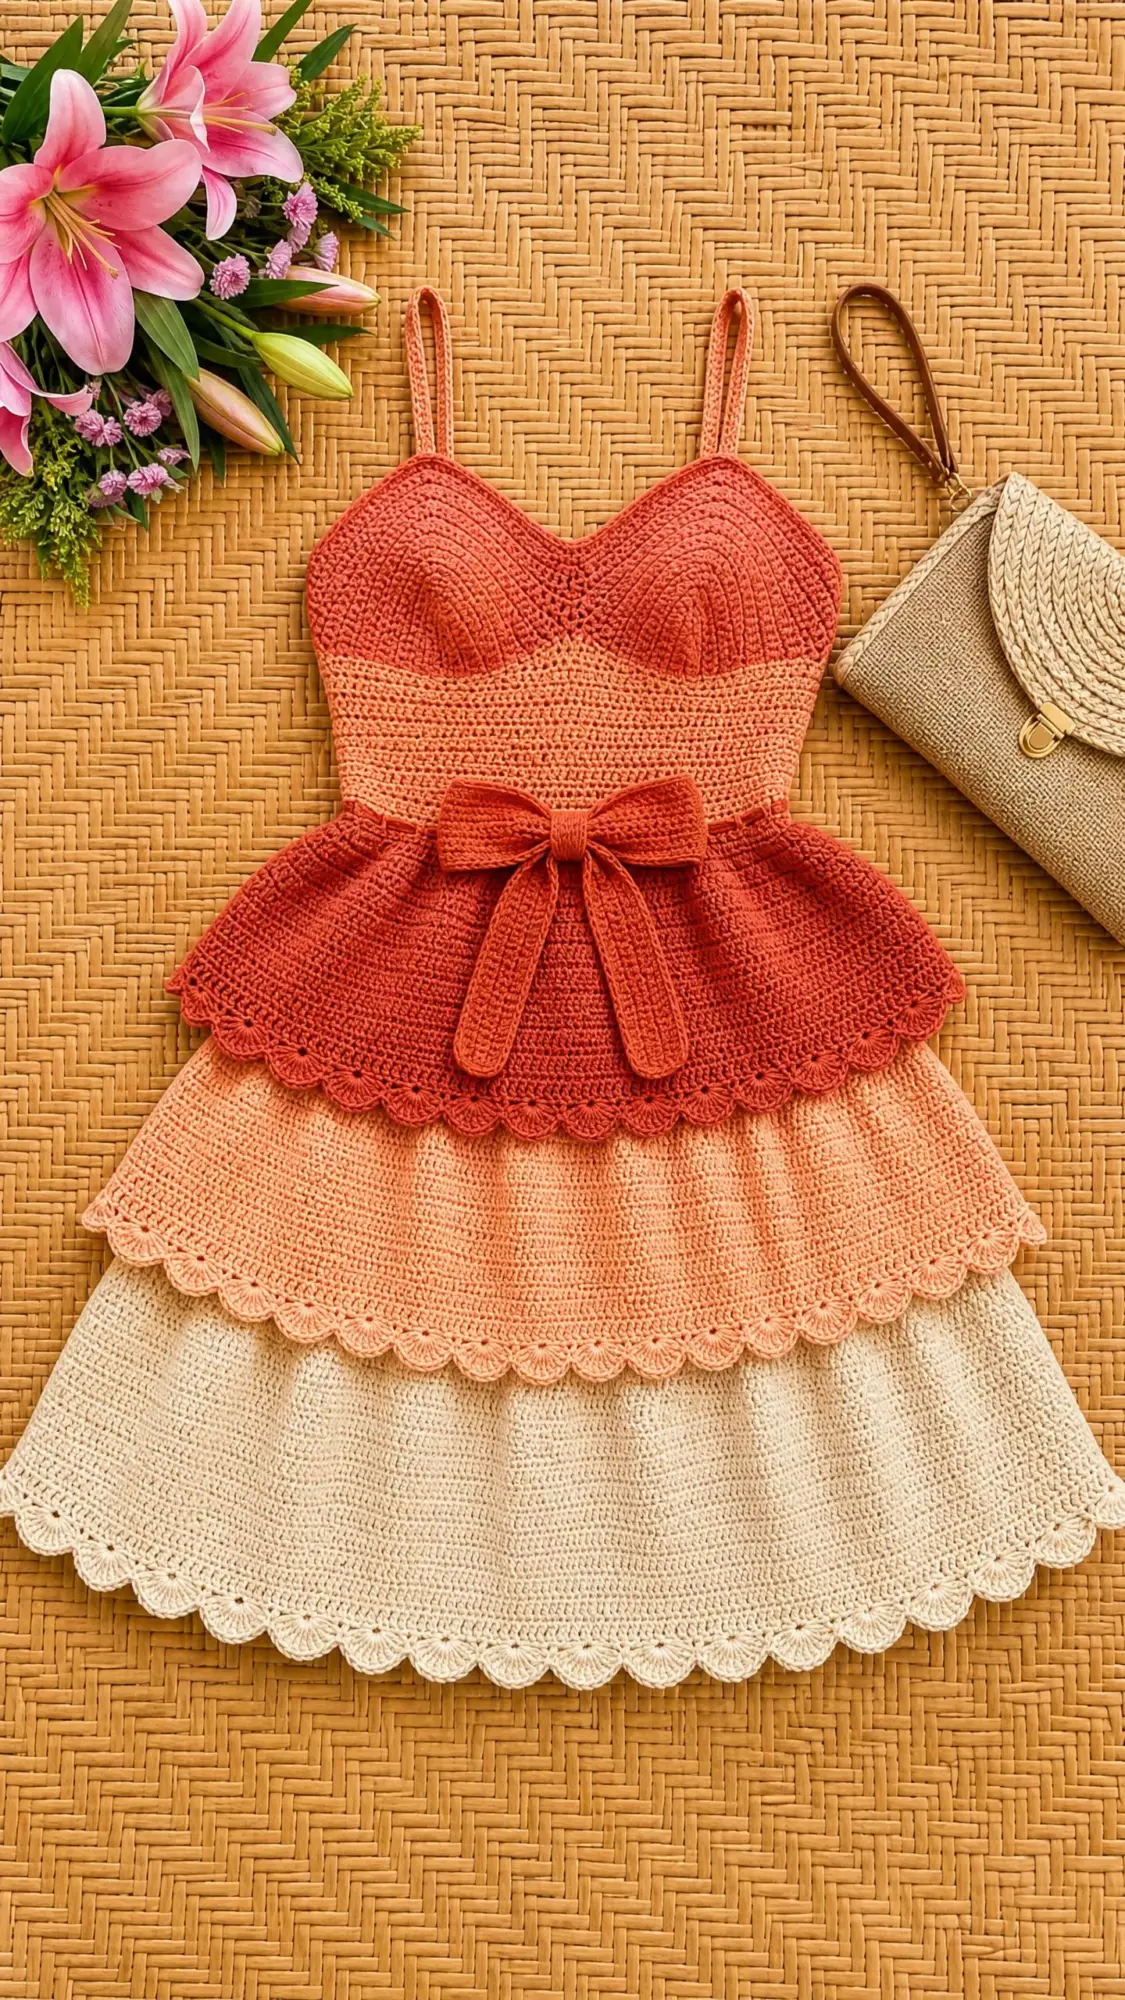
This stunning tiered ruffle dress uses short-row cup shaping and three cascading tiers with scalloped edges. The construction is genuinely interesting. You work two separate bust cups flat, join them with chain bridges, then continue in the round for the bodice. Each skirt tier attaches to the same waist round but in different loops, creating that beautiful layered cascade. I will be honest with you. This is an intermediate to advanced project. The sweetheart neckline shaping requires patience, and the stitch count management across the tiers demands attention.
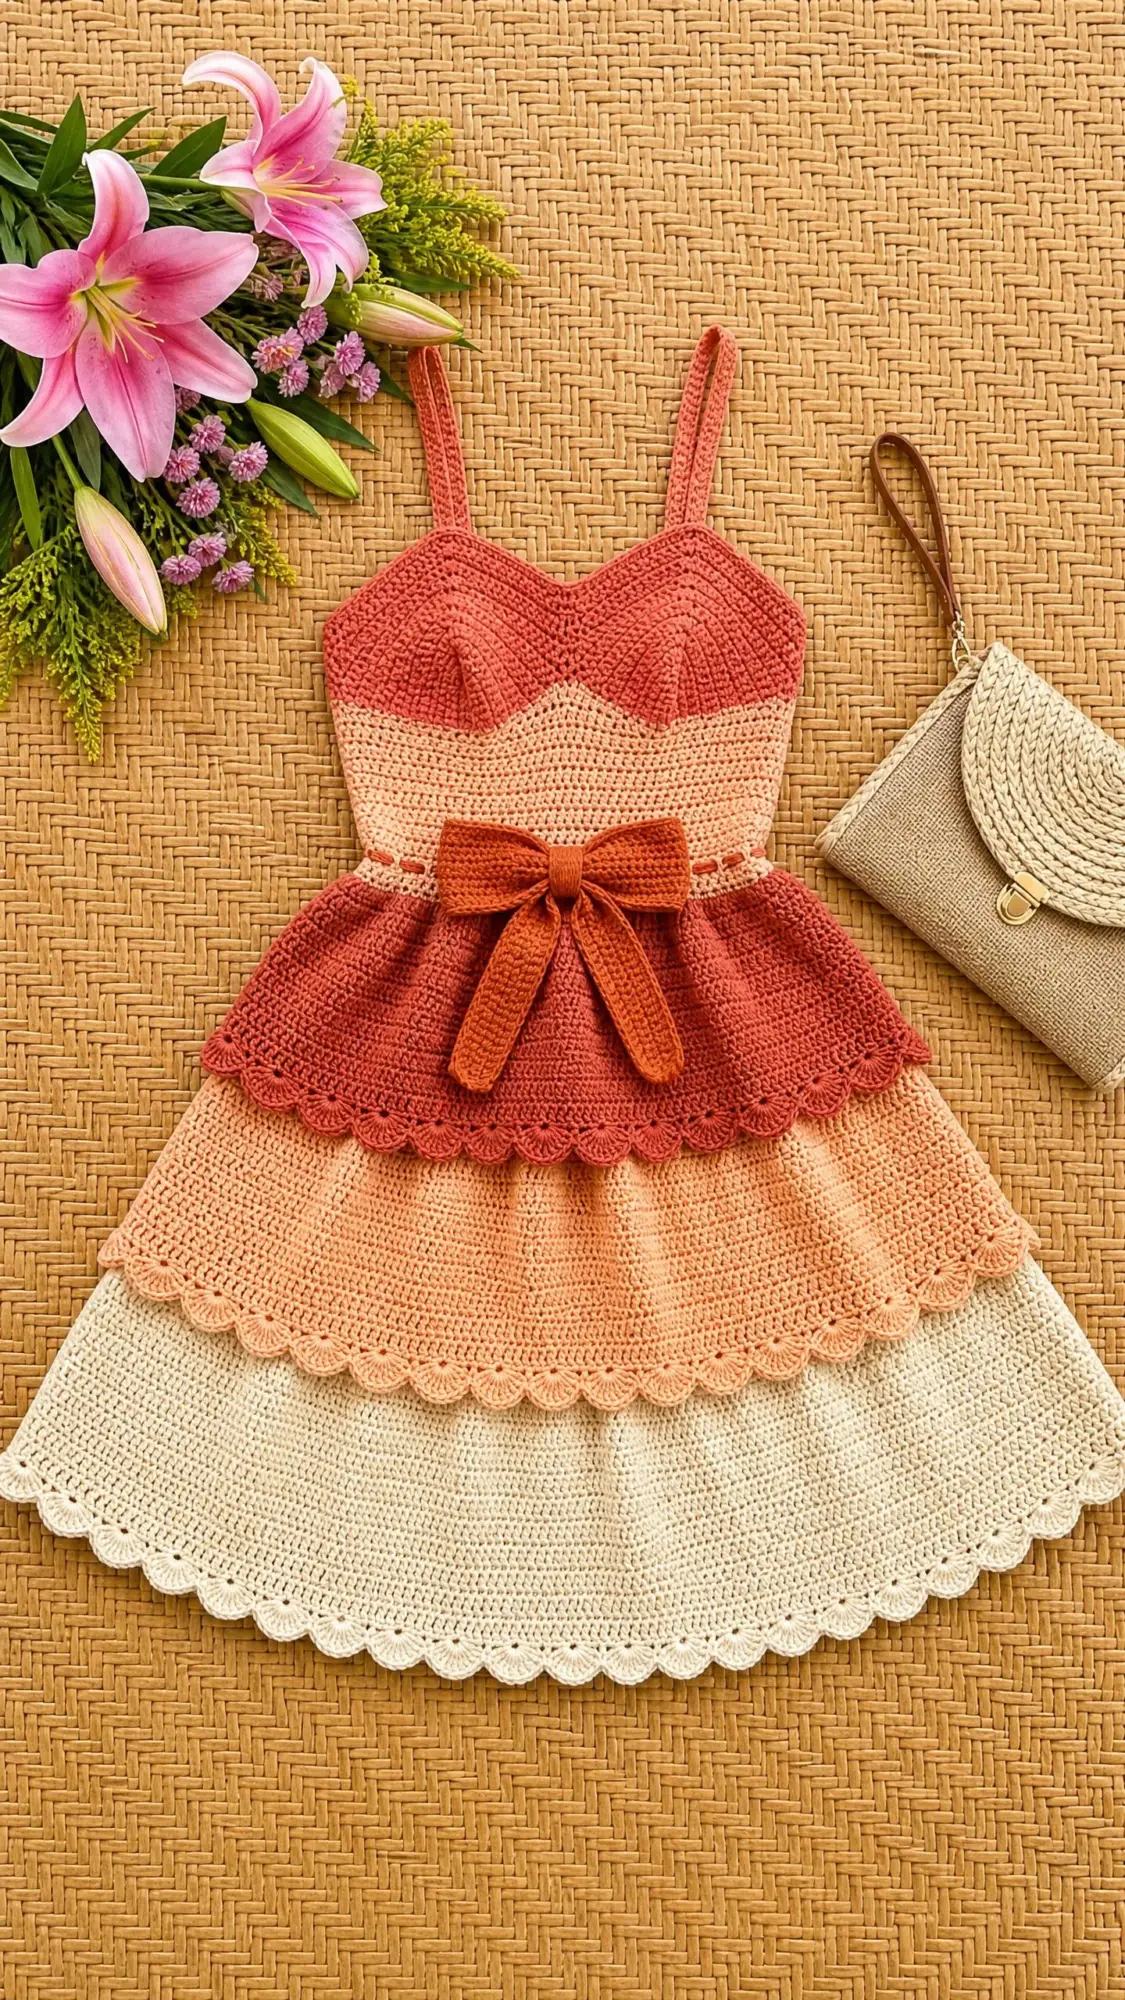
But if you have been crocheting for a while and you want a showstopper summer dress, this is your moment. The gradient from deep terracotta through brick red, soft peach, and cream creates that dreamy sunset effect. Let me walk you through every single step.
About This Crochet Pattern
This fitted spaghetti-strap mini dress features a sweetheart neckline, structured bodice with horizontal color bands, and three ruffled tiers. Each tier finishes with a delicate shell scallop edging. A crocheted bow cinches the waist at the peplum.
The dress works primarily in the round from the top down. You shape the bodice flat in two mirror-image cups before joining at center front. Each skirt tier picks up from the row below and works outward so the ruffles fall naturally.
Skill Level: Intermediate to Advanced
Time Estimate: Approximately 20 to 28 hours for an experienced intermediate crocheter. If you are new to short-row shaping, budget an additional 4 to 6 hours.
Finished Measurements
These measurements fit a 34-inch bust and 26-to-28-inch waist.
Materials Needed
Yarn (DK weight, CYCA 3):
I recommend 100% mercerized cotton or a cotton-acrylic blend for stitch definition, drape, and breathability.
Hooks:
Notions:
Yarn Suggestions
Option 1: Paintbox Yarns Simply DK (100% acrylic, 137 yards per 50g ball). Shades: Burnt Orange, Vintage Pink, Blush Pink, Paper White. You need 2 balls of Color A, 3 balls each of Colors B, C, and D.
Option 2: Lion Brand 24/7 Cotton DK (100% mercerized cotton, 186 yards per 100g skein). Shades: Terracotta, Persimmon, Peach, Ecru. You need 2 skeins of each color.
Option 3: Drops Safran (70% cotton / 30% polyamide, 175 yards per 50g ball). Shades: Rust, Old Rose, Powder Pink, Off White. You need 2 balls of each color.
Avoid textured or bouclé yarns. They obscure the stitch definition needed for the sweetheart shaping and scallop edging.
Gauge
22 single crochet (sc) x 26 rows = 4 inches / 10 cm in single crochet worked in the round, blocked
18 double crochet (dc) x 9 rows = 4 inches / 10 cm in double crochet worked in the round, blocked
Gauge is mandatory for this garment. Even one stitch per inch difference in the bodice changes the bust measurement by up to 2 inches around. Swatch in the round, not flat. Block your swatch before measuring.
Abbreviations and Stitch Definitions
Special Stitches and Techniques
Shell Stitch
Work 5 dc all into the same stitch or space. This creates a fan-shaped shell. Unless noted otherwise, skip 2 stitches before and after each shell.
Scallop Edging
Work 1 sc in first st, then repeat the following around: skip 2 sts, work 5 dc into next st (shell made), skip 2 sts, work 1 sc into next st. Each repeat uses 6 stitches. Your tier’s final round must have a stitch count divisible by 6 before beginning this edging.
Short Row Bust Cup Shaping
A short row is a partial row that does not travel all the way across. To work one in single crochet: work to the turning point specified, chain 1, turn, leaving remaining stitches unworked. On the return, work back to the opposite edge, chain 1, turn. Short rows build height at the center of each cup and create the sweetheart curve. No special wrap is needed when working cotton at this gauge.
Peplum Gather Row
Work 1 sc into the FLO of every stitch around the waist join round. This creates a visible ridge line and anchors the peplum tier.
Pattern Notes Before You Begin
1. The dress works top-down. Bodice cups are separate, then joined and worked in the round to the waist. Each skirt tier works in the round and attaches to the previous tier.
2. Color placement:
3. When changing color, work the last stitch of the old color until the final yarn-over, then draw through with the new color. Fasten off and weave ends as you go.
4. Place a stitch marker at the beginning of every round. Place additional markers at side seams to monitor ease.
5. Blocking is strongly recommended. Cotton relaxes significantly with wet blocking and the scallop shells open beautifully.
Crochet Pattern Instructions
Right Bust Cup
Using Color A and 3.5 mm hook, chain 96.
Foundation Row (WS): Sc in 2nd ch from hook and in each ch across, ch 1, turn. (95 sc)
Row 1 (RS): Sc in each st across, ch 1, turn. (95 sc)
Row 2: Sc in each st across, ch 1, turn. (95 sc)
Row 3 (short row): Sc in first 85 sts, ch 1, turn. (85 sts worked)
Row 4 (short row): Sc in first 75 sts, ch 1, turn. (75 sts worked)
Row 5: Sc across all 95 sts, ch 1, turn. (95 sc)
Row 6: 2 sc in first st, sc in each st to last st, 2 sc in last st, ch 1, turn. (97 sc)
Row 7: Sc in each st across, ch 1, turn. (97 sc)
Row 8: 2 sc in first st, sc in each st to last st, 2 sc in last st, ch 1, turn. (99 sc)
Row 9 (short row): Sc in first 89 sts, ch 1, turn. (89 sts worked)
Row 10 (short row): Sc in first 79 sts, ch 1, turn. (79 sts worked)
Row 11: Sc across all 99 sts, ch 1, turn. (99 sc)
Row 12: Sc in each st across, ch 1, turn. (99 sc)
Row 13: Sc in each st across, ch 1, turn. (99 sc)
Row 14: Sc in each st across. (99 sc)
Do not fasten off. Place a locking marker in the live loop. Set aside.
Left Bust Cup
Using Color A and 3.5 mm hook, chain 96.
Foundation Row (WS): Sc in 2nd ch from hook and in each ch across, ch 1, turn. (95 sc)
Row 1 (RS): Sc in each st across, ch 1, turn. (95 sc)
Row 2: Sc in each st across, ch 1, turn. (95 sc)
Row 3 (short row): Sc in each st to last 10 sts, ch 1, turn. (85 sts worked)
Row 4 (short row): Sc in each st to last 20 sts, ch 1, turn. (75 sts worked)
Row 5: Sc across all 95 sts, ch 1, turn. (95 sc)
Row 6: 2 sc in first st, sc in each st to last st, 2 sc in last st, ch 1, turn. (97 sc)
Row 7: Sc in each st across, ch 1, turn. (97 sc)
Row 8: 2 sc in first st, sc in each st to last st, 2 sc in last st, ch 1, turn. (99 sc)
Row 9 (short row): Sc in each st to last 10 sts, ch 1, turn. (89 sts worked)
Row 10 (short row): Sc in each st to last 20 sts, ch 1, turn. (79 sts worked)
Row 11: Sc across all 99 sts, ch 1, turn. (99 sc)
Row 12: Sc in each st across, ch 1, turn. (99 sc)
Row 13: Sc in each st across, ch 1, turn. (99 sc)
Row 14: Sc in each st across. (99 sc)
Do not fasten off.
Joining Cups and Working Bodice in the Round
With the live loop from the Left Cup still active, ch 2 (underarm bridge, left side). Insert hook into the first live st of the Right Cup (remove marker), sc across all 99 sts of the Right Cup, ch 2 (underarm bridge, right side), continue sc across all 99 sts of the Left Cup, sl st to first sc to join. (99 + 2 + 99 + 2 = 202 sts)
Rnd 1 (Color A): Ch 1, sc in each st and ch around. (202 sc)
Rnd 2: Sc in each st around. (202 sc)
Rnd 3: Sc in each st around. (202 sc)
Change to Color C at the end of Rnd 3.
Rnd 4 (Color C): Sc in each st around. (202 sc)
Rnd 5: Sc in first 10 sts, sc2tog, sc in next 10 sts; rep from 16 more times, sc2tog, sc in remaining sts to end. (184 sc)
Rnd 6: Sc in each st around. (184 sc)
Rnd 7: Sc in first 9 sts, sc2tog, sc in next 10 sts; rep from 14 more times, sc2tog, sc in remaining sts to end. (168 sc)
Rnd 8: Sc in each st around. (168 sc)
Rnd 9: Sc in first 7 sts, sc2tog, sc in next 8 sts; rep from 13 more times, sc2tog, sc to end. (154 sc)
Rnd 10 (waist round): Sc in each st around. (154 sc)
Checkpoint 1
Your bodice should measure approximately 6 inches from cup tops to waist round. The waist opening should measure 28 inches in circumference when laid flat (14 inches across). If smaller, your tension is tight. Move up a hook size. If larger, move down a hook size.
Peplum Tier (First Skirt Tier)
Change to Color B.
Peplum Setup Rnd: Working into FLO of every st of Rnd 10, join Color B with sl st, ch 3 (counts as first dc), dc in same st, 2 dc in each remaining st around, sl st to top of ch-3 to join. (308 dc)
Rnds 1-10: Ch 3 (counts as dc), dc in each st around, sl st to top of ch-3. (308 dc)
Rnd 11 (adjustment for scallop): Ch 3, dc in next 153 sts, dc2tog, dc in next 153 sts, dc2tog, sl st to top of ch-3. (306 dc)
This adjustment ensures your stitch count is divisible by 6 for the scallop edging.
Scallop Edging Rnd: Ch 1, sc in first st, sk 2 sts, 5 dc in next st (shell), sk 2 sts, sc in next st; rep from around, sl st to first sc. (51 shells, 51 sc)
Fasten off Color B. Weave ends.
Checkpoint 2
The dress should now measure approximately 10.5 inches from cup tops. The peplum should flare visibly from the waist with clean scallops all around.
Tier 2 (Second Skirt Tier)
Change to Color C.
Tier 2 Setup Rnd: Working into BLO of every st of the waist round (Rnd 10), join Color C with sl st, ch 3 (counts as dc), dc in same st, 2 dc in each remaining st around, sl st to top of ch-3. (308 dc)
Rnds 1-4: Ch 3, dc in each st around, sl st to top of ch-3. (308 dc)
Rnd 5 (volume increase): Ch 3, dc in next 3 sts, 2 dc in next st; rep from around, sl st to top of ch-3. (385 dc)
Rnds 6-12: Ch 3, dc in each st around, sl st to top of ch-3. (385 dc)
Adjustment Rnd: Work dc2tog once to bring count to 384 (divisible by 6). (384 dc)
Scallop Edging Rnd: Ch 1, sc in first st, sk 2 sts, 5 dc in next st, sk 2 sts, sc in next st; rep from around, sl st to first sc. (64 shells)
Fasten off Color C. Weave ends.
Tier 3 (Third Skirt Tier)
Change to Color D.
Attach Tier 3 to the back loops of the Tier 2 Setup Rnd (the round where Tier 2 was joined).
Tier 3 Setup Rnd: Working into BLO, join Color D with sl st, ch 3, dc in same st, 2 dc in each st around, sl st to top of ch-3. (616 dc)
Rnds 1-14: Ch 3, dc in each st around, sl st to top of ch-3. (616 dc)
Adjustment Rnd: Work dc2tog twice evenly to reach 612 (divisible by 6). (612 dc)
Scallop Edging Rnd: Ch 1, sc in first st, sk 2 sts, 5 dc in next st, sk 2 sts, sc in next st; rep from around, sl st to first sc. (102 shells)
Fasten off Color D. Weave ends.
Spaghetti Straps (Make 2)
Using Color A and 3.25 mm hook.
Ch 80. Sc in 2nd ch from hook and in each ch across. (79 sc)
Fasten off, leaving a long tail for sewing.
Sew one end of each strap to the inside top edge of each bust cup at the outer edge. Try on the dress and adjust strap length as needed. Sew the other end of each strap to the corresponding point at the back bodice.
Crocheted Bow
Using Color B and 3.25 mm hook.
Ch 21.
Row 1: Sc in 2nd ch from hook and in each ch across. (20 sc)
Rows 2-16: Ch 1, turn, sc in each st across. (20 sc)
Fasten off, leaving a long tail.
Fold the rectangle so the short ends meet in the center. Pinch the center together tightly. Wrap a separate length of Color B yarn around the pinched center 8 to 10 times, pulling firmly. Tie off and weave ends.
Sew the finished bow to the center front waist, right where the peplum tier begins.
Finishing Your Dress
Weave in all remaining ends. Block the dress on blocking mats using rust-proof pins. Wet blocking works best for cotton. The scallop shells will open beautifully and the tiers will relax into their natural drape.
If desired, add a small button or snap at the center back for easier dressing.
Size Customization Tips
To adjust for a larger bust, add stitches to your foundation chain in multiples of 4. For every 4 stitches added to each cup, your bust measurement increases approximately 1.5 inches. Adjust the waist decreases proportionally.
For a longer dress, add rounds to each tier before the scallop edging. Each round of double crochet adds approximately 0.4 inches of length.
Troubleshooting Common Issues
Cups look uneven: The short rows build height asymmetrically. Block each cup before joining to see the true shape.
Waist too loose: Your gauge is looser than specified. Drop down a hook size for the bodice portion.
Scallops puckering: Your stitch count was not divisible by 6. Count carefully before the edging round and adjust with a dc2tog if needed.
Tiers not cascading: Make sure Tier 1 attaches to FLO and Tier 2 attaches to BLO of the same waist round. This is what creates the layered effect.
I really hope you love making this sunset ombre tiered ruffle dress as much as I enjoyed designing it. The color gradient is absolutely dreamy and those scalloped edges give it such a romantic finish. If you found this crochet tutorial helpful, save it to your Pinterest boards so you can find it when you are ready to start. And please leave a comment below if you make one. I would love to see your finished dress!
You Might Also Like
- Dusty Rose Granny Square Mini Dress Free Crochet Pattern
- Blush Pink Shell Clutch with Pearl Accents Free Crochet Pattern
- Charcoal Gray Modern Crochet Backpack Free Pattern
- Coral Sunset Tiered Ruffle Crochet Dress Free Pattern