
Tiny crocheted sea creatures dangling from your ankle? It looks impossibly intricate, right? I promise you it is not as hard as it appears. If you can single crochet in the round and follow a stitch count, you can absolutely make this adorable ocean-themed anklet.
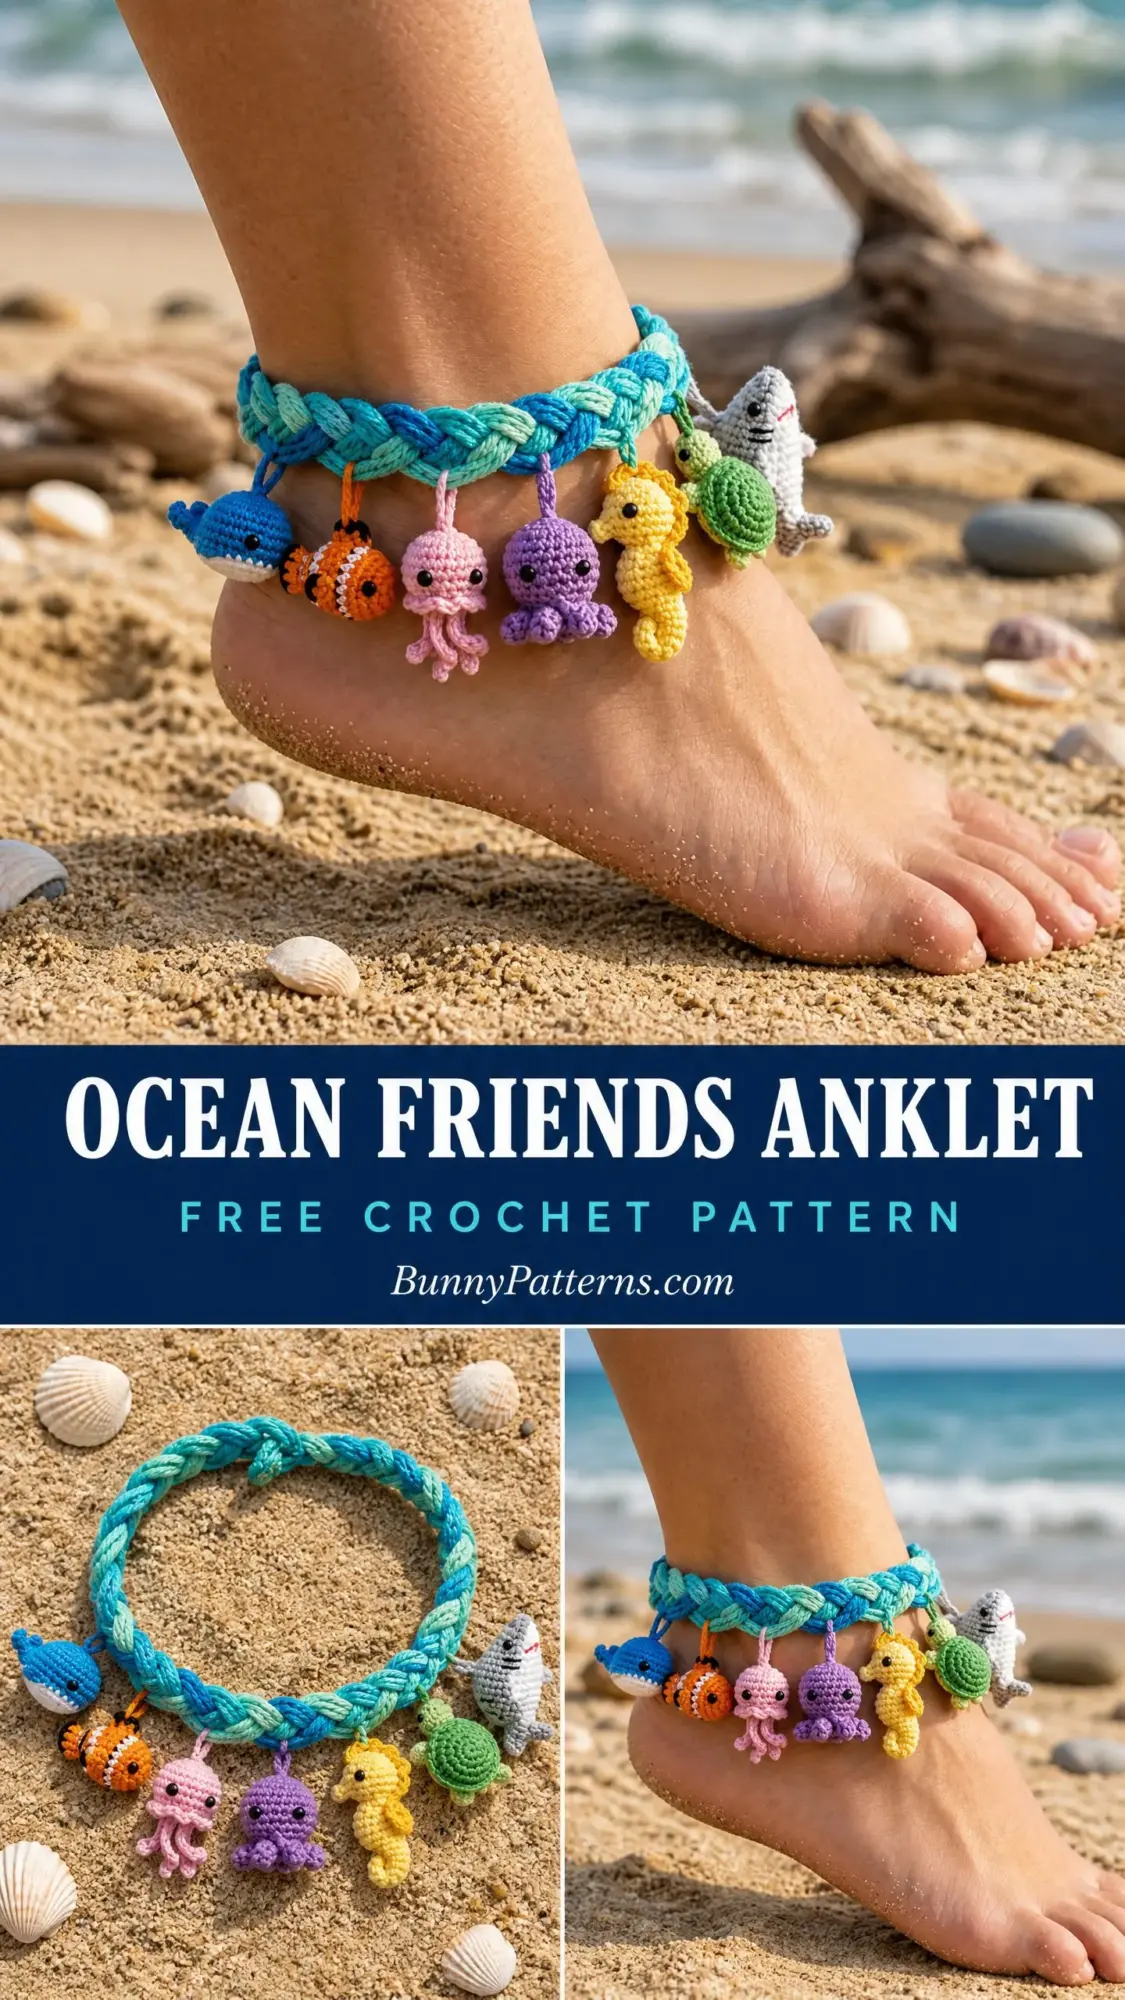
The secret is that each little charm is built the same basic way. A magic ring, some increases to make a ball, some decreases to close it up, then simple embellishments. The braided band is just three rolled strips twisted together. Break it down piece by piece and suddenly the whole project feels manageable.
Whether you are an intermediate crocheter looking for a fun challenge or an advanced maker wanting a quick portable project, this pattern meets you where you are. I will walk you through every single step, define every stitch, and give you checkpoints along the way so you always know you are on track.
Why You Will Love This Ocean Friends Anklet Crochet Pattern
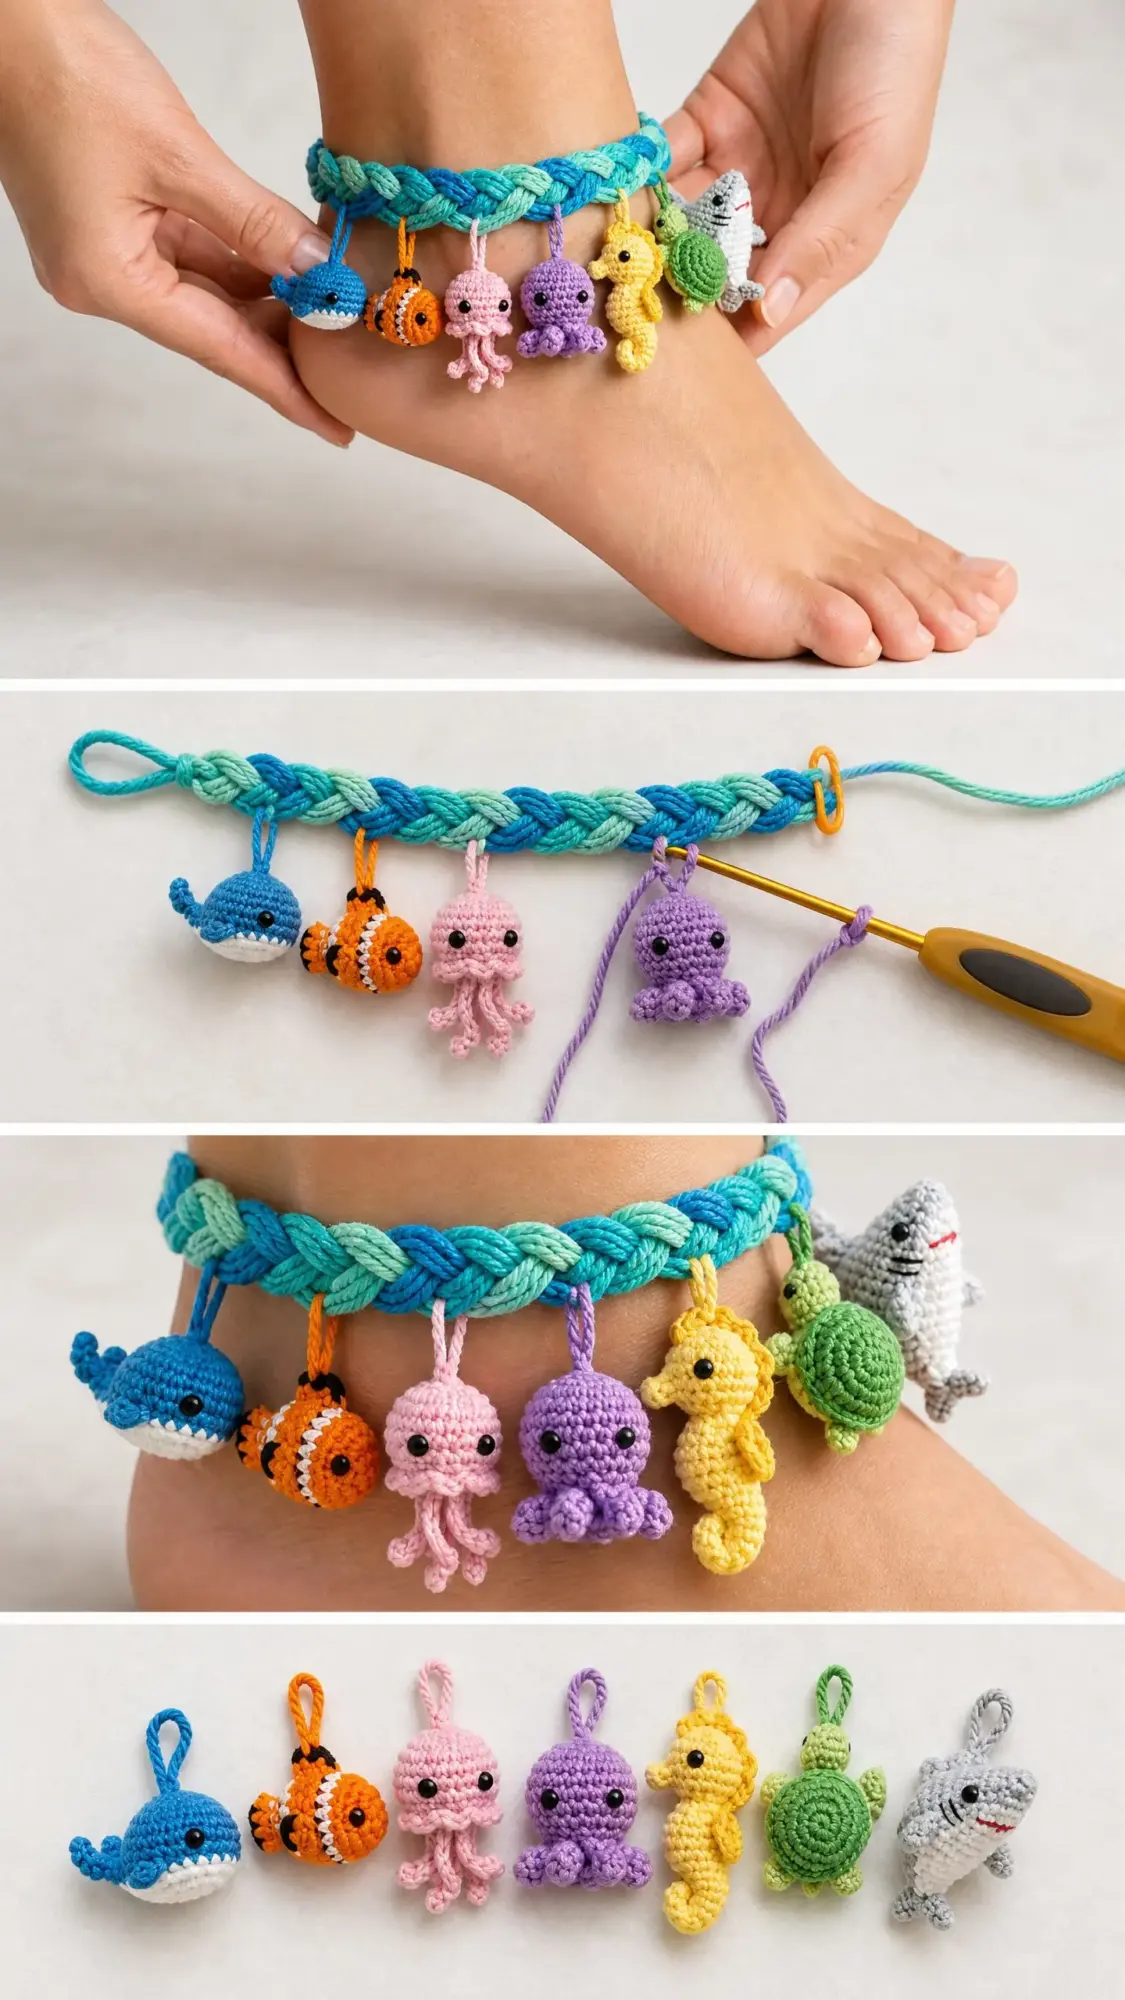
This anklet is pure summer joy. Eight tiny amigurumi charms, including a whale, clownfish, jellyfish, octopus, seahorse, sea turtle, and shark, hang from a braided band in gorgeous ocean blues. It is the kind of project that makes people stop and say "wait, you MADE that?"
The construction is modular. You make the band first, then each charm separately, then attach them. This means you can work on it anywhere. Finish a charm during your lunch break. Braid the band while watching TV. There is no pressure to complete everything in one sitting.
It also makes a fantastic gift for beach lovers, ocean enthusiasts, or anyone who appreciates whimsical handmade accessories. The adjustable sliding knot closure fits most ankle sizes, and I have included customization tips for smaller or larger measurements.
Skill Level
Intermediate to Advanced. You should be comfortable working in continuous rounds, making tight amigurumi fabric, managing color changes, and doing surface embroidery for details. Each tiny charm requires precise stitch counts in small rounds. The braided band itself is straightforward, but managing eight individual charms with shaping and embellishment takes patience.
If you have never made amigurumi before, I recommend practicing one basic ball shape first to get your tension right. You want stitches tight enough that stuffing does not show through.
Time Estimate
Plan for 8 to 12 hours total. The band takes roughly 30 to 45 minutes. Each charm takes 30 to 60 minutes depending on complexity. Budget extra time for assembly and finishing. This is a perfect project to spread over a week or two.
Finished Measurements
Band: Approximately 9 to 10 inches (23 to 25.5 cm) in circumference, adjustable
Each charm: Approximately 0.75 to 1 inch (2 to 2.5 cm) tall
Total anklet including dangling charms: Approximately 2.5 inches (6.5 cm) in height when worn
Materials Needed
Yarn
Use size 10 crochet thread or fingering weight (sock weight) yarn in these colors:
Recommended Yarn Brands
Paintbox Yarns Simply DK (fingering/DK weight, 100% acrylic, 276 yards per 100 g): Wide range of vibrant solids with smooth texture that shows stitch definition beautifully.
Lion Brand 24/7 Cotton in fingering or size 10 thread weight: 100% cotton with excellent stitch definition. Holds shape well and takes color vividly. Ideal for the band where drape matters.
Scheepjes Catona (mercerized cotton, fingering weight, 125 m per 50 g): Enormous color range and excellent stiffness for tiny charms. Makes shaping very clean.
Substitution Note: Any smooth fingering or size 10 cotton thread works for the charms. For the braided band, choose yarn with some body and minimal stretch so the braid holds shape and charms hang neatly. Avoid fluffy or textured yarns as they obscure stitch definition.
Hook
Size B-1 (2.25 mm) steel or aluminum crochet hook for charms
Size D-3 (3.25 mm) hook for the braided band
Other Supplies
Gauge
For the braided band (D-3 hook): 20 single crochet (sc) x 24 rows = 4 inches (10 cm) in single crochet
For the amigurumi charms (B-1 hook): 6 sc x 6 rows = 1 inch (2.5 cm) in single crochet worked in the round
Tight gauge is essential for the charms so stuffing does not show through. If your stitches look loose, switch to a smaller hook. The band gauge matters more for fit, so measure your ankle before beginning.
Abbreviations
ch = chain: Wrap yarn over hook, pull through loop on hook
sl st = slip stitch: Insert hook, yarn over, pull through stitch and loop on hook in one motion
sc = single crochet: Insert hook, yarn over, pull up loop (2 loops on hook), yarn over, pull through both loops
sc2tog = single crochet two together (decrease): Insert hook into next stitch, yarn over, pull up a loop. Without finishing, insert hook into following stitch, yarn over, pull up a loop (3 loops on hook). Yarn over and draw through all 3 loops. This decreases by one stitch.
inc = increase: Work 2 single crochet into the same stitch. This increases by one stitch.
MR = magic ring: Make a loop with yarn, leaving a 6-inch tail. Insert hook through loop, yarn over and draw up a loop, chain 1 to secure. Work indicated stitches into the ring, then pull tail firmly to close the hole.
st(s) = stitch(es)
rnd = round
rep = repeat
BLO = back loop only
pm = place marker
Special Stitch: Surface Slip Stitch
This technique creates a visible chain-like line on the surface of your work. With yarn and hook on the right side, insert hook through fabric from front to back. Draw up a loop of contrast yarn, then draw that loop through the loop on hook. Continue inserting hook through next hole and drawing through loops. Used for stripe details on clownfish.
Pattern Notes Before You Begin
1. The band is made from three separate rope strands braided together. Each strand is a chain with single crochet overlay that forms a firm rope.
2. All charms are worked in continuous rounds (amigurumi style). Do not join rounds unless specified. Use a stitch marker to track each round’s beginning.
3. Stuff charms firmly but not so tightly the fabric distorts. Use very small pinches of fiberfill for these tiny pieces.
4. Attach safety eyes before closing any charm opening.
5. Charms attach to the underside of the braided band using yarn tails, pulled through and knotted securely.
6. Charms are attached across the front half of the band only, so they hang from the front and sides of your ankle.
7. Read all instructions through before beginning. Lay out all yarn colors so color changes go smoothly.
Part One: The Braided Band
The band has three individual rope strands braided together. Make three strands using the D-3 (3.25 mm) hook.
Rope Strand (Make 3)
Make one strand in Blue, one in Teal, one in Aqua/Mint.
Foundation: Ch 55. (Adjust length as needed for different ankle sizes.)
Row 1: Starting in 2nd ch from hook, sc in each ch across. Turn. (54 sc)
Row 2: Ch 1, sc in BLO of each st across. Turn. (54 sc)
Row 3: Ch 1, sc in BLO of each st across. Fasten off, leaving a 10-inch tail for braiding assembly. (54 sc)
Rolling the Rope: Roll each completed strip tightly along its length so it forms a rope-like cord. The BLO rows give the strip a natural tendency to curl. Use your fingers to roll and smooth it evenly. Do not sew it. The rolling is purely shaping.
Checkpoint: Each rope strand should measure approximately 10 inches (25.5 cm) long after rolling and approximately 0.25 inch (0.6 cm) in diameter.
Braiding the Band
Step 1: Hold all three rope strands together at one end and knot them together approximately 0.5 inch (1.3 cm) from the end. Secure this knot by wrapping a small length of matching yarn around the bundle several times and tying off.
Step 2: Attach the knotted end to a stable surface (tape it to a table or use a safety pin on a cushion).
Step 3: Braid the three strands in a standard 3-strand braid (right over center, left over center, repeat) until the braid measures 8.5 inches (21.5 cm) for a 9-inch ankle.
Step 4: Knot the end of the braid securely. Trim all tails to 0.5 inch (1.3 cm).
Adjustable Sliding Knot Closure
Step 1: Bring both ends of the braided band together so they overlap by approximately 1.5 inches (3.8 cm).
Step 2: Take a separate 12-inch (30.5 cm) piece of blue yarn and wrap it around both ends of the band at the overlap point, creating a sliding knot. Tie this wrap piece in a surgeon’s knot around both strands of the band.
Step 3: Trim the wrap tails to 0.5 inch (1.3 cm) and secure with a small drop of fabric glue.
Step 4: The anklet now slides open and closed by pulling the ends of the band.
Checkpoint: The finished band should be approximately 9 inches (23 cm) in circumference when the closure is set to its middle position, and approximately 0.5 inch (1.3 cm) wide.
Part Two: The Charms
All charms use the B-1 (2.25 mm) hook. All are worked in continuous rounds. Place a stitch marker at the beginning of each round and move it up as you go. Stitch counts appear at the end of each round in parentheses.
Charm 1: Blue Whale
Colors: Blue for body, White for belly patch
Rnd 1: With Blue, MR, 6 sc into ring. (6)
Rnd 2: Inc in each st around. (12)
Rnd 3: (Sc in next st, inc in next st) rep 6 times. (18)
Rnd 4: Sc in each st around. (18)
Rnd 5: Sc in each st around. (18)
Rnd 6: (Sc in next 4 sts, sc2tog) rep 3 times. (15)
Rnd 7: Sc in each st around. (15)
Rnd 8: (Sc in next 3 sts, sc2tog) rep 3 times. (12)
Attach safety eyes between Rnds 5 and 6, approximately 3 stitches apart on each side of the head. Stuff body firmly.
Rnd 9: Sc2tog 6 times. (6)
Close: Cut yarn, leaving a 6-inch tail. Thread tail through yarn needle and weave through front loops of remaining 6 sts, pull to close. Fasten off.
Belly Patch: With White yarn and yarn needle, use a few straight stitches to embroider a small oval on the underside between Rnds 3 and 6.
Tail Fin: With Blue, ch 5, sl st in 2nd ch from hook, sc in next 2 ch, sl st in last ch. Fasten off leaving a 6-inch tail. Attach to the closed end of the whale body. The fin points outward horizontally.
Side Fins (make 2): With Blue, ch 4, sl st in 2nd ch from hook, sc in next ch, sl st in last ch. Fasten off. Attach one fin to each side between Rnds 6 and 7.
Attachment Loop: Cut a 10-inch length of Blue yarn. Fold in half to form a loop. Thread both tails through the top of the whale using yarn needle, from outside in, so the loop extends above. Tie tails in a secure double knot inside the body.
Charm 2: Clownfish
Colors: Orange for body, White for stripes
Rnd 1: With Orange, MR, 6 sc into ring. (6)
Rnd 2: Inc in each st around. (12)
Rnd 3: (Sc in next st, inc in next st) rep 6 times. (18)
Rnd 4: Sc in each st around. (18)
Rnd 5: Sc in each st around. (18)
Rnd 6: (Sc in next 4 sts, sc2tog) rep 3 times. (15)
Rnd 7: Sc in each st around. (15)
Rnd 8: (Sc in next 3 sts, sc2tog) rep 3 times. (12)
Attach safety eyes between Rnds 4 and 5. Stuff firmly.
Rnd 9: Sc2tog 6 times. (6)
Close: Weave tail through remaining 6 sts. Pull closed. Fasten off.
White Stripes: Using surface slip stitch or straight stitch embroidery with White yarn, add two vertical stripes around the body at approximately Rnd 3 and Rnd 6, encircling the body completely.
Tail Fin: With Orange, ch 6. Row 1: sc in 2nd ch from hook, sc in next 3 ch, 3 sc in last ch, working back along opposite side of ch, sc in next 3 sts, sl st in first st. Fasten off leaving tail for attachment. Sew to closed end of body.
Top Fin: With Orange, ch 4. Row 1: sc in 2nd ch from hook, sc in next ch, sl st in last ch. Fasten off. Sew along top center of body.
Attachment Loop: Attach as for whale, using Orange yarn at top of Rnd 1.
Charm 3: Pink Jellyfish
Color: Pink for bell and tentacles
Rnd 1: With Pink, MR, 6 sc into ring. (6)
Rnd 2: Inc in each st around. (12)
Rnd 3: (Sc in next st, inc in next st) rep 6 times. (18)
Rnd 4: Sc in each st around. (18)
Rnd 5: Sc in each st around. (18)
Rnd 6: (Sc in next st, sc2tog) rep 6 times. (12)
Attach safety eyes between Rnds 3 and 4. Stuff lightly. The bell should be a soft dome shape, not rigidly packed.
Rnd 7: Sc2tog 6 times. (6)
Close: Weave tail through remaining 6 sts. Pull closed. Fasten off.
Tentacles (make 5): Cut five lengths of Pink yarn, each approximately 1.5 inches long. Fold each in half. Using a crochet hook, pull the folded loop through the bottom edge of the bell, then pull the two loose ends through the loop and tighten (lark’s head knot). Trim tentacles to approximately 0.5 to 0.75 inch. Space evenly around bottom opening. Unravel yarn strands slightly for a wispy effect if desired.
Attachment Loop: Attach with Pink yarn at top center of bell.
Charm 4: Purple Octopus
Color: Purple
Rnd 1: With Purple, MR, 6 sc into ring. (6)
Rnd 2: Inc in each st around. (12)
Rnd 3: (Sc in next st, inc in next st) rep 6 times. (18)
Rnd 4: Sc in each st around. (18)
Rnd 5: Sc in each st around. (18)
Rnd 6: (Sc in next 4 sts, sc2tog) rep 3 times. (15)
Rnd 7: (Sc in next 3 sts, sc2tog) rep 3 times. (12)
Attach safety eyes between Rnds 3 and 4. Stuff head portion firmly.
Rnd 8: Sc2tog 6 times. (6)
Close: Weave tail through remaining 6 sts. Pull closed. Fasten off.
Tentacles (make 8): With Purple, ch 8. Starting in 2nd ch from hook, sl st in each ch back to beginning. Fasten off leaving a tail. Attach one tentacle by sewing its starting tail to the bottom of the octopus body, spacing 8 tentacles evenly around. Each tentacle is approximately 0.5 inch long and curls slightly.
Attachment Loop: Attach with Purple yarn at top of Rnd 1.
Charm 5: Yellow Seahorse
Color: Yellow
The seahorse is worked vertically, creating a body that tapers into a curled tail.
Head:
Rnd 1: With Yellow, MR, 6 sc into ring. (6)
Rnd 2: Inc in each st around. (12)
Rnd 3: (Sc in next st, inc in next st) rep 6 times. (18)
Rnd 4: Sc in each st around. (18)
Rnd 5: (Sc in next 4 sts, sc2tog) rep 3 times. (15)
Rnd 6: (Sc in next 3 sts, sc2tog) rep 3 times. (12)
Attach safety eyes between Rnds 3 and 4.
Snout: With Yellow, ch 4, sl st in 2nd ch from hook, sl st in next ch, sl st in last ch. Fasten off leaving a tail. Sew snout to front of head at approximately Rnd 3, centered between eyes.
Body (continue from head, do not stuff head yet):
Rnd 7: (Sc in next 2 sts, sc2tog) rep 3 times. (9)
Rnd 8: Sc in each st around. (9)
Rnd 9: Sc in each st around. (9)
Rnd 10: (Sc in next st, sc2tog) rep 3 times. (6)
Stuff head and upper body lightly at this point.
Rnd 11: Sc in each st around. (6)
Rnd 12: Sc in each st around. (6)
Rnd 13: Sc2tog 3 times. (3)
Close: Sl st in next st. Fasten off leaving a tail.
Tail: The remaining 3-stitch tube is the tail. Use your fingers or a pin to curl this end into a tight spiral and tack it down with a few stitches using the fasten-off tail.
Dorsal Fin: With Yellow, ch 5. Row 1: sc in 2nd ch from hook, sc in next 2 ch, sl st in last ch. Fasten off. Sew along the back of the body vertically.
Attachment Loop: Attach with Yellow yarn at top of head.
Charm 6: Green Sea Turtle
Colors: Green for shell dome, Dark Green for shell markings, Green for head and flippers
Shell:
Rnd 1: With Green, MR, 6 sc into ring. (6)
Rnd 2: Inc in each st around. (12)
Rnd 3: (Sc in next st, inc in next st) rep 6 times. (18)
Rnd 4: Sc in each st around. (18)
Rnd 5: Sc in each st around. (18)
Shell Markings: With Dark Green yarn and yarn needle, embroider 5 to 6 straight stitches radiating from the center of the shell to create a pentagon pattern.
Continue Shell:
Rnd 6: (Sc in next 4 sts, sc2tog) rep 3 times. (15)
Rnd 7: (Sc in next 3 sts, sc2tog) rep 3 times. (12)
Do not stuff yet. Set aside.
Underbody and Head: With Green, ch 10.
Row 1: sc in 2nd ch from hook, sc in next 7 ch, 3 sc in last ch, working back along opposite side, sc in next 8 ch. (19 sc)
This oval becomes the underbody. Fasten off leaving a long tail.
Head: With Green, MR, 6 sc into ring, sl st to join, ch 1. Rnd 2: Inc in each st around. (12). Sl st to join. Fasten off. Attach 2 safety eyes between Rnds 1 and 2.
Flippers (make 4): With Green, ch 4, 2 sc in 2nd ch from hook, sc in next ch, sl st in last ch. Fasten off leaving a tail. Slightly flatten each flipper.
Assembly: Sew head to one narrow end of underbody oval. Sew two front flippers at upper sides of underbody and two rear flippers at lower sides. Lightly stuff shell dome piece. Place shell dome over underbody assembly, right side up, and whipstitch two pieces together around edges at Rnd 7 of shell.
Attachment Loop: Attach with Green yarn at center top of shell.
Charm 7: Gray Shark
Colors: Gray for body, White for belly, Red for mouth
Rnd 1: With Gray, MR, 6 sc into ring. (6)
Rnd 2: Inc in each st around. (12)
Rnd 3: (Sc in next st, inc in next st) rep 6 times. (18)
Rnd 4: Sc in each st around. (18)
Rnd 5: Sc in each st around. (18)
Rnd 6: (Sc in next 4 sts, sc2tog) rep 3 times. (15)
Rnd 7: Sc in each st around. (15)
Rnd 8: (Sc in next 3 sts, sc2tog) rep 3 times. (12)
Attach safety eyes between Rnds 4 and 5. Stuff firmly.
Rnd 9: Sc2tog 6 times. (6)
Close: Weave tail through remaining 6 sts. Pull closed. Fasten off.
Belly Patch: With White, embroider a large oval on underside spanning Rnds 3 through 7.
Mouth: With Red, embroider a curved line near tip of nose using a backstitch.
Dorsal Fin: With Gray, ch 5. Row 1: sc in 2nd ch from hook, sc in next 2 ch, sl st in last ch. Fasten off. Sew to top center of body between Rnds 5 and 7.
Tail Fin: With Gray, ch 7. Row 1: sc in 2nd ch from hook, sc in next 5 ch. Row 2: ch 3, turn, sc in 2nd ch from hook, sc in next ch, sc in next 2 sts of Row 1, sl st in next st. Fasten off leaving a tail. This creates an asymmetric tail fin. Sew to closed back end of shark body.
Side Pectoral Fins (make 2): With Gray, ch 4, sc in 2nd ch from hook, sc in next ch, sl st in last ch. Fasten off. Sew one fin to each side between Rnds 6 and 7.
Attachment Loop: Attach with Gray yarn at top of Rnd 1.
Checkpoint Before Assembly
You should now have:
Each charm should have its attachment loop in place.
Part Three: Assembly
Step 1: Lay the braided band flat. Identify the front-facing portion (approximately half the band’s circumference, the section that will sit on top of the foot when worn).
Step 2: Divide the front half of the band into 7 evenly spaced attachment points. For a 9-inch band, these points should be approximately 0.6 inch (1.5 cm) apart.
Step 3: For each charm, thread both yarn tails of the attachment loop onto a yarn needle. Insert needle through the braid from outside downward, catching several plies of the braided strands. Pull tails through to the inside of the band.
Step 4: Tie tails in a firm double knot on the inside of the band. Apply a tiny drop of craft glue and allow to dry.
Step 5: Arrange charms in this order from left to right: whale, clownfish, pink jellyfish, purple octopus, yellow seahorse, green sea turtle, gray shark.
Step 6: Trim all excess tails to approximately 0.25 inch after knotting and gluing.
Size Customization Tips
To adjust band length for different ankle sizes:
Quick reference:
To add or remove charms, the attachment method is modular. Recalculate spacing based on number of charms divided into front half of band length.
Finishing and Care
Weave in all ends securely before attaching charms. For the band, block lightly by misting with water and laying flat, gently stretching into a smooth curve. Allow to dry completely before attaching charms.
For charms, do not wet block as fiberfill may clump. If a charm appears uneven, use steam from an iron held 2 inches away and gently shape with fingers while warm. Do not press iron directly onto charms.
Important safety note: If making this anklet for a child, substitute embroidered French knot eyes using black yarn instead of safety eyes to eliminate choking hazard.
Care instructions: Hand wash gently in cool water with mild soap. Do not wring. Press in clean towel to remove excess water. Reshape while damp and air dry flat away from direct sunlight. Do not tumble dry or iron directly.
You Did It!
I am so proud of you for tackling this project. Those tiny sea creatures take patience and precision, and every single one you complete is a little victory. When you wear this anklet to the beach or pool this summer, you will have the most unique accessory there.
Thank you so much for trusting me to guide you through this crochet tutorial. I had such a blast designing these little ocean friends, and I hope you enjoyed making them just as much. If you have any questions along the way, do not hesitate to reach out.
If you loved making this ocean friends anklet crochet pattern, I would be thrilled if you saved it to your Pinterest boards so you can find it again later and share it with your crafty friends. And please drop a comment below if you make one of these cuties. I absolutely love seeing your finished projects!
You Might Also Like
- Sage Green Bobble Stitch Sweater Vest Free Crochet Pattern
- Coral Sunset Granny Square Tote Free Crochet Pattern
- Coral Sunset Gradient Chain Purse Free Crochet Pattern
- Blush Pink Ruffle Peplum Crochet Cardigan Pattern