
Last summer, my niece announced that her two favorite things in the entire world were sea turtles and strawberry cake. She said it with such conviction, like she was sharing a secret truth about the universe. I laughed, wrote it down in my project notebook, and promptly forgot about it.
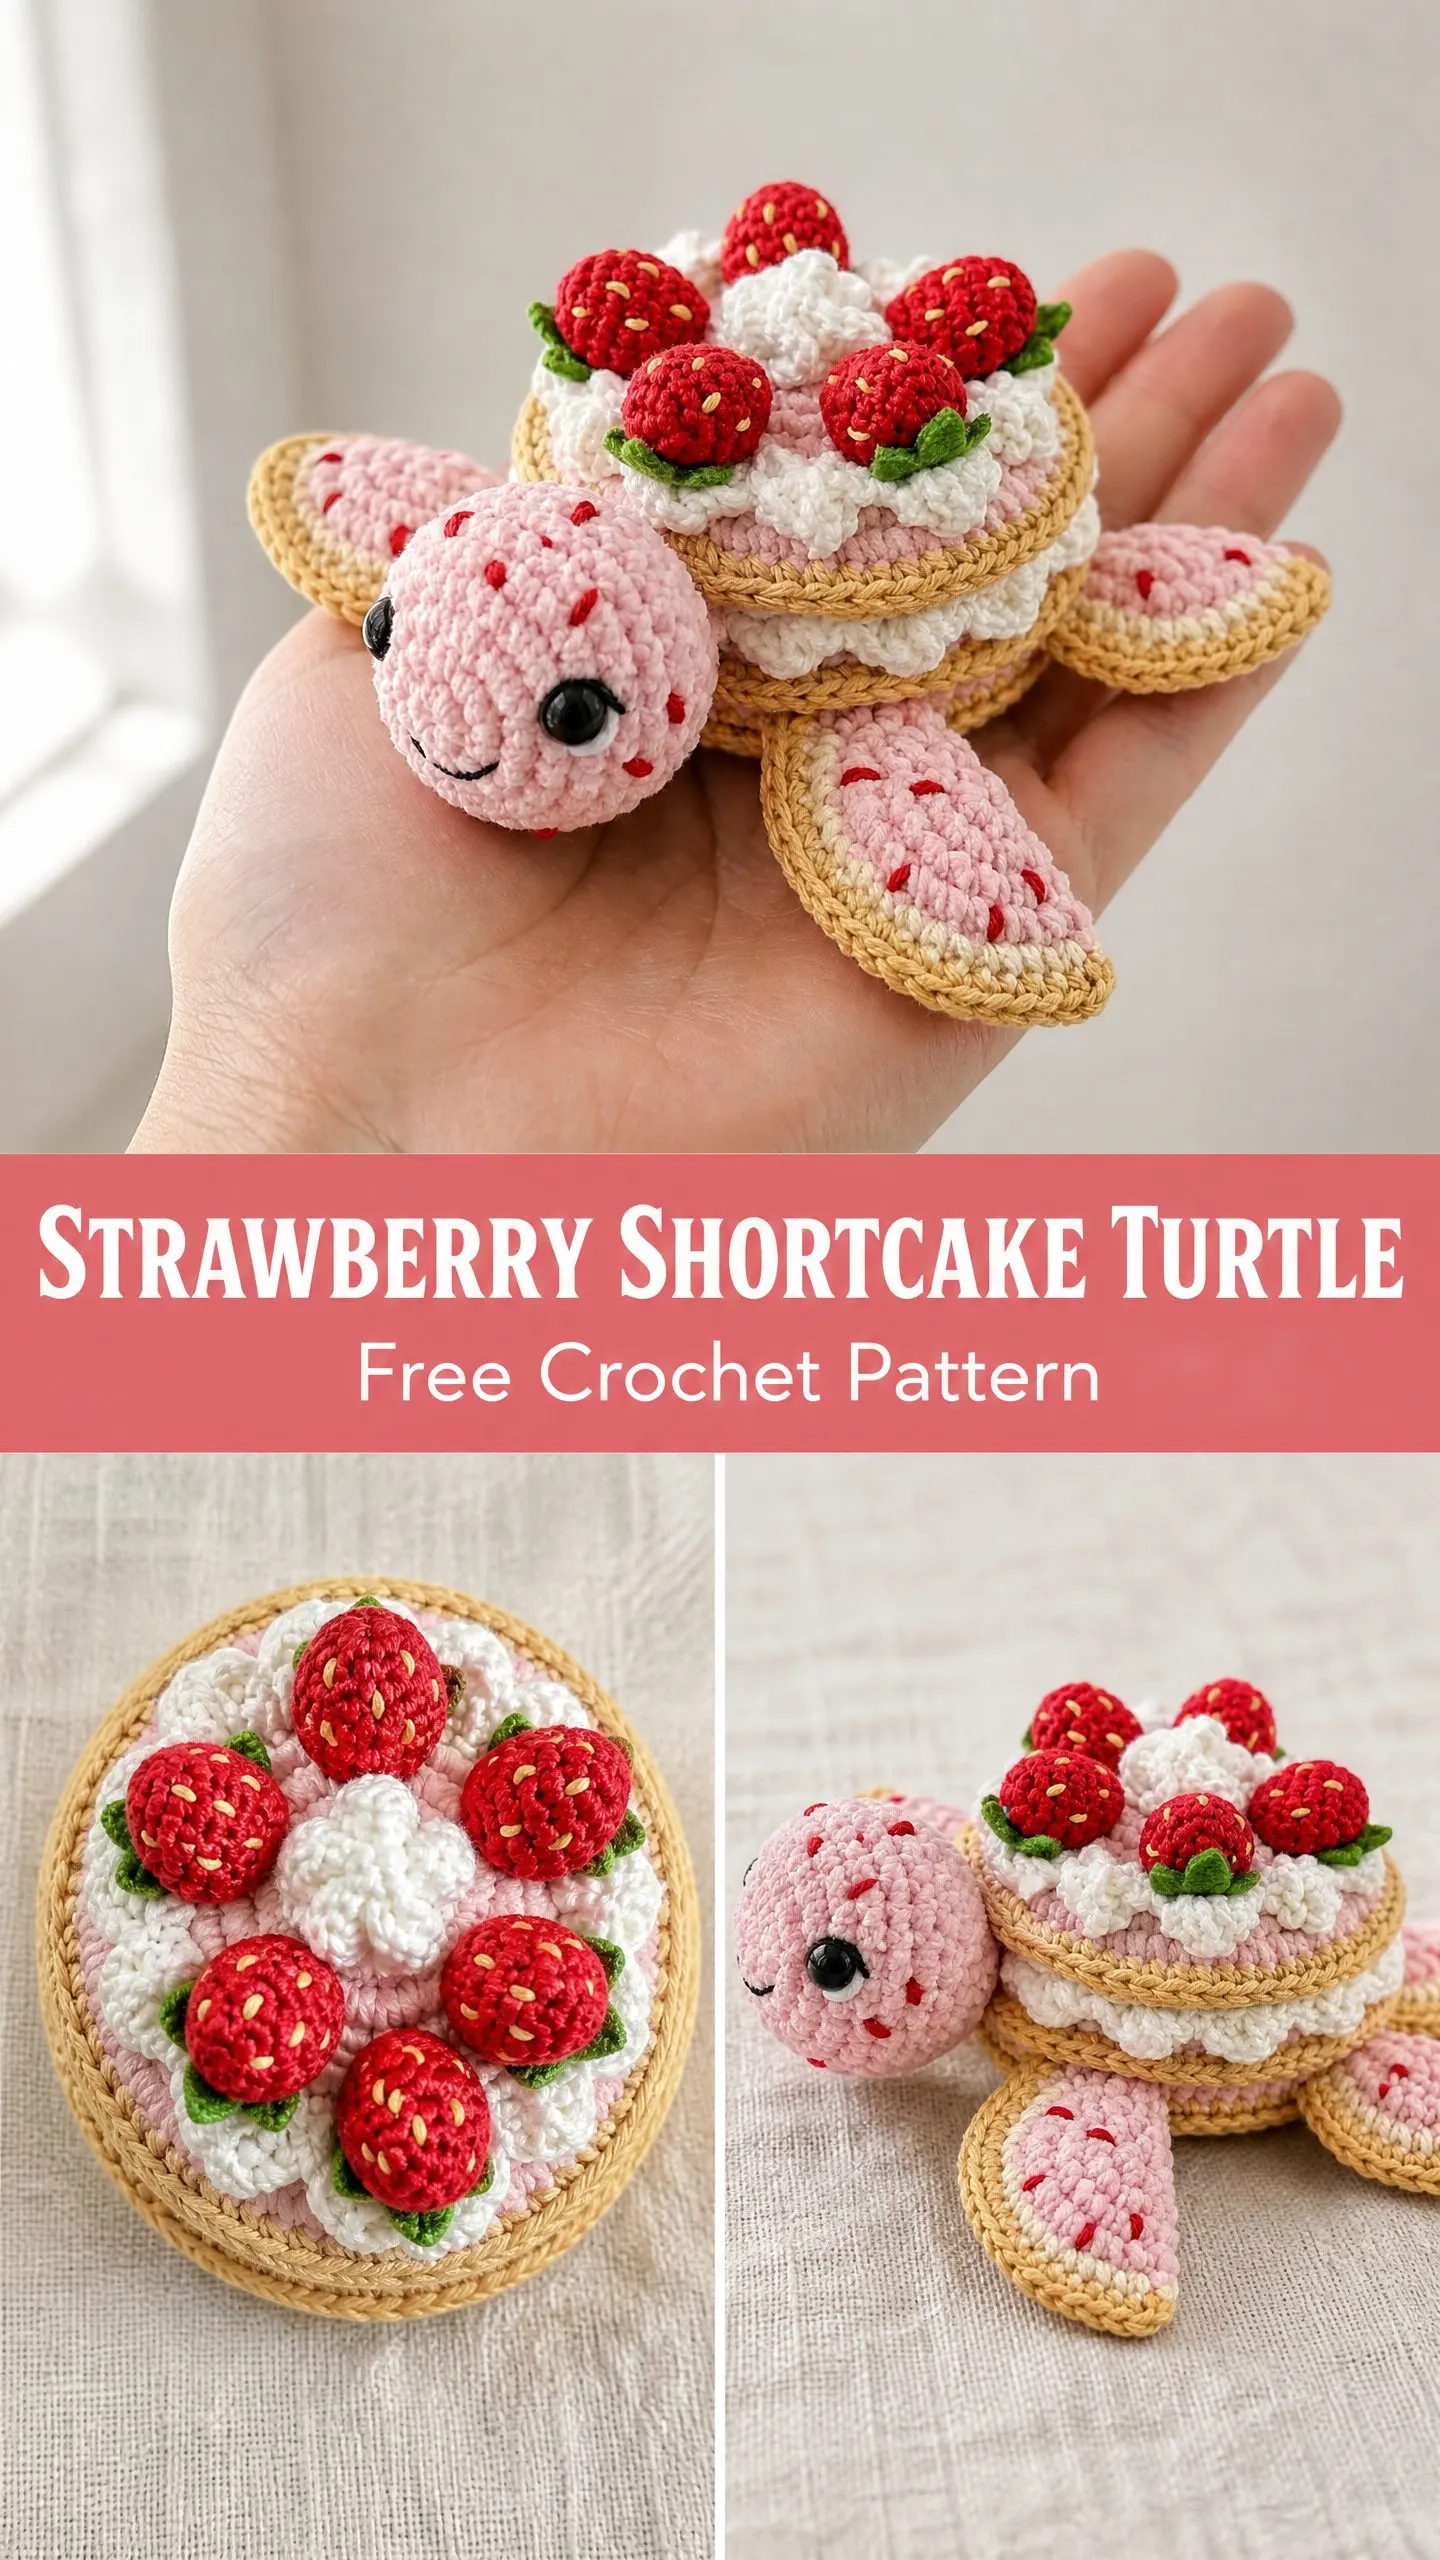
Then her birthday crept up on me. I found that scribbled note while frantically searching for gift ideas, and suddenly I knew exactly what to make. What if I combined both of her favorite things into one ridiculous, adorable plush? A turtle whose shell looks like a layered strawberry shortcake, complete with whipped cream ruffles and tiny crocheted strawberries on top.
The look on her face when she opened it was worth every single one of the twelve hours it took me to make. Now I want to share this pattern with you, because honestly, it might be the cutest thing I have ever designed.
About This Strawberry Shortcake Turtle Crochet Pattern
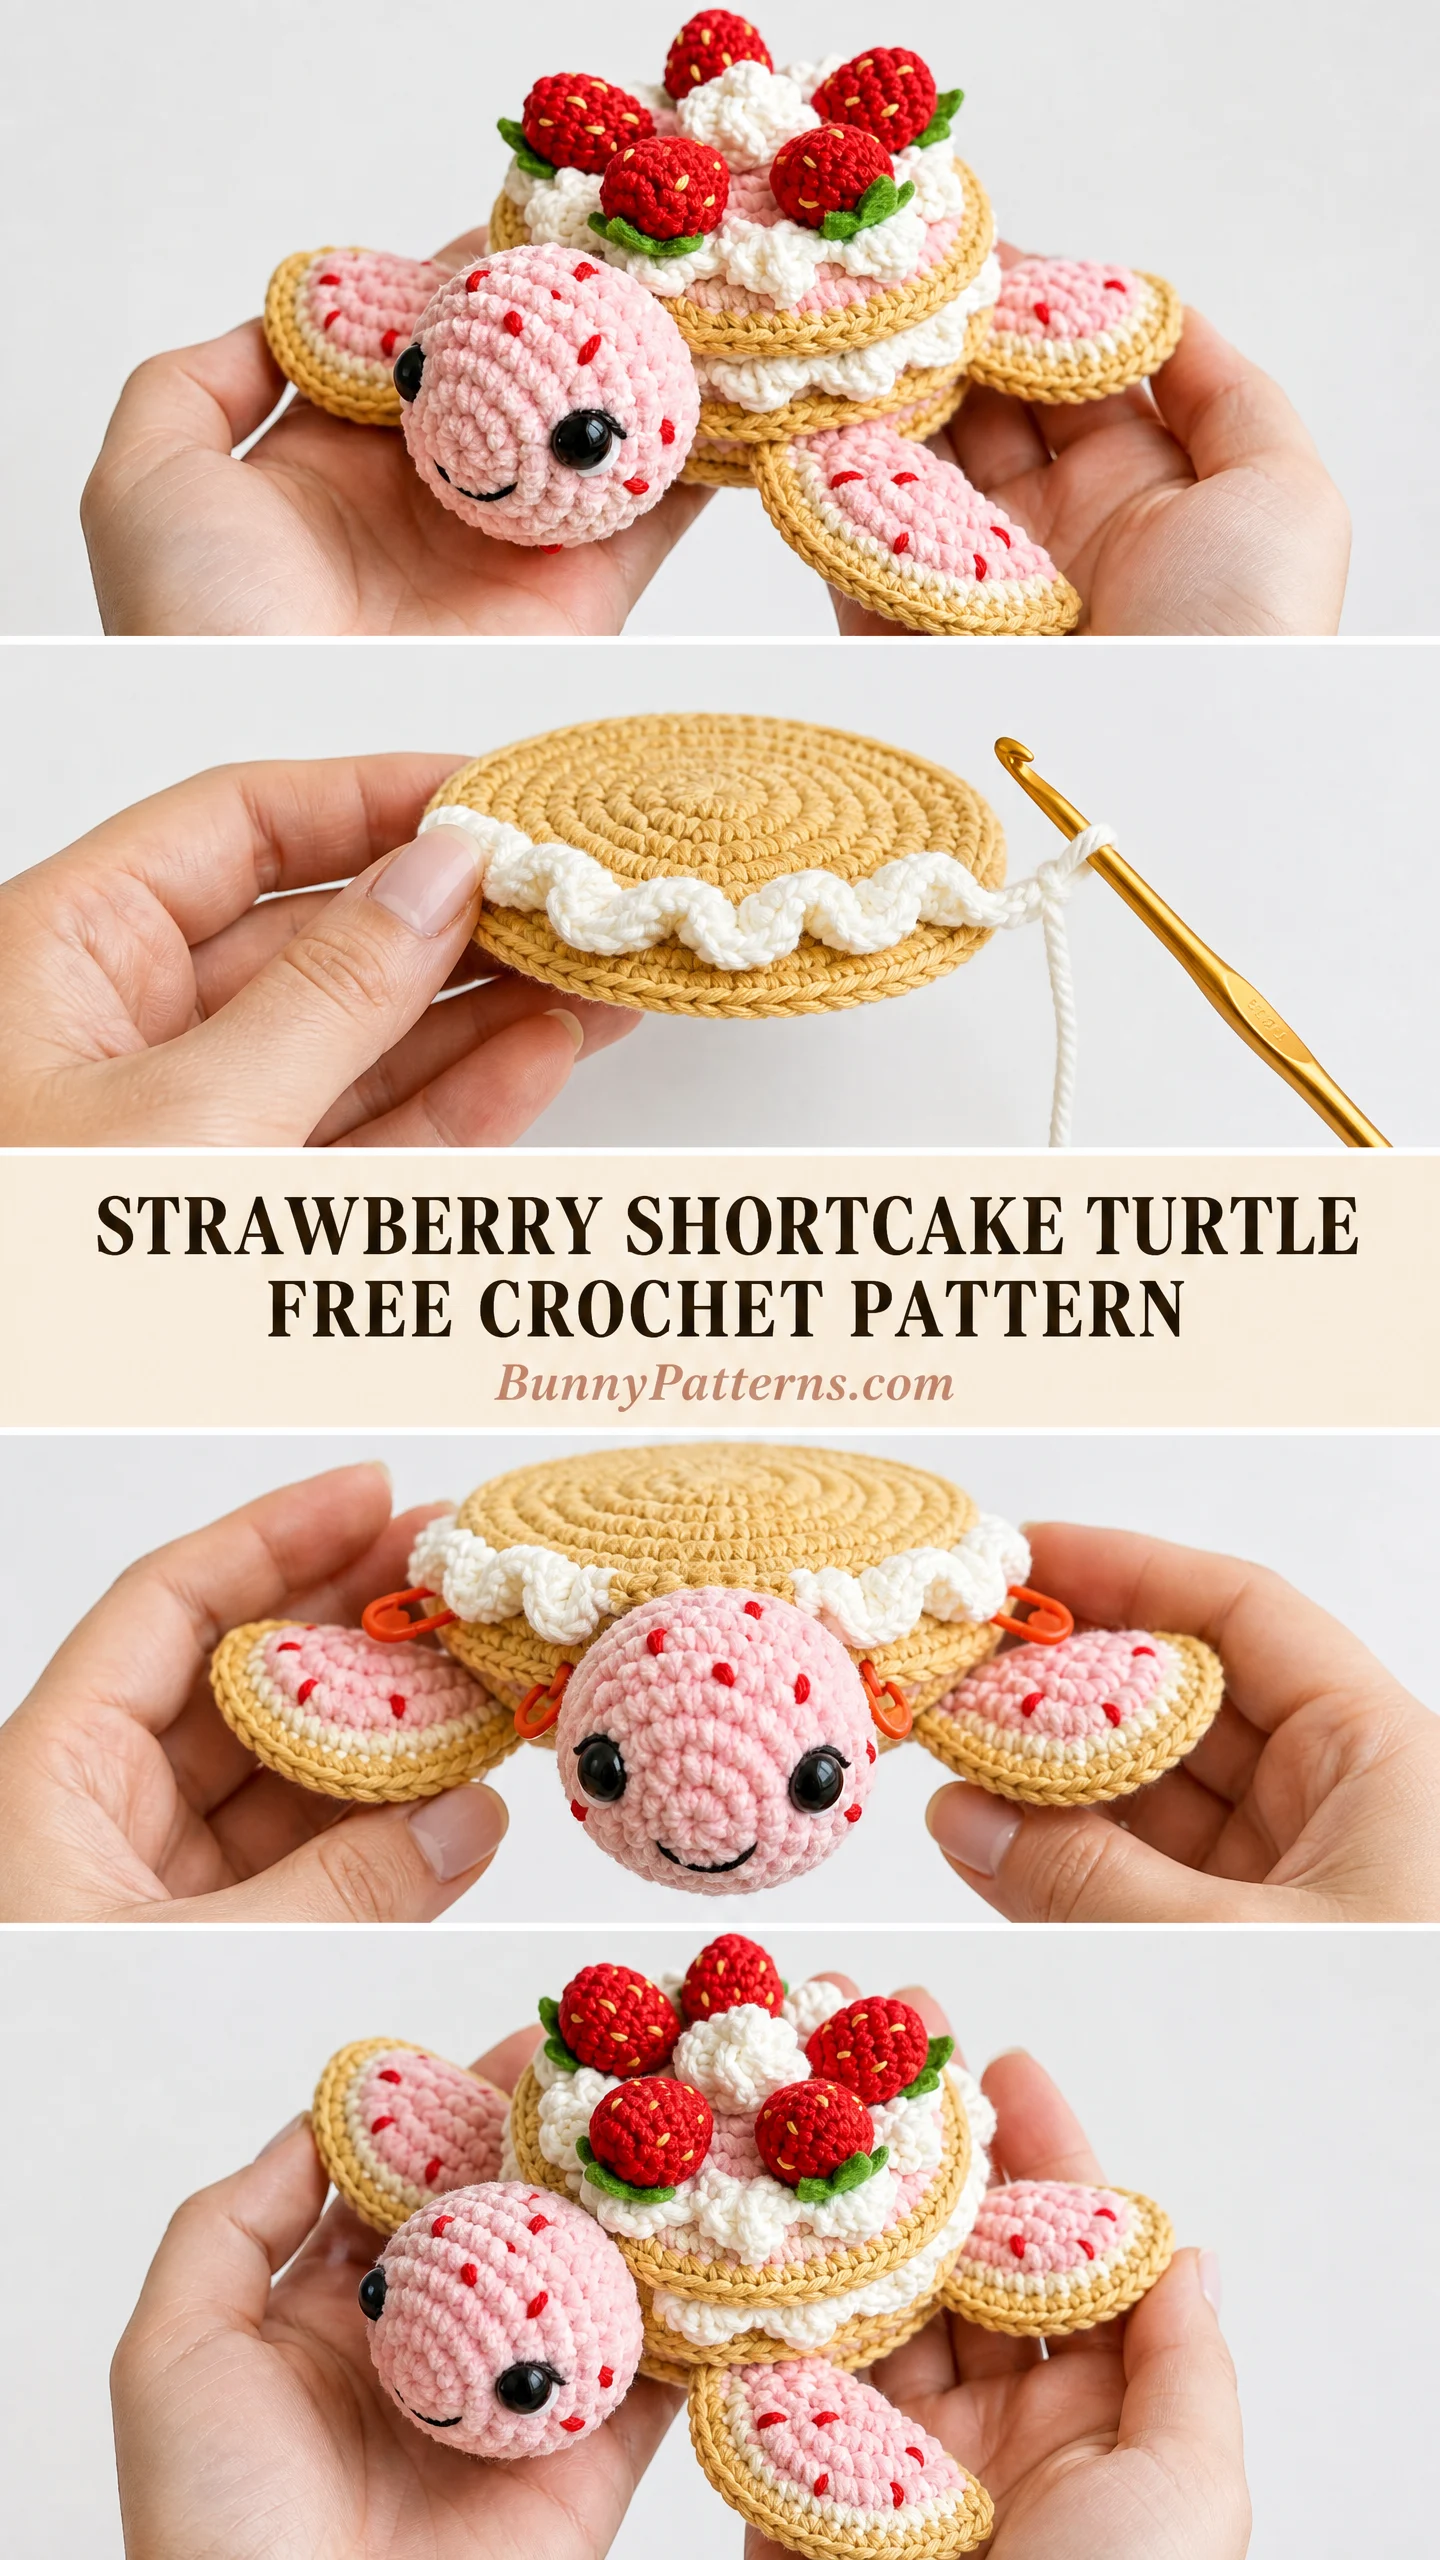
This amigurumi project combines two design concepts into one cohesive plush. You will create a classic sea turtle with a rounded head, four paddle shaped flippers, and a small tail. But here is where things get fun. The shell transforms into a layered strawberry shortcake with golden tan edges, pink sponge layers, billowy white whipped cream ruffles, and a cluster of miniature strawberry toppers with embroidered seeds and green leaf caps.
The color palette keeps everything soft and sweet. Think soft pink for the turtle body, golden biscuit tones for the shell and cake edges, crisp white for the cream layers, and bright red strawberries with green leaves. The finished turtle fits comfortably in an adult palm, measuring approximately 5 inches wide by 4 inches tall by 2.5 inches deep.
Skill Level and Time Commitment
I would call this an intermediate level crochet pattern. You should feel comfortable working in continuous rounds without a seam, managing stitch counts across shaping, sewing multiple pieces together neatly, and doing some basic embroidery for the strawberry seeds and the turtle’s smile.
If you have completed two or three amigurumi animals before, you can absolutely handle this project. The techniques are not complicated on their own. There are just a lot of pieces to assemble, and that takes patience.
Time estimate: Plan for approximately 10 to 14 hours spread across multiple sessions. The actual crocheting goes fairly quickly. Assembly and embroidery details take the most time, so do not rush that part.
Materials You Will Need
Yarn (all worsted weight):
Hook: US size E-4 (3.5 mm) crochet hook. This is intentionally smaller than typical for worsted weight yarn. The tight gauge creates a dense fabric that holds stuffing without gaps showing through.
Notions:
Yarn suggestions: Lion Brand Pound of Love, Paintbox Yarns Simply DK worked doubled, or Caron Simply Soft all work beautifully for this project. Avoid fuzzy or textured yarns like chenille or boucle. You need crisp stitch definition so the shaping reads clearly and the embroidered seeds show up properly.
Gauge
13 single crochet by 14 rounds = 2 inches by 2 inches (5 cm by 5 cm) worked in continuous rounds with a US E-4 (3.5 mm) hook.
Gauge matters here for achieving the stated finished size. If your piece is too large, go down a hook size. If too small, go up a hook size. Your hook should feel slightly resistant as you work. That dense fabric is intentional.
Abbreviations and Stitch Definitions
Let me walk you through every abbreviation you will encounter. I define each one so you never have to guess.
Special Stitches Explained
Whipped Cream Shell Stitch
This stitch creates the ruffled, billowy look of piped whipped cream. Here is how it works:
1. Skip one stitch
2. Work 5 double crochet into the next stitch
3. Skip one stitch
4. Work one slip stitch into the next stitch
Repeat these four steps across or around as instructed. Each shell uses 4 stitches from the base round.
Invisible Decrease (Preferred Method)
This creates a nearly invisible decrease that looks much cleaner than standard sc2tog:
1. Insert hook into the front loop only of the first stitch
2. Without completing the stitch, insert hook into the front loop only of the second stitch
3. Yarn over and draw through both front loops (2 loops on hook)
4. Yarn over and draw through remaining 2 loops on hook
I strongly recommend using this method throughout the pattern for professional looking results.
Pattern Notes Before You Begin
Work in continuous rounds unless otherwise stated. Do not turn and do not join with a slip stitch unless instructed. Use a stitch marker to mark the first stitch of each round and move it up as you go.
All pieces begin with a magic ring unless otherwise specified.
Stuff pieces firmly as you go. Add fiberfill before the opening becomes too small to access easily. The head and body should be very firmly stuffed so they hold their rounded shape. Flippers receive light to moderate stuffing. Strawberries are stuffed firmly for their small size.
Step by Step Instructions
Head
Using Color A (pink), make a magic ring.
Rnd 1: 6 sc into MR. (6 sts)
Rnd 2: Inc in each st around. (12 sts)
Rnd 3: (Sc 1, inc) repeat 6 times. (18 sts)
Rnd 4: (Sc 2, inc) repeat 6 times. (24 sts)
Rnd 5: (Sc 3, inc) repeat 6 times. (30 sts)
Rnd 6: (Sc 4, inc) repeat 6 times. (36 sts)
Rnds 7 through 11: Sc in each st around. (36 sts) Work 5 rounds even.
Rnd 12: (Sc 4, sc2tog) repeat 6 times. (30 sts)
Insert safety eyes between rounds 8 and 9, approximately 6 stitches apart. Embroider the smile below and between the eyes using black floss.
Rnd 13: (Sc 3, sc2tog) repeat 6 times. (24 sts)
Rnd 14: (Sc 2, sc2tog) repeat 6 times. (18 sts)
Stuff the head firmly with fiberfill.
Rnd 15: (Sc 1, sc2tog) repeat 6 times. (12 sts)
Rnd 16: (Sc2tog) repeat 6 times. (6 sts)
Fasten off, leaving a short tail. Close the opening with a tapestry needle by weaving through the 6 remaining stitches, pulling tight, and knotting. This will be the back of the head and will attach to the body.
Add scattered red dot embroidery across the head surface after assembly.
Body
Using Color A, make a magic ring.
Rnd 1: 6 sc into MR. (6 sts)
Rnd 2: Inc in each st around. (12 sts)
Rnd 3: (Sc 1, inc) repeat 6 times. (18 sts)
Rnd 4: (Sc 2, inc) repeat 6 times. (24 sts)
Rnd 5: (Sc 3, inc) repeat 6 times. (30 sts)
Rnd 6: (Sc 4, inc) repeat 6 times. (36 sts)
Rnd 7: (Sc 5, inc) repeat 6 times. (42 sts)
Rnds 8 through 14: Sc in each st around. (42 sts) Work 7 rounds even.
Rnd 15: (Sc 5, sc2tog) repeat 6 times. (36 sts)
Rnd 16: (Sc 4, sc2tog) repeat 6 times. (30 sts)
Rnd 17: (Sc 3, sc2tog) repeat 6 times. (24 sts)
Stuff the body firmly before the opening becomes too small.
Rnd 18: (Sc 2, sc2tog) repeat 6 times. (18 sts)
Rnd 19: (Sc 1, sc2tog) repeat 6 times. (12 sts)
Rnd 20: (Sc2tog) repeat 6 times. (6 sts)
Fasten off and close opening as for the head. The closed end is the underside of the body. Add red dot embroidery after full assembly.
Checkpoint: The body should measure approximately 2.5 inches (6.5 cm) in diameter at its widest point.
Front Flippers (Make 2)
Using Color A, make a magic ring.
Rnd 1: 6 sc into MR. (6 sts)
Rnd 2: Inc in each st around. (12 sts)
Rnd 3: (Sc 1, inc) repeat 6 times. (18 sts)
Rnd 4: (Sc 2, inc) repeat 6 times. (24 sts)
Rnd 5: Sc in each st around. (24 sts)
Rnd 6: (Sc 3, inc) repeat 6 times. (30 sts)
Rnds 7 through 8: Sc in each st around. (30 sts) Work 2 rounds even.
Now flatten the flipper for shaping. Fold the piece flat so the magic ring end (rounded tip) is at one end and the opening is at the other. Using the working yarn, sc across the top edge only through both layers to close and flatten the flipper. This is not a round. You are working across approximately 15 stitches through both layers. Fasten off, leaving a long tail for sewing.
Add a small amount of fiberfill before closing if desired for slight puffiness, or leave flat for a paddle shape.
Add red dot embroidery across the flat surface of each flipper.
Using Color B, join to the outside edge of each flipper and work 1 round of sc around the outer edge, or whip stitch a round of tan yarn around the perimeter to create the golden border. Fasten off.
Back Flippers (Make 2)
Using Color A, make a magic ring.
Rnd 1: 6 sc into MR. (6 sts)
Rnd 2: Inc in each st around. (12 sts)
Rnd 3: (Sc 1, inc) repeat 6 times. (18 sts)
Rnd 4: (Sc 2, inc) repeat 6 times. (24 sts)
Rnds 5 through 6: Sc in each st around. (24 sts) Work 2 rounds even.
Flatten and close as for front flippers by working sc through both layers across approximately 12 stitches. Fasten off leaving a long tail for sewing.
Back flippers are slightly smaller and rounder than front flippers. Add red dot embroidery. Add tan border as for front flippers.
Tail
Using Color A, make a magic ring.
Rnd 1: 4 sc into MR. (4 sts)
Rnd 2: Inc in each st around. (8 sts)
Rnd 3: Sc in each st around. (8 sts)
Rnd 4: (Sc 1, sc2tog, sc 1) repeat twice. (6 sts)
Rnd 5: Sc in each st around. (6 sts)
Do not stuff. Pinch flat and close by working through both layers with 3 sc. Fasten off leaving a long tail for sewing.
Shell Base Disk (Make 2)
The shell base consists of two flat disks. One is the underside panel and one is the top surface. Make both in Color B (golden tan).
Using Color B, make a magic ring.
Rnd 1: 6 sc into MR. (6 sts)
Rnd 2: Inc in each st around. (12 sts)
Rnd 3: (Sc 1, inc) repeat 6 times. (18 sts)
Rnd 4: (Sc 2, inc) repeat 6 times. (24 sts)
Rnd 5: (Sc 3, inc) repeat 6 times. (30 sts)
Rnd 6: (Sc 4, inc) repeat 6 times. (36 sts)
Rnd 7: (Sc 5, inc) repeat 6 times. (42 sts)
Rnd 8: (Sc 6, inc) repeat 6 times. (48 sts)
Fasten off for both disks, leaving a long tail on one for joining.
To join: Hold both disks together with wrong sides facing. Insert hook through corresponding stitches of both layers and sc through both layers around the full perimeter. (48 sts)
Before joining, insert a small amount of fiberfill or optional cardboard between the two layers for firmness.
Shell Side Band
After joining the two disks, work 2 rounds even in sc around the joined edge to create a slight depth to the shell.
Rnd 1 (after join): Sc in each st around. (48 sts)
Rnd 2: Sc in each st around. (48 sts)
Fasten off Color B.
Checkpoint: The shell base should measure approximately 3.5 inches (9 cm) in diameter.
Cake Layer 1 (Bottom Pink Layer)
Using Color A (pink), make a magic ring.
Rnd 1: 6 sc into MR. (6 sts)
Rnd 2: Inc in each st around. (12 sts)
Rnd 3: (Sc 1, inc) repeat 6 times. (18 sts)
Rnd 4: (Sc 2, inc) repeat 6 times. (24 sts)
Rnd 5: (Sc 3, inc) repeat 6 times. (30 sts)
Rnd 6: (Sc 4, inc) repeat 6 times. (36 sts)
Do not fasten off. Switch to Color B (tan).
Rnd 7 (edge round in Color B): Working in BLO, sc in each st around. (36 sts)
Rnd 8: Sc in each st around. (36 sts)
Fasten off Color B, leaving a long tail for sewing.
Cake Layer 2 (Top Pink Layer)
Work exactly as Cake Layer 1. Same instructions, same stitch counts.
Whipped Cream Ruffle Band (Make 2)
Using Color C (white), chain 37. Join with a slip stitch to form a ring, being careful not to twist.
Rnd 1: Ch 1, sc in each ch around. (36 sts)
Rnd 2 (Whipped Cream Shell Stitch round): (Sk 1 st, 5 dc in next st, sk 1 st, sl st in next st) repeat 9 times. (9 shells)
Fasten off leaving a long tail for sewing.
Strawberry Toppers (Make 5 to 6)
Using Color D (red), make a magic ring.
Rnd 1: 6 sc into MR. (6 sts)
Rnd 2: Inc in each st around. (12 sts)
Rnd 3: (Sc 1, inc) repeat 6 times. (18 sts)
Rnd 4: Sc in each st around. (18 sts)
Rnd 5: (Sc 1, sc2tog) repeat 6 times. (12 sts)
Stuff firmly with a small amount of fiberfill.
Rnd 6: (Sc2tog) repeat 6 times. (6 sts)
Fasten off, leaving a tail. Close the opening. The magic ring end is the top (wider end) where the leaf cap attaches.
After closing, embroider 4 to 6 small straight stitches in yellow or gold yarn across the surface to represent seeds.
Strawberry Leaf Caps (Make 5 to 6)
Using Color E (green), make a magic ring.
Rnd 1: 4 sc into MR. (4 sts)
Rnd 2: (Ch 3, sl st back into first ch of that chain, sl st in next sc) repeat 4 times to create 4 small pointed leaves. (4 leaves)
Fasten off. Sew each leaf cap onto the wide (top) end of a strawberry.
Assembly Instructions
Take your time with this section. Assembly is where the magic happens, but rushing leads to frustration.
Step 1: Lay out all pieces and confirm you have: 1 head, 1 body, 2 front flippers, 2 back flippers, 1 tail, 1 assembled shell base, 2 cake layer disks, 2 whipped cream ruffle bands, and 5 to 6 assembled strawberries.
Step 2: Sew the head to the front of the body. Use the tail yarn and a mattress stitch or whip stitch, sewing in a circle around the joining point. The head should extend forward and slightly upward.
Step 3: Sew the two front flippers to either side of the body, positioned just below and behind the head. The wide rounded tip faces forward and outward.
Step 4: Sew the two back flippers to either side of the lower body, angled slightly backward.
Step 5: Sew the tail to the very back center of the body, pointing slightly downward.
Step 6: Sew the assembled shell base onto the top of the body. Center it and pin before sewing.
Step 7: Sew Cake Layer 1 on top of the shell base.
Step 8: Sew one whipped cream ruffle band around the perimeter of Cake Layer 1.
Step 9: Sew Cake Layer 2 on top of the first cream ruffle band.
Step 10: Sew the second whipped cream ruffle band along the top perimeter of Cake Layer 2.
Step 11: Arrange the strawberries in a cluster on top and sew each one firmly through its bottom point.
Step 12: Add the scattered red dot embroidery to the head, body, and flipper surfaces. Use small French knots or cross stitches at irregular intervals.
Step 13: Weave in all remaining yarn ends securely.
Size Customization Tips
For a smaller turtle (approximately 3.5 inches): Use fingering weight yarn and a US size B-1 (2.25 mm) hook throughout. Reduce strawberry count to 3.
For a larger turtle (approximately 7 inches): Use bulky weight yarn and a US size H-8 (5.0 mm) hook. Add 1 to 2 additional strawberry toppers.
Care Instructions
Hand wash in cool water with gentle soap. Gently squeeze out excess water without wringing. Reshape while damp and lay flat to dry away from direct sunlight. Do not machine wash or tumble dry.
Thank you so much for making it all the way through this strawberry shortcake turtle crochet tutorial. I hope you love making this sweet little guy as much as I loved designing it. If you give this pattern a try, I would absolutely love to see your finished turtle! Tag me on Instagram or share a photo in our Facebook group.
If this pattern made you smile, go ahead and save it to your Pinterest boards so you can find it when you are ready to start. And please drop a comment below if you make one. I read every single one, and your finished projects genuinely make my day.
You Might Also Like
- Sunset Ombre Granny Square Tote Free Crochet Pattern
- Blush Pink Tiered Baby Dress Free Crochet Pattern
- Coral Sunset Granny Square Tote Free Crochet Pattern
- Lavender Butterfly Baby Dress Free Crochet Pattern