
A crochet crossbody bag in soft oatmeal cotton, with airy mesh stripes, a beaded drawstring bow and a long slim strap, is the kind of project that feels relaxed to make and easy to wear.
The Crochet Crossbody Bag
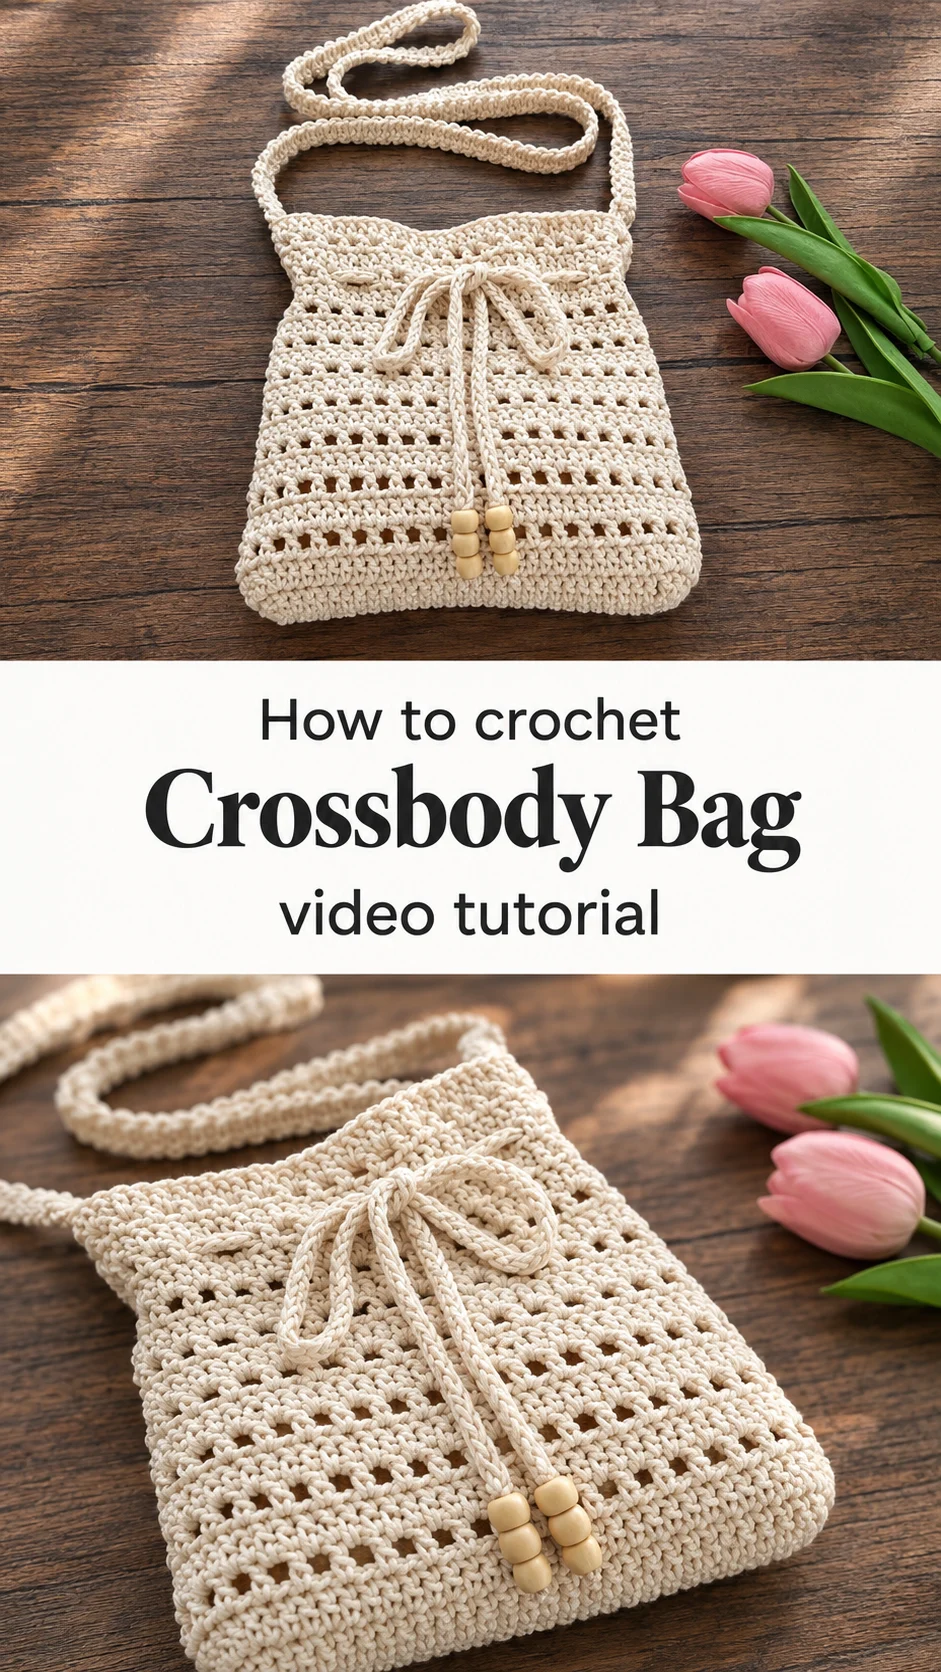
This crochet crossbody bag is a small, boxy pouch worked in a creamy oatmeal cotton with a gently rustic look. Bands of dense stitches alternate with rows of open mesh, so the fabric reads as striped even though it is only one colour. A thin drawstring cord threads through the upper rows and ties in a bow at the front. Three wooden beads sit at the end of each tail, adding weight and a touch of warmth. A long, narrow strap lets the bag rest at the hip. Nothing about it is fussy. It suits a market morning, a beach afternoon or a casual dinner where you only need a phone, keys and lip balm.
The bag also makes a thoughtful gift. It is quick enough to finish in a few evenings, and it teaches a useful lesson in alternating solid and open rows. Small. Practical. Pretty.
Crossbody Bag Related Posts:
- Crochet Arcanowave Mandala: A Timeless Lace Masterpiece
- Crochet Rectangle Table Runner: A Chic Handmade Accent
- Crochet Spring Tote Bag: A Blooming Floral Treasure
- Crochet Round Ripple Baby Blanket: A Timeless Sunburst Treasure
Materials
For a crochet crossbody bag like this, choose a mercerized or soft worsted-weight cotton in an oatmeal, cream or ecru shade. Cotton holds its shape better than acrylic and gives the stitches the crisp definition you can see in the mesh stripes. Pick a hook that makes a fairly tight fabric, since a loose gauge would let the bag stretch under the weight of a phone and wallet. A hook slightly smaller than the yarn label suggests is a good starting point. You will also need a tapestry needle for weaving in ends and joining seams, scissors, and stitch markers to keep track of rows. For the finishing touch, gather six wooden beads with holes wide enough for your cord, two for each tail would be too few, so plan on three per tail. If you want a lined interior, a small piece of cotton fabric and a needle and thread will do the job.
Understanding the Structure
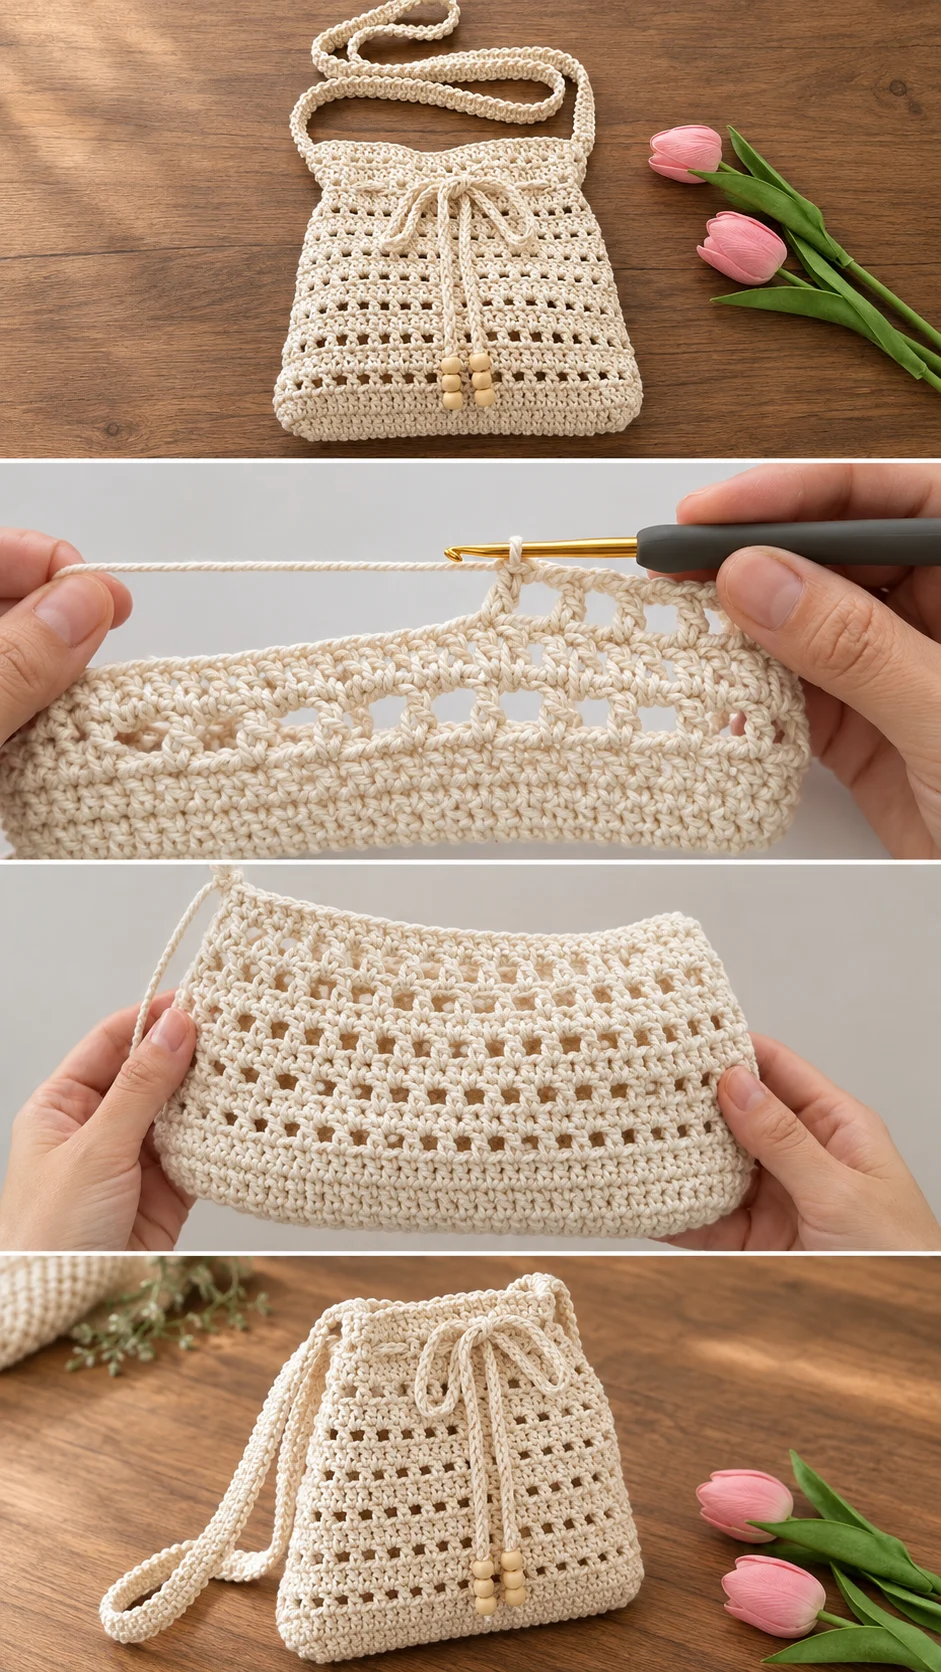
The bag looks like a simple rectangle that has been folded and joined, and that is a sound way to think about it. The body appears to be a squared pouch with a flat base, a straight top edge and a slightly gathered neckline where the drawstring sits. The strap is a separate long strip attached at each side of the opening.
Because the sides look clean and the front panel lies flat, the body is probably worked as a seamless tube or as two panels joined at the edges. The video will show which method the designer uses, so watch the first few minutes closely and pause when the base takes shape. The base is where a bag either stands up properly or slumps.
The rows run horizontally across the bag, and each stripe of mesh sits at the same height as its neighbours. That regular rhythm is what gives the front its tidy, woven look. Keep a stitch marker at the start of every round or row, and the stripes will line up from one side to the other.
Best Stitches for Strength and Style
The fabric combines two textures. The solid bands are dense, compact stitches that look like tightly worked double crochet, and they give the bag its body. The open bands are mesh rows made with chains and spaces, and they add lightness and a little show of the lining or whatever sits inside.
That mix is clever for a bag. Solid rows alone would feel heavy and warm, while mesh alone would sag and let small items poke through. Alternating the two gives you structure where it counts and breathing room in between.
Mesh rows are the place where tension matters most. If your chains are loose, the spaces become wide and floppy. If they are tight, the row pulls in and the bag narrows. Aim for chains that match the height of the stitches beside them, and check the close-up of the mesh in the video to compare your hand position.
If the fabric feels limp after a few stripes, drop down a hook size for the next bag. If it feels stiff enough to stand alone like cardboard, go up half a size. Cotton relaxes slightly with use, so a firm start is better than a loose one.
The Drawstring Bow and Beads: The Detail That Defines It
The drawstring is what turns a plain pouch into something charming. A slim cord runs through the mesh near the top and comes out at the front, where it ties in a soft bow. The two tails hang down the front of the bag and end in clusters of wooden beads.
The cord looks like a narrow chain or a small round tube of crochet, the sort of thing that is quick to make and neat to handle. A round cord holds a bow better than a flat strip would, and it glides through the mesh spaces without catching. Make it long enough to tie comfortably, then add a little extra so you can pull the neckline closed without the bow disappearing.
The beads are more than decoration. They weigh down the tails so the bow hangs straight rather than curling, and the pale wood echoes the cream cotton. Before threading them on, test that the cord end passes through the bead holes easily. Finish each tail with a firm knot below the last bead, so nothing slides off after a few weeks of use.
A common mistake is threading the cord through the wrong spaces so it twists at the back. Weave it in and out of the same row of mesh all the way around, and check the path before you tie anything. If the cord runs through a different row at the back, the neckline will pucker.
Straps and Fit
The strap on this bag is long, slim and flat, with a slightly ridged texture that suggests a few rows of tightly worked stitches. It is thin enough to feel light but wide enough not to dig into the shoulder under a small load. Because it is a crossbody strap, it needs enough length to sit diagonally across the torso with the bag resting near the hip.
Measure the strap against yourself before sewing it on. Drape a tape measure from one shoulder to the opposite hip, add a little for the join at each end, and work to that length rather than guessing. A strap that is too short pulls the bag up under the arm, and one that is too long makes it bounce when you walk.
Cotton stretches a little with weight, so make the strap marginally shorter than your ideal length. If it still ends up too long after a few outings, you can fold the ends and stitch them again. If it is too short, there is no easy fix, so lean toward generous when in doubt.
Attach the strap firmly at the sides, sewing through several stitches rather than only the outer loops. A bag carries more weight than it looks, and weak joins are the first thing to fail. Reinforce each end with a small square of extra stitching.
How to Style a Crochet Crossbody Bag
In its natural cream colour, the bag pairs with almost anything. Over a white linen shirt and wide trousers it looks quietly bohemian, and the wooden beads pick up any warm accent in the outfit. It also works against a striped breton top, where the mesh stripes echo the pattern.
For a summer day out, carry it with a sundress and flat sandals. The open stitches suit warm weather, and the cross-body position keeps your hands free for ice cream or a sun hat. In cooler months, try it over a chunky knit or a denim jacket, where the lighter texture contrasts nicely with heavier fabrics.
The colour can change the whole mood. A deep forest green or rust would feel autumnal, while soft sage or powder blue suits spring. Keep the beads natural wood in any palette, as they tie the look together.
Tips for a Neat Finish
Weave in every end with care. Cotton is slippery, and ends can work loose after a few wears. Thread each tail through the stitches for several inches in one direction, then back in the other, and trim close.
If the bag looks a little uneven when you finish, lay it flat and steam it lightly, or dampen it and pat it into shape. Cotton responds well to gentle blocking, and the mesh rows in particular benefit from being eased into straight lines. Let it dry completely before you add the cord or strap.
If you want the inside to be tidy, a simple fabric lining stops small items from slipping through the mesh. Cut the lining slightly smaller than the bag so it sits smoothly, stitch it to the inside of the top edge, and leave the drawstring channel free. If you prefer the airy look, skip the lining and carry a small pouch inside instead.
For care, hand wash in cool water with mild soap, press out the water without wringing, and dry flat. Cotton shrinks with heat, and a tumble dryer would warp the shape and could crack the wooden beads.
Following the Tutorial
The video tutorial below shows every stitch in real time, which is the best way to see the mesh rhythm. Watch the first minutes once without your hook, so you understand how the stripes alternate. Then start working along with it, pausing whenever the hands move to a new stitch.
Pay particular attention to how the creator forms the open rows and where the chains sit in relation to the stitches beneath. Replay that section as often as you need. It is the heart of the pattern, and getting it right early saves you from ripping back later. When the video moves on to the strap and the cord, pause again and check the length against your own measurements.
A Simple Handmade Companion
This crochet crossbody bag is a small project with a lot of personality. It offers quick results, a relaxed shape and a pretty bow that sets it apart from an ordinary pouch.
Four things decide how well it turns out: a firm cotton yarn, even tension in the mesh rows, a strap measured to your body, and a cord that runs cleanly through the same row all the way around. Get those right and the rest follows.
Tie the bow, slip it on, and go.
Video tutorial for this crochet crossbody bag by Chompu Handicrafts. Watch the original on their YouTube channel.
VIDEO
Follow us on Pinterest and subscribe to the Newsletter so you don’t miss a thing!
Tutorial and photos of this crossbody bag by: Chompu Handicrafts.