
A crochet tulip pouch bag turns a row of tiny puffed buds into a little drawstring carryall that looks like a spring border you can sling over your shoulder.
The Crochet Tulip Pouch Bag
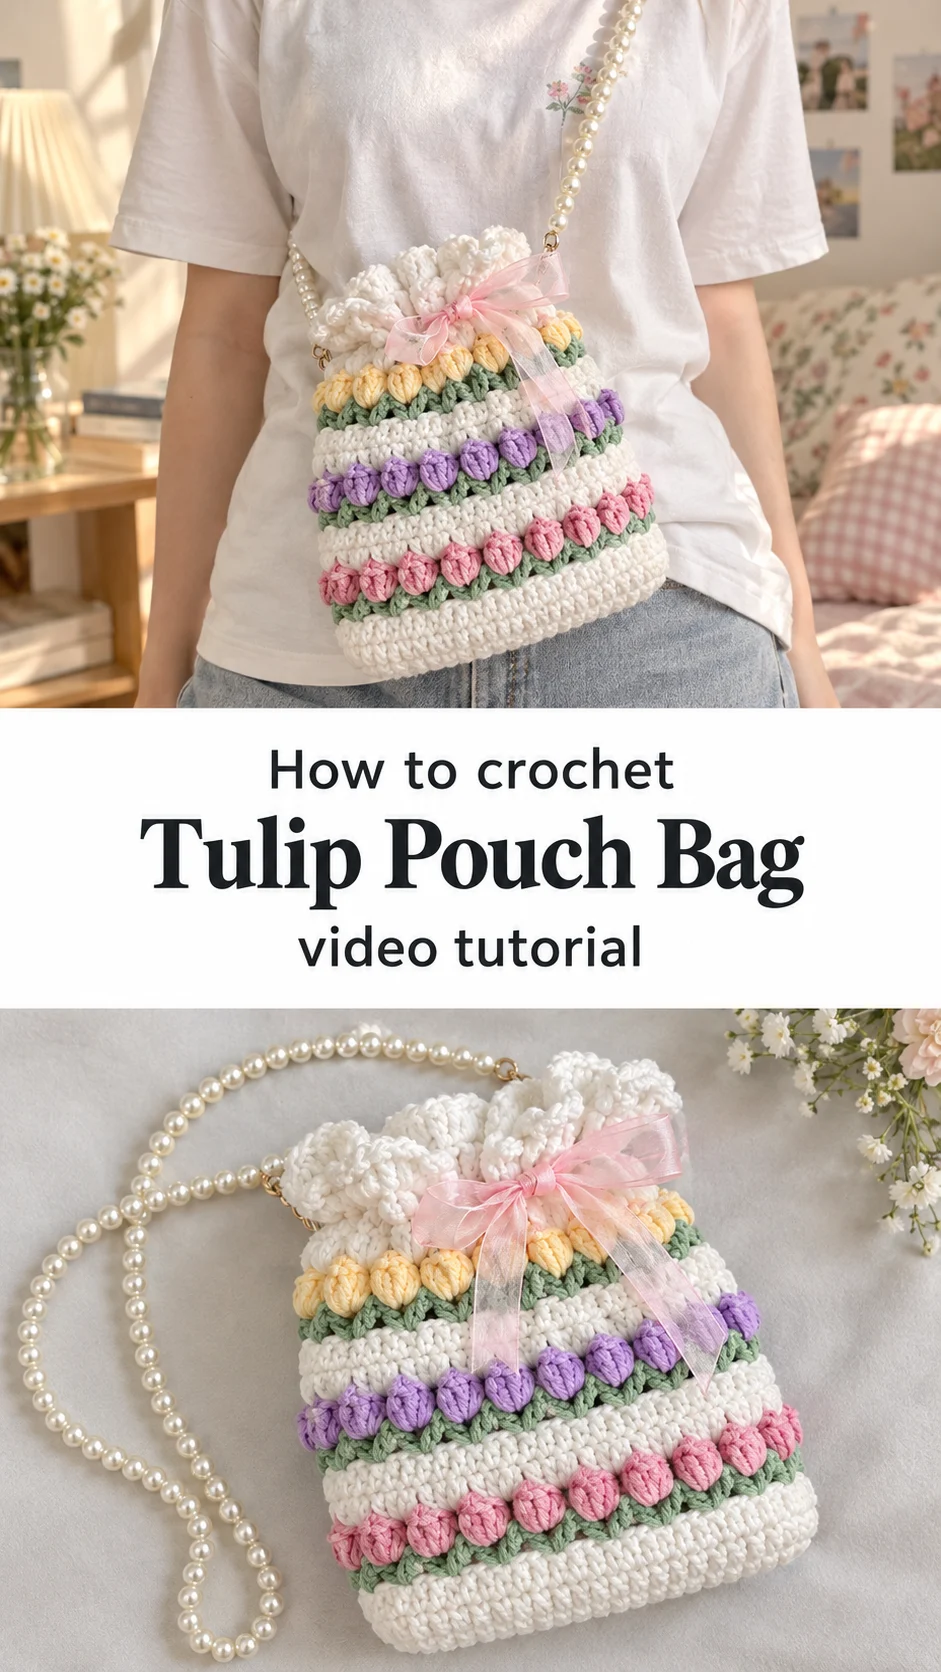
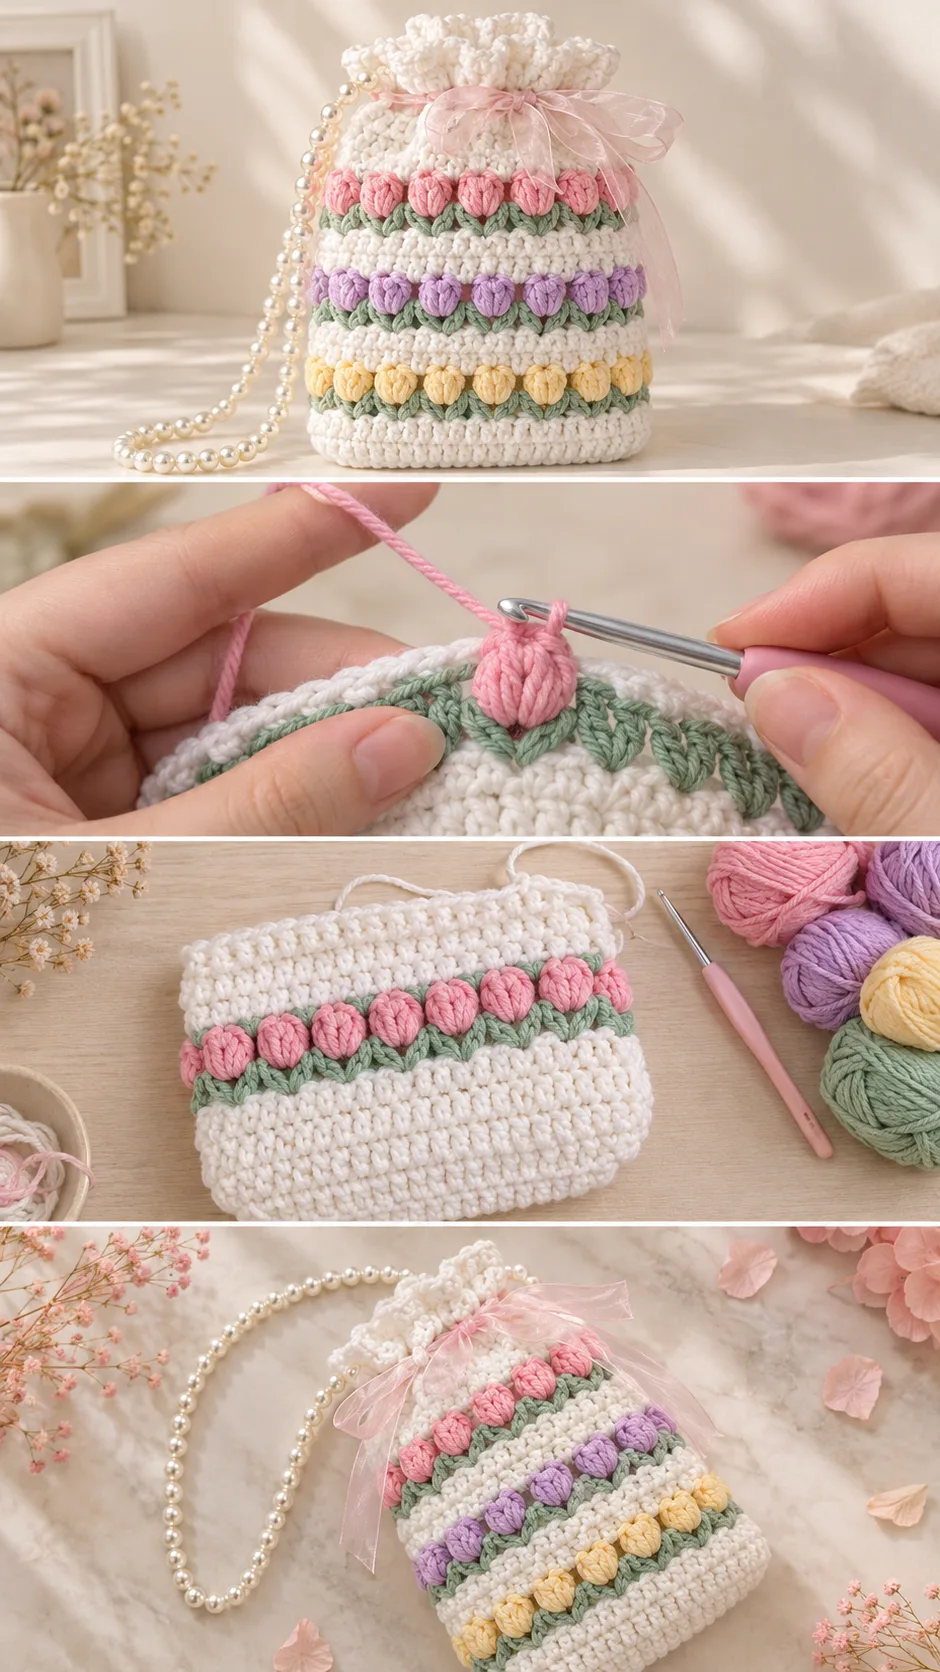
The crochet tulip pouch bag is a small bucket-style bag worked in soft white with horizontal bands of tulip buds. Each band is a different colour: rose pink, lilac, and butter yellow, all rising from a stem line of sage green. The tulips are plump little puffs, set shoulder to shoulder so they read as a garden border wrapped around the bag. Plain white stripes between the flower rows give the eye a rest and keep the colours from fighting. A ruffled white top, a sheer pink ribbon and a pearl-bead strap finish it off. It suits spring outings, tea with friends, and anyone who likes a bag that gets a smile before she even opens it.
The tulip rows are the whole story, but there is a second pleasure in the design. The pouch is small enough to finish quickly, yet every band teaches a repeatable technique. Make it once and the same flower border can wander onto a cushion cover, a headband or a baby blanket. A gift version in a favourite person’s colours is also very easy to picture.
Pouch Bag Related Posts:
- Crochet Dragon Scale Beanie: A Bold Winter Essential
- Crochet Table Runner: A Timeless and Elegant Centerpiece
- Crochet Elastic Ankle Boots: A Cozy Handmade Classic
- Crochet Puff Stitch Blanket: A Soft and Timeless Treasure
Materials
For the crochet tulip pouch bag, choose a smooth, medium-weight yarn with a little body, such as a soft cotton or a cotton-acrylic blend, in white plus rose pink, lilac, butter yellow and sage green. The fabric in the photos looks dense and slightly plush, so a plied, rounded yarn will give the puffs a clean, defined shape, while a fuzzy yarn would blur them. Pick a hook that makes firm stitches, usually one size smaller than the yarn label suggests, so the pouch stands up and the buds do not gap. Beyond yarn and hook, you need a tapestry needle, scissors, a length of sheer ribbon for the drawstring bow, and a string of large faux pearls or a bead chain for the strap. A small stitch marker is useful for keeping track of rounds, and a lining is optional but worth considering if you plan to carry keys or loose coins.
Understanding the Structure
This pouch looks like a bucket with a gathered top, and it appears to be worked in the round from the base upward, which means almost no seaming. A solid white base comes first, then the sides rise in dense stitches so the bag keeps a gentle, slightly rounded body. The stripes sit one above another like stacked bands, so the project is really a series of short rounds repeated in different colours.
The top is the one part that behaves differently. Instead of ending in a straight edge, the white section flares into a frilled collar that can be pulled closed with the ribbon. That means the bag has three zones: a firm base, a patterned middle, and a soft ruffled opening. Keeping those zones in mind while you watch the video helps you see why the stitch height and tension change as you climb.
The pouch is shown standing upright and holding its shape, which points to a tight gauge. If yours slumps, the fabric is too loose for the weight of the yarn. Drop a hook size before you go any further, because correcting it after the flower rows are in place means pulling out a lot of work.
Tulip Rows: The Detail That Makes the Bag
Each flower band begins with a green row of V-stitches, which become the little stems and leaves. The tutorial then attaches the flower colour in the V spaces and works a cluster of double crochets into the same space. Those clusters swell into rounded buds, and because they sit in the gaps of the V, every tulip seems to grow neatly from its own stem. This is the stitch worth slowing the video down for.
The most common mistake is working the cluster into the stitch rather than the space. The bud then sits crooked, and the stem line looks broken. Watch where the hook enters in the close-up, and pause until your own hands match. Keep the loops loose while the cluster is built, then pull the closing yarn-over firmly so each bud puffs forward instead of lying flat.
Colour changes happen at the start of each flower row. Carry the yarn only if the distance is short, otherwise cut and weave in, because long strands behind the flowers will show through the open V-stitch. If your buds look uneven, check that you have the same number of double crochets in every space. A bud with one stitch too few looks pinched, and one too many looks like it is about to burst.
Keeping the Stripes Even
The white bands between the flower rows are worked in plain, dense stitches, and they are the best place to correct tension. If the bag is flaring wider as it rises, tighten up your hand in these rows. If it is pulling inward, relax slightly. Because the buds add volume, the flower rows naturally grow thicker than the white ones, so do not panic when the sides look a little bumpy before the bag is finished.
Choosing Colours and Yarn
The palette in the photos is a soft pastel set: rose pink, lavender, pale yellow and sage on a white ground. Sage green is a clever choice for the stems, because it is muted enough to calm the brighter flower shades. If you want a more grown-up bag, try deep burgundy, plum and mustard on a cream base, with olive stems.
For yarn, a mercerised cotton gives crisp bud definition and a slight sheen, but it has little stretch, so your hands may tire. A cotton-acrylic blend is kinder to the wrists and still holds the puff shape. Avoid very fluffy or brushed yarns, since they hide the bud outline, and avoid anything too thin, which will make the pouch floppy.
If you are using leftovers, keep the flower yarns the same thickness as the white. A thinner colour makes the band look sunken. Test a few buds in a swatch before committing to the full row.
Ruffle, Ribbon and Strap
The frilled top is made by working many stitches into each stitch of the last few rounds, so the fabric has more length than the circle can hold and ripples outward. The more increases you make, the wilder the frill. For a neat, gathered look, keep the increase consistent all the way around, and leave a row of spaces for the ribbon to run through.
Thread the ribbon through those spaces with the needle, starting and ending at the front, then tie a bow. Sheer organza in pale pink is what the pouch wears in the photos, and it softens the white without hiding the tulips beneath. A satin ribbon would be heavier and could pull the frill down.
The strap is a string of large pearls, which gives the pouch a delicate, vintage feel. Tie it securely to the sides of the bag or loop it through the stitches near the top. Pearls are light, but a full pouch can strain a single thread, so use a strong cord or double the line, and knot it between a few beads at the attachment point so a slip does not scatter the whole strand. If you prefer a sturdier option, crochet a short strap in white cord or use a chain.
How to Style a Crochet Tulip Pouch Bag
In the photos, the pouch hangs at hip height over a white tee with a pink print, which shows how well it suits casual, pastel outfits. The same look works with a denim skirt, a cream cardigan and white sneakers. The pearls echo the white of the bag, so the whole outfit feels cohesive.
For a dressier option, pair it with a floral sundress or a linen set at a garden party, where the tulips will blend with the surroundings. It also makes a sweet bag for a girl to carry her lip balm and a few small treasures. Because it is compact, it works best as an evening or occasion bag rather than an everyday tote.
As a gift, tuck a scented sachet inside, or fill it with wrapped sweets for a spring birthday. It looks just as pretty hanging on a doorknob or a bedroom hook as it does on a shoulder.
Tips for a Neat Finish
Weave in ends as you go whenever you change colour. Waiting until the end leaves dozens of tails behind the flower rows, and they are hard to hide among the puffs. Work each tail back along the stem row, where the dense stitches will grip it.
If the bag looks uneven after the last round, steam it lightly or dampen it and shape it around a small box or jar to dry. Do not press the buds flat. If the bottom is bulging, lay the base on a table and pat it gently into shape while damp. If the ruffle is curling the wrong way, a little pinning while it dries will train it.
Wash by hand in cool water with mild soap, and lay it flat. The pearl strap should be removed first, since soaking can loosen the thread or dull the finish. If the pink ribbon runs, test it first on a hidden corner.
Following the Tutorial
The video shows the tulip rows in real time, so use the pause button often. Watch how the hook goes into the V space, and how the yarn is held for the cluster. Replay the first bud until your own matches, because every other bud in the row depends on that rhythm.
A sensible order is to build the base and sides, then the first flower band, and check the shape before adding more colours. This also shows you whether your tension is right early on. When you reach the ruffle, slow down again, since the increases there are easy to miscount.
A Sweet Handmade Garden
This crochet tulip pouch bag is a small pastel garden you can carry, built from stacked flower bands, a frilled collar and a string of pearls. The result depends on four things: a firm tension, buds worked into the spaces rather than the stitches, tails woven in as you go, and a ruffle with even increases.
Make it in the colours of your own spring, and it will be the bag people ask about.
Video tutorial by vivi_crochet, whose clear demonstration of the crochet tulip pouch bag is embedded below.
VIDEO
Follow us on Pinterest and subscribe to the Newsletter so you don’t miss a thing!
Tutorial and photos of this tulip pouch bag by: Vivi Crochet 🌷.