
The crochet amber pocket scarf is a long, rectangular wrap in rich burnt orange, finished with braided tassels and two deep pockets that keep your hands warm and your phone close.
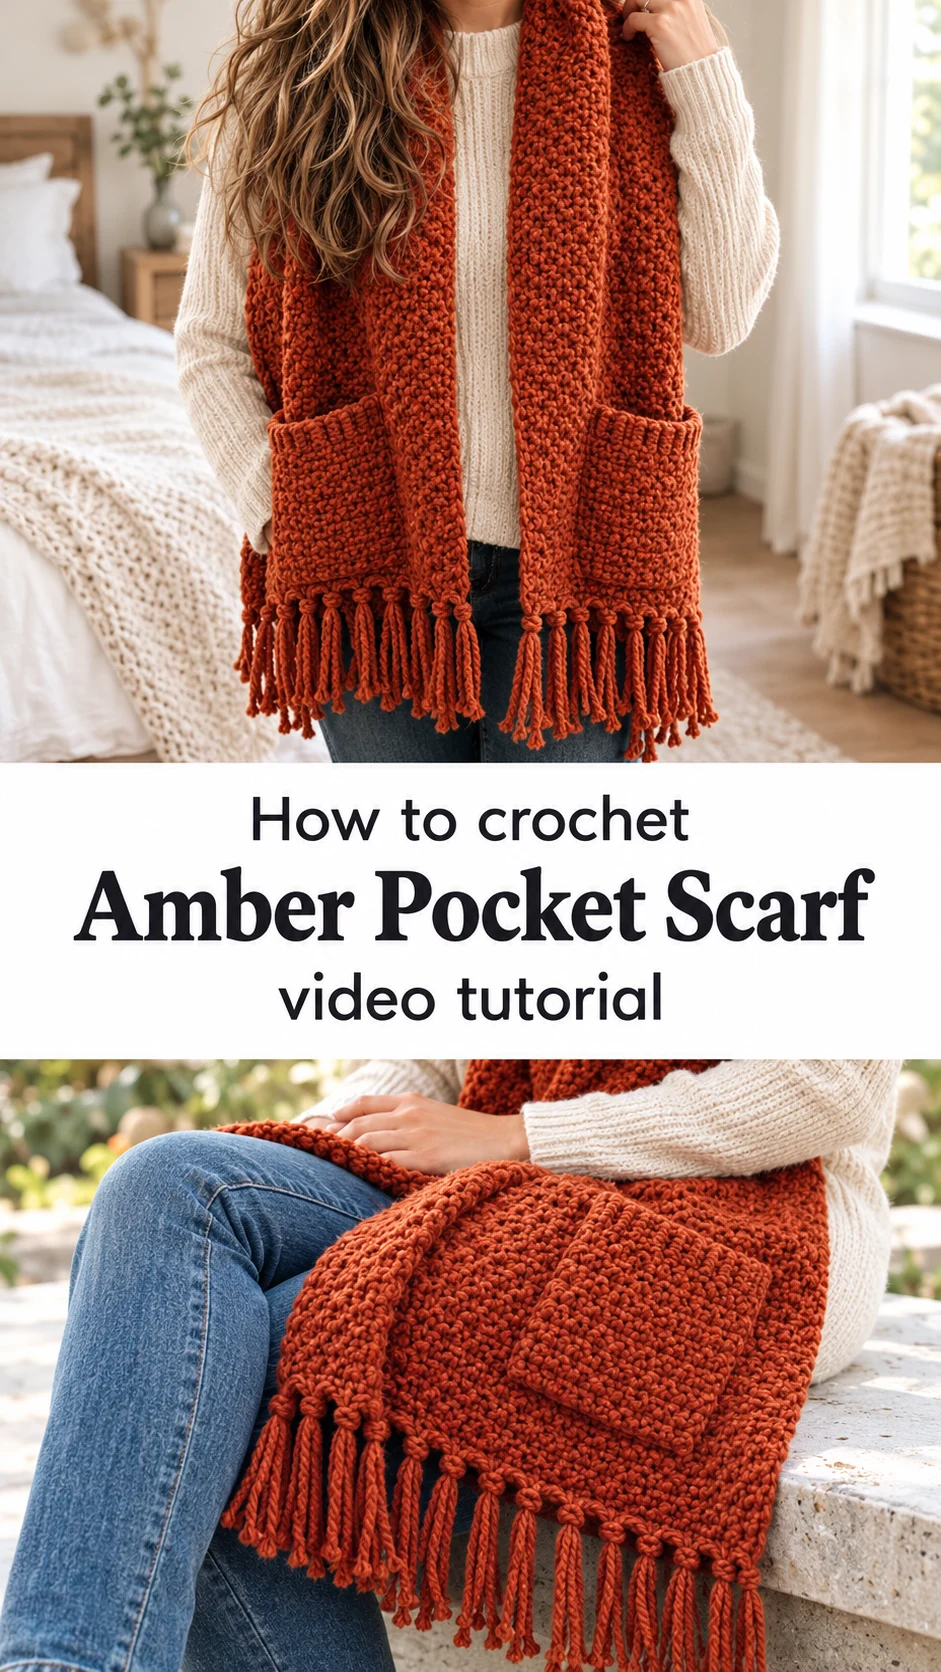
The Crochet Amber Pocket Scarf
The crochet amber pocket scarf is a generous wrap that drapes over the shoulders and hangs straight down the front. It is worked in a deep amber, a burnt orange that sits somewhere between rust and terracotta. The fabric has a dense, bumpy texture made of tightly packed stitches, so it looks closer to a knitted fabric than to an open crochet net. Two pockets sit low on the front panels, each topped with a neat ribbed band. Rows of braided tassels trim the ends. It reads as part scarf, part shawl and part cardigan, and it suits cool autumn days, cozy evenings on the sofa and walks where your hands need somewhere to go.
Wear it open like a long vest, or wrap one end around the neck for extra warmth. Because the pockets are built in, it makes a thoughtful gift for anyone who feels the cold. It also builds useful skills: working a textured stitch over a wide piece, adding ribbing, and attaching pockets cleanly. The reward is a piece that looks far more complicated than it is.
Pocket Scarf Related Posts:
- Crochet Lace Table Runner: An Elegant Home Accent
- Crochet Chunky Scarf: A Warm and Timeless Essential
- Crochet Summer Blouse: An Incredible Warm Weather Essential
- Crochet Peplum Cardigan: A Timeless Autumn Essential
Materials
To make the crochet amber pocket scarf you need a soft, medium to bulky weight yarn in a warm amber shade, a crochet hook sized to suit that yarn, a yarn needle for weaving in ends and sewing the pockets, and a pair of scissors. A wool blend or a soft acrylic gives the best result, because the stitch is dense and the wrap is large. Cotton would feel heavy and pull downward, while a fuzzy mohair would hide the texture that makes this design special. Choose a yarn with a little spring and a slight sheen, and pick a hook that feels one step firmer than usual so the fabric stays thick and warm instead of floppy. Buy all the yarn from the same dye lot, since a rich solid color shows any difference between skeins. Extra yarn is also needed for the tassels, so plan a little more than the body alone seems to need.
Understanding the Shape and Construction
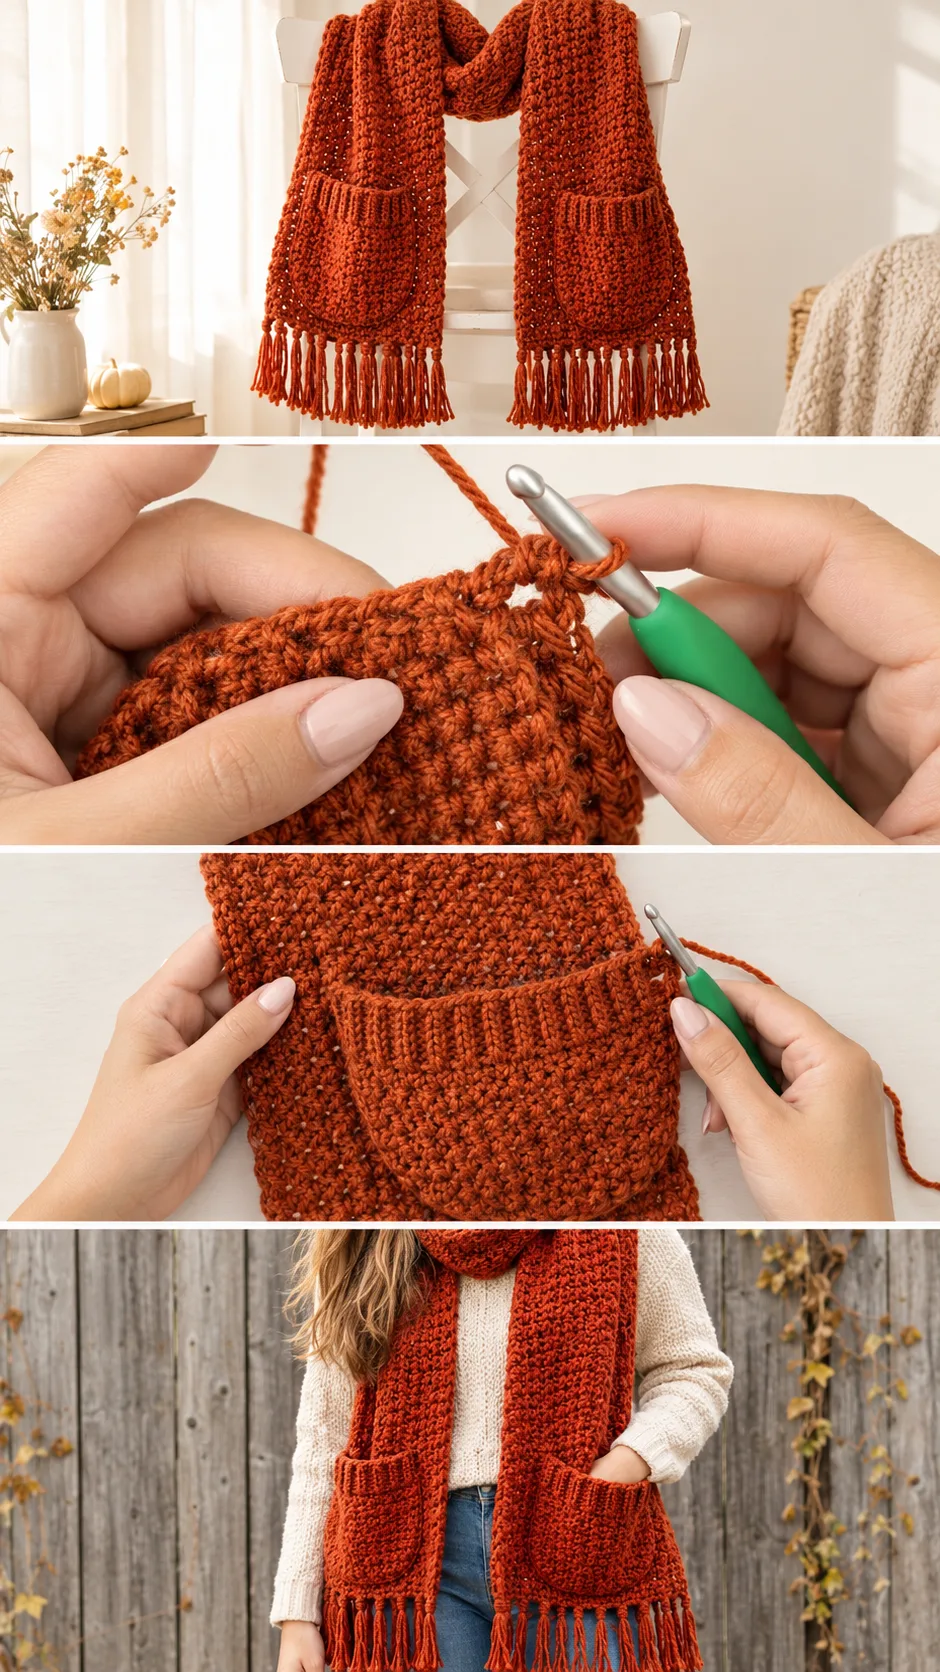
The wrap is a long rectangle that hangs open at the front. It looks as though the body is one wide panel worked flat, with the pockets added as separate pieces and the ends fringed. The two pocket openings sit low and slightly angled, at a height where a relaxed arm can slide in without stretching.
Pockets can be built in two ways: worked into the body as you go, or made separately and sewn on. The wrap here appears to use separate pocket pieces, each finished with a ribbed top so the opening holds its shape. That ribbed band matters. Without it, the opening would stretch under the weight of a phone or keys and gape open.
Plan the width before you begin. A wrap this size needs to clear the shoulders and still hang with a little overlap in front, so measure across your own shoulders and add a comfortable allowance. If you make it too narrow, it will sit like a scarf and the pockets will fall too close together at the sides.
The Stitch Texture
The fabric is a tight, pebbled stitch with small raised bumps running in tidy columns. It looks like a close cousin of the moss or linen family of stitches, built from short stitches worked into spaces so the rows interlock. The result is thick and firm, with no gaps for cold air.
This type of stitch eats yarn and grows slowly, so patience helps. Each row looks modest on its own, yet the fabric becomes warm and substantial once there are a few inches of it. If the edges begin to wave, you are probably adding stitches at the turns. Count your stitches at the end of a few rows and keep the edge straight.
If the fabric feels stiff and board-like, go up half a hook size. If it feels loose and drapes too much, go down. A wrap should hang softly but still show its texture, so test a small swatch before committing to the full length.
Pockets: The Detail That Makes It Useful
The pockets are the signature feature, and they are what lifts this piece above an ordinary scarf. Each one is a deep square of the same textured stitch, topped by a ribbed edge that looks like a cuff. The ribbing gives a clean, structured opening, and the contrast in texture adds a tailored touch.
Position matters more than anything. Try the wrap on before sewing, slide your hands in as if they were resting, and pin each pocket where your fingertips naturally land. Pockets set too high feel awkward, and pockets set too low pull the wrap down at the front.
When you sew them on, use the same yarn and small, even stitches along the sides and bottom, leaving the top open. Sew through the loops of both layers without pulling tight, or the body will pucker behind the pocket. This is the step where the video is most useful. Pause when the creator shows how the pocket meets the body, and replay it until you see how the edge lines up.
Keeping the Pocket Opening Neat
If the ribbed top flares outward, the ribbing is worked too loosely, so try a smaller hook for that band only. If it pulls inward and squeezes your hand, loosen your tension a little. A good opening relaxes flat against the wrap and holds its shape when filled.
Choosing the Best Yarn for a Warm Wrap
Three fibers suit this design well. A merino or wool blend gives the most warmth and a lovely matte glow in the amber shade. A soft acrylic is budget friendly, machine washable and holds color well. A wool and acrylic mix sits between the two, with good bounce and easier care.
Avoid slippery, glossy yarns such as rayon or bamboo. They make the dense stitch hang heavily and can stretch over time, so the pockets sag. A very fuzzy yarn also hides the pebbled texture that gives this wrap its character.
If amber is not your color, rich shades of mustard, deep forest green, plum or oatmeal keep the autumn mood. A solid or lightly tonal yarn shows the texture best, while a strongly variegated one would blur the stitch pattern.
Tassels and Finishing Touches
The ends are trimmed with a row of long braided tassels, each ending in a small tuft. They add movement and give the straight ends a handmade finish. Cut your strands to equal length, attach them in evenly spaced groups, then braid and knot the ends.
Before adding the fringe, weave in every loose end and block the wrap lightly. Blocking evens the stitches and relaxes the edges, so the fringe hangs from a straight line. If a tassel looks uneven, trim it after braiding rather than before, since braiding shortens the strands unpredictably.
How to Style a Crochet Amber Pocket Scarf
The wrap looks relaxed over a cream ribbed sweater and blue jeans, where the amber stands out against soft neutrals. Left open, it falls like a long vest and frames the outfit with a strong vertical line.
For a dressier look, drape it over a black turtleneck and dark trousers, and let the color carry the outfit. Over a simple dress with boots, it works as a stylish layer that replaces a coat on mild days. Folded around the neck, it becomes a thick, cozy scarf that still leaves the pockets within reach.
Caring for Your Wrap
Wash by hand in cool water with a gentle detergent, because heat and agitation can felt wool and roughen the surface. Press out the water in a towel without wringing, then lay the wrap flat to dry so the weight does not pull it out of shape.
Fold it for storage instead of hanging it. A hanger will stretch the shoulders and the pockets over time. If pilling appears, remove it gently with a fabric shaver.
A Cozy Handmade Companion
The crochet amber pocket scarf is a warm, textured wrap with deep pockets and swinging tassels. What decides the result is simple: a soft yarn with some spring, a firm but not stiff tension, pockets sewn at a comfortable height, and ribbing that holds its shape.
Take your time, pause the tutorial where the pockets join, and the finished wrap will serve you for many winters.
Video tutorial for the crochet amber pocket scarf by CJ Design. Watch the full tutorial below.
Video Tutorial
Watch the full video tutorial for the Amber Pocket Scarf below.
Follow us on Pinterest and subscribe to the Newsletter so you don’t miss a thing!
Tutorial and photos of this amber pocket scarf by: CJ Design.