
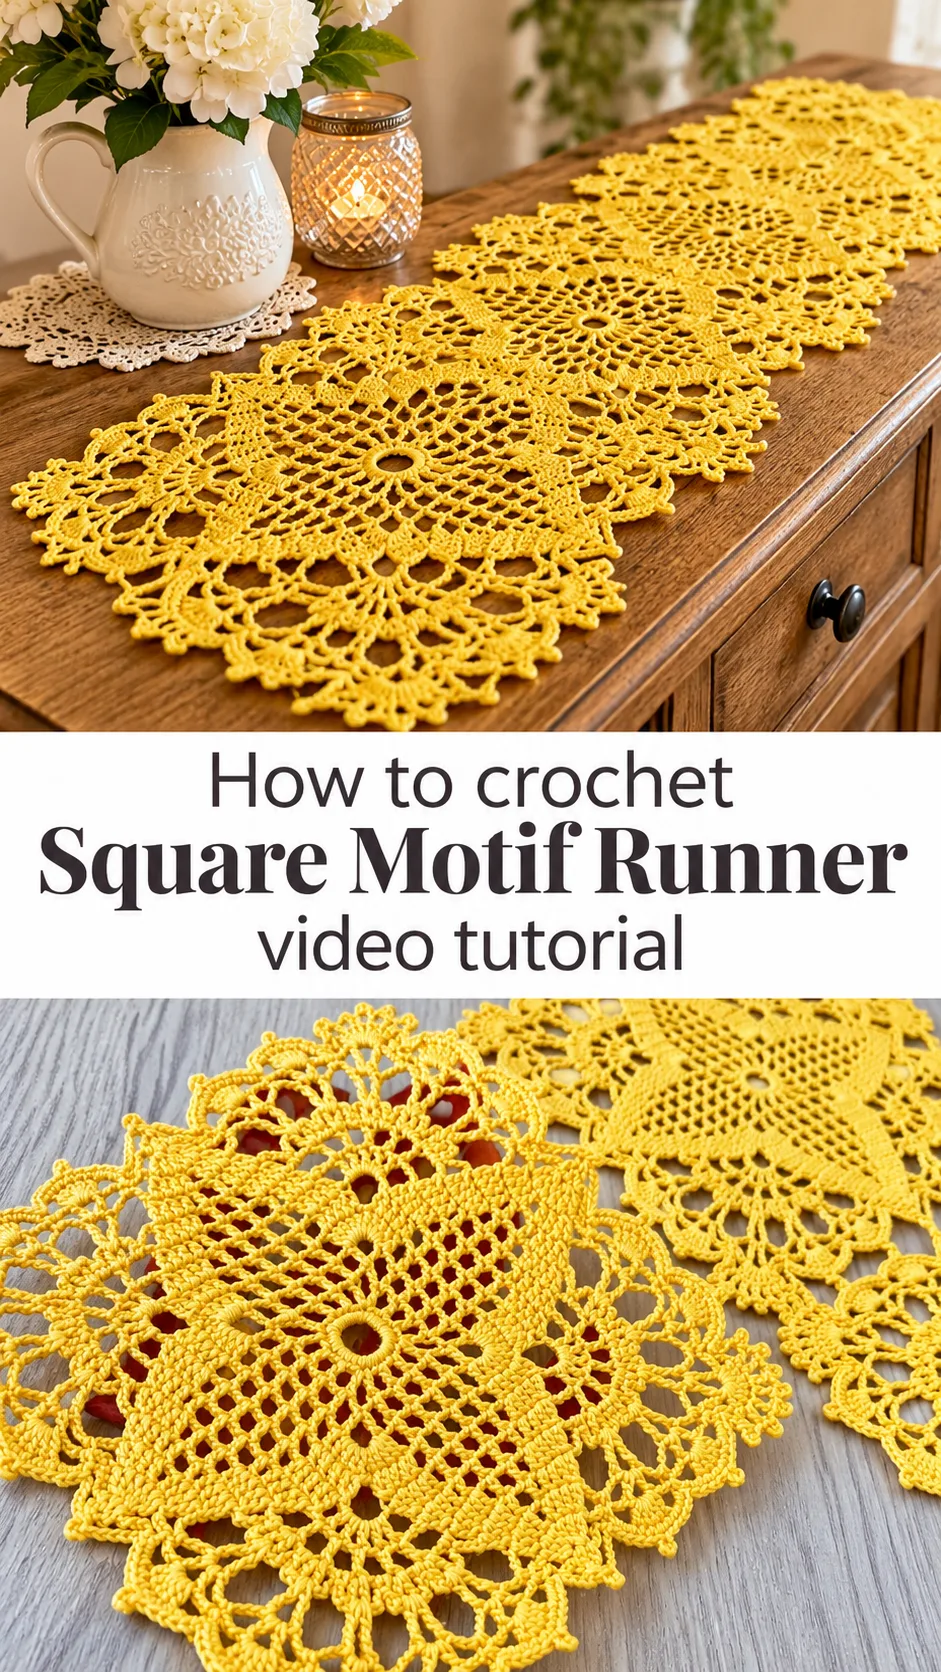
A crochet square motif runner is a delicate piece of lace worked in warm butter yellow thread, built from open mesh, fan edges and tiny picot points that catch the light on a tabletop.
The Crochet Square Motif Runner
The crochet square motif runner is made of lace squares joined side by side into a long, narrow table piece. Each square opens on a small central ring, and a field of tiny diamond mesh radiates outward from it. Wide fan shells and scalloped points frame every square, so the edge looks like a ruffle of tiny flowers. The thread is a fine, smooth, slightly glossy cotton in a soft sunshine yellow. That choice gives the runner a cheerful, vintage warmth without any fuss. It suits a sideboard, a dining table, a dresser top or the back of a sofa. Because the motifs are separate squares, the length is yours to decide.
Pieces like this have a long history on grandmothers’ tables, yet the yellow colour keeps the look fresh. A runner also makes a lovely gift, since it is small enough to finish in stages and large enough to feel generous. Making it builds real skill in reading lace, keeping tension even and joining motifs neatly. Patience pays off.
Motif Runner Related Posts:
- Crochet Flower Basket: A Soft and Charming Accent
- Crochet Tassels: A Charming Decorative Touch
- Crochet Flower Choker: A Delicate and Charming Accessory
- Crochet Ruffle Baby Booties: A Sweet Handmade Treasure
Materials
For a crochet square motif runner like this one, choose a fine mercerized cotton thread in a soft yellow, the kind sold for doilies and lace. Mercerized cotton has a gentle sheen, holds crisp stitch definition and survives repeated washing, which matters for something that will sit under vases and plates. Pair it with a steel crochet hook in the small range, roughly 1.25 to 1.75 mm, and adjust after a test square. A hook that is too large makes the mesh floppy and the shells lose their shape, while one that is too small makes the fabric stiff. You will also need a tapestry needle for weaving in ends, sharp scissors, rustproof pins and a flat padded surface for blocking. Starch or a stiffening spray is optional, but it helps the scalloped edges stand up.
Understanding the Motif Structure
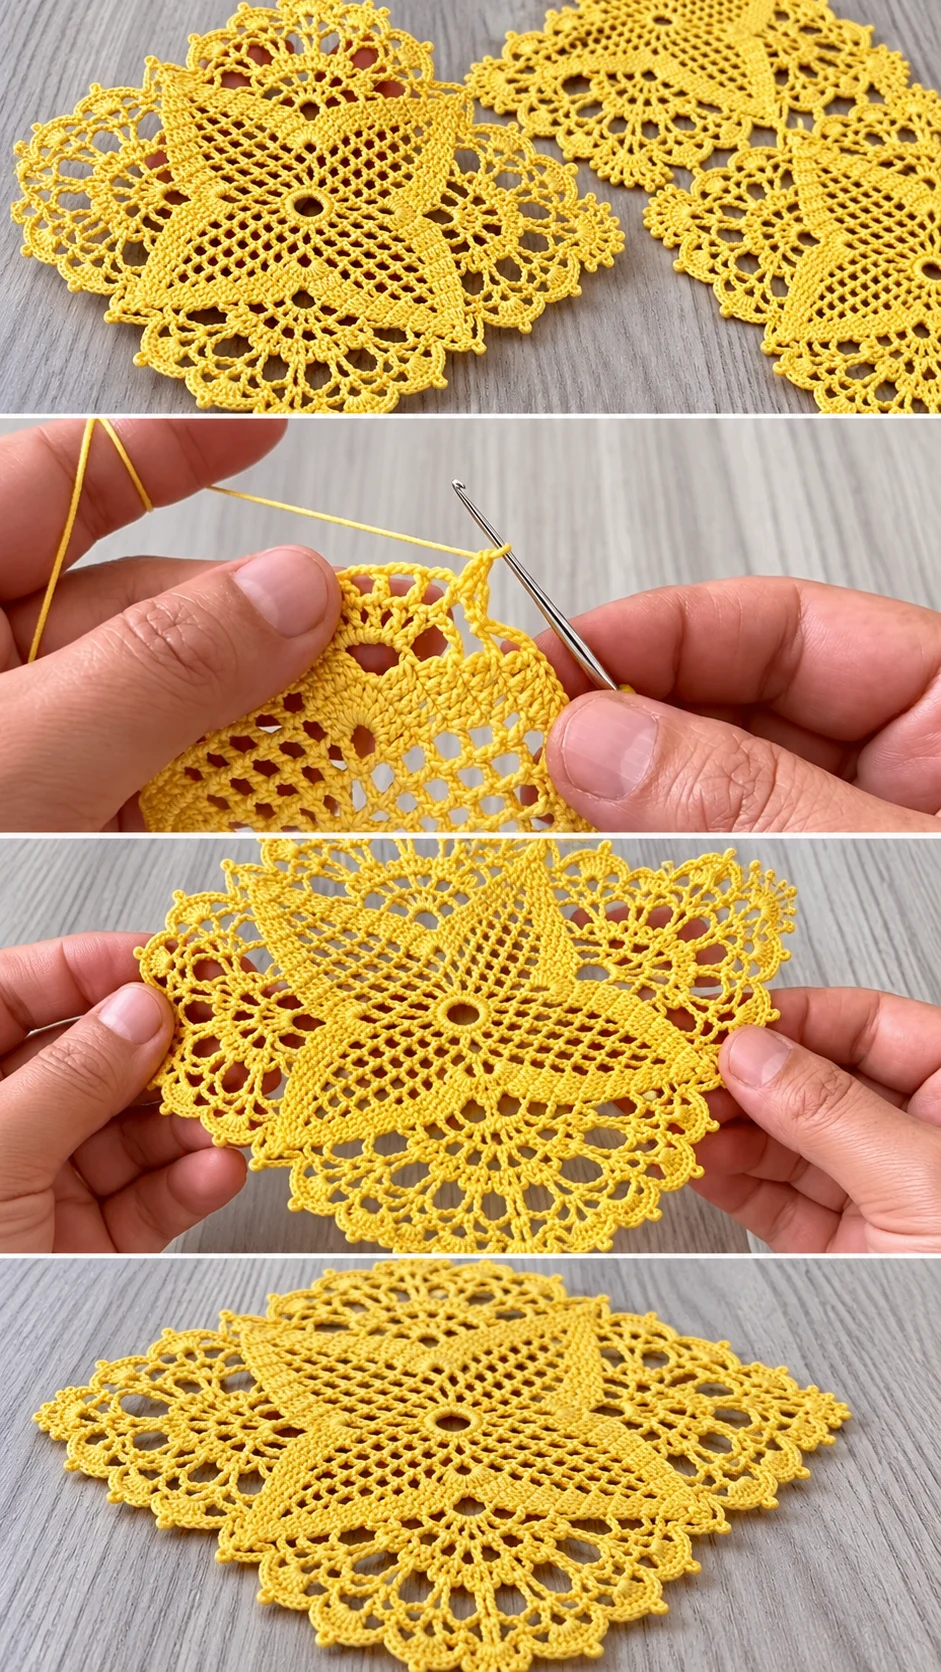
Each square begins at the centre with a small ring, and the work grows outward in rounds. The first rounds form a tight spoke of stitches, and then the mesh opens into evenly spaced diamond holes. Lines of denser stitches run diagonally across the square, creating the impression of a leaf or petal shape within the mesh. That contrast between solid and open areas is what gives the motif its depth.
The corners deserve attention. In the photos, the outer rounds push out into pointed scallops at each corner, with a small ring of picot loops capping the tip. These corners are where the square becomes a decorative shape rather than a plain grid, so they must be worked symmetrically.
The final rounds form the lace border: fans of tall stitches sitting inside arches of chain loops. Each arch frames an open hole, and the holes line up neatly between neighbouring fans. If a fan looks lopsided, count the stitches in that section before moving on.
Mesh and Fans: The Stitches That Carry the Design
The mesh is built from single stitches separated by short chain spaces, forming small diamonds. It looks airy, yet it is firm because every space is anchored at both sides. The mesh needs steady tension. If you pull the chains too tight, the diamonds distort and the square starts to cup.
The fans along the edge look like clusters of tall stitches worked into a single point, spreading out like a shell. A fan that is too tight will pucker the border, while a fan that is too loose will flop outward. Aim for stitches that sit side by side without crowding. If the border ripples after a few rounds, your fans are probably tighter than the mesh behind them, so loosen your grip slightly on those stitches.
The tiny picot points on the outer corners are small but visible. They are formed by short chain loops closed into the stitch below. Keep each picot the same size, because the eye notices uneven points much more than an uneven interior.
Choosing the Best Thread and Colour
Mercerized cotton is the safest choice. It gives clear stitch definition, handles blocking well and keeps its colour. Pure cotton without mercerizing is softer and a little more matte, which can be pretty but shows less detail in the fans. Avoid acrylic thread for this project, because it resists blocking and the scallops will not hold their points.
Yellow is the colour in the photos, a buttery shade between lemon and honey. It looks lovely on a pale wooden table, as the images show, and also against white linen or dark walnut. If yellow feels bold, ecru or soft white gives a classic heirloom look, while sage green or powder blue brings a calm, spa-like mood. Choose a single flat colour rather than variegated thread, since colour changes would hide the lace pattern.
Buy all the thread you need at once, and check the dye lot number. Even a slight difference in yellow becomes visible when squares are joined side by side.
Joining the Squares and Keeping the Runner Flat
A runner is only as good as its joins. The squares in the photos meet along their scalloped sides, and the lace edges nestle against one another so the connection reads as part of the design. Whether the squares are joined as you work the last round or sewn together afterwards, the aim is the same: seams that lie flat and do not tug.
If you join as you go, plan the order of squares before starting so you always know which edge connects next. Use the same joining method every time, because mixed methods leave some seams thicker than others. If you sew, use the same thread and small, loose whip stitches so the seam stays flexible.
If the finished runner buckles along the joins, your join tension is tighter than the squares themselves. Unpick one join and redo it more loosely. If the runner is wavy along its length, the squares were probably not blocked to identical sizes. Pin each one to the same measurement before joining.
Skill Level and What Takes Patience
This is an intermediate project. The stitches are basic, mostly single, double and chain stitches with simple clusters, but the work is fine and requires focus. Reading lace in thread, where each stitch is small, feels slower than working in yarn.
The hardest part is the border. Fans, arches and picots stack on top of each other in the final rounds, and a miscount early on shows clearly in the finished edge. Work in good light, use stitch markers at each corner and check the count at the end of every round.
The video tutorial is where this project becomes manageable. Watch how the maker positions the thread over the finger and how the hook enters each space, then pause and replay the fan sections until the rhythm feels natural. Make one practice square before committing to a full runner.
Blocking for Crisp Lace
Blocking turns a good square into a beautiful one. Wet the finished piece in cool water, press out the excess in a towel and pin it on a flat surface, easing each scallop and picot into place. Pin every point on the border, not just the corners, so the edge shape is sharp and even.
A light mist of starch or a diluted fabric stiffener gives the lace body, which helps it lie flat under dishes and resist curling. Let it dry completely before unpinning. If the runner still looks limp after drying, it likely needs a second round of blocking with a little more stiffener.
How to Style a Crochet Square Motif Runner
In the photos, the yellow lace rests on a pale grey-washed wood surface, and the contrast makes the pattern stand out. That is a good starting point: a light lace on a plain surface lets the stitches do the talking.
On a dining table, lay the runner down the centre and place a low bowl or a short vase on one of the squares. Avoid tall arrangements that hide the lace. On a sideboard, let the runner hang slightly over the ends for a softer line. On a dresser, place a small tray or a candle on it so the mesh shows around the object.
For gifting, roll the finished runner loosely and tie it with a ribbon in a matching tone. Wedding showers, housewarmings and holiday tables all suit a handmade lace piece.
Caring for Your Runner
Wash by hand in lukewarm water with a mild soap, pressing gently rather than wringing. Wringing distorts the mesh and flattens the picots. Rinse until the water runs clear, roll the piece in a towel to remove moisture and pin it flat to dry in the shape you want.
Store the runner flat or loosely rolled, never folded sharply, since creases in cotton lace can be stubborn. Keep it away from direct sunlight, which can fade yellow thread unevenly. If a stain appears, treat it quickly with a gentle spot cleaner before washing.
A Bright Handmade Heirloom
The crochet square motif runner is a patient project that rewards care. Its charm comes from repeated lace squares, each with a mesh centre, crisp fans and tiny picot corners.
Four things decide how it turns out: a fine mercerized cotton thread, even tension in the mesh, symmetrical fans and thorough blocking. Get those right and the squares will join into a runner that lies flat and looks polished.
Take your time, and let the yellow glow on your table.
Follow us on Pinterest and subscribe to the Newsletter so you don’t miss a thing!
Tutorial and photos of this square motif runner by: Crochet Knitting Therapy .