
A handmade backpack that actually holds its shape and looks polished enough for everyday use? That’s exactly what this pattern delivers. The Dusty Rose Backpack uses simple single crochet stitches worked firmly to create a structured bag with a rounded flap, front zipper pocket, top handle, and adjustable shoulder straps. It’s perfect for yourself or as a thoughtful handmade gift. The construction might look complex, but I promise it breaks down into manageable pieces that come together beautifully. If you can single crochet and sew pieces together, you can absolutely make this bag.
Get the Ad-Free PDF Pattern
You can find the free pattern below, or you can purchase the ad-free printable PDF from my shop.
Get the Printable PDF →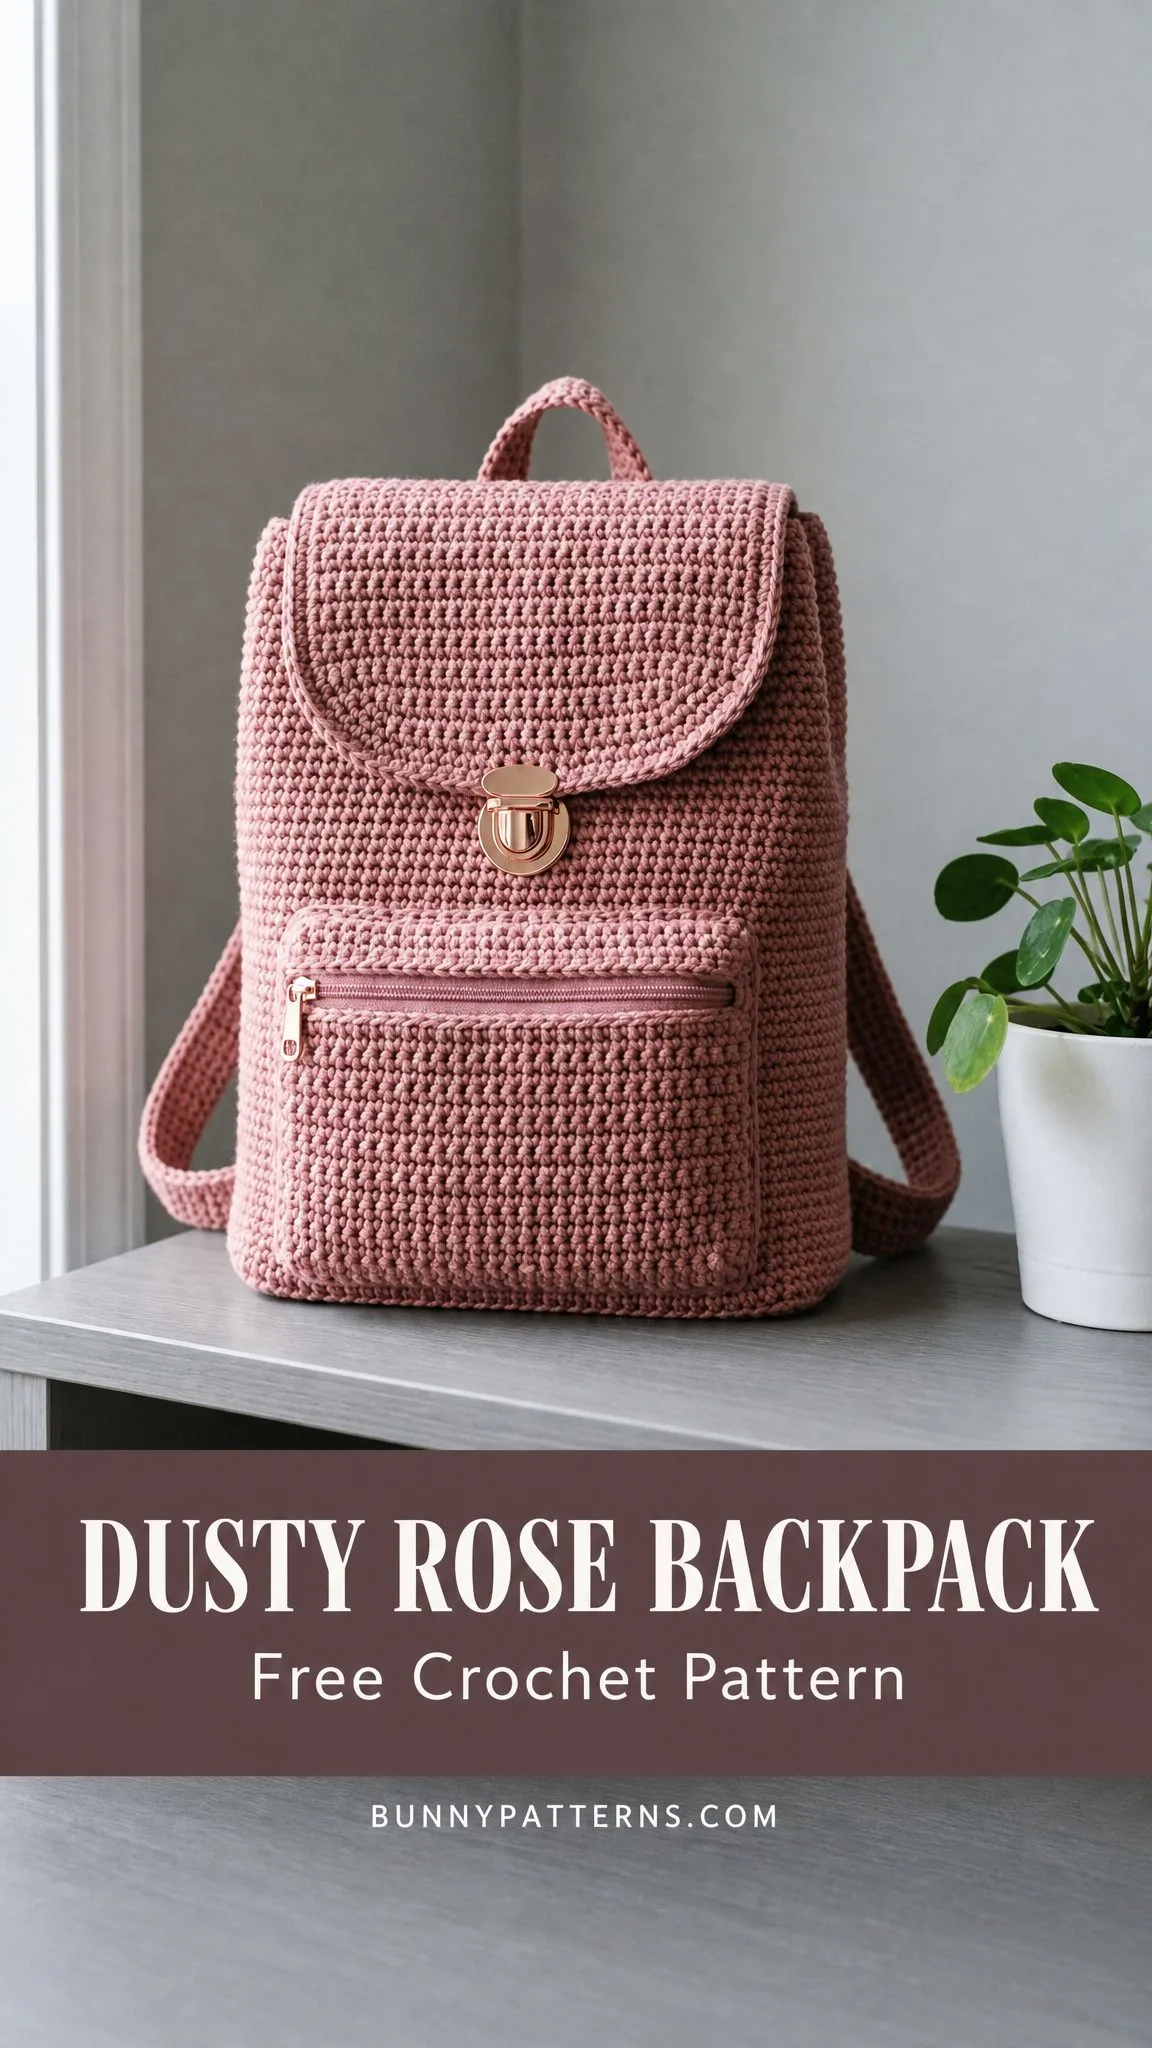
About This Crochet Backpack Pattern
This crochet backpack pattern creates a softly structured bag measuring approximately 9 inches wide by 10 inches tall by 3 inches deep (23 x 25.5 x 7.5 cm), not including the handle and straps. The finished piece has that professional, store-bought look while still being unmistakably handmade.
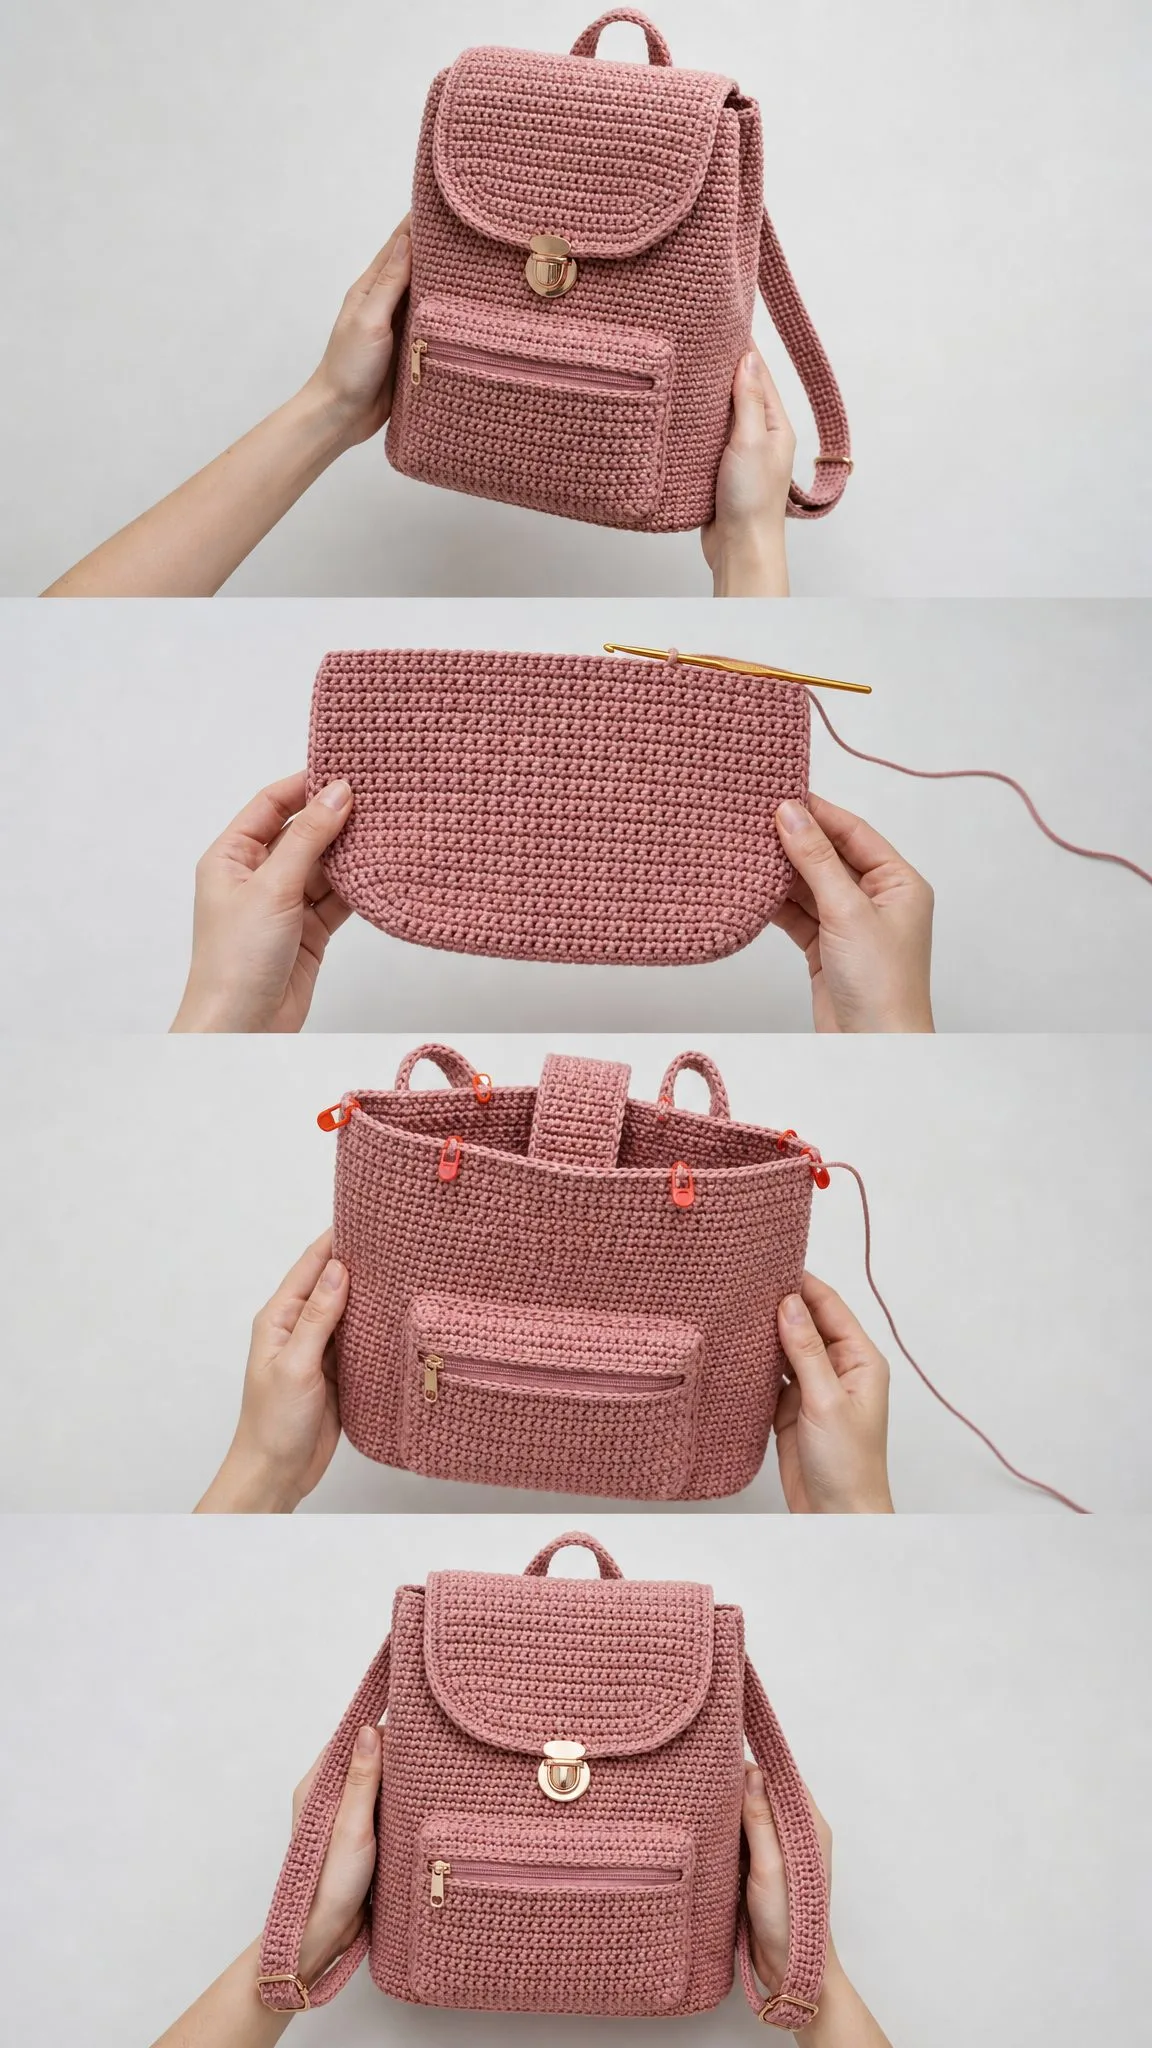
The construction method is straightforward once you understand the flow. You’ll start with a firm rectangular base worked flat. Then you’ll pick up stitches around that base and work the body upward in joined rounds. The flap, pocket, handle, straps, and tabs are all made separately and sewn on at the end. Breaking it into pieces like this makes the whole project feel much less overwhelming.
Skill level: Intermediate. The crochet itself is simple and repetitive, which is actually a good thing here. The intermediate rating comes from the finishing work: firm shaping, hardware installation, zipper placement, straps, and neat seaming. If you’ve never sewn in a zipper before, don’t worry. I’ll walk you through the placement, and you can always practice on a scrap piece first.
Time estimate: Plan for about 10 to 14 relaxed hours. This isn’t a one-evening project, but it’s not months of work either. Perfect for a weekend dedicated to making something special.
Materials You’ll Need
Gathering your materials before you start makes the whole process smoother. Here’s everything you’ll need for this crochet backpack pattern:
Yarn: Bulky weight cotton, cotton-acrylic blend, or tube yarn. You’ll need approximately 430 to 520 yards (393 to 475 meters) in dusty rose or your preferred color.
Some yarn suggestions that work beautifully:
A note on yarn substitution: Choose a sturdy yarn that creates a firm fabric at gauge. Soft, stretchy yarns can make the backpack slump and lose its shape. If you’re using a softer yarn, plan to add a lining and base insert for extra structure.
Hook: US H/8 (5 mm), or the size needed to match gauge. Here’s an important tip: use a smaller hook than your yarn label suggests. This creates the firm bag fabric that helps the backpack hold its shape.
Notions:
Optional but recommended:
Gauge Information
Getting gauge right matters more for bags than you might think. It affects not just the size but also how well your backpack holds its shape.
Gauge: 12 single crochet stitches by 14 rows or rounds equals 4 inches (10 cm) in firm single crochet, blocked lightly.
Match both your stitch gauge and your row gauge before starting. If your gauge is off, your bag will be a different size, and your pieces might not fit together properly.
Checkpoints to verify you’re on track:
Stitch Guide and Abbreviations
Let me define all the stitches and abbreviations you’ll encounter. Even if you know these already, a quick refresher never hurts.
ch = chain
rep = repeat
rnd(s) = round(s)
RS = right side (the outside of your work)
WS = wrong side (the inside of your work)
sc = single crochet (insert hook in stitch, yarn over, pull up a loop, yarn over, pull through both loops on hook)
sc2tog = single crochet two stitches together (a decrease). Here’s how: insert hook in next stitch, yarn over and pull up a loop. Insert hook in the following stitch, yarn over and pull up a loop. Yarn over and pull through all 3 loops on hook. You’ve just turned two stitches into one.
sl st = slip stitch
st(s) = stitch(es)
Special Techniques
Firm single crochet: This is just regular single crochet worked with intention. Insert your hook under both top loops, yarn over, pull up a loop, yarn over, pull through both loops. The key is keeping each stitch compact and even. Don’t let your loops get loose and sloppy.
Invisible join: This technique makes your round endings look seamless. Fasten off and thread your tail onto a tapestry needle. Insert the needle under both loops of the first stitch of the round, then back down through the center of the last stitch. Adjust the tension until it looks like a regular stitch.
Surface slip stitch edging: This creates the raised rim around the flap and pocket. Hold your yarn on the wrong side. Insert your hook from the right side through the fabric, pull a loop to the front. Insert the hook in the next space, pull up a loop and pull it through the loop on your hook. Keep your loops loose so the edge doesn’t pucker.
For left-handed crocheters: Work the same stitch counts. Your rounds may travel in the opposite direction, so place your pocket, flap, and strap marks by measurement from center front and center back rather than by right and left orientation.
UK crocheters: US single crochet (sc) equals UK double crochet (dc).
Base and Body Instructions
Base Panel (Worked Flat)
The base forms the foundation of your entire backpack. Take your time here to get it nice and even.
Chain 28.
Row 1: Single crochet in the 2nd chain from hook and in each chain across. Turn. (27 sc)
Rows 2 through 9: Chain 1, single crochet in each stitch across. Turn. (27 sc)
Do not fasten off. Place a stitch marker in each corner. Your base should measure about 9 inches by 3 inches (23 x 7.5 cm).
Body (Picked Up and Worked Upward)
Now comes the satisfying part where your flat base transforms into a three-dimensional bag.
Round 1: Chain 1, work 27 single crochet across the first long edge, 9 single crochet across the short edge, 27 single crochet across the second long edge, and 9 single crochet across the final short edge. Join with a slip stitch to the first single crochet. (72 sc)
Round 2: Chain 1, single crochet in each stitch around. Join. (72 sc)
Rounds 3 through 32: Repeat Round 2. Keep the seam at one back corner for consistency. (72 sc each round)
Rounds 33 and 34: Chain 1, single crochet in each stitch around, joining each round. These two rounds form a firm top lip that helps the bag opening hold its shape. (72 sc each round)
Fasten off with an invisible join. Your body height from the base edge should be about 9.5 to 10 inches (24 to 25.5 cm).
Marker map for later: Mark center front at 14 stitches from each front corner. Mark center back the same way. These marks will guide your pocket and flap placement.
Flap and Closure
The rounded flap gives this backpack its distinctive look. The shaping is simple, just decreases at each end to create that gentle curve.
Rounded Flap
Chain 27.
Row 1: Single crochet in the 2nd chain from hook and in each chain across. Turn. (26 sc)
Rows 2 through 10: Chain 1, single crochet in each stitch across. Turn. (26 sc)
Row 11: Chain 1, sc2tog, single crochet in the next 22 stitches, sc2tog. Turn. (24 sc)
Row 12: Chain 1, sc2tog, single crochet in the next 20 stitches, sc2tog. Turn. (22 sc)
Row 13: Chain 1, sc2tog, single crochet in the next 18 stitches, sc2tog. Turn. (20 sc)
Border Round: Chain 1, single crochet evenly around the entire flap: 20 single crochet across the curved lower edge, 13 single crochet up the first side, 26 single crochet across the top, 13 single crochet down the second side. Join. (72 sc)
Optional: Work 1 round of surface slip stitch around the outer edge for the raised rim detail you see in the photos.
Attaching the Flap
Center the straight top edge of the flap on the back top edge of the backpack. Sew through the top 26 flap stitches and the back body fabric, about 1 round below the top lip. Let the rounded end fold over toward the front.
Installing the Closure
Fold the flap into position and mark where the closure should go at center front. Install your turn lock or magnetic snap through both the flap and the bag front. I recommend reinforcing the inside with a small fabric patch to prevent the hardware from pulling through over time.
Front Zipper Pocket
This pocket adds function and visual interest to the front of your backpack.
Pocket Panel
Chain 23.
Row 1: Single crochet in the 2nd chain from hook and in each chain across. Turn. (22 sc)
Rows 2 through 10: Chain 1, single crochet in each stitch across. Turn. (22 sc)
Border Round: Chain 1, work 22 single crochet across the top, 10 single crochet down the side, 22 single crochet across the bottom, 10 single crochet up the side. Join. (64 sc)
Optional: Add the raised rim with surface slip stitch around the pocket edge.
Your finished pocket panel should measure about 7.25 inches wide by 3.25 inches tall (18.5 x 8 cm) before sewing.
Zipper Placement
Center the zipper horizontally on the bag front, about 3.25 inches (8 cm) above the base. Sew the zipper to the bag first. Then place the pocket panel below the zipper so the top edge sits just under the zipper tape. Sew the pocket sides and bottom securely to the bag.
Tip: Baste (temporary stitch) your zipper in place first before committing. This lets you adjust the placement if needed.
Handle, Straps, and Tabs
These pieces turn your crocheted body into a functional backpack.
Top Handle
Chain 26.
Row 1: Single crochet in the 2nd chain from hook and in each chain across. Turn. (25 sc)
Rows 2 through 4: Chain 1, single crochet in each stitch across. Turn. (25 sc)
For a rounded handle, fold the long edges slightly to the wrong side and whipstitch them together. Sew the ends to the top back of the bag, centered 2.25 inches (5.5 cm) apart.
Shoulder Straps (Make 2)
Chain 78.
Row 1: Single crochet in the 2nd chain from hook and in each chain across. Turn. (77 sc)
Rows 2 through 4: Chain 1, single crochet in each stitch across. Turn. (77 sc)
Fasten off, leaving long tails for sewing. Each finished strap measures about 25.5 inches (65 cm) before hardware adjustment.
Lower Tabs (Make 2)
Chain 10.
Row 1: Single crochet in the 2nd chain from hook and in each chain across. Turn. (9 sc)
Rows 2 and 3: Chain 1, single crochet in each stitch across. Turn. (9 sc)
Thread each tab through a D-ring, fold in half, and sew to the lower back corners of the bag.
Strap Assembly
Sew the upper ends of each strap near the back top edge, positioning them inside the handle ends. Thread the lower ends through the sliders and D-rings, then sew the folded ends securely.
Important: Reinforce every strap seam with a rectangle and X pattern of stitching. Your straps will bear weight, and you want them to stay firmly attached.
Finishing Your Crochet Backpack
You’re in the home stretch now. These finishing touches make all the difference.
Weave in all your ends on the inside. Steam lightly without pressing the stitch texture flat. While the fabric is warm, shape the base and corners with your hands. Let everything dry completely before using.
Adding Structure
For a crisp, professional-looking backpack, cut plastic canvas to fit the base and slide it inside. Add a fabric lining with a zipper opening if you plan to carry keys, pens, or other small items that might slip through the stitches.
Size Customization
Want a different size? Here’s how to adjust:
Troubleshooting Common Issues
Bag leans or twists: Keep your round joins stacked at a back corner and block the body square.
Top edge flares: Go down a hook size for the final 2 rounds or work them with firmer tension.
Flap curls: Add the border round loosely and steam lightly.
Pocket puckers: Baste the zipper first, then sew the pocket panel without stretching it.
Care Instructions
Spot clean when possible. For washable yarn, hand wash cold, reshape, stuff lightly with towels, and dry flat. Remove any insert that isn’t washable before cleaning.
You Did It!
Thank you so much for choosing this crochet backpack pattern. I hope the finished bag brings you joy every time you use it or gives someone special a truly unique handmade gift. I would absolutely love to see your version, so please share your photos on Instagram or Facebook and tag me so I can celebrate your work.
If you found this pattern helpful, consider saving it to your Pinterest boards so you can find it easily later or share it with fellow crochet lovers. And if you make this backpack, please drop a comment below. I’d love to hear how it turned out and see any color variations you created!
Want a Quick & Easy Printable Version?
Get a clean, beautifully formatted PDF of this pattern — easy to follow step by step, ready to print or save on any device. No scrolling, no distractions, just the pattern.
Get the Printable PDF →You Might Also Like
- Mint Green Popcorn Stitch Baby Jumpsuit Free Crochet Pattern
- Lavender Crochet Sandals in Modern Bedroom Free Pattern
- Boho Monstera Crochet Plant for Bedroom Shelf Decor
- Mint Chocolate Daisy Granny Square Blanket Free Crochet Pattern