
Granny square bags look intimidating, right? All those little motifs, all that joining, all those yarn ends. I totally get it. But here’s the truth: if you can double crochet and chain, you can absolutely make this bag. Each square uses the exact same four rounds, and the rhythm becomes second nature after just two or three squares. Whether you’ve never joined a granny square in your life or you’ve made dozens, this pattern breaks everything down into bite-sized pieces.
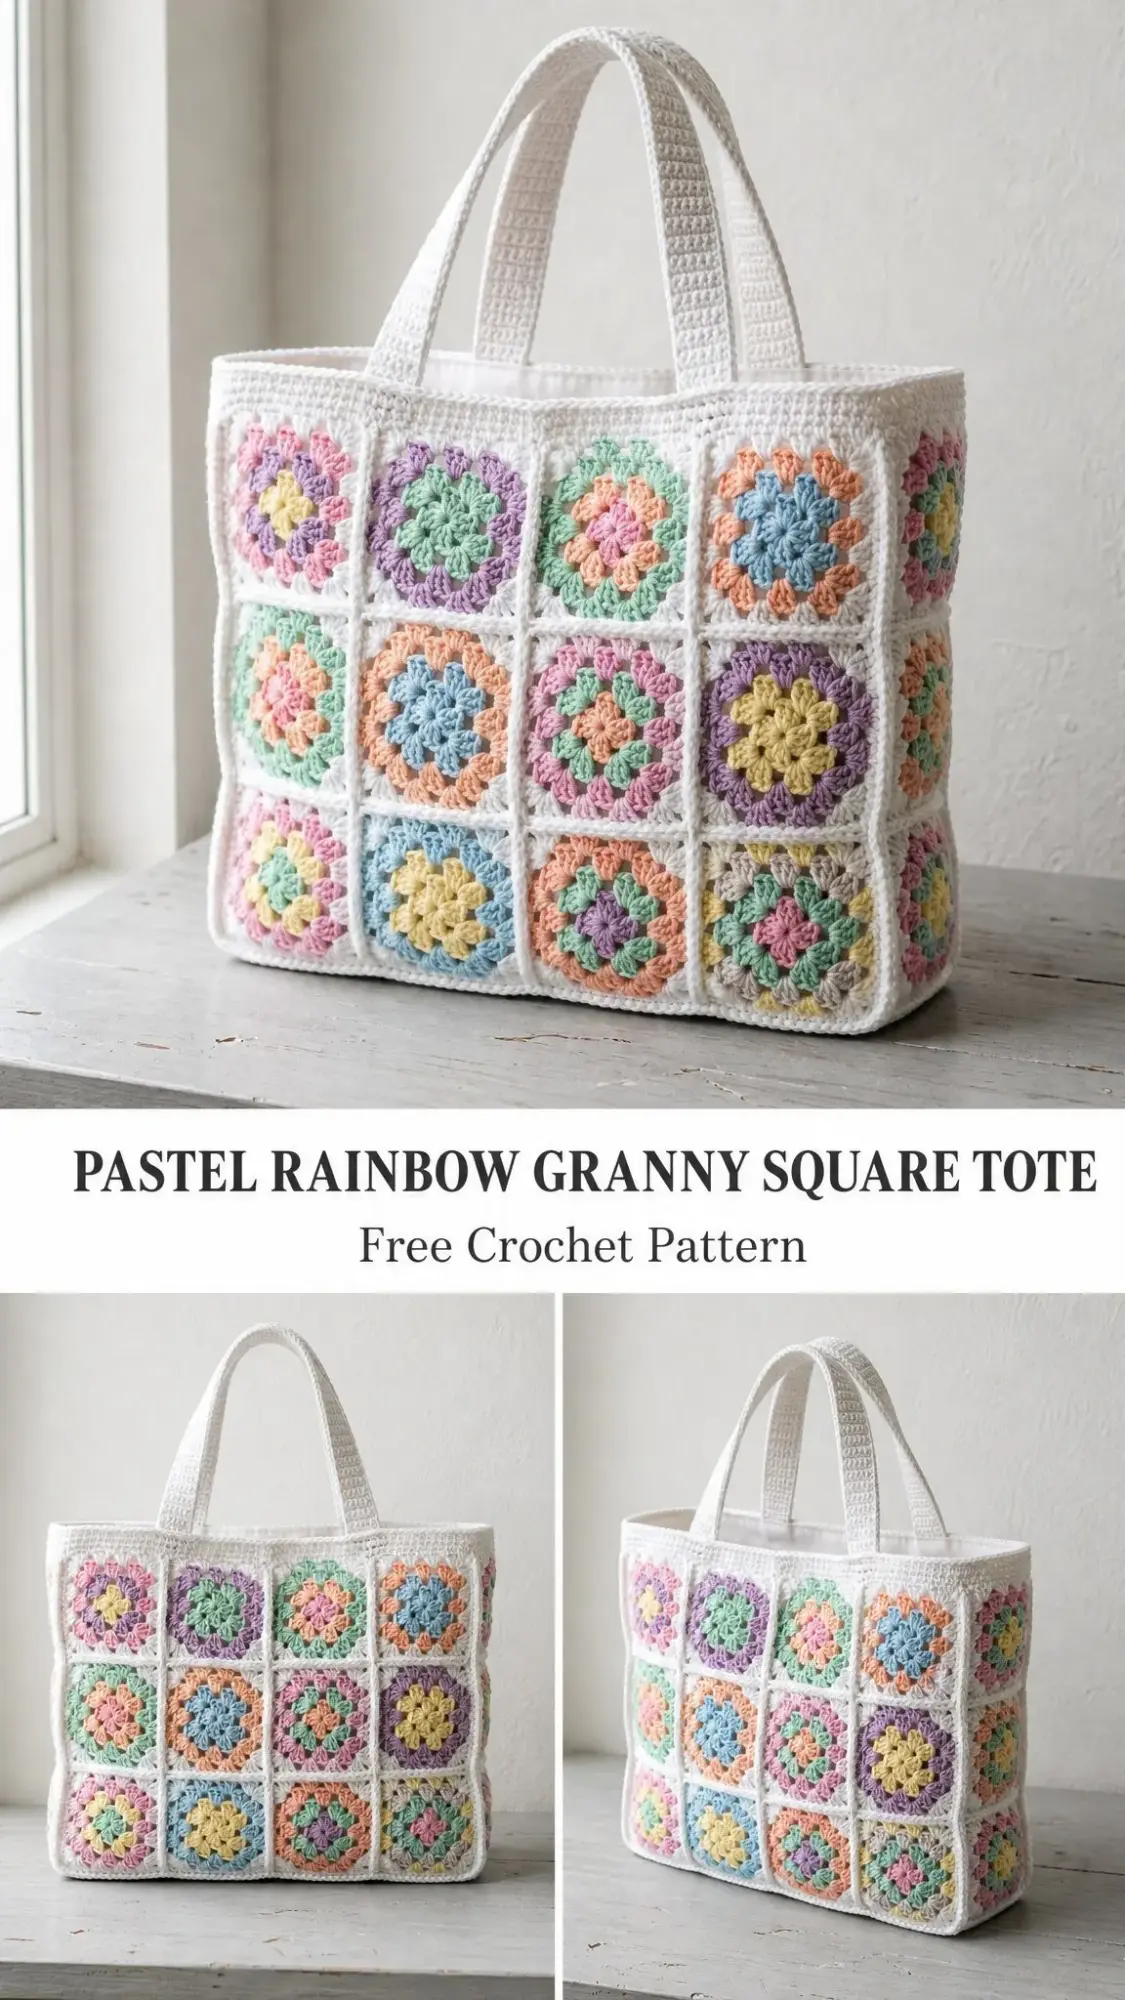
The Pastel Rainbow Granny Square Tote is built from thirty-four little flower squares in soft pastel shades, all framed in crisp cream borders. The construction is straightforward: make your squares, lay them out, join them into panels, then add a simple top border and sturdy handles. No complicated shaping, no confusing decreases, just satisfying repetition and a gorgeous finished project.
This is the perfect pattern for using up those cotton scraps you’ve been hoarding. You know the ones. That half skein of mint, that leftover peach, that butter yellow you bought because it was pretty. Grab them all, because this tote wants every soft shade you’ve got.
About This Crochet Pattern
This beginner-friendly crochet pattern creates a roomy market tote measuring approximately 12 × 10 × 3 inches (30 × 25 × 7.5 cm) with a comfortable 9-inch (23 cm) handle drop. The bag is perfect for farmers market trips, project storage, or everyday errands. Expect to spend about 10 to 14 hours on this project, which makes it an ideal weekend make.
The skill level is easy to advanced beginner. You’ll need to know how to work basic stitches and join rounds, but the pattern walks you through every special technique. The flower granny square at the heart of this design uses a classic structure that crocheters have loved for generations, with a colorful twist that makes each motif pop against the cream background.
Materials You’ll Need
Yarn:
This pattern uses DK weight cotton throughout. Cotton is ideal for bags because it holds its shape beautifully and gets softer with use.
Recommended yarns:
Hook and Notions:
Gauge
One finished flower granny square (4 rounds) should measure 3 inches (7.5 cm) square using a 4.0 mm hook.
Here’s a quick check: after Round 2, your square should sit flat at about 1.5 inches (4 cm) across. If your square is too big, try a smaller hook. If it’s too small, go up a hook size. Getting gauge right matters here because it keeps all your panels even when you join them together.
Abbreviations and Special Stitches
This pattern uses US crochet terms. If you’re a UK crocheter, remember that US single crochet (sc) equals UK double crochet (dc), and US double crochet (dc) equals UK treble crochet (tr).
Special Stitches:
Magic Ring (MR): Loop the yarn around your fingers, work the first round of stitches into the loop, then pull the tail to close the center tight. This creates a clean center with no hole. If you’re not comfortable with magic rings, you can chain 4 and slip stitch to join into a ring instead.
3-dc Granny Group: Three double crochet stitches worked into the same space. This little fan is the building block of every granny square round.
Corner: A cluster of (3 dc, ch 2, 3 dc) worked into one corner space. This is what turns the corner and keeps your square flat and square.
Important Pattern Notes
Before you start crocheting, read through these notes. They’ll save you confusion later.
1. The bag requires 34 flower granny squares total: 12 for the front, 12 for the back, 3 for each side panel (6 total), and 4 for the base strip.
2. Every square follows the same four rounds. Only the center and petal colors change. Rounds 3 and 4 are always cream, which creates that beautiful effect of colorful flowers floating on a white grid.
3. The starting ch-3 counts as the first dc on each round unless noted otherwise.
4. At the end of each round, join with a sl st to the top of the beginning ch-3, then slip stitch across into the next corner space to position yourself for the new round.
5. Weave in your ends as you go. With 34 squares and multiple color changes, you’ll have a lot of tails. Trust me, dealing with them square by square is much easier than facing a mountain of ends at the finish.
6. Squares are joined using a slip stitch join through the back loops, which creates a soft decorative ridge. However, whip stitch or any joining method you prefer works just as well.
The Flower Granny Square Pattern
Make 34 squares total. Round 1 is your center color (pick something bright), Round 2 is your petal color (a contrasting pastel), and Rounds 3 and 4 are always cream. Mix your pastels freely from square to square for that beautiful scattered rainbow effect.
Round 1 (Center color):
Into a magic ring: ch 3 (counts as dc), 2 dc in ring, ch 2, [3 dc in ring, ch 2] 3 times. Join with sl st to top of beg ch-3. Pull the ring closed tight.
(12 dc, 4 corner spaces)
Round 2 (Petal color):
Sl st into the next ch-2 corner space. Ch 3, (2 dc, ch 2, 3 dc) in same space, [ch 1, (3 dc, ch 2, 3 dc) in next corner space] 3 times, ch 1. Join to top of beg ch-3.
(24 dc, 8 groups)
Round 3 (Cream):
Sl st into the next corner space. Ch 3, (2 dc, ch 2, 3 dc) in same space, ch 1, 3 dc in next ch-1 space, ch 1, (3 dc, ch 2, 3 dc) in next corner space; rep from twice, ch 1, 3 dc in last ch-1 space, ch 1. Join.
(36 dc, 12 groups)
Round 4 (Cream):
Sl st into the next corner space. Ch 3, (2 dc, ch 2, 3 dc) in same space, [ch 1, 3 dc in next ch-1 space] twice, ch 1, (3 dc, ch 2, 3 dc) in next corner space; rep from twice, [ch 1, 3 dc in next ch-1 space] twice, ch 1. Join and fasten off.
(48 dc, 16 groups)
Tip: After completing Round 4, your square should measure 3 inches (7.5 cm). Gently steam-block each square to the same size before joining. This small step makes the assembly stage so much quicker and neater.
Understanding the Round-by-Round Structure
The stitch counts follow a satisfying pattern: 12 dc on Round 1, 24 dc on Round 2, 36 dc on Round 3, and 48 dc on Round 4. Each round adds one extra 3-dc group to every side. This steady rhythm keeps the corners crisp and the motif perfectly square.
Think of it this way:
Color Play and Square Count
There’s no fixed color map for this bag, and that’s part of the charm. The key is to pair a brighter center with a softer petal ring so each flower has good contrast. Then scatter your six pastels so no two identical squares sit side by side.
Here’s exactly how many squares you need for each section:
| Section | Layout | Squares Needed |
|---|---|---|
| Front panel | 4 across × 3 down | 12 squares |
| Back panel | 4 across × 3 down | 12 squares |
| Side panels | 1 across × 3 down, make 2 | 6 squares |
| Base strip | 4 across × 1 down | 4 squares |
| Total | 34 squares |
Before you start joining, lay out all your squares and shuffle them around until you love the arrangement. Take a photo so you remember the layout when you start assembling.
Joining the Panels
Step 1: Lay Out the Grid
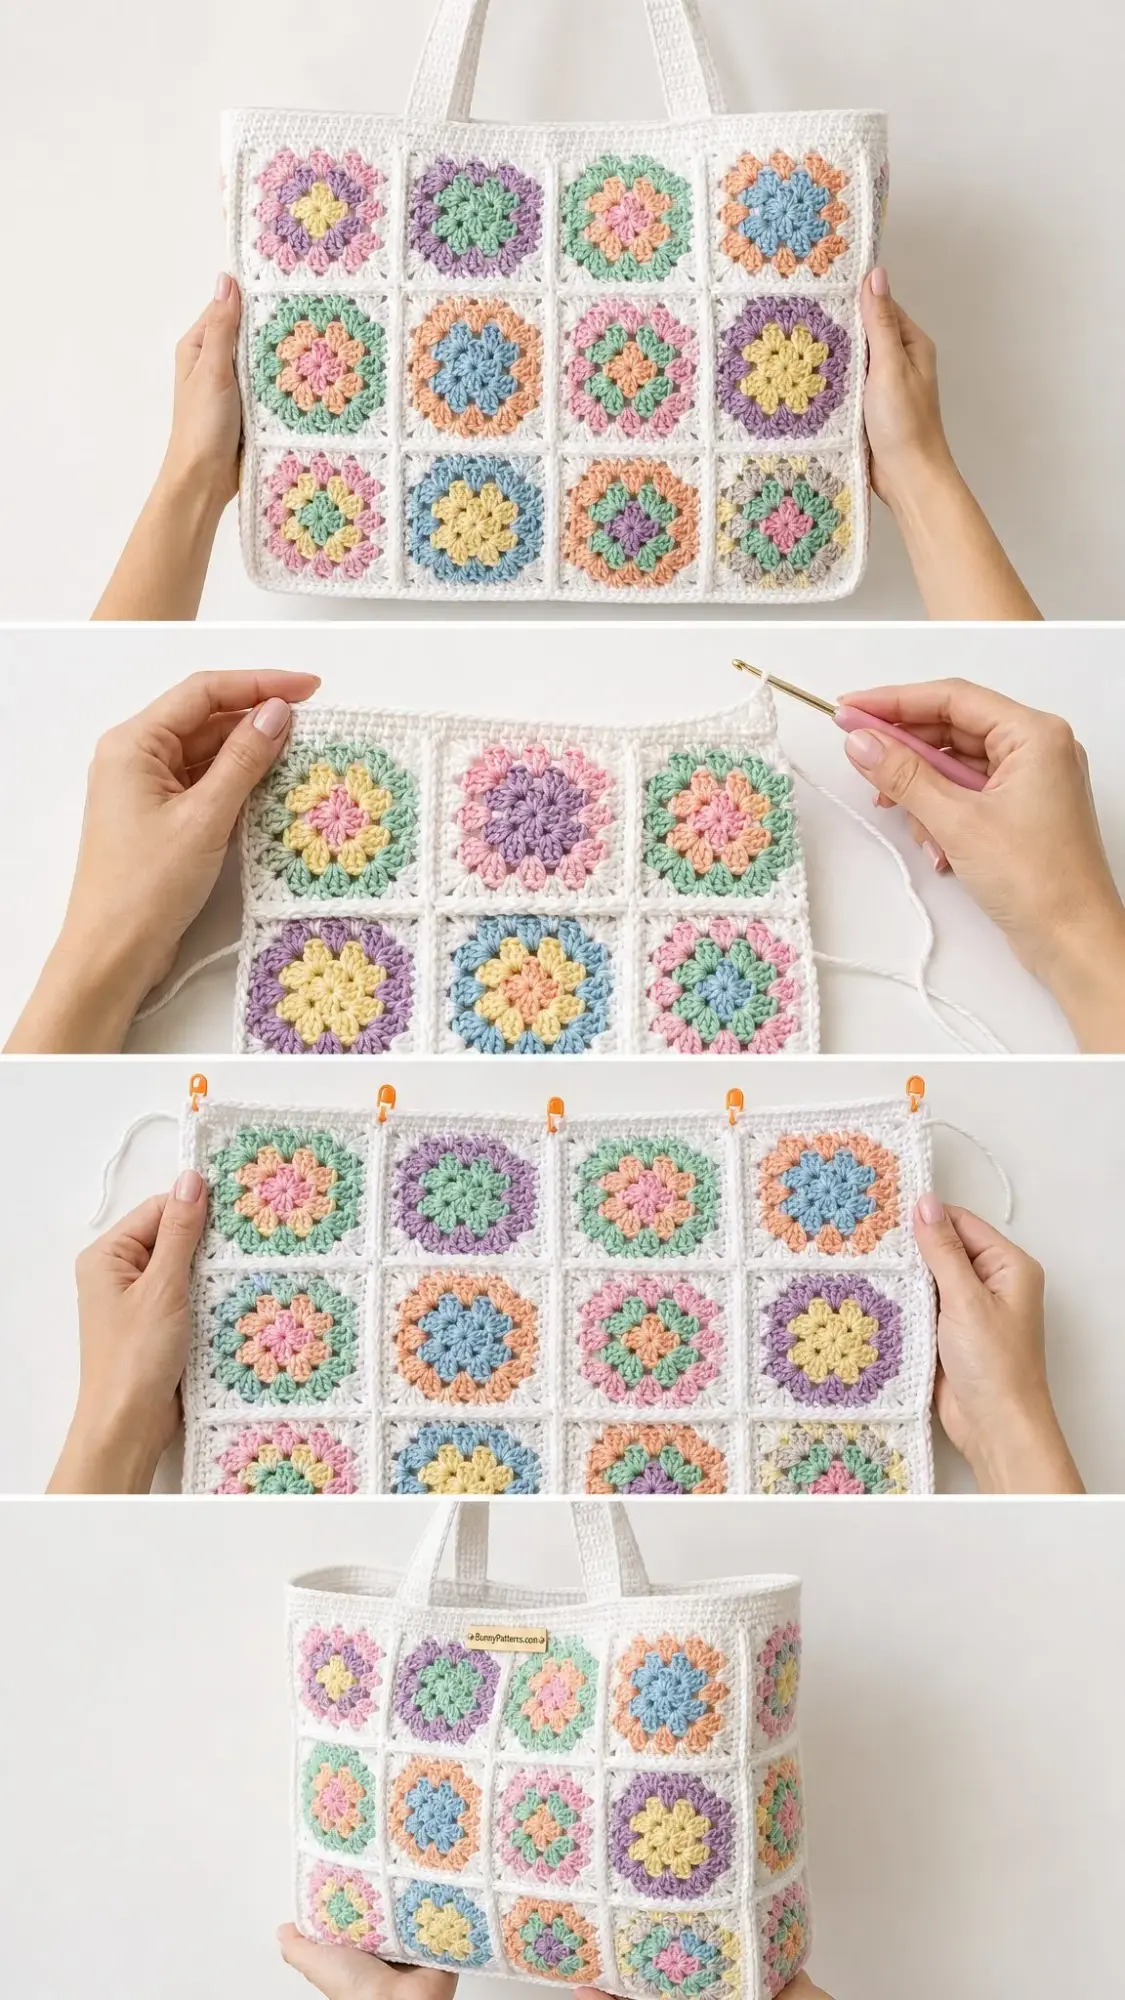
Arrange your front 12 squares in a 4 × 3 layout that pleases you. Do the same for the back panel. Lay each side panel as a 1 × 3 vertical strip and the base as a 4 × 1 horizontal strip.
Step 2: Join Into Panels
Using cream yarn and with right sides together, slip stitch through the back loops along each seam. Join all the vertical seams first, then join the horizontal seams. You’ll end up with five flat pieces: front, back, two sides, and base.
Step 3: Build the Box
Slip stitch the base strip to the lower edge of the front panel (4 squares to 4 squares). Then add the back panel to the opposite long edge of the base. You now have an open box shape.
Step 4: Set In the Sides
Slip stitch each 1 × 3 side panel into place. Join it to the side edges of the front, the back, and the short end of the base to form the gusset. After this step, your bag holds its shape.
Step 5: Tidy the Corners
At each base corner, work an extra slip stitch or two to draw the seam in neatly. This helps the bag stand square and look professional.
Top Border and Handles
Top Border:
Round 1: Join cream yarn at a top side seam. Single crochet evenly around the whole opening, working 1 sc in each stitch and easing around corners so the edge lies flat. Join with a slip stitch.
Rounds 2 through 4: Ch 1, sc in each sc around, join. Repeat for three smooth rounds total. This firms up the rim and gives a clean finished edge.
Handles (Make 2):
Mark two points on the front rim, centered and about 5 inches (13 cm) apart. Mark the back to match.
With cream yarn, ch 9. Sc in 2nd ch from hook and in each ch across (8 sc). Working in continuous rows, sc in each stitch across for approximately 18 inches (46 cm). This creates a long strap that folds into a sturdy double-thick handle. Adjust the length for your preferred handle drop.
Fold each strap lengthwise and single crochet or whip stitch the long edges together for strength. Stitch the handle ends firmly to the inside of the rim at your marked points, reinforcing with several passes of yarn. Repeat for the second handle, matching the drop exactly.
Handle Tip: For heavier loads, slip a length of cotton cord or webbing inside the folded strap before seaming. This invisible support prevents the handles from stretching over time.
Finishing and Care
Finishing:
Weave in every remaining end on the wrong side of your work and trim close. Gently steam-block or wet-block the entire bag, shaping the corners square and the rim even. Let it dry fully while stuffed with a towel to help it hold its form.
Optional Lining: Cut cotton fabric to the inside dimensions plus seam allowance, sew it into a simple pouch shape, and hand-stitch it just below the top border. A lining adds structure and hides all those join ridges beautifully.
Care Instructions:
Size and Customization Options
Because this bag is built from a grid of identical squares, resizing is simple. Just add or remove whole squares and the math stays friendly.
Make it bigger: Add a column of squares to the front and back (5 wide instead of 4) and a matching square to the base strip. This creates a roomy weekender bag.
Make it taller: Add a fourth row to the front, back, and side panels for extra depth. This works great for a project bag.
Make it a clutch: Work just the front and back at 3 × 2 squares each, join three sides, and add a button loop instead of handles.
Change the gauge: A thicker yarn with a 5.0 mm hook creates larger squares and a bigger bag. Lace-weight cotton with a 3.0 mm hook makes a sweet mini version.
Add a shoulder strap: Lengthen each handle to about 28 inches (71 cm) for comfortable over-the-shoulder carry.
Remember: one square equals 3 inches (7.5 cm). Multiply by the number of squares per edge to plan any size before you even pick up your hook.
You Did It!
Thank you so much for making this Pastel Rainbow Granny Square Tote with me. I hope you love using it as much as I loved designing it. There’s something so satisfying about turning a pile of colorful squares into a functional, beautiful bag you’ll reach for again and again.
If you make this pattern, I would absolutely love to see your version. Tag me on Instagram or share a photo in my Facebook group. Seeing your color combinations and creative choices is honestly the best part of sharing patterns.
If you loved this crochet pattern, save it to your Pinterest boards so you can find it whenever you’re ready to start. And please drop a comment below if you make one. I read every single comment and love hearing about your projects!
You Might Also Like
- Sunshine Lemon Tiered Baby Dress Free Crochet Pattern
- Sage Green Mesh Tie Cardigan Free Crochet Pattern
- Lavender Dream Kitty Tote Bag Free Crochet Pattern
- Sage Green Meadow Crochet Robe Free Pattern