
This roomy hobo bag is the perfect project when you need a practical, everyday carryall that actually fits your book, water bottle, and everything else you drag around. The construction uses worsted weight cotton and basic double crochet stitches, making it totally doable for confident beginners who want to try their hand at granny squares.
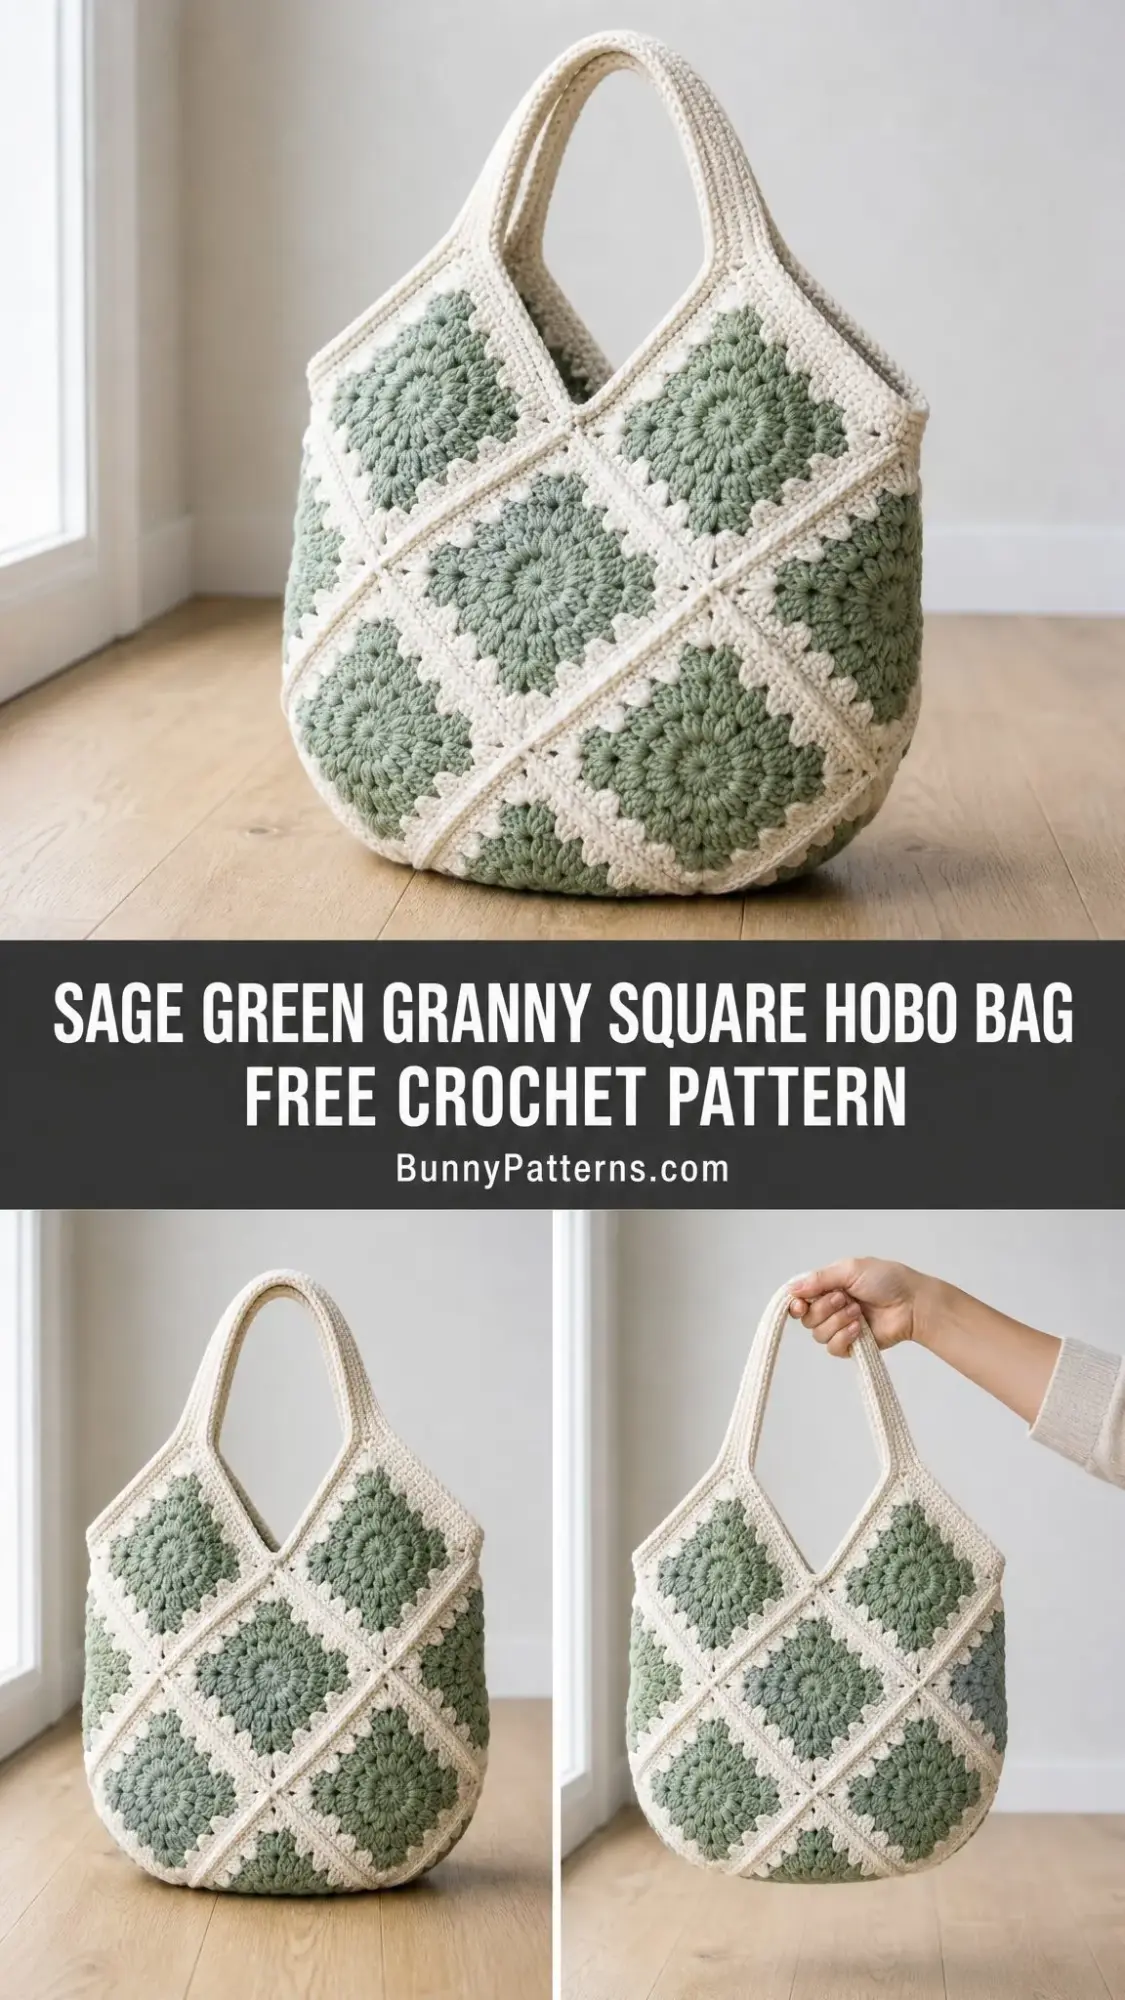
The whole bag comes together from 18 identical sunburst squares joined in a simple grid. Those sage green centers pop against the cream border, and when you seam everything together, the corners line up into this gorgeous diagonal lattice effect. It looks way more complicated than it actually is.
If you have been wanting to make a handmade bag for yourself or as a gift, this one works up in about 14 to 18 hours of stitching time. The repetitive nature of making the squares makes it wonderfully portable, so you can take it anywhere and get a little crocheting done whenever you have a spare moment.
Why You Will Love This Crochet Hobo Bag Pattern
The sunburst granny square at the heart of this design creates a beautiful floral effect that blooms outward from the center. Each square measures 4 inches (10 cm), which means you get quick wins as you work through your stack of 18. That sense of progress keeps the project feeling fresh and motivating.
The finished bag has a soft, slouchy silhouette thanks to the center-set handle and the relaxed V-shaped openings on each side. It sits comfortably on your shoulder and has plenty of room inside for daily essentials. The boxed bottom corners give it just enough structure to stand on its own while maintaining that lived-in hobo bag look.
Cotton yarn gives this bag excellent stitch definition and durability. Unlike acrylic, cotton holds its shape well and gets softer with use without stretching out of shape. The suggested yarns include Paintbox Yarns Cotton Aran, Lily Sugar’n Cream, and DMC Natura Just Cotton XL, all of which work beautifully for this project.
Materials You Will Need
Yarn:
You want worsted weight yarn, also called Aran or 10-ply, which is Craft Yarn Council weight 4. Cotton or a cotton blend gives the best results for stitch definition and structure.
Suggested Yarns:
Hook and Notions:
Gauge
One finished Sunburst Square measures 4 inches (10 cm) square using a 4.0 mm hook in worsted cotton.
Gauge is not critical for fit, but it does change your finished size and yarn use. If your square runs large or small, simply change hook size up or down until you hit that 4-inch measurement.
Finished Measurements
Abbreviations and Special Stitches
This pattern is written in US crochet terms. If you typically follow UK patterns, see the conversion note below.
UK Conversion: US single crochet (sc) equals UK double crochet (dc). US double crochet (dc) equals UK treble crochet (tr). Follow the US terms above and substitute the UK name throughout.
Special Stitches:
Magic Ring: An adjustable loop used to start each square. Pull it tight to close the center hole. If you have never done a magic ring before, there are plenty of video tutorials online. You can also substitute ch 4 and join with a slip stitch to form a ring.
2-dc increase: Work 2 dc into the same stitch to widen the round.
Corner: Work (3 dc, ch 2, 3 dc) into one space to turn a square corner.
Whip Stitch Join: With a tapestry needle, sew matching edge stitches together through the back loops for a flat, low-profile seam.
Pattern Notes Before You Begin
The bag is worked from 18 identical Sunburst Squares, with nine for the front panel and nine for the back.
Each square uses Sage (A) for the center burst and Cream (B) for the final corner round. Keeping this order consistent is what creates the diagonal cream lattice across the finished bag.
The beginning ch-3 counts as the first dc throughout unless noted otherwise.
Join each round with a sl st to the top of the beginning ch-3 (or first sc) unless told otherwise.
Weave in the center tail of each square as you go. You will have far fewer ends to chase at the finish if you deal with them now.
Blocking the squares to a true 4 inches (10 cm) before joining makes assembly dramatically easier and neater. Trust me on this one.
Stitch counts appear in parentheses at the end of every round, for example (48 dc).
How to Crochet the Sunburst Square
Begin each square with Sage (Color A).
Round 1 (Sage):
Into a magic ring: ch 3 (counts as first dc), work 11 dc into the ring. Join with sl st to top of beg ch-3. Pull the ring closed. (12 dc)
Round 2 (Sage):
Ch 3 (counts as first dc), dc in same st, then 2 dc in each st around. Join to top of beg ch-3. (24 dc)
Round 3 (Sage):
Ch 1, sc in same st, ch 3, skip next st; sc in next st, ch 3, skip next st repeat from * around (12 times total). Join with sl st to first sc. Fasten off Sage. (12 sc, 12 ch-3 sps)
Round 4 (Cream):
Join Cream in any ch-3 sp. Ch 3, (2 dc, ch 2, 3 dc) in same sp, this is your first corner made. 3 dc in each of next 2 ch-3 sps; (3 dc, ch 2, 3 dc) in next sp for corner, 3 dc in each of next 2 ch-3 sps repeat from * twice more. Join to top of beg ch-3. Fasten off. (48 dc, 4 corners)
You should have a tidy 4 inch (10 cm) square with a sage sunburst framed by a clean cream border. Make a swatch of one before committing to all 18 squares.
Making All Your Squares
Work a total of 18 Sunburst Squares, all identical. Nine will form the front panel and nine will form the back. There is no need to track which is which yet since the panels are interchangeable.
Blocking Your Squares
Pin each square to 4 inches (10 cm) on a blocking mat, mist with water (or steam cotton lightly), and let dry fully. Square, even motifs make the cream lattice line up perfectly when you join.
Pro tip: Arrange your blocked squares into two 3×3 grids on a flat surface before joining. Step back and take a look. A tidy layout now saves unpicking later.
Joining the Panels Step by Step
Each panel is a flat 3×3 grid. Join squares with Cream using the whip stitch method, working through the back loops of matching outer stitches so the seam stays flat and the lattice reads cleanly on the right side.
Step 1: Join into rows
With RS facing each other, whip stitch 3 squares side by side along one edge to form a row of three. Match stitch-for-stitch: 9 dc plus the two corner spaces per edge. Make 3 such rows. (3 rows of 3)
Step 2: Join the rows
Whip stitch the three rows together along their long edges to complete one 3×3 panel. Keep all corners meeting crisply at the intersections. (1 front panel)
Step 3: Repeat
Work Steps 1 and 2 again with the remaining 9 squares to make the matching back panel. (2 panels total)
Tip: Sew with a length of yarn no longer than your forearm. Shorter working lengths tangle less and let you keep even tension along every seam.
Shaping and Seaming the Bag Body
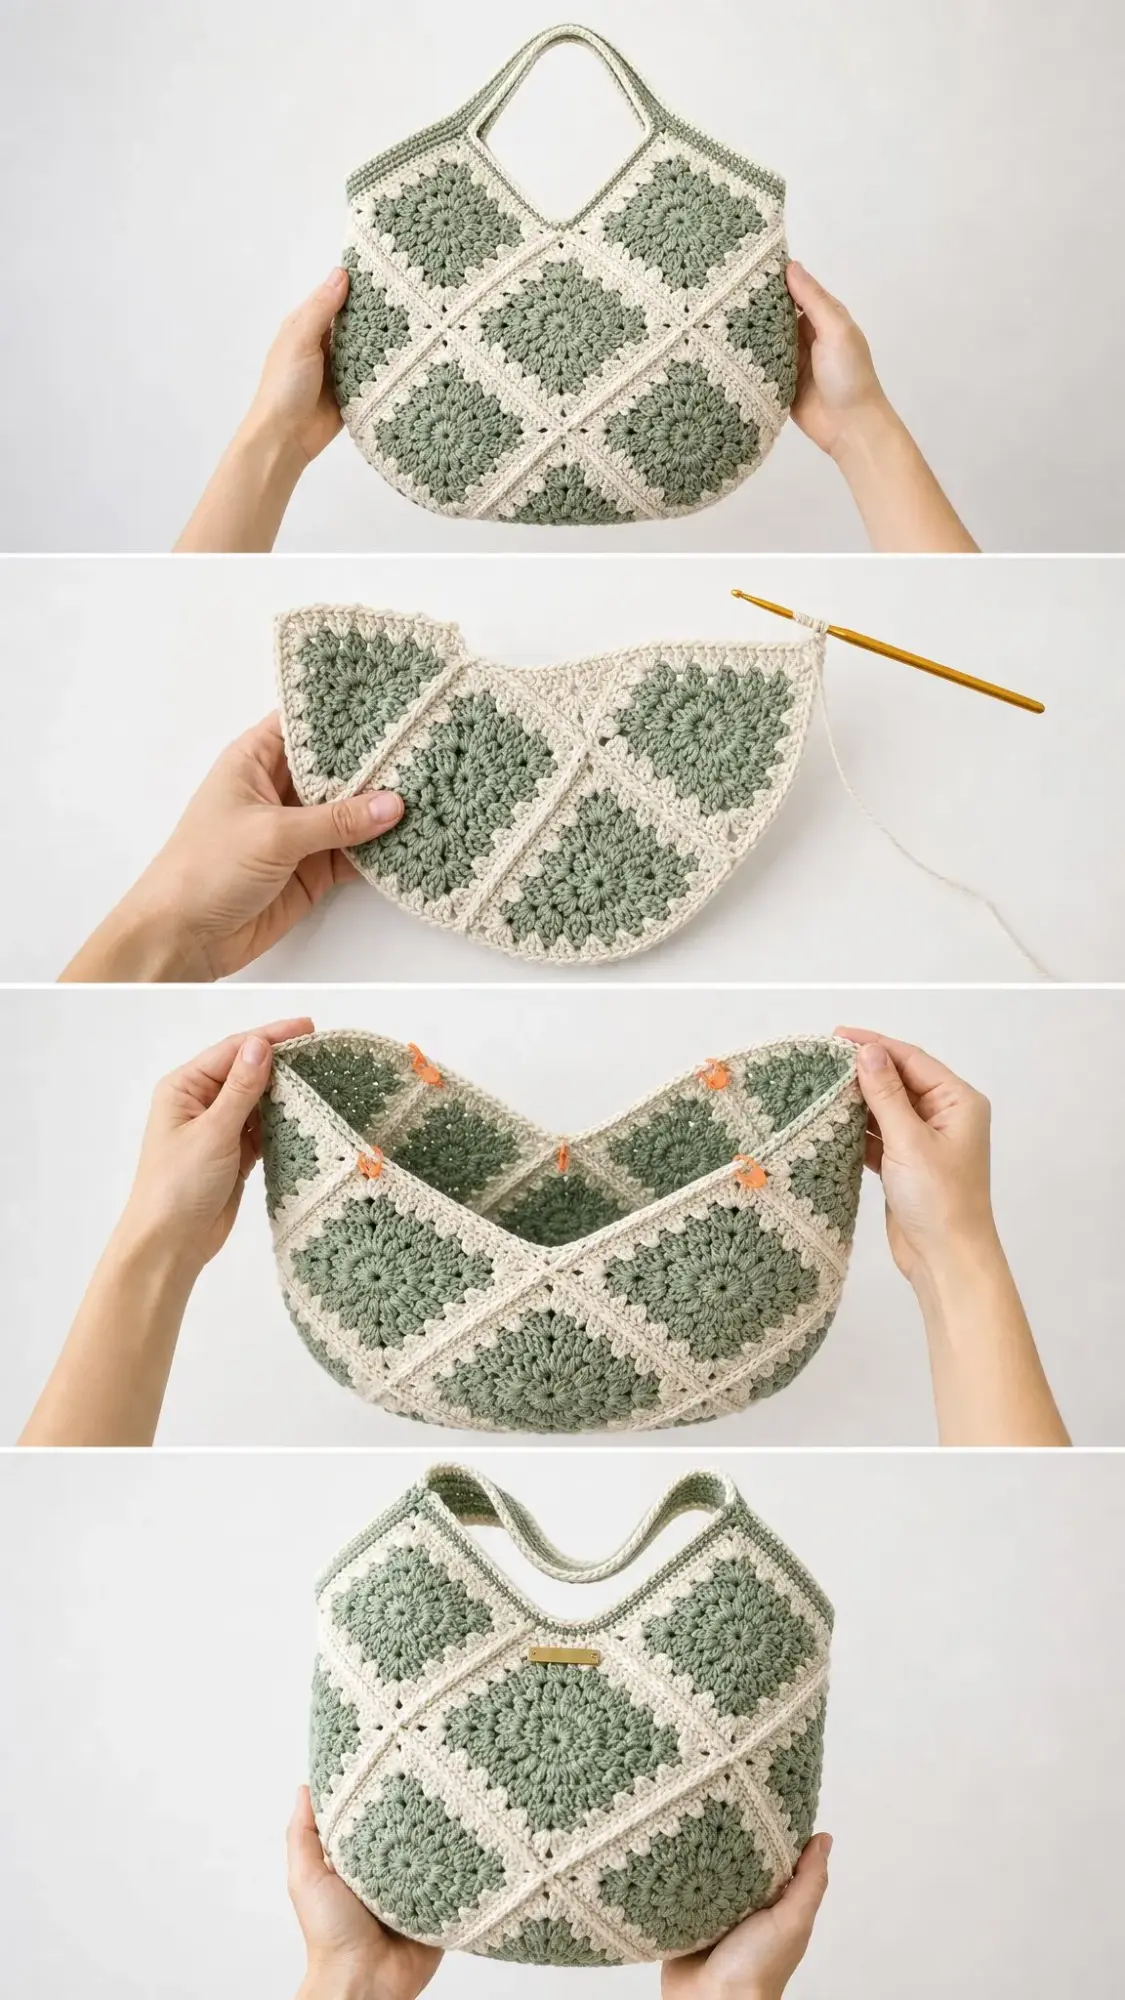
Now the two flat panels become a soft, rounded hobo bag. Place the front and back panels with wrong sides together, edges aligned.
Step 1: Seam the sides and base
With Cream, whip stitch the two panels together up each side and across the bottom, leaving the entire top edge open. Work stitch-for-stitch for an even seam. (3 closed edges)
Step 2: Round the base corners
To create the gentle hobo curve, flatten each bottom corner into a small triangle and seam straight across about 1.5 inches (4 cm) from the point. This softens the square base into a rounded bottom. (2 corners boxed)
Step 3: Turn right side out
Turn the bag RS out and gently shape it with your hands. The body is complete. Only the top edge and handle remain. (body complete)
Want a flatter base? Skip Step 2 for a square-bottomed tote, or seam a deeper triangle (2 inches / 5 cm) for a rounder, more pronounced curve.
Top Edging and Handle Instructions
Top Edging in Sage
With RS facing, join Sage at one top side seam. Sc evenly around the entire top opening, working roughly 1 sc per stitch and 1 sc per row-end so the edge lies flat. Join with sl st to first sc. Work 1 more even round, then fasten off. (approximately 132 sc)
Your exact count will depend on tension. Aim for an edge that lies flat without ruffling or pulling.
Handle in Cream and Sage
Step 1: Foundation in Cream
Ch 13. Row 1: sc in 2nd ch from hook and in each ch across. Turn. (12 sc)
Step 2: Work the strap
Row 2 and every row: ch 1, sc in each st across. Turn. Repeat until the strap measures about 22 inches (56 cm). Fasten off. (12 sc each row)
Step 3: Sage edging
Join Sage at one long end and sc evenly along each long edge of the strap to frame it. Fasten off. (approximately 88 sc per side)
Strap Comfort Tip: For extra body, fold the strap in half lengthwise and whip stitch the long edges together before attaching, or slip a length of cotton webbing inside for additional support.
Finishing Your Hobo Bag
Step 1: Position the handle
Center the strap over the bag. Pin one end to the front opening across the middle third, and the other end to the back opening directly opposite. The un-strapped corners on each side will drape into the relaxed V openings.
Step 2: Attach securely
Whip stitch each strap end firmly to the inside of the top edging, stitching twice around for strength since the handle carries the bag’s weight.
Step 3: Weave and block
Weave in all remaining ends. Give the finished bag a final light steam or mist-and-shape to settle the seams and even out the lattice.
Step 4: Optional lining and closure
Cut cotton lining 0.5 inches (1.5 cm) larger than the flattened bag, sew into a pouch, and hand-stitch inside the top edge. Add a magnetic snap or button loop at center top if you would like a closure.
Care Instructions for Your Finished Bag
If you lined your bag, check that your lining fabric is also washable and colorfast before laundering. When in doubt, spot clean only.
Ways to Customize This Pattern
Resize the Bag
Change the Scale
Play with Color
Yarn for Resizing: Each square uses about 14 yd (13 m) sage and 11 yd (10 m) cream. Multiply by your square count to estimate yarn for any size.
You Did It!
Your Sage Granny Square Hobo Bag is ready to wear and enjoy. A lining gives structure and hides any inside seams, which makes it lovely for gifting. This bag is generous enough for everything you need during a day out, and the soft slouchy shape only gets better with use.
Thank you so much for choosing this pattern for your next crochet project! I really hope you enjoy making it as much as I enjoyed designing it. If you make one, I would absolutely love to see your finished bag. Tag me on Instagram or share a photo on Facebook so I can admire your beautiful work.
If you loved this pattern, go ahead and save it to your Pinterest boards so you can find it easily when you are ready to start. And please drop a comment below if you make this bag or have any questions along the way. I always love hearing from you!
You Might Also Like
- Sunshine Daisy Bow Crochet Vest Free Crochet Pattern
- Mustard Yellow Circle Purse Free Crochet Pattern
- Gray and Pink Heart Granny Square Blanket Free Crochet Pattern
- Pastel Rainbow Granny Square Purse Free Crochet Pattern