
If you have a baby shower coming up or a little one who deserves something extra special, this dress set is the perfect project. The Snow Princess Baby Dress Set includes a fitted bodice dress with a Peter Pan collar, matching booties, and a sweet headband bow. All three pieces use basic single crochet and an easy shell pattern that looks far more complicated than it actually is.
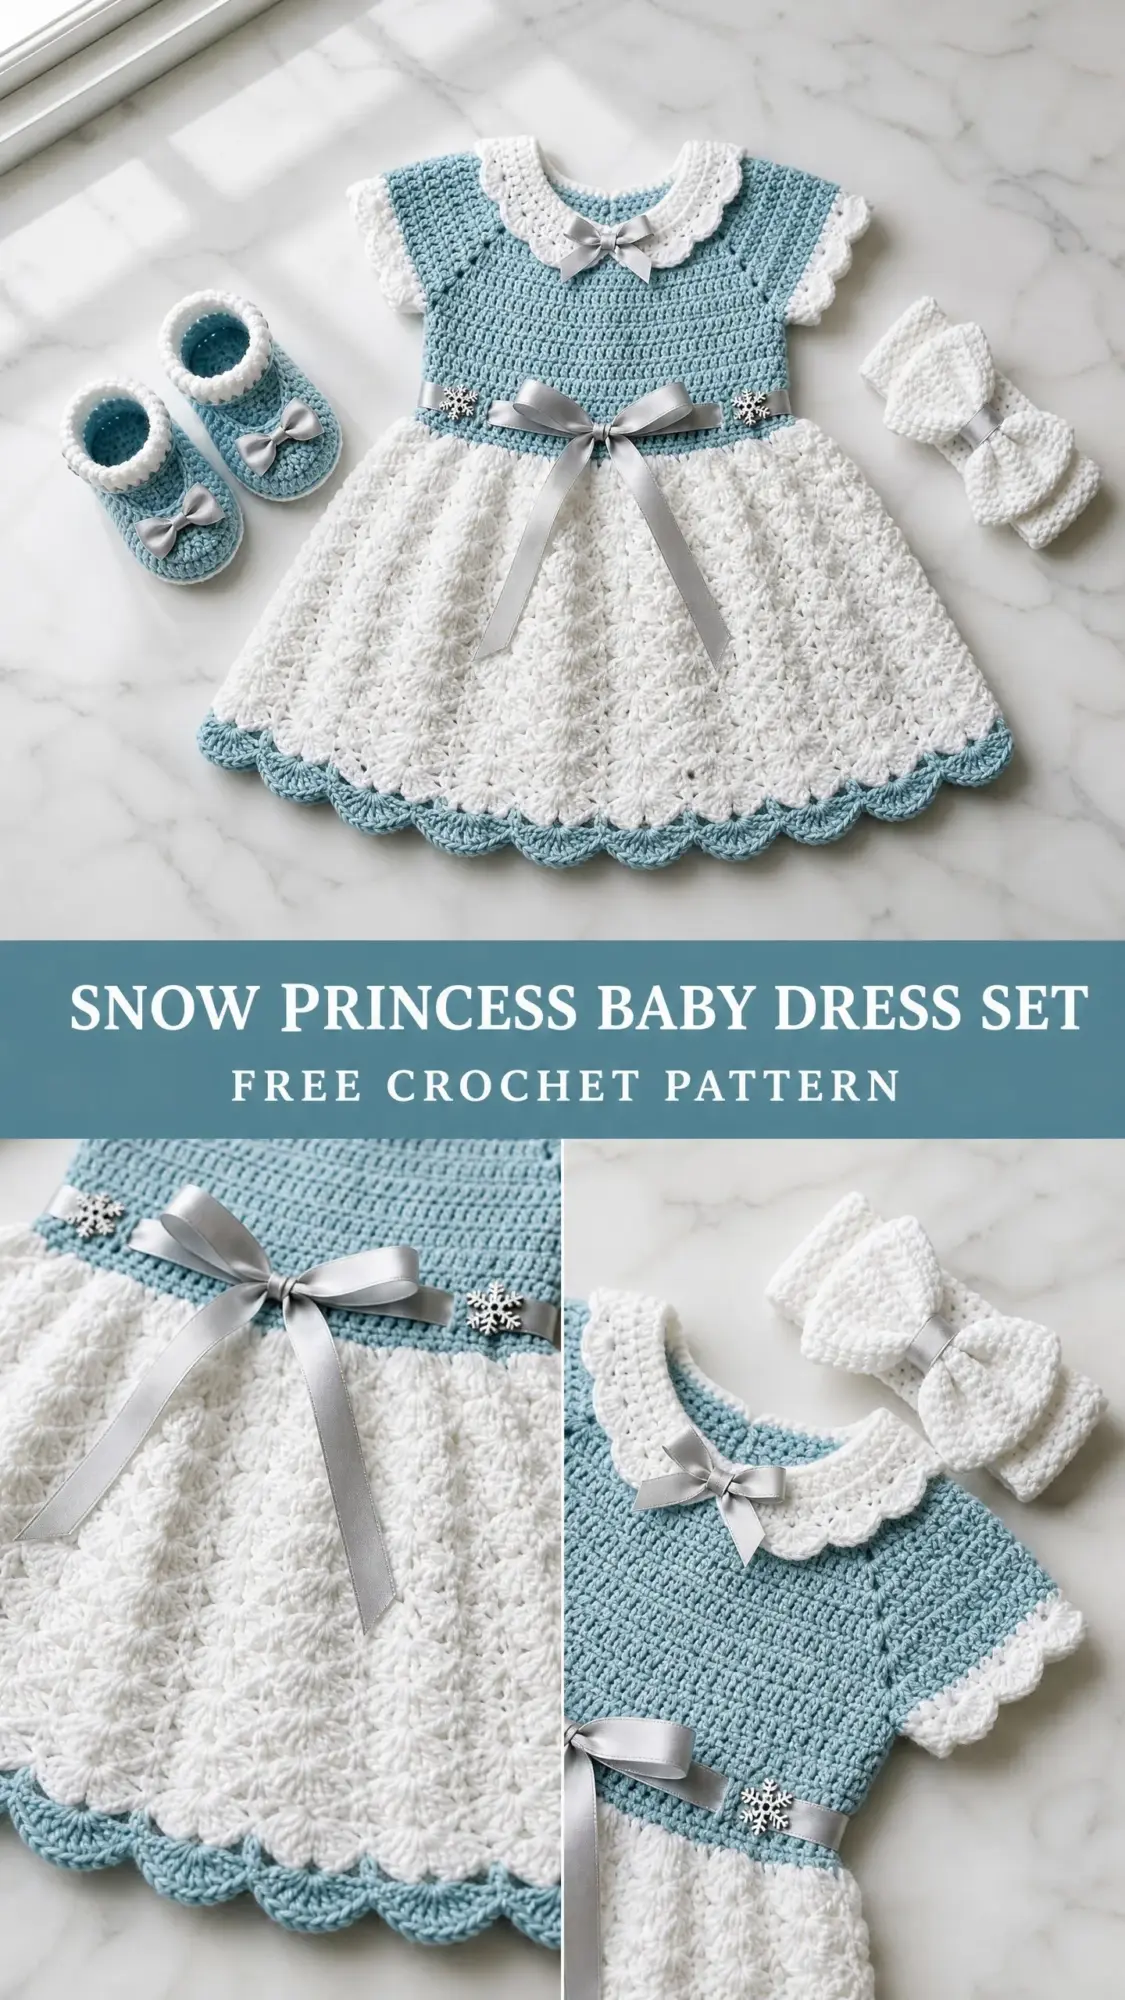
This set works up in DK weight cotton yarn, which means it’s soft against newborn skin and holds its shape beautifully. The dress fits babies from birth to three months, making it ideal for bringing-home outfits, blessing ceremonies, or simply dressing up for special photos.
Whether you’re making this for your own baby, a grandchild, or a gift, you’ll end up with an heirloom-quality piece that looks like it took weeks. It didn’t. With the step-by-step instructions below, you can finish the entire set in about 12 to 18 hours of stitching time.
What You’ll Need for This Baby Dress Crochet Pattern
Before you begin, gather all your materials. Having everything ready makes the project flow smoothly without interruptions.
Yarn:
Hook: US size D-3 / 3.25 mm
Notions:
Yarn Suggestions:
Paintbox Yarns Simply DK in Duck Egg Blue and Pure White works beautifully and is machine washable. Lion Brand 24/7 Cotton in Aqua and White gives crisp stitch definition and breathability. For a premium option, try Scheepjes Catona in Sky Blue (510) and White (106).
When substituting yarn, match the yards per 50 grams rather than relying only on the weight label. Avoid fuzzy or halo yarns because they’ll obscure the pretty stitch texture.
Finished Measurements
Dress: fits 0 to 3 months
Booties: fits newborn to 3 months, sole length approximately 3.5 inches / 9 cm
Headband: approximately 14 inches / 35.5 cm unstretched circumference
Gauge
22 single crochet stitches by 24 rows = 4 inches / 10 cm, worked flat, using Color A and US D-3 / 3.25 mm hook, blocked.
Skirt pattern gauge: One 6-stitch shell-and-V repeat = approximately 1 inch / 2.5 cm wide; 4 pattern rows = approximately 1 inch / 2.5 cm tall.
Gauge matters here. If your stitches are too loose, the dress will be too big. Too tight, and it won’t fit over baby’s head. Swatch first and adjust your hook size if needed.
Abbreviations and Special Stitches
Let me walk you through every abbreviation you’ll encounter. I’ve included plain-English definitions so nothing feels mysterious.
Basic Abbreviations:
Special Stitches:
Shell Stitch: Work 5 double crochets into the same stitch or chain space. This creates a pretty fan shape that gives the skirt its texture.
V Stitch (V-st): Work 1 double crochet, chain 1, 1 double crochet all into the same stitch or space. The chain-1 space in the middle becomes an anchor point for the next round.
Shell-and-V Pattern: This is the main pattern for the skirt. It’s a 6-stitch repeat that alternates shells and V-stitches. Don’t let it intimidate you. Once you complete one round, you’ll see exactly how the pieces fit together.
Scallop Edging: Skip 2 stitches, 5 double crochet in next stitch, skip 2 stitches, slip stitch in next stitch. Repeat across. This creates the beautiful wavy edge on the collar, sleeves, and hem.
Pattern Notes Before You Begin
Read through these notes first. They’ll save you confusion later.
1. The dress is worked top-down, starting at the neckline and working toward the hem.
2. The collar is made separately and sewn on after the bodice is complete.
3. The bodice begins flat (back and forth in rows) because there’s a button opening at the center back. This makes it easy to dress baby.
4. Color A (blue) is used for the bodice, sleeve caps, and hem border. Color B (white) is used for the collar, skirt, and headband.
5. The satin ribbon weaves through an eyelet row at the waist. Don’t thread it until the very end.
6. Stitch counts appear in parentheses at the end of each row or round.
7. Block all pieces before assembly by misting with water, pinning to measurements, and letting dry flat.
Section 1: Peter Pan Collar (Make 2 Halves)
The collar is worked flat in Color B. Each half starts at center front and ends at center back.
Foundation Row (RS): With Color B, ch 25. Sc in second ch from hook and in each ch across. (24 sc)
Row 1 (WS): Ch 1, turn. Sc in each st across. (24 sc)
Row 2 (RS): Ch 1, turn. Sc in first 3 sts, (2 sc in next st, sc in next 3 sts) 5 times, sc in last st. (29 sc)
Row 3 (WS): Ch 1, turn. Sc in each st across. (29 sc)
Row 4 (RS): Ch 1, turn. Sc in first 3 sts, (2 sc in next st, sc in next 4 sts) 5 times, sc in last st. (34 sc)
Row 5 (WS): Ch 1, turn. Sc in each st across. (34 sc)
Row 6 (RS): Ch 1, turn. Sc in first 4 sts, (2 sc in next st, sc in next 5 sts) 4 times, 2 sc in next st, sc in last 5 sts. (39 sc)
Row 7 (WS): Ch 1, turn. Sc in each st across. (39 sc)
Do not fasten off.
Scallop Border: Rotate piece. Working along the shaped outer edge of Row 7, work scallop edging: Sl st in first st, (skip 2 sts, 5 dc in next st, skip 2 sts, sl st in next st) repeat across curved edge. Adjust spacing to keep scallops even.
Make a second collar half as a mirror image.
Finishing Collar: With right sides together, whip stitch the two center front edges together using Color B. Block the collar flat. Each half should measure approximately 5.5 inches along the outer arc. Total collar laid flat should measure approximately 11 inches.
Section 2: Bodice Yoke
The bodice yoke is worked top-down in Color A, flat (turning rows) because of the back opening.
Foundation Row: With Color A, ch 57. Sc in second ch from hook and in each ch across. (56 sc)
This foundation edge is the neckline. Place markers at stitch 8, 16, 40, and 48 to mark your raglan increase points.
Raglan Increase Pattern: On every RS row, work 2 sc in the stitch before each marker and 2 sc in the stitch after each marker. This adds 8 stitches per increase row.
Row 1 (WS): Ch 1, turn. Sc in each st across. (56 sc)
Row 2 (RS, increase row): Ch 1, turn. Work increases at each marker as described. (64 sc)
Rows 3-13: Continue alternating plain WS rows with increase RS rows.
After Row 13, you should have (104 sc).
Dividing Sleeves from Body
Row 14, Divide Row (RS): Ch 1, turn. Sc across 14 left back sts, ch 4 (underarm bridge), skip 22 left sleeve sts, sc across 37 front sts, ch 4 (underarm bridge), skip 17 right sleeve sts, sc across 14 right back sts. (77 working sts)
Row 15 (WS): Ch 1, turn. Sc in each st and each ch across. (77 sc)
Rows 16-23: Work even in sc. (77 sc each row)
Bodice Checkpoint: The bodice from neckline to current row should measure approximately 6 inches in length.
Section 3: Eyelet Waistband Row
Row 24, Eyelet Row (RS): Ch 4, turn (counts as dc plus ch 1), skip first 2 sts, (dc in next st, ch 1, skip 1 st) across to last st, dc in last st. (39 dc plus 38 ch-1 spaces)
Row 25 (WS): Ch 1, turn. Sc in first dc, (sc in ch-1 sp, sc in next dc) across. (77 sc)
The ribbon will weave through these spaces later.
Section 4: Joining for Skirt in the Round
Fold the bodice with right sides together and slip stitch the back edges together for 3 stitches at the bottom to close the back seam at waist level only.
Setup Round: With RS facing and Color B, join at center back seam. Ch 1, sc in each st around. Work an increase at center front to bring the count to 78 (divisible by 6 for the pattern repeat). Join with sl st. (78 sc)
Section 5: Skirt
All skirt rounds are worked in Color B with the right side always facing you.
Skirt Round 1 (increase round): Ch 1, (sc in next 12 sts, 2 sc in next st) 6 times. Join with sl st. (84 sc)
Skirt Round 2 (begin Shell-and-V pattern): Ch 3 (counts as first dc), 2 dc in same st, (skip 2 sts, V-st in next st, skip 2 sts, 5 dc in next st) 13 times, ending with V-st, skip 2 sts, 2 more dc in same st as beg ch-3. Join with sl st to top of beg ch-3. (14 shells, 14 V-sts)
Skirt Round 3: Sl st into next 2 dc, sl st into ch-1 sp of V-st. Ch 3, 2 dc in same ch-1 sp, skip shell, V-st in center dc of shell, (5 dc in ch-1 sp of V-st, skip shell, V-st in center dc of shell) 13 times, 2 more dc in same ch-1 sp as beg ch-3. Join. (14 shells, 14 V-sts)
Skirt Rounds 4-9: Repeat Round 3 pattern.
After Round 9, skirt length should be approximately 5.5 inches.
Section 6: Hem Border
Change to Color A.
Hem Round 1: Join Color A with sl st in ch-1 sp of any V-st. Ch 1, sc in same sp. (Sc in each dc of shell, sc in ch-1 sp of V-st) around. Join. (84 sc)
Hem Round 2 (Scallop): Sl st in first sc, (skip 2 sc, 5 dc in next sc, skip 2 sc, sl st in next sc) 14 times. (14 scallops)
Hem Round 3 (optional picot accent): Sl st into center dc of each scallop, ch 3, sl st in first ch of ch-3 to form picot, sl st into sl st between scallops. Repeat around.
Fasten off. Weave in ends.
Section 7: Cap Sleeves
Left Sleeve Setup: With Color A, join at underarm chain. Pick up and sc across 4 ch sts, sc in each of the 22 held sleeve sts. (26 sc)
Left Sleeve Row 1 (WS): Ch 1, turn. Sc in each st across. (26 sc)
Left Sleeve Rows 2-6: Work decrease rows on RS rows (sc2tog at each end), plain rows on WS rows. End with (20 sc).
Sleeve Cap Scallop Edge (RS): Ch 1, do not turn. Work scallop along the shaped edge: (skip 2, 5 dc in next st, skip 2, sl st in next) repeat around cap perimeter.
Repeat for Right Sleeve.
Section 8: Button Band
Button Band (left back edge): With Color A, RS facing, join at bottom left back edge. Sc evenly up the edge. (24 sc) Work one more row of sc. Sew 4 buttons evenly spaced.
Buttonhole Band (right back edge): Row 1: Sc evenly up right back edge. (24 sc) Row 2: Ch 1, turn. Sc in first 2 sts, (ch 2, skip 2 sts, sc in next 4 sts) 3 times, ch 2, skip 2 sts, sc in last 2 sts. Row 3: Ch 1, turn. Sc in each st and 2 sc in each ch-2 sp. (24 sc)
Section 9: Attaching the Collar
Work a neckline edging round in Color B, approximately 60 sc around the neckline.
Align the collar’s inner edge with the neckline, centering it at front. Pin and whip stitch in place. Sew a small silver satin bow to center front of collar.
Section 10: Booties (Make 2)
Sole:
With Color A, ch 11.
Rnd 1: Sc in 2nd ch from hook, sc in next 8 ch, 4 sc in last ch, rotating to opposite side: sc in next 8 ch, 3 sc in first ch. Join. (24 sc)
Rnd 2: Ch 1, 2 sc in first sc, sc in next 8 sc, 2 sc in next 4 sc, sc in next 8 sc, 2 sc in next 3 sc. Join. (32 sc)
Rnd 3: Ch 1, (2 sc in next sc, sc in next sc) once, sc in next 8 sc, (2 sc in next sc, sc in next sc) 4 times, sc in next 8 sc, (2 sc in next sc, sc in next sc) 3 times. Join. (40 sc)
Sides:
Rnd 4: Ch 1, working in back loops only: sc in each st around. Join. (40 sc)
Rnds 5-6: Ch 1, sc in each st around. Join. (40 sc)
Toe Decrease:
Rnd 7: Ch 1, sc in first 14 sc, (sc2tog) 6 times, sc in last 14 sc. Join. (34 sc)
Rnd 8: Ch 1, sc in first 12 sc, (sc2tog) 5 times, sc in last 12 sc. Join. (29 sc)
Rnd 9: Ch 1, sc in first 10 sc, (sc2tog) 4 times, sc in last 11 sc. Join. (25 sc)
Cuff:
Change to Color B.
Rnd 10: Ch 1, sc in each st around. Join. (25 sc)
Rnd 11: Ch 1, (sc in next 4 sts, 2 sc in next st) 5 times. Join. (30 sc)
Rnds 12-13: Ch 1, sc in each st around. Join. (30 sc)
Rnd 14 (scallop): Sl st in first sc, (skip 2 sc, 5 dc in next sc, skip 2 sc, sl st in next sc) 5 times. (5 scallops)
Fasten off. Sew ribbon bow to front of each bootie.
Section 11: Headband Bow
Band:
With Color B, ch 76.
Row 1: Sc in 2nd ch from hook and in each ch across. (75 sc)
Rows 2-3: Ch 1, turn. Sc in each st across.
Join ends to form a circle with slip stitches.
Create a separate bow piece by chaining 30, working 3 rows of sc, and wrapping the center with a small strip. Attach to the headband.
Finishing Your Snow Princess Baby Dress Set
Thread the silver satin ribbon through the eyelet row at the waist, starting and ending at center front. Tie in a bow. If using snowflake charms, sew one on each side of the bow.
Block all pieces one final time. Weave in any remaining ends.
Give buttons a gentle tug to make sure they’re secure. Check that all ribbon ends are trimmed neatly.
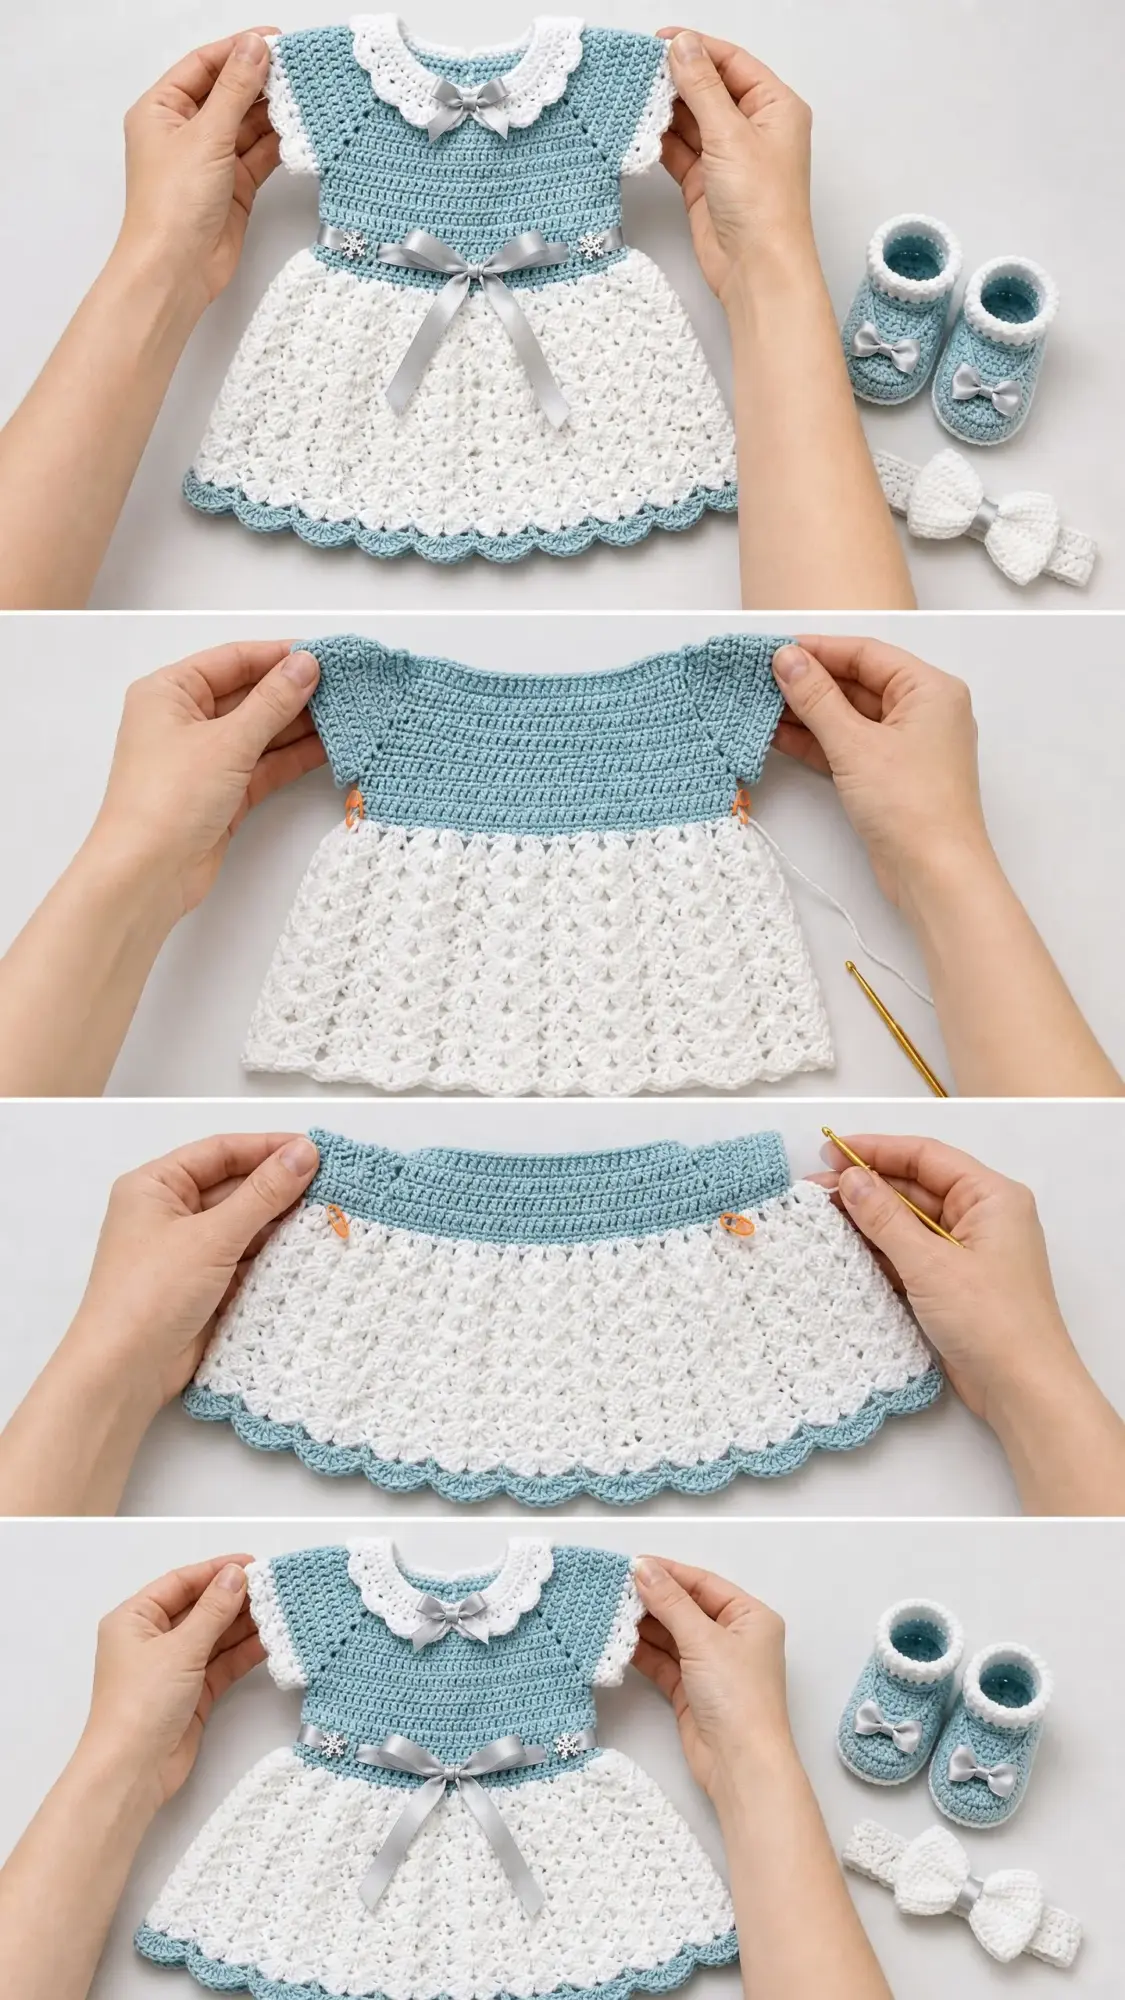
Tips for Success with This Crochet Tutorial
Take breaks. This is a multi-hour project. Work it in sections to keep your tension consistent.
Count your stitches. Especially during the raglan increases and the skirt pattern. A lost stitch early creates problems later.
Block before assembly. Blocking the collar and dress separately before attaching makes everything line up perfectly.
Use stitch markers generously. Mark your raglan points, mark the beginning of rounds, mark center front. You’ll thank yourself.
Thank you so much for choosing this pattern for your next project. I hope you enjoy every stitch, and I truly hope a special little one gets to wear this beautiful set.
If you make this Snow Princess Baby Dress Set, I would absolutely love to see it. Tag me on Instagram or share a photo in my Facebook group. Seeing your finished projects is honestly one of my favorite parts of sharing patterns.
Don’t forget to save this pattern to your Pinterest boards so you can find it easily when you’re ready to start. And if you make it, please leave a comment below. I love hearing how it turned out for you.
You Might Also Like
- Lavender Rose Granny Square Tote Free Crochet Pattern
- Champagne Gold Bell Sleeve Crochet Top Free Pattern
- Crimson Valentine Rose Crochet Dress Free Crochet Pattern
- Sage Green Summer Tote with Cream Tassels Free Crochet Pattern