
A handmade baby dress makes one of the most treasured gifts you can give. This lavender butterfly baby dress keeps little ones looking adorable for spring portraits, Easter celebrations, or any special occasion that calls for something extra sweet. The construction uses single crochet for the fitted bodice and a beautiful diagonal shell stitch for the flared skirt, creating that dreamy layered look without complicated techniques.
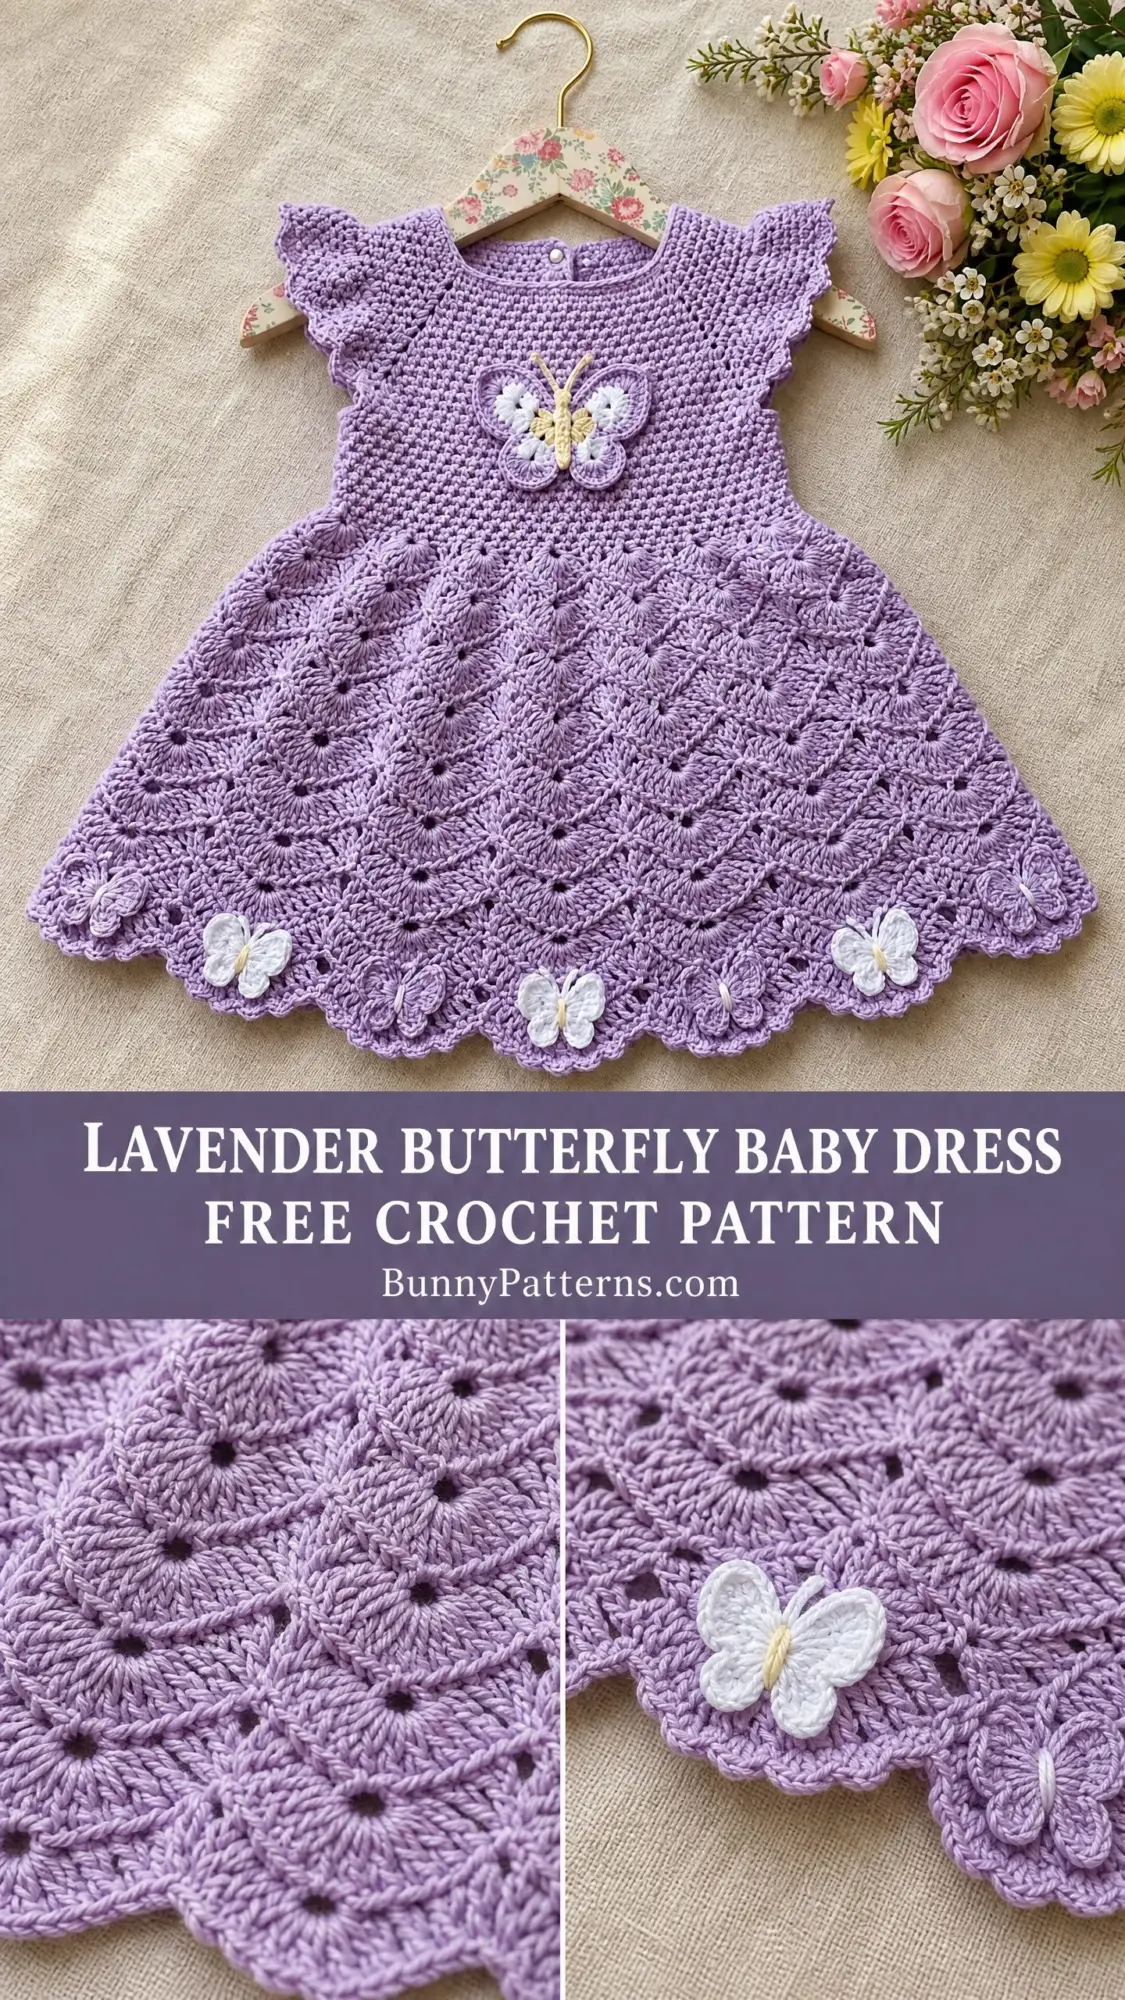
This crochet pattern works up in sizes newborn through 12 months, making it perfect for baby showers when you might not know the exact size needed. The flutter sleeves add a feminine touch, and those sweet butterfly appliques at the chest and hem turn an already lovely dress into something truly memorable.
Whether you are making this for your own little one, a grandchild, or a friend’s baby, expect to spend around 14 to 20 hours on this project. That makes it ideal for crafters who want something special without committing to months of work. The end result is a keepsake quality garment that photographs beautifully and washes easily.
Skill Level
This pattern is rated intermediate. You should be comfortable working in continuous rounds, reading stitch repeats, seaming a small back opening, and working increases within a textured repeat. If you have completed several beginner projects and feel ready to level up, this dress is an excellent challenge that teaches new skills without overwhelming you.
Finished Measurements
Newborn to 3 months: chest 14 inches (35.5 cm), length from shoulder to hem 12 inches (30.5 cm)
3 to 6 months: chest 16 inches (40.5 cm), length from shoulder to hem 13.5 inches (34 cm)
6 to 12 months: chest 18 inches (45.5 cm), length from shoulder to hem 15 inches (38 cm)
The pattern is written for size 3 to 6 months throughout. Instructions for newborn and 6 to 12 months appear in parentheses where they differ, formatted as: newborn (3-6 months, 6-12 months). When only one number appears, it applies to all sizes.
Materials
Yarn: Approximately 280 (320, 380) yards or 256 (293, 347) meters of DK weight yarn in main color lavender (MC). Approximately 25 yards or 23 meters of white (CC) for butterfly appliques.
Hooks: US size E-4 (3.5 mm) crochet hook for bodice and sleeves. US size F-5 (3.75 mm) crochet hook for skirt.
Notions:
Yarn Suggestions
Option 1: Lion Brand Pound of Love (100 percent acrylic, DK weight, 1020 yards per 16 oz skein) in Pastel Purple. Machine washable, widely available, and excellent stitch definition for lace patterns.
Option 2: Paintbox Yarns Cotton DK (100 percent cotton, 137 yards per 50 g skein) in Wisteria Purple. Cotton gives extra drape and breathability, ideal for warmer climates and sensitive skin.
Option 3: Scheepjes Softfun (60 percent cotton, 40 percent acrylic, 153 yards per 50 g skein) in a lilac shade. The cotton-acrylic blend balances structure and softness and holds stitch definition well in lace repeats.
Substitution note: Choose any DK weight yarn with good stitch definition. Avoid loosely spun or fluffy yarns as the fan-shell lace pattern and butterfly details will not read clearly. Always crochet a gauge swatch before beginning.
Gauge
Bodice gauge using E-4 hook: 18 sc and 22 rows equals 4 inches (10 cm) in single crochet worked in rounds.
Skirt gauge using F-5 hook: One full fan-shell repeat (14 stitches wide) equals approximately 2.75 inches (7 cm) wide. Four rows of fan-shell pattern equals approximately 2 inches (5 cm) tall.
Gauge is critical for achieving the correct chest measurement and overall length. Please swatch and adjust hook size as needed. Taking a few extra minutes here saves frustration later.
Abbreviations
Before we dive in, here are all the abbreviations you will encounter:
Special Stitches
Fan Shell Stitch (used in skirt)
This is the beautiful diagonal texture you see in the skirt. Here is how it works:
Step 1: Skip 2 stitches.
Step 2: Work 5 dc into the next stitch (this is the fan center).
Step 3: Skip 2 stitches.
Step 4: Sc into the next stitch (this is the connector sc between fans).
One fan shell repeat equals 6 stitches (2 skipped plus 1 fan center plus 2 skipped plus 1 connector sc). In the skirt, fans are stacked in a diagonal arrangement by offsetting the center stitch each row, which creates that lovely diagonal fan-shell texture visible in the finished dress.
Expanded Fan Shell (used in skirt increase rows)
Work 7 dc into the designated center stitch instead of 5 dc. This widens the fan and adds circumference to the skirt.
Picot Edging (used at sleeve and neckline edges)
This gives that sweet scalloped finish:
Step 1: Sc into the first stitch.
Step 2: Ch 3.
Step 3: Sl st into the first ch of the ch-3 (picot made).
Step 4: Sc into next stitch.
Repeat steps 2 through 4 across or around.
Butterfly Applique
Make 3 total: 1 in MC with CC accent at center, 2 in CC.
Upper Wings: Ch 5, join with sl st to form a ring.
Round 1: Ch 1, work 8 sc into ring, sl st to first sc. (8 sc)
Round 2: Ch 3 (counts as dc), work 2 dc in same st, ch 2, sl st to next st, (ch 2, 3 dc in next st, ch 2, sl st to next st) once more. Fasten off leaving long tail. This forms two upper wings.
Lower Wings: Join yarn to base of upper wings at center ring with a sl st.
Round 1: Ch 1, work 6 sc into the same ring space at lower section, sl st to first sc. (6 sc)
Round 2: Ch 3, 2 dc in same st, ch 2, sl st to next st, ch 2, 3 dc in next st, ch 2, sl st to next st. Fasten off leaving long tail. This forms two smaller lower wings.
Antennae: Thread yarn needle with 8 inches (20 cm) of MC. Make two small straight stitches emerging from top center of butterfly, curling tips with a French knot or small back stitch.
Body: Using CC yarn, embroider a small vertical satin stitch at the center join of all four wings to form the butterfly body.
Pattern Notes Before You Begin
1. The bodice is worked in continuous rounds from the top neckline downward, with a back opening worked as flat rows to accommodate the button closure.
2. The flutter sleeves are not separate seamed pieces. They are picked up and worked from the armhole opening after the bodice is complete.
3. The skirt is joined at the bodice waist and worked downward in turned rows to create the diagonal fan-shell texture.
4. The back opening runs from the neckline down approximately 3 inches (7.5 cm) and is finished with a simple sc edging with button loops.
5. All rounds are joined rounds unless otherwise stated. All rows use a turning chain.
6. The dress is designed to be worn with approximately 0.5 inches (1.25 cm) ease at the chest.
7. When working the fan-shell skirt, the diagonal effect is achieved by placing the connector sc of each new row directly above the center dc of the fan from the previous row. The pattern specifies exactly where to place each stitch.
8. Place stitch markers at the start of each round and at each underarm division point.
9. The skirt fan repeat is based on a multiple of 6 stitches plus 3 for balance. The bodice waist stitch count is adjusted to meet this requirement.
Step-by-Step Baby Dress Crochet Pattern Instructions
Section 1: Neckline Foundation and Yoke
Using MC and E-4 hook, begin at the neckline.
Chain 66 (60, 72). Because this dress has a back opening, you will work flat for the first portion of the yoke. Do not join into a ring yet.
Row 1 (RS): Ch 1, sc in each ch across. (66, 60, 72 sc)
Row 2 (WS): Ch 1, turn. Sc in each st across. (66, 60, 72 sc)
Row 3 (RS): Ch 1, turn. Sc across all sts. (66, 60, 72 sc)
Now begin working in joined rounds with the back opening maintained by working back and forth in rows that simulate rounds. Treat the two end stitches as the back center opening edges throughout.
Raglan Yoke Setup: Place markers to divide the yoke into 4 sections: 2 fronts/back and 2 sleeves.
Row 4 (RS) Division Row: Ch 1, turn. Sc 9 (8, 10) [right back], pm, sc 12 (11, 13) [right sleeve], pm, sc 24 (22, 26) [front], pm, sc 12 (11, 13) [left sleeve], pm, sc 9 (8, 10) [left back]. (66, 60, 72 sc)
Row 5 (WS): Ch 1, turn. Sc to 1 st before first marker, 2 sc in next st, sm, 2 sc in next st, sc to 1 st before next marker, 2 sc in next st, sm, 2 sc in next st, sc to 1 st before next marker, 2 sc in next st, sm, 2 sc in next st, sc to 1 st before next marker, 2 sc in next st, sm, 2 sc in next st, sc to end. 8 sts increased. (74, 68, 80 sc)
Row 6 (RS): Ch 1, turn. Sc to 1 st before first marker, 2 sc in next st, sm, 2 sc in next st, sc to 1 st before next marker, 2 sc in next st, sm, 2 sc in next st, sc to 1 st before next marker, 2 sc in next st, sm, 2 sc in next st, sc to 1 st before next marker, 2 sc in next st, sm, 2 sc in next st, sc to end. 8 sts increased. (82, 76, 88 sc)
Row 7 (WS): Rep Row 5 increase pattern. 8 sts increased. (90, 84, 96 sc)
Row 8 (RS): Rep Row 6 increase pattern. 8 sts increased. (98, 92, 104 sc)
Row 9 (WS): Rep Row 5 increase pattern. 8 sts increased. (106, 100, 112 sc)
Row 10 (RS): Rep Row 6 increase pattern. 8 sts increased. (114, 108, 120 sc)
Row 11 (WS): Rep Row 5 increase pattern. 8 sts increased. (122, 116, 128 sc)
Row 12 (RS): Rep Row 6 increase pattern. 8 sts increased. (130, 124, 136 sc)
After Row 12, sections should measure:
Checkpoint: After the yoke, the piece measured from the foundation chain edge to the base of the yoke should be approximately 2.5 inches (6.5 cm) deep.
Section 2: Separating Sleeves from Body
Row 13 (WS) Separation Row: Ch 1, turn. Sc 17 (16, 18) [right back], ch 3 (underarm bridge), skip 28 (27, 29) sleeve sts, sc 40 (38, 42) [front], ch 3, skip 28 (27, 29) sleeve sts, sc 17 (16, 18) [left back].
Body stitch count: 17 + 3 + 40 + 3 + 17 = 80 (76, 84) sts counting ch-3 bridges as 3 sts each. (80, 76, 84 sts)
Row 14 (RS): Ch 1, turn. Sc across all 80 (76, 84) sts, working sc into each ch of the underarm bridges. (80, 76, 84 sc)
Section 3: Bodice
Continue working back and forth in sc rows to build the bodice body, maintaining the back opening at each end.
Rows 15 through 24 (10 rows): Ch 1, turn, sc across each row, no increases or decreases. (80, 76, 84 sc each row)
After Row 24, the bodice from separation row to current row should measure approximately 1.75 inches (4.5 cm).
Checkpoint: After the full bodice section, the piece from neckline foundation to the bottom of the bodice should measure approximately 4.5 inches (11.5 cm) tall. The chest width at the widest point should measure approximately 8 inches (20.5 cm) wide when flat, which equals 16 inches (40.5 cm) circumference with back opening seam, matching the 3-6 month size.
Now adjust stitch count for skirt pattern divisibility. The fan-shell pattern requires a stitch count that is a multiple of 6 plus 3. Target count for 3-6 months is 81 stitches.
Row 25 (WS) Adjustment Row: Ch 1, turn. Sc across, increasing 1 st evenly spaced. (81, 75, 87 sc)
Section 4: Skirt
Switch to F-5 hook. The skirt is worked in turned rows for the diagonal fan-shell effect.
Skirt Row 1 (RS): Ch 3 (counts as dc), turn. Dc 2 in first st (half fan at edge), sk 2, sc in next st, (sk 2, 5 dc in next st, sk 2, sc in next st) across to last 3 sts, sk 2, 3 dc in last st (half fan at edge).
For 81 sts: 13 full fans plus 2 half fans at edges. (81 sts used)
Skirt Row 2 (WS): Ch 1, turn. Sc in first dc (edge), (sk 2 dc, 5 dc in next sc, sk 2 dc, sc in center dc of next fan) across to end, sc in top of tch. (81 sts used)
Skirt Row 3 (RS): Ch 3, turn. Dc 2 in first st, sk 2, sc in next st, (sk 2, 5 dc in next sc, sk 2, sc in next st) across, 3 dc in last st. (81 sts used)
Skirt Row 4 (WS): Rep Skirt Row 2 orientation. (81 sts used)
Skirt Transition Row (after Row 4): Ch 1, turn. Sc across all sts, inc 12 sts evenly spaced (one extra sc in every 6th or 7th st). (93 sc)
Skirt Rows 5 and 6: Work fan-shell pattern as established over 93 sts. 15 full fans plus 2 half-fan edges.
Skirt Transition Row 2 (after Row 6): Ch 1, turn. Sc across all sts, inc 12 sts evenly spaced. (105 sc)
Skirt Rows 7 and 8: Work fan-shell pattern over 105 sts. 17 full fans plus 2 half-fan edges.
Skirt Transition Row 3 (after Row 8): Ch 1, turn. Sc across, inc 12 sts evenly. (117 sc)
Skirt Rows 9 and 10: Work fan-shell pattern over 117 sts.
Skirt Transition Row 4 (after Row 10): Ch 1, turn. Sc across, inc 12 sts evenly. (129 sc)
Skirt Rows 11 and 12: Work fan-shell pattern over 129 sts.
Skirt Transition Row 5 (after Row 12): Ch 1, turn. Sc across, inc 12 sts evenly. (141 sc)
Skirt Rows 13 and 14: Work fan-shell pattern over 141 sts.
Checkpoint: After Skirt Row 14, the skirt portion alone should measure approximately 7 inches (18 cm) deep. Total dress length from shoulder should be approximately 12 inches (30.5 cm) for newborn, 13.5 inches (34 cm) for 3-6 months, 15 inches (38 cm) for 6-12 months. Add or subtract pairs of fan rows to hit your target length.
Section 5: Hem Scallop and Edging
After the final fan-shell row, do not cut yarn.
Hem Edging Row 1: Ch 1, turn. Sc across the top of all sts of the last fan row, working 1 sc per dc and 1 sc per connector sc. (141 sc for 3-6 months)
Hem Final Scallop Row (RS): With RS facing, ch 1. Working into the sc connector sts and center fan dc sts of the final fan row: Sc 1 in first st, (5 dc in next connector sc, sc in center dc of next fan) across entire hem, sc 1 at end. This adds one final complete scalloped shell row for the picot hem look. Fasten off. Weave in end.
Section 6: Flutter Sleeves
The sleeves are picked up from the armhole opening on each side.
With RS facing and E-4 hook, join MC at underarm center with sl st.
Round 1: Ch 1, sc around entire armhole opening including 3 ch of underarm bridge and all skipped sleeve sts (28, 27, 29 sleeve sts plus 3 underarm bridge sts equals 31, 30, 32 sts). Join with sl st. (31, 30, 32 sc)
Round 2 (Flutter Increase Round): Ch 1. (Sc 1, 2 sc in next st) around, ending with adjustments to keep count even. For 31 sts: work (sc 1, 2 sc in next) 10 times, sc 1 in last st. (41, 40, 43 sc)
Round 3 (Flutter Increase Round): Ch 1. (Sc 1, 2 sc in next st) around. Adjust final sts as needed. For 41 sts: (sc, inc) 13 times, sc 2. (54, 53, 57 sc)
Round 4 (Picot Edging Round): Ch 1. (Sc in next st, ch 3, sl st in first ch of ch-3) around. Join, fasten off, weave in ends.
The ruffle flutter sleeve effect is created by the rapid increase in stitch count over 3 rounds, causing the edge to fan out and ruffle beautifully.
Repeat sleeve instructions for second armhole.
Section 7: Neckline Edging
With RS facing and E-4 hook, join MC at top right back edge of neckline.
Row 1: Ch 1, sc evenly along neckline edge across all foundation chain sts, picking up approximately 1 sc per chain st. For 3-6 months: sc 66 sts across neckline. (66 sc)
Row 2: Ch 1, turn. (Sc 1, ch 3, sl st in first ch of ch-3 for picot) across. Fasten off.
Section 8: Back Opening Edging and Button Loops
With RS facing and E-4 hook, join MC at bottom of right back opening edge.
Row 1: Ch 1, sc evenly up the right back edge at approximately 2 sc per row. Total should be approximately 24 to 28 sc depending on exact row count. Fasten off.
Row 2 (Left Back with Button Loops): Join MC at top of left back opening edge. Ch 1, sc down the left back edge to match stitch count of right edge. At 3 evenly spaced points (approximately every 8 sts), create a button loop: ch 4, skip 2 sts, sl st back into the same edge st, then continue sc down the edge. Fasten off.
Sew 3 pearl buttons onto right back band, aligned with the button loops on the left band. Buttons should be approximately 0.5 inches (1.25 cm) from the edge.
Section 9: Butterfly Appliques
Make 3 butterflies following the Butterfly Applique instructions in the Special Stitches section above.
Make 1 butterfly using MC with CC (white) embroidered center body and CC daisy-like wing accent stitches. This is the large chest butterfly.
Make 2 butterflies using CC (white) for the hem butterflies.
Using yarn needle and matching thread or tail yarn, sew the large MC butterfly centered on the bodice front, approximately 1 inch (2.5 cm) below the neckline edge at the center of the chest.
Sew the two white CC butterflies along the hem scallop edge, spacing them evenly. Position one butterfly slightly left of center hem and one slightly right of center hem, each nestled in the valley between two scallops.
Secure all butterfly appliques with multiple small, firm stitches through all layers to prevent shifting with wear.
Size Customization Tips
For smaller or larger sizes, add or subtract 6 stitches from the foundation chain (keeping multiples of 6 plus 3 for the skirt pattern after the bodice adjustment row). Each 6-stitch addition or removal adds or removes approximately 1.25 inches (3 cm) of chest circumference at gauge.
For additional length in the skirt, add pairs of fan-shell rows (one RS row and one WS row per pair) plus one sc transition row with increases before each pair to maintain the flare. Each pair of fan rows adds approximately 1 inch (2.5 cm) of skirt length.
To make the dress for an older toddler (12 to 24 months), work the yoke for 3 to 4 additional increase rows before separating sleeves, adding 6 stitches per increase row to back and front while keeping sleeve increases standard.
Finishing and Blocking Your Baby Dress
Weave in all yarn ends securely using a yarn needle, working ends through at least 1 inch (2.5 cm) of stitches in multiple directions.
Wet blocking is strongly recommended for this dress to open the fan-shell lace pattern and allow the skirt to drape correctly.
Fill a clean basin with cool water and a drop of gentle wool wash (even for acrylic, this helps the fibers relax). Submerge the dress and gently press out air. Soak for 15 minutes. Do not wring. Gently squeeze excess water, then roll the dress in a clean towel and press firmly.
Lay flat on blocking mats. Shape the neckline into a smooth circle, gently stretch and pin the skirt hem to open the scallops, and pin the flutter sleeves to show the ruffle shape. Allow to dry completely, at least 24 hours, before unpinning.
Attach butterfly appliques after blocking and drying, as the appliques may distort if wet-blocked in place.
Care Instructions
Hand wash in cool water with mild detergent. Do not wring or twist. Lay flat to dry. Do not tumble dry. Do not bleach. If using 100 percent acrylic yarn, the item may be machine washed on the gentle cycle in a mesh laundry bag and laid flat to dry, but confirm with the specific yarn’s care label. Iron only on the lowest setting if needed, using a pressing cloth between the iron and the garment. Store flat or rolled to prevent stretching.
Final Thoughts on This Crochet Baby Dress Pattern
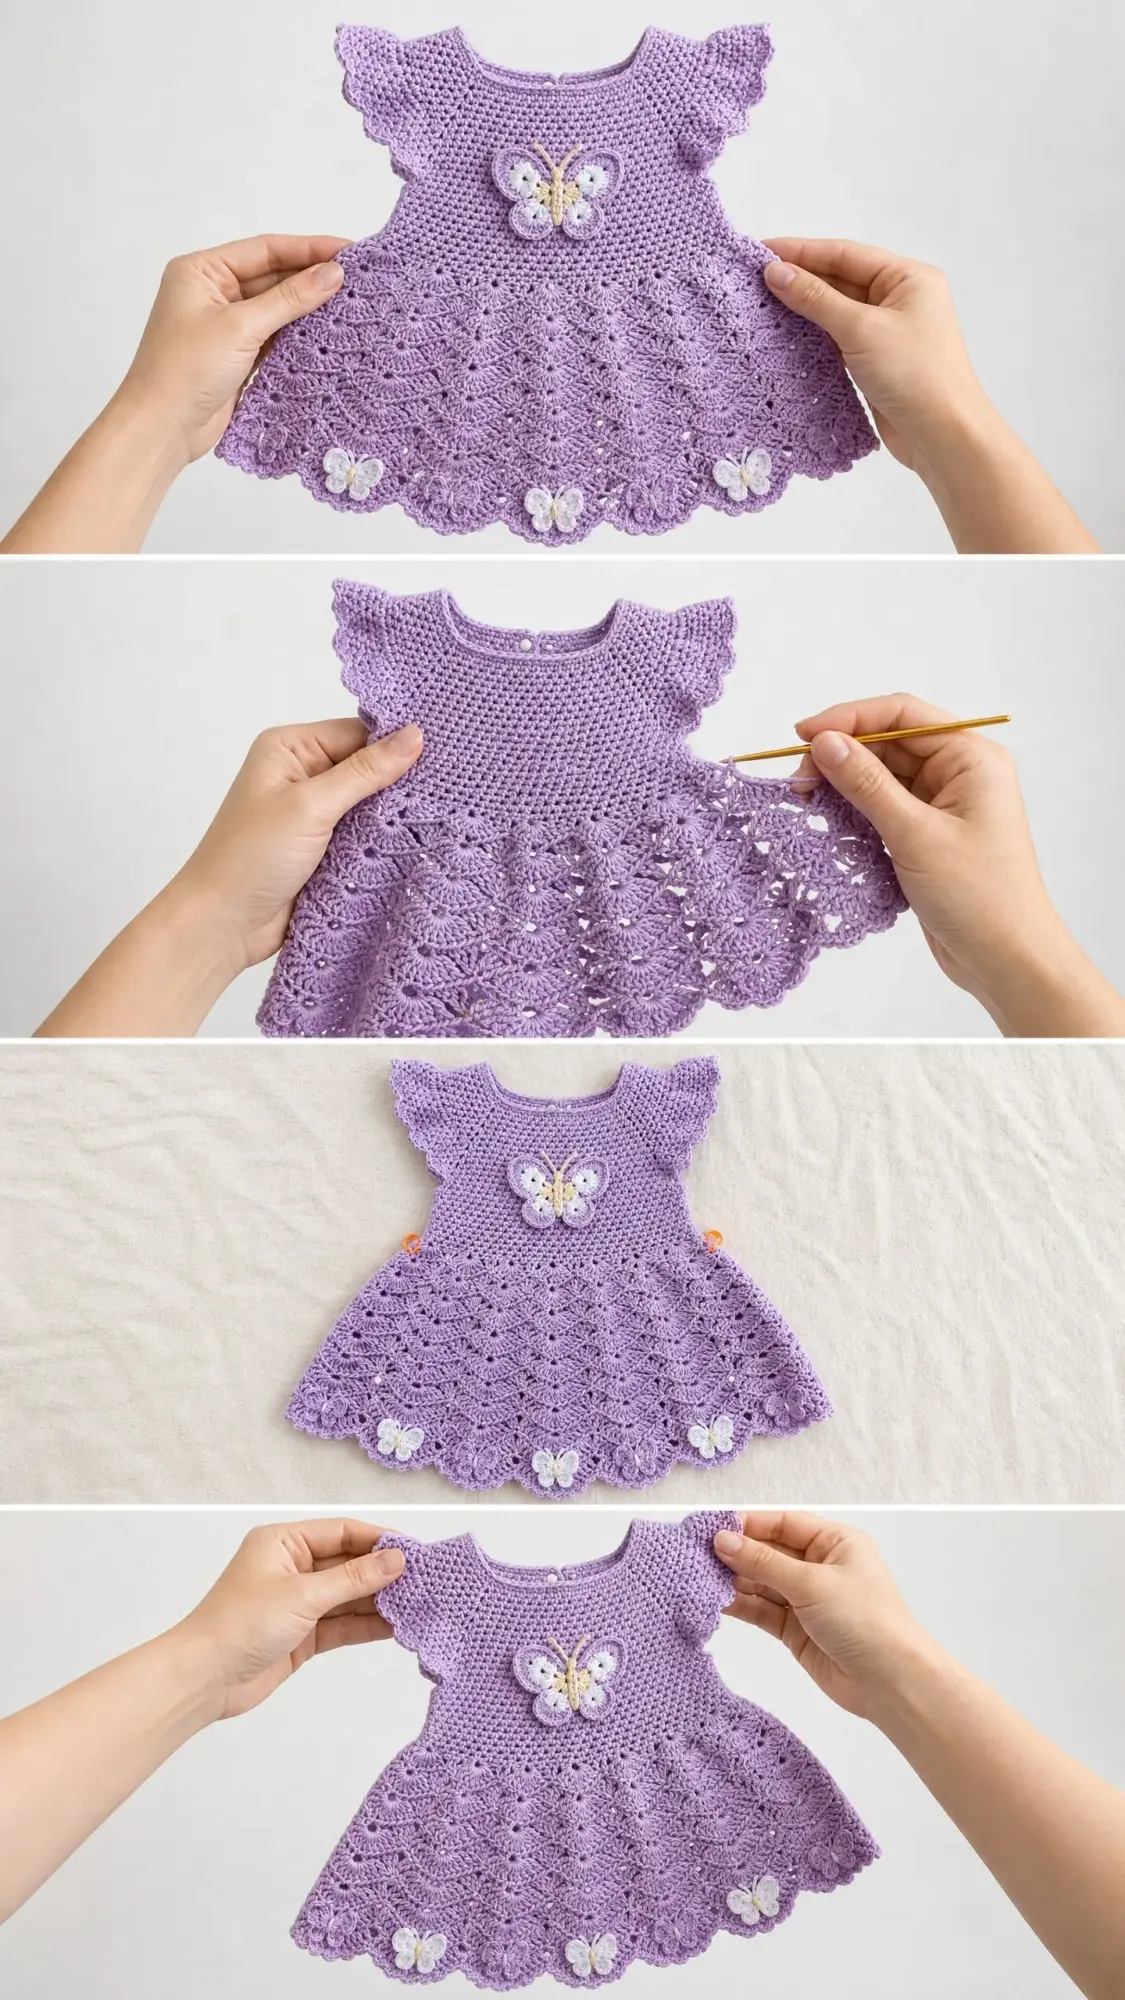
This lavender butterfly baby dress truly is a labor of love, and the finished result shows every bit of care you put into it. The combination of the smooth fitted bodice, those dreamy flutter sleeves, and the gracefully flared shell stitch skirt creates a garment that looks far more complicated than it actually is to make. New parents and grandparents absolutely melt when they receive a handmade dress like this one.
I hope you have enjoyed working through this crochet tutorial as much as I enjoyed designing it. There is something deeply satisfying about creating a wearable piece that will be cherished, photographed, and maybe even passed down.
If you make this dress, I would absolutely love to see it. Save this pattern to your Pinterest boards so you can find it easily when you are ready to start, and please leave a comment below to share your finished project or ask any questions. Happy crocheting!
You Might Also Like
- Terracotta Desert Shell Purse Free Crochet Pattern
- Sage Green Mesh Cover Up Free Crochet Pattern
- Dusty Rose Fringed Pocket Wrap Free Crochet Pattern
- Ocean Blue Floral Shoulder Dress Free Crochet Pattern