
Gradient sweaters look intimidating. I get it. You see that smooth color transition and think you need advanced skills or special techniques to pull it off. Here’s the truth: this sweater is built on one of the simplest stitch patterns in crochet. A basic mesh grid. That’s it.
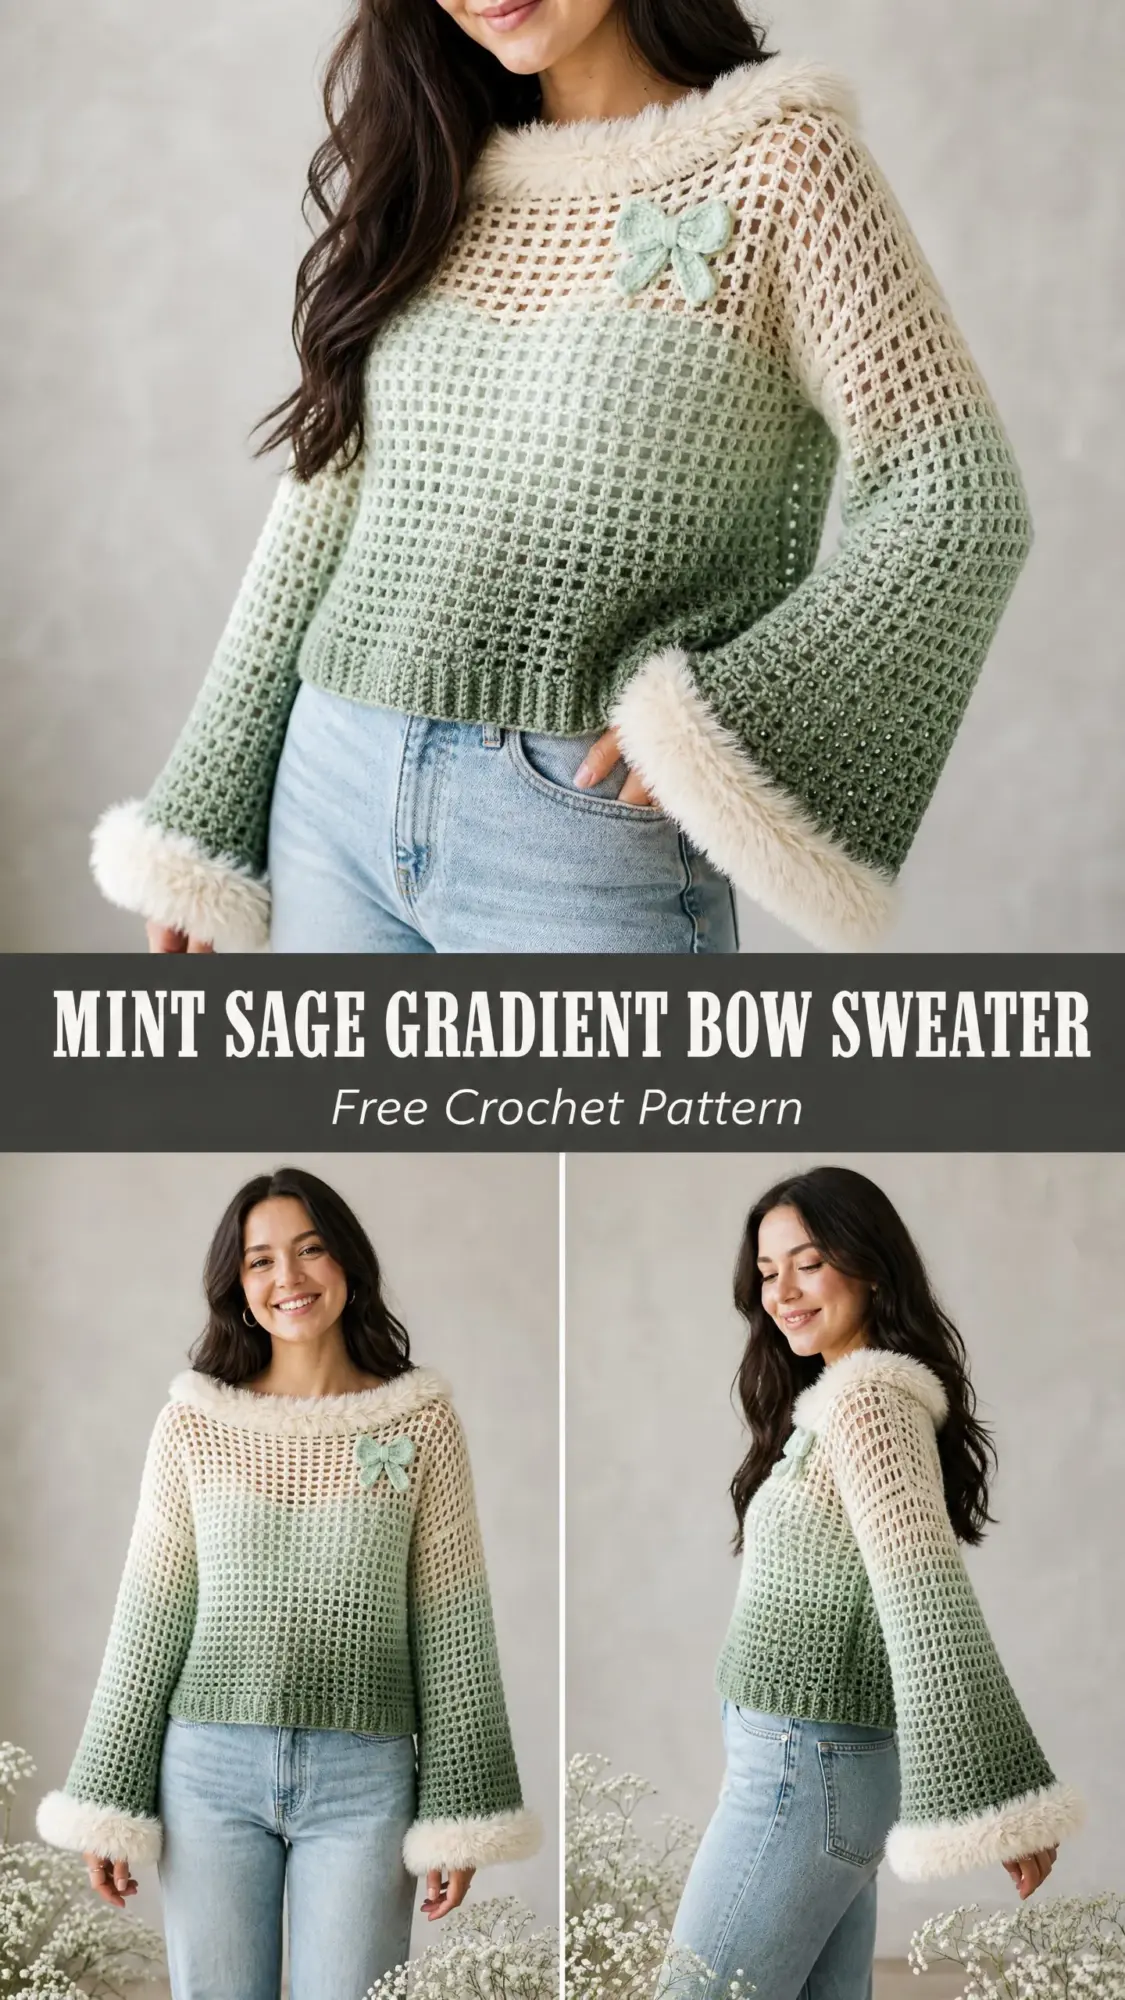
If you can chain and single crochet, you can make this sweater. The gradient happens naturally if you choose the right yarn, or you can control it yourself by switching colors gradually. The fancy faux fur trim? Just single crochet with fluffy yarn. The adorable bow? A few rows of single crochet pinched in the middle.
I designed this pattern to look impressive while staying completely approachable. Whether you’ve made one garment or twenty, this construction method works. Flat panels, simple seaming, sleeves worked in the round. No complicated yoke shaping. No confusing decreases. Just straightforward crochet that builds into something genuinely stunning.
Why You’ll Love This Crochet Sweater Pattern
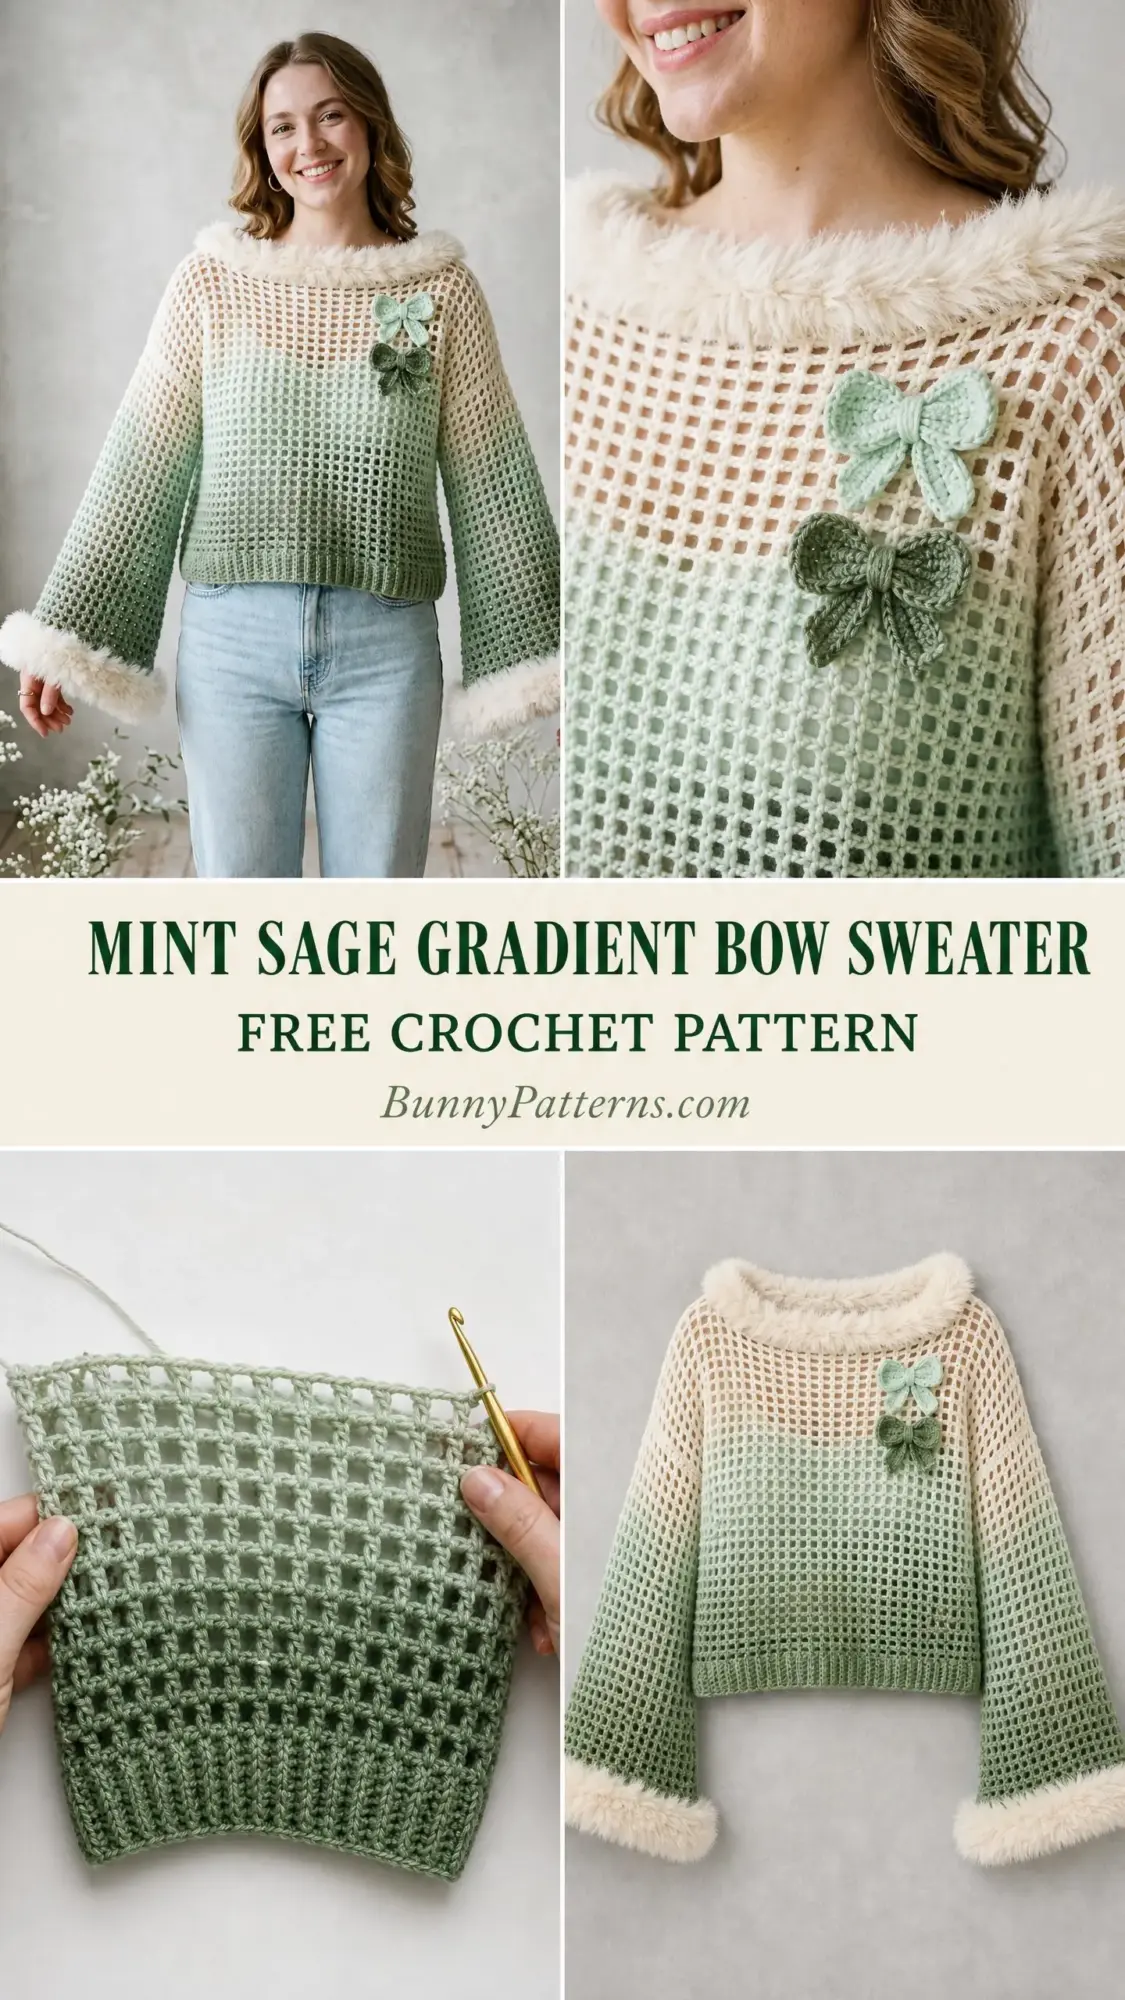
This Mint Sage Gradient Bow Sweater combines everything I love about modern crochet fashion. The open mesh creates a lightweight layer perfect for transitional weather. The gradient colorway adds visual interest without any complicated colorwork techniques. Those bell sleeves with fluffy cuffs? Pure whimsy.
The cropped, boxy silhouette flatters so many body types. It sits right at the natural waist, pairs beautifully with high-waisted jeans, and the relaxed fit means you don’t need to stress about precise shaping. The bateau neckline with that cozy faux fur collar frames your face and adds warmth right where you want it.
This is a statement piece. The kind of sweater that makes people ask where you bought it. And you get to say you made it yourself.
Skill Level
Intermediate. The mesh stitch itself is beginner-friendly, but this project asks you to manage a few different skills: working with gradient yarn or manually transitioning colors, picking up stitches around an armhole, seaming flat panels, and adding trim with faux fur yarn. If you’ve completed a few scarves and want to try your first garment, this is an excellent choice. Take it slow and you’ll do great.
Time Estimate
Plan for approximately 20 to 30 hours of work, including blocking and finishing. The mesh fabric works up quickly, but the sleeves, seaming, and trim application add time. Spread it across a few weeks and enjoy the process.
Finished Measurements
This pattern creates a finished bust of 40 inches (102 cm), fitting a women’s size M/L with generous ease. The body measures approximately 16 inches (41 cm) from shoulder to hem for a cropped fit. Total sleeve length from shoulder seam to cuff edge is 25 inches (63.5 cm).
Size customization guidance is included at the end of the pattern.
Materials Needed
Gathering the right supplies before you start makes everything smoother. Here’s your complete list:
Yarn A (Main Gradient Yarn): Approximately 800 yards (730 m) of DK weight yarn in a gradient colorway ranging from cream or off-white to sage green. If using solid yarns instead, you’ll need approximately 400 yards (365 m) of cream and 400 yards (365 m) of sage green.
Yarn B (Faux Fur Trim Yarn): Approximately 100 yards (91 m) of bulky or super bulky faux fur or eyelash yarn in cream or off-white.
Yarn C (Bow Yarn): Approximately 20 yards (18 m) of DK weight yarn in light sage green. This can be leftover from Yarn A.
Hook for Main Body: US size H-8 (5.0 mm) crochet hook
Hook for Faux Fur Trim: US size J-10 (6.0 mm) crochet hook
Hook for Bow: US size G-6 (4.0 mm) crochet hook
Notions: Yarn needle, stitch markers (at least 6), scissors, rust-proof pins for blocking, removable stitch markers, one small button or snap (optional, for bow backing)
Yarn Suggestions
Option 1: Lion Brand Mandala works beautifully for Yarn A. It’s a self-striping DK weight yarn that creates natural gradients. Choose a colorway with cream transitioning to green tones. You’ll need approximately 3 to 4 cakes.
Option 2: WeCrochet Swish DK in "Cream" and "Jade Heather" gives you precise control. Work with two separate skeins and transition manually every 6 rows.
Option 3: Paintbox Yarns Simply DK in "Paper White" and "Spearmint" as a two-color option. You can blend by carrying both strands briefly during transition rows.
Substitution Note: Any DK weight yarn with good stitch definition works for the body. Avoid overly fuzzy or halo yarns for the main mesh since the open grid will lose its structure. For Yarn B, any faux fur, bouclé, or eyelash yarn in cream that works at a 6.0 mm hook is suitable. The trim yarn does not need to match fiber content.
Gauge
Getting gauge right is crucial for garment fit. Please swatch before starting.
With Yarn A and US H-8 (5.0 mm) hook, in the Mesh Stitch pattern:
14 mesh spaces x 14 rows = 4 inches x 4 inches (10 cm x 10 cm)
One mesh space equals one chain-2 space plus one single crochet, measuring approximately 0.57 inches (1.45 cm) wide and 0.57 inches (1.45 cm) tall.
Gauge check: Work a foundation chain of 32 stitches. Work 14 rows in Mesh Stitch. Block lightly. Your piece should measure 4 inches wide by 4 inches tall. Adjust hook size up or down as needed.
Abbreviations
Let me walk you through every abbreviation used in this pattern. If you’re newer to reading crochet patterns, bookmark this section.
ch = chain (wrap yarn over hook and pull through the loop on your hook)
sl st = slip stitch (insert hook, yarn over, pull through both the stitch and the loop on your hook in one motion)
sc = single crochet (insert hook, yarn over and pull up a loop, yarn over and pull through both loops)
hdc = half double crochet
dc = double crochet
sp = space
ch-sp = chain space (the gap created when you chain between stitches)
sk = skip (pass over the indicated stitch without working into it)
st(s) = stitch(es)
rep = repeat
RS = right side (the side that faces outward when worn)
WS = wrong side
rem = remaining
beg = beginning
cont = continue
pm = place marker
sm = slip marker
yo = yarn over
tog = together
approx = approximately
t-ch = turning chain
inc = increase (work 2 stitches into same space)
dec = decrease
rnd = round
BLO = back loop only (insert your hook under only the back loop of the stitch, leaving the front loop unworked)
Special Stitches and Techniques
Before diving into the pattern, let’s cover the key techniques you’ll use throughout this project.
Mesh Stitch (Worked Flat)
This stitch creates an open square grid. Each mesh space is made of one single crochet anchoring the grid and one chain-2 bridge between anchors.
Row setup: The turning chain counts as the first sc plus ch-2 bridge of the new row. At the start of each row, chain 3 (this counts as sc plus ch-2). Skip the first ch-2 space from the previous row. Work sc into the next sc. Continue working ch 2, skip the ch-2 sp, sc into the next sc across. Turn.
To begin a mesh fabric from scratch: Chain a multiple of 3 plus 2 additional chains.
Example for 20 mesh spaces: Chain 62. Row 1 (foundation): sc into 8th chain from hook (counts as sc, ch-2, sk 2, sc). Ch 2, skip 2 chains, sc into next chain. Repeat ch-2, skip 2, sc across to end. Turn. (20 mesh spaces)
Subsequent rows: Ch 3, turn. Skip first ch-2 sp. Sc into next sc. Ch 2, skip ch-2 sp, sc into next sc. Rep across, ending sc into t-ch sp (treating the ch-3 turning chain as a sc). Turn.
Important: The final sc of every row is worked into the top of the ch-3 turning chain from the previous row.
Faux Fur Trim Edging
Using Yarn B and J-10 hook, join to any edge stitch. Work sc into each available stitch or chain space around the edge. Do not work turning chains. This creates a dense, fluffy border. Fasten off.
Mesh Increase at Row Edges
To add one mesh space at the start of a row: Chain 5 instead of chain 3 at the beginning of the row. Work sc into the first sc of the previous row, establishing a new mesh space to the left.
To add one mesh space at the end of a row: Work ch 2, then sc into the base of the turning chain of the previous row (into the junction point) to create an additional mesh space on the right edge.
Ribbed Border (Worked Flat)
Foundation row: With Yarn A in sage green, chain 8.
Row 1: sc into 2nd ch from hook and into each ch across. (7 sc) Turn.
Row 2: ch 1, sc in BLO across. (7 sc) Turn.
Repeat Row 2 until ribbed strip reaches desired length. This is seamed to the hem edge.
Crochet Bow
Bow Center Strip: With Yarn C and G-6 hook, ch 16. Sc into 2nd ch from hook and each ch across. (15 sc) Fasten off. Weave in ends. Pinch the strip at its center and wrap with a short length of yarn to cinch. Secure tightly.
Bow Loop Piece: With Yarn C and G-6 hook, ch 26. Sc into 2nd ch from hook and each ch across. (25 sc) Rows 2 to 4: ch 1, turn, sc across. (25 sc) Fasten off. Form into a loop by joining the short ends. Flatten the loop so the seam is at center back. Wrap the center strip around the middle of the loop to form bow shape. Sew securely.
A second smaller bow is made with ch 20 foundation and 19 sc base, following the same method, for a stacked double-bow appearance.
Pattern Notes
This sweater is constructed in flat panels. You’ll work the front and back separately, seam them at the shoulders and sides, then pick up stitches and work the sleeves downward in the round from the armhole opening. This construction avoids complex yoke shaping and suits the boxy silhouette perfectly.
About the gradient: If working with two separate yarns (cream and sage green), begin with cream and introduce sage green gradually over a transitional section of approximately 8 rows in the middle of the body. Carry the unused color loosely or work over it. The upper body and upper sleeve are cream, the lower body and lower sleeve are sage green.
About the mesh: The open mesh fabric is sheer. This is intentional. Style the sweater over a camisole or slip.
Counting mesh spaces: Count each ch-2 sp as one mesh space. The sc stitches act as anchors between spaces.
Turning chains: The ch-3 at the start of each mesh row counts as one sc plus one ch-2 bridge. This means it creates the first mesh space of the row.
Step-by-Step Pattern Instructions
Back Panel
The back is worked from the neckline edge downward. We begin with a foundation chain and establish the full width at the shoulders, then work straight down to the hem.
For the size given (40-inch bust), the back panel is 20 inches (51 cm) wide, which equals 48 mesh spaces.
Foundation Chain: With Yarn A (beginning with cream end of gradient) and H-8 hook, chain 149.
Row 1 (WS, foundation row): sc into 8th chain from hook. (Ch 2, skip 2 ch, sc into next ch) across to end. Turn. (48 mesh spaces)
Place a stitch marker at each end of Row 1 to mark shoulder line.
Rows 2 through 28 (plain mesh): Ch 3, turn. Skip first ch-2 sp. Sc into next sc. (Ch 2, skip ch-2 sp, sc into next sc) across, ending with sc into top of t-ch. Turn. (48 mesh spaces each row)
Rows 29 through 56: Continue in Mesh Stitch as established. Turn. (48 mesh spaces each row)
At Row 28, begin transitioning Yarn A from cream toward sage green if using two separate colors. Gradually introduce sage green by Row 35, working fully in sage green by Row 42 onward. If using a gradient yarn, this transition happens automatically.
After Row 56, the back panel measures approximately 16 inches (41 cm) from shoulder to hem. Do not fasten off.
Checkpoint: After Row 56, the back panel should measure approximately 20 inches (51 cm) wide and 16 inches (41 cm) tall. Count 48 mesh spaces across the top edge and 48 across the bottom edge.
Hem Ribbing for Back Panel
Do not cut yarn. With RS facing, the bottom edge of Row 56 is the hem edge.
Work the Ribbed Border strip separately:
With Yarn A in sage green and H-8 hook, ch 8. Sc into 2nd ch from hook and each ch across. (7 sc) Turn. Ch 1. Sc in BLO across. (7 sc) Turn. Repeat the BLO sc row until the strip is the same length as the bottom edge of the back panel (approximately 20 inches / 51 cm, which works out to approximately 70 rows of ribbing at gauge). Fasten off leaving a long tail. Pin the ribbed strip along the bottom edge of the back panel and seam using a whipstitch through corresponding edge stitches.
Front Panel
Work the front panel exactly as the back panel. Foundation chain 149. Work Rows 1 through 56 identically. (48 mesh spaces per row, 56 rows total)
Apply hem ribbing strip same as back.
Checkpoint: You now have two identical flat panels. Each measures 20 inches (51 cm) wide and approximately 16 inches (41 cm) tall.
Shoulder Seams
Place front and back panels with RS together. The neckline opening spans the center 18 mesh spaces of the top edge of each panel. Mark the center 18 spaces on both panels with stitch markers (leaving 15 mesh spaces on each shoulder side).
Seam the right shoulder: Using a yarn needle and Yarn A, whipstitch through the corresponding sc anchors of the first 15 mesh spaces on the right edge of the top row of both front and back panels. This connects 15 mesh spaces on the right shoulder.
Seam the left shoulder: Repeat on the left side for the outer 15 mesh spaces.
The center 18 mesh spaces remain open for the neckline. This creates a neckline opening of approximately 10 to 11 inches (25 to 28 cm), suitable for a wide bateau neckline.
Side Seams
The sweater body is 16 inches tall. The armhole depth is 10 inches (25 cm), which equals approximately 35 rows. This means the side seam starts at Row 35 from the top (shoulder) and continues to the hem.
With RS together, seam each side from Row 35 down to the hem using whipstitch through sc anchor points along the side edges of the front and back panels. Leave Rows 1 through 34 open on each side for the armhole.
Checkpoint: After side seaming, the armhole opening on each side measures approximately 10 inches (25 cm) deep. The body tube is complete.
Collar Trim
With Yarn B and J-10 hook, join to any sc anchor at the back neckline.
Round 1: Work sc evenly around the entire neckline opening. Work approximately 80 sc evenly around the neckline. (80 sc)
Round 2: Sl st into each sc around to maintain volume without growing. Fasten off and weave in ends.
The faux fur yarn creates a thick, fluffy collar ring. Do not try to count exact stitches in this yarn. Work by eye to create an even, full trim all around the neckline.
Sleeves
Each sleeve is worked in the round, top down, from the armhole opening downward.
With RS facing and Yarn A in cream (to match the upper body gradient), join yarn to the top center of the armhole at the shoulder seam point.
Set-Up Round: Work sc evenly around the entire armhole opening. Round up to 84 sc. Join with sl st to first sc. (84 sc)
Round 1 (begin mesh in the round): Ch 3 (counts as sc plus ch-2). Skip 1 sc. Sc into next sc. (Ch 2, skip 1 sc, sc into next sc) around. Join with sl st to the first sc of the round (NOT into the ch-3). (42 mesh spaces)
Rounds 2 through 10: Ch 3. (Ch 2, skip ch-2 sp, sc into next sc) around. Ch 2, sl st into first sc to close. (42 mesh spaces each round)
Color transition: Begin transitioning from cream to sage green at Round 10, fully in sage green by Round 18.
Rounds 11 through 44: Continue in Mesh Stitch in the round. (42 mesh spaces each round)
Sleeve Flare (Bell Shaping)
At Round 44, begin sleeve flare increases.
Round 45 (increase round): Ch 5 (instead of ch 3). Work mesh around. At end, work ch 2, sc into the joining sl st from the previous round. Join. (44 mesh spaces)
Rounds 46 through 48: Work even. (44 mesh spaces each round)
Round 49 (increase round): Ch 5. Work mesh around. Add one space at end. Join. (46 mesh spaces)
Rounds 50 through 52: Work even. (46 mesh spaces each round)
Round 53 (increase round): Ch 5. Work mesh around. Add one space at end. Join. (48 mesh spaces)
Rounds 54 through 56: Work even. (48 mesh spaces each round)
Round 57 (increase round): Ch 5. Work mesh around. Add one space at end. Join. (50 mesh spaces)
Rounds 58 through 60: Work even. (50 mesh spaces each round)
Round 61 (increase round): Ch 5. Work mesh around. Add one space at end. Join. (52 mesh spaces)
Rounds 62 through 78: Continue in mesh stitch with no further increases. (52 mesh spaces each round)
Fasten off Yarn A.
Sleeve Cuff Ribbing
Work a ribbed strip in Yarn A sage green, chain 8, sc into 2nd ch and across (7 sc), work BLO sc rows until strip equals the circumference of the sleeve opening (approximately 105 rows). Seam the short ends of the ribbing strip together to form a ring. Attach the ribbing ring to the bottom edge of the sleeve with whipstitch, joining evenly around.
Sleeve Cuff Faux Fur Trim
With Yarn B and J-10 hook, join to the bottom edge of the ribbing.
Round 1: Sc into each available stitch around the cuff edge. Work approximately 52 sc evenly. (52 sc)
Round 2: Sl st into each sc. Fasten off. Weave in ends.
Make second sleeve to match.
Bow Applique
Make one large bow (25-sc base, 4 rows) and one small bow (19-sc base, 4 rows) following the special stitch instructions. Stack the small bow on top of the large bow, offsetting slightly. Sew both bows together at the center cinch point. Sew the stacked bow unit onto the upper left chest of the sweater (from the wearer’s perspective), approximately 4 inches (10 cm) below the neckline edge and 4 inches (10 cm) from the left shoulder seam.
Size Customization
To size up or down, adjust the foundation chain of the body panels by increments of 3 stitches (adding or removing one mesh space per 3 chains). Each mesh space adds approximately 0.57 inches (1.45 cm) of width.
For a smaller size, reduce the foundation chain by 9 stitches (removing 3 mesh spaces) per panel, which reduces the bust by approximately 3.4 inches total. For a larger size, add 9 stitches (3 mesh spaces) per panel for approximately 3.4 inches of additional bust ease.
For length adjustments, add or remove rows from the body before the hem ribbing. Every 4 rows added or removed changes the length by approximately 1.14 inches (2.9 cm).
Finishing and Blocking
Weave in all yarn ends securely using a yarn needle. Bury tails into the back of the mesh work through at least 3 anchor sc stitches in different directions to prevent unraveling.
Wet block the main body: Soak the completed sweater (before attaching faux fur trim if possible) in cool water for 20 minutes. Gently press out excess water without wringing. Lay flat on a blocking mat. Pin to the finished measurements. Allow to dry completely.
Do not wet block the faux fur trim. Apply faux fur trim after blocking is complete and the main body is fully dry.
Care Instructions
Hand wash in cool water with gentle wool wash or mild soap. Do not wring or twist. Press out water gently between towels. Lay flat to dry, reshaping to measurements. Do not tumble dry. Do not iron directly on the faux fur trim. Store folded, not hung, to prevent the open mesh from stretching over time.
Thank you so much for choosing this pattern. I truly hope you love making this sweater as much as I loved designing it. If you make one, I would absolutely love to see your finished piece. Tag me on Instagram or share in our Facebook group. Seeing your creations makes my whole week.
If this pattern caught your eye, go ahead and pin it to your Pinterest boards so you can find it when you’re ready to start. And please drop a comment below if you make this sweater or have any questions along the way. I always love hearing from you.
You Might Also Like
- Cinderella Blue Baby Dress Set Free Crochet Pattern
- Ocean Breeze Granny Square Tote Free Crochet Pattern
- Pink Strawberry Cow Print Crochet Pants Pattern
- Lavender Sunflower Granny Square Tote Free Crochet Pattern