
A cropped top with a cable heart motif on the front. That is exactly what this pattern delivers. The construction uses half double crochet for the body, front and back post stitches for the cables, and simple shaping for a flattering sweetheart neckline.
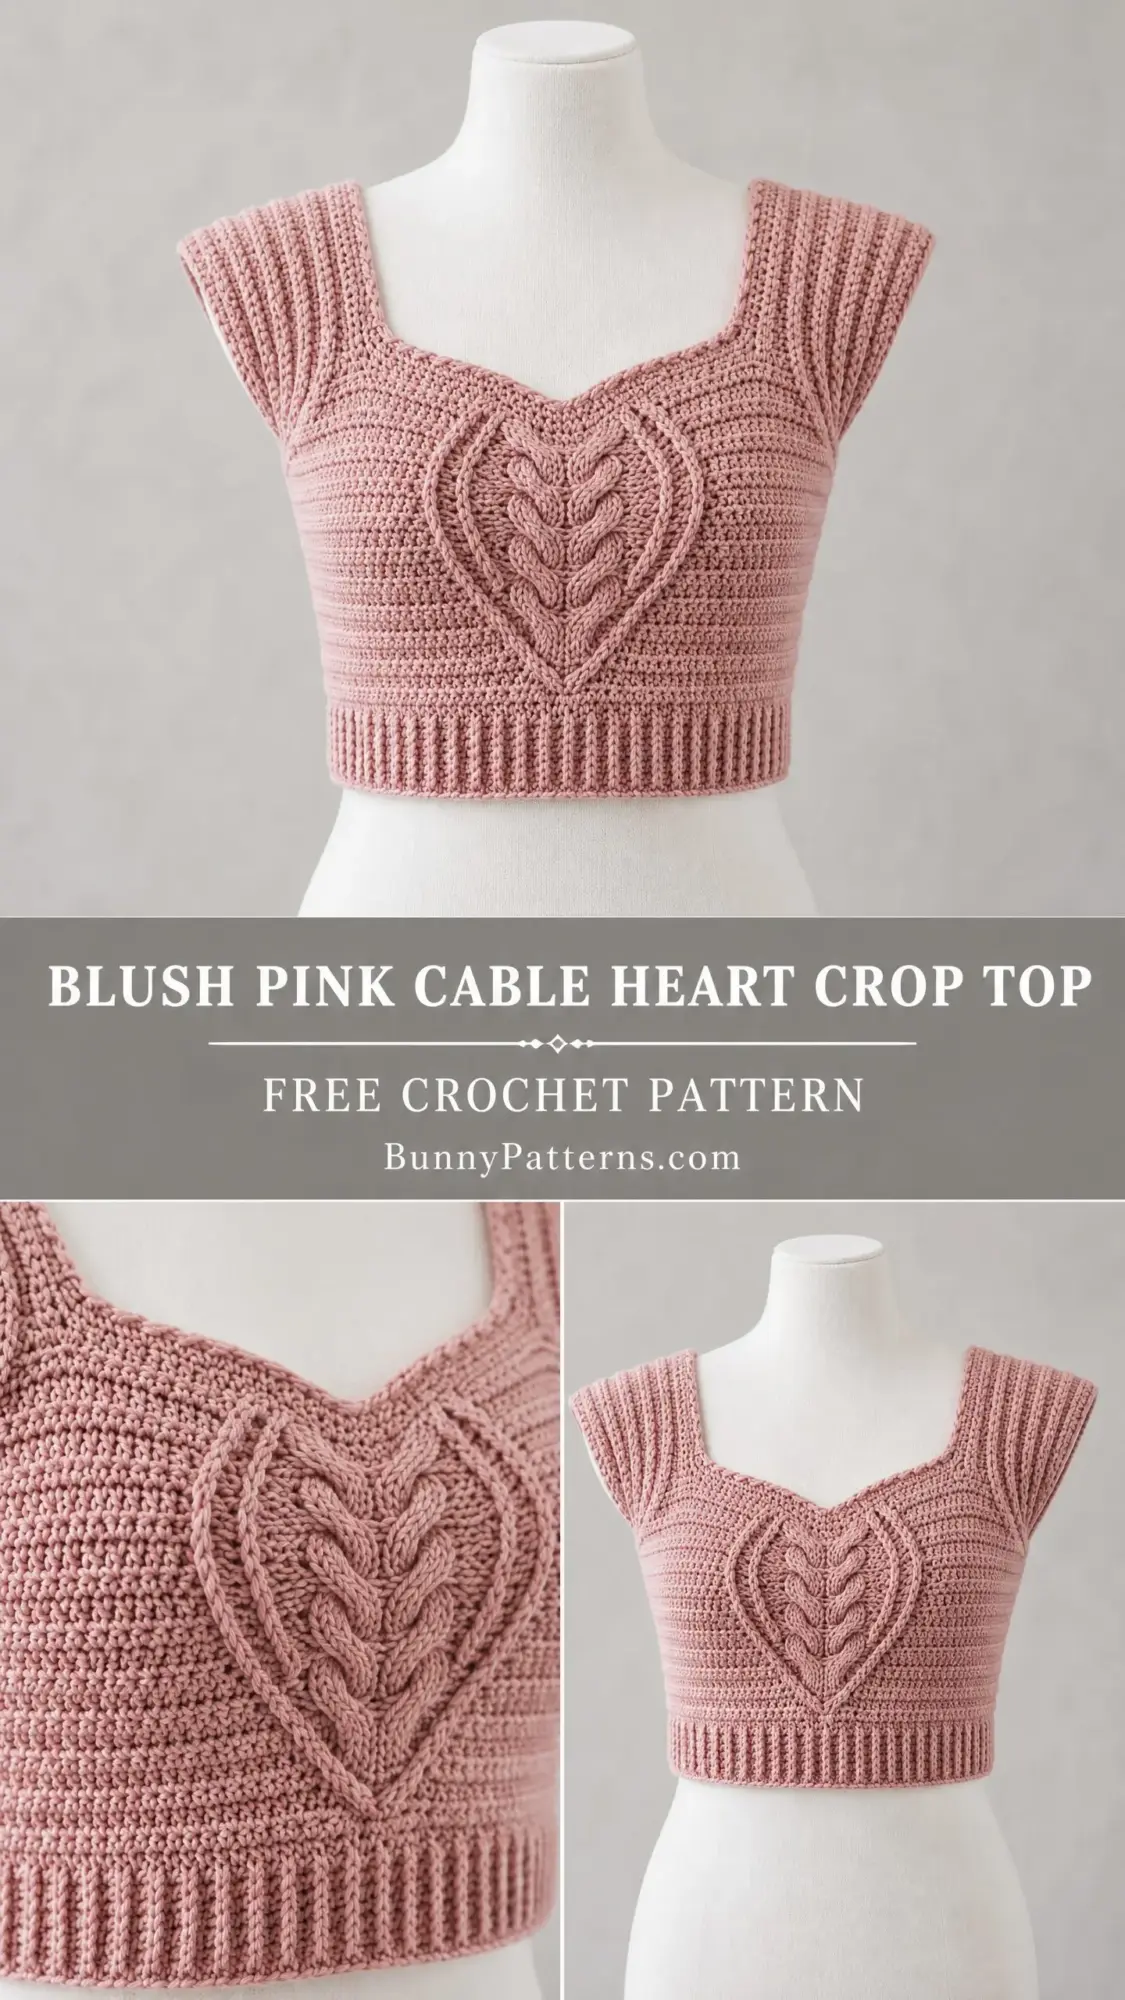
This project sits at an intermediate to advanced skill level. If you have worked post stitches before and feel comfortable reading a detailed pattern, you can absolutely make this top. The cable heart looks intricate, but it builds row by row in a logical sequence.
The finished piece hits above the natural waist with cap sleeve style armholes and a ribbed hem band. It is fitted, feminine, and perfect for layering or wearing on its own during warmer months.
Why You Will Love This Cable Heart Crop Top Crochet Pattern
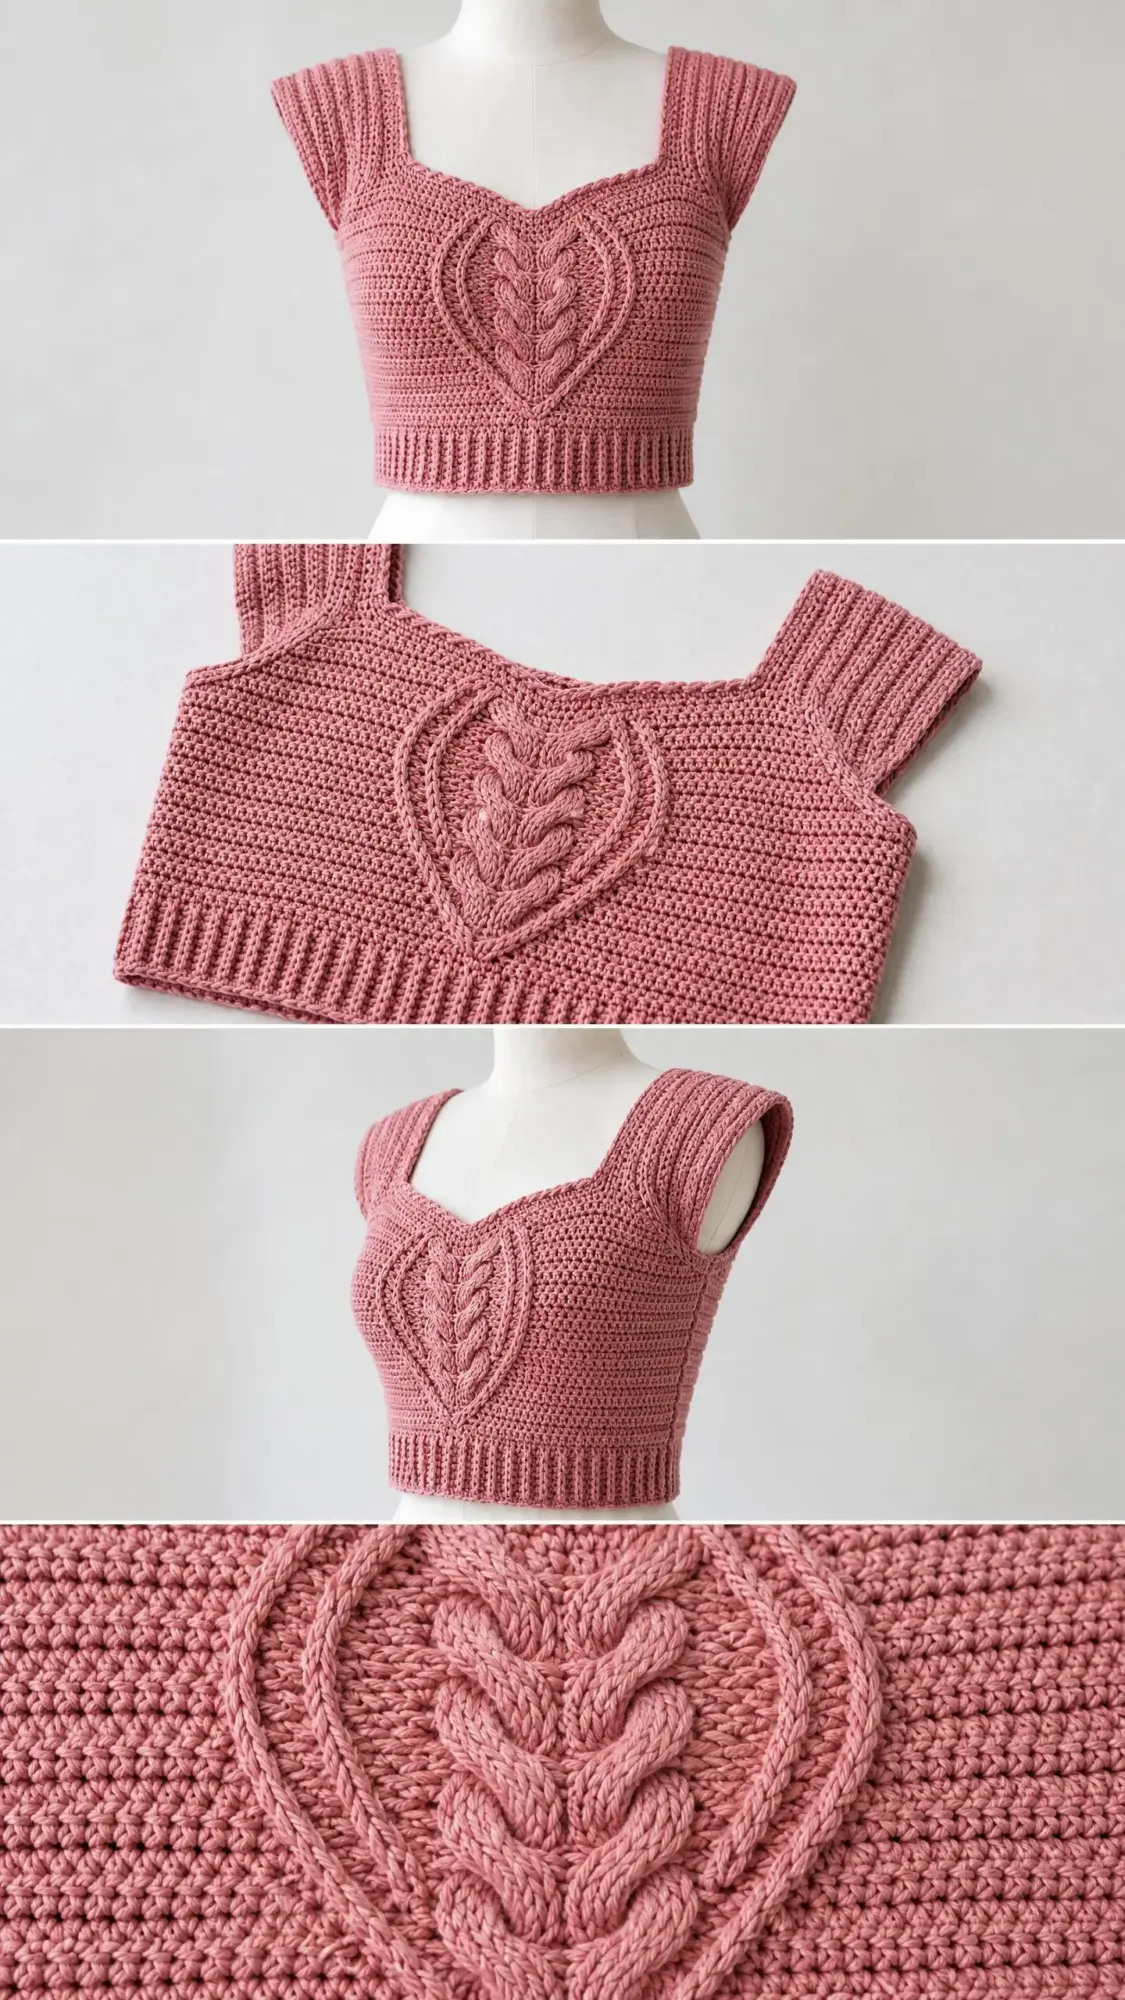
This top stands out because of that gorgeous dimensional heart on the front bodice. The cable technique creates a knit look using only your crochet hook. No knitting needles required. The heart forms naturally as you work the cable crosses, curving outward for the two lobes at the top and meeting at a point at the bottom.
The silhouette flatters many body types. A sweetheart neckline frames the face and adds visual interest to the front, while the back features a clean square neckline that sits higher. This difference in neckline heights is intentional and creates a beautiful shape when worn.
I also love that this top uses a simple half double crochet (hdc) fabric for most of the body. The cables pop against this smooth background without competing textures.
Materials You Will Need
Gather these supplies before you begin. Having everything ready makes the process smoother.
Yarn: Worsted weight yarn, weight category 4. You will need approximately 600 to 700 yards total. A smooth cotton or cotton blend yarn works best to showcase the cable texture. The original design uses a dusty rose or blush pink shade.
Recommended Yarn Options:
Hook: US size G-6 / 4.0 mm. Adjust your hook size if needed to meet gauge.
Notions: Yarn needle for seaming and weaving ends, 6 to 8 stitch markers, scissors, pins for blocking, measuring tape.
Important Note on Yarn Choice: Avoid fuzzy, bouclé, or heavily textured yarns. They will hide your beautiful cable work. Stick with a smooth, consistent twist for the best stitch definition.
Gauge
18 stitches and 20 rows = 4 inches / 10 cm in half double crochet, measured over a blocked flat swatch.
I cannot stress this enough. Gauge matters for a fitted garment. Even one stitch difference per 4 inches will throw off your bust measurement significantly. Make a swatch, block it, measure it, and adjust your hook size if necessary.
Finished Measurements
This pattern is written for size Small/Medium:
Abbreviations and Stitch Definitions
Let me walk you through every stitch and abbreviation used in this pattern. If any of these are new to you, practice them on a small swatch first.
ch = chain. The foundation stitch that creates your starting row.
sl st = slip stitch. Insert hook, yarn over, pull through both loops on hook. Used for joining and binding off.
sc = single crochet. Insert hook, yarn over and pull up a loop (2 loops on hook), yarn over and pull through both loops.
hdc = half double crochet. Yarn over, insert hook, yarn over and pull up a loop (3 loops on hook), yarn over and pull through all 3 loops. This creates the main body fabric.
dc = double crochet. Yarn over, insert hook, yarn over and pull up a loop, (yarn over, pull through 2 loops) twice.
fpdc = front post double crochet. Yarn over, insert hook from front to back to front around the post (vertical bar) of the stitch in the row below, yarn over and pull up a loop, (yarn over, pull through 2 loops) twice. This creates a raised ridge on the front of your work.
bpdc = back post double crochet. Yarn over, insert hook from back to front to back around the post of the stitch in the row below, yarn over and pull up a loop, (yarn over, pull through 2 loops) twice. This creates a recessed line on the front of your work.
fptr = front post treble crochet. Yarn over twice, insert hook from front to back to front around the post of the indicated stitch, yarn over and pull up a loop, (yarn over, pull through 2 loops) three times.
hdc2tog = half double crochet two together (decrease). Yarn over, insert hook in next stitch, pull up a loop, yarn over, insert hook in following stitch, pull up a loop (5 loops on hook), yarn over and pull through all 5 loops.
RS = right side. The side that faces outward when worn.
WS = wrong side. The side that faces your body.
st(s) = stitch(es)
rem = remaining
rep = repeat
Special Cable Stitches
These cable crosses create the heart motif. They look complicated but follow a simple logic.
Right Cross Cable (RC): Skip the next fpdc post, work fptr around the second fpdc post, then work fptr around the first (skipped) fpdc post. This cable leans to the right.
Left Cross Cable (LC): Skip the next fpdc post, work fptr around the second fpdc post, then work fptr around the first (skipped) fpdc post, working in the opposite direction. This cable leans to the left.
The heart forms because the right cable column crosses outward to the right and the left cable column crosses outward to the left, creating the two humps at the top. Then both columns curve inward and meet at a point at the bottom.
Pattern Notes Before You Begin
Read through these notes. They will save you confusion later.
1. The top is worked in two flat panels, front and back, then seamed together at the shoulders and sides.
2. The front panel is taller than the back due to the sweetheart neckline shaping.
3. The cable heart motif appears only on the front panel.
4. Turning chains are worked as ch 1 throughout and do not count as a stitch.
5. Right side rows are odd numbered rows.
6. Stitch counts at the end of each row reflect actual stitches, not counting the turning chain.
7. Always work cable post stitches around the posts in the previous row.
Front Panel Instructions
Foundation and Body Setup
Foundation Chain: Chain 79.
Row 1 (RS): Starting in 2nd chain from hook, hdc across. Turn. (78 hdc)
Rows 2 through 10: Ch 1, hdc across. Turn after each row. (78 hdc each row)
Checkpoint: After Row 10, your panel should measure approximately 2 inches in height. Confirm your stitch count of 78 before continuing.
Cable Heart Motif Setup
The cable heart spans the center 22 stitches of your 78 stitch panel. This places the motif between stitch 29 and stitch 50, with 28 stitches on each side.
On cable rows, work the stitches outside the cable zone in regular hdc. Only the center 22 stitches change to include post stitches.
Row 11 (RS) Cable Setup Row:
Ch 1, hdc in next 28 sts.
Cable Panel (22 sts): hdc in 2, bpdc in 1, fpdc in 2, bpdc in 1, fpdc in 2, bpdc in 1, fpdc in 2, hdc in 2, fpdc in 2, bpdc in 1, fpdc in 2, bpdc in 1, hdc in 2.
Hdc in remaining 28 sts. Turn. (78 sts)
Row 12 (WS): Ch 1, hdc across all 78 sts. Turn. (78 hdc)
Heart Motif Rows 13 through 28
All wrong side rows (even rows 12, 14, 16, 18, 20, 22, 24, 26, 28): Work all 78 stitches in hdc across. Turn. (78 hdc)
For all right side cable rows, work 28 hdc before the cable zone and 28 hdc after. The cable zone instructions change as follows:
Row 13 Cable Zone: hdc 1, fpdc 1, RC-2 (right cross over 2 fpdc), bpdc 1, hdc 4, bpdc 1, LC-2 (left cross over 2 fpdc), fpdc 1, hdc 1, fpdc 2, bpdc 1, fpdc 2, hdc 2. (22 sts)
Row 15 Cable Zone: fpdc 1, RC-2, hdc 1, bpdc 1, hdc 6, bpdc 1, hdc 1, LC-2, fpdc 1, bpdc 1, fpdc 2, bpdc 1, hdc 1. (22 sts)
Row 17 Cable Zone: RC-3 (right cross over 3 fpdc), hdc 2, bpdc 1, hdc 6, bpdc 1, hdc 2, LC-3, fpdc 2, bpdc 1, fpdc 1. (22 sts)
Row 19 Cable Zone: hdc 1, RC-2, hdc 2, bpdc 1, hdc 4, bpdc 1, hdc 2, LC-2, hdc 1, RC-2, bpdc 1, fpdc 1. (22 sts)
Row 21 Cable Zone: hdc 2, RC-2, hdc 1, bpdc 1, hdc 2, bpdc 1, hdc 1, LC-2, hdc 2, LC-2, bpdc 1. (22 sts)
Row 23 Cable Zone: hdc 3, RC-2, bpdc 1, hdc 1, bpdc 1, hdc 1, bpdc 1, LC-2, hdc 1, LC-2, hdc 1. (22 sts)
Row 25 Cable Zone: hdc 4, RC-2, bpdc 1, hdc 2, bpdc 1, LC-2, hdc 2, LC-2. (22 sts)
Row 27 Cable Zone: hdc 5, RC-2, bpdc 2, LC-2, hdc 3, LC-2, hdc 1. (22 sts)
Row 28 (WS): Hdc across all 78. Turn. (78 hdc)
Checkpoint: After Row 28, your front panel should measure approximately 5.5 to 6 inches in height. The cable heart should be clearly visible with two lobes at the top and cables converging downward.
Continue Body
Rows 29 through 34: Ch 1, hdc across. Turn after each row. (78 hdc each row)
Checkpoint: After Row 34, the front panel should measure approximately 7 inches in height.
Front Panel Armhole Shaping
Row 35 (RS): Sl st across first 5 sts (binding off for armhole), ch 1, hdc across to last 5 sts, leave last 5 sts unworked. Turn. (68 hdc)
Row 36 (WS): Ch 1, hdc2tog, hdc across to last 2 sts, hdc2tog. Turn. (66 hdc)
Row 37 (RS): Ch 1, hdc2tog, hdc across to last 2 sts, hdc2tog. Turn. (64 hdc)
Row 38 (WS): Ch 1, hdc2tog, hdc across to last 2 sts, hdc2tog. Turn. (62 hdc)
Rows 39 and 40: Ch 1, hdc across. Turn. (62 hdc each row)
Rows 41 through 48: Ch 1, hdc across. Turn after each row. (62 hdc each row)
Checkpoint: After Row 48, the front panel should measure approximately 10 inches from the foundation edge.
Sweetheart Neckline Shaping
Mark the center 2 stitches (stitches 31 and 32 of the 62 stitch row). You will work each shoulder section separately.
Right Shoulder Section:
Row 49 (RS): Ch 1, hdc across first 28 sts, hdc2tog. Turn. (29 hdc)
Row 50 (WS): Ch 1, hdc2tog, hdc across. Turn. (28 hdc)
Row 51 (RS): Ch 1, hdc across to last 2 sts, hdc2tog. Turn. (27 hdc)
Row 52 (WS): Ch 1, hdc2tog, hdc across. Turn. (26 hdc)
Row 53 (RS): Ch 1, hdc across to last 2 sts, hdc2tog. Turn. (25 hdc)
Row 54 (WS): Ch 1, hdc across. Turn. (25 hdc)
Row 55 (RS): Ch 1, hdc across to last 2 sts, hdc2tog. Turn. (24 hdc)
Row 56 (WS): Ch 1, hdc across. Turn. (24 hdc)
Row 57 (RS): Ch 1, hdc across to last 2 sts, hdc2tog. Turn. (23 hdc)
Row 58 (WS): Ch 1, hdc across. Turn. (23 hdc)
Row 59 (RS): Sl st across first 4 sts (inner neckline bind off), ch 1, hdc across remaining 19 sts. Turn. (19 hdc)
Row 60 (WS): Ch 1, hdc across to last 2 sts, hdc2tog. Turn. (18 hdc)
Row 61 (RS): Sl st across first 2 sts, ch 1, hdc across remaining 16 sts. Turn. (16 hdc)
Row 62 (WS): Ch 1, hdc across to last 2 sts, hdc2tog. Turn. (15 hdc)
Rows 63 through 66: Ch 1, hdc across. Turn after each row. (15 hdc each row)
Fasten off right shoulder. 15 stitches remain for shoulder seam.
Left Shoulder Section:
Return to Row 48. Skip the center 2 stitches and rejoin yarn in the next stitch (stitch 33) with RS facing.
Row 49 (RS): Ch 1, hdc2tog, hdc across remaining 30 sts. Turn. (29 hdc)
Row 50 (WS): Ch 1, hdc across to last 2 sts, hdc2tog. Turn. (28 hdc)
Row 51 (RS): Ch 1, hdc2tog, hdc across. Turn. (27 hdc)
Row 52 (WS): Ch 1, hdc across to last 2 sts, hdc2tog. Turn. (26 hdc)
Row 53 (RS): Ch 1, hdc2tog, hdc across. Turn. (25 hdc)
Row 54 (WS): Ch 1, hdc across. Turn. (25 hdc)
Row 55 (RS): Ch 1, hdc2tog, hdc across. Turn. (24 hdc)
Row 56 (WS): Ch 1, hdc across. Turn. (24 hdc)
Row 57 (RS): Ch 1, hdc2tog, hdc across. Turn. (23 hdc)
Row 58 (WS): Ch 1, hdc across. Turn. (23 hdc)
Row 59 (RS): Ch 1, hdc across to last 4 sts, leave last 4 sts unworked. Turn. (19 hdc)
Row 60 (WS): Ch 1, hdc2tog, hdc across. Turn. (18 hdc)
Row 61 (RS): Ch 1, hdc across to last 2 sts, leave last 2 sts unworked. Turn. (16 hdc)
Row 62 (WS): Ch 1, hdc2tog, hdc across. Turn. (15 hdc)
Rows 63 through 66: Ch 1, hdc across. Turn after each row. (15 hdc each row)
Fasten off left shoulder. 15 stitches remain for shoulder seam.
Front Panel Complete: Total height at center front should be approximately 14 inches. Set aside.
Back Panel Instructions
Foundation Chain: Chain 79.
Rows 1 through 34: Work exactly as Front Panel Rows 1 through 34 in hdc throughout. No cable motif on the back. (78 hdc each row)
Back Panel Armhole Shaping
Row 35 (RS): Sl st across first 5 sts, ch 1, hdc across to last 5 sts, leave last 5 sts unworked. Turn. (68 hdc)
Row 36 (WS): Ch 1, hdc2tog, hdc across to last 2 sts, hdc2tog. Turn. (66 hdc)
Row 37 (RS): Ch 1, hdc2tog, hdc across to last 2 sts, hdc2tog. Turn. (64 hdc)
Row 38 (WS): Ch 1, hdc2tog, hdc across to last 2 sts, hdc2tog. Turn. (62 hdc)
Rows 39 and 40: Ch 1, hdc across. Turn. (62 hdc each row)
Rows 41 through 56: Ch 1, hdc across. Turn after each row. (62 hdc each row)
Back Neckline Shaping
The back has a square neckline spanning the center 24 stitches, leaving 19 stitches for each shoulder.
Right Shoulder Back:
Row 57 (RS): Ch 1, hdc across first 19 sts. Turn. (19 hdc)
Row 58 (WS): Ch 1, hdc across. Turn. (19 hdc)
Row 59 (RS): Ch 1, hdc2tog, hdc across. Turn. (18 hdc)
Row 60 (WS): Ch 1, hdc across to last 2 sts, hdc2tog. Turn. (17 hdc)
Row 61 (RS): Ch 1, hdc2tog, hdc across. Turn. (16 hdc)
Row 62 (WS): Ch 1, hdc across to last 2 sts, hdc2tog. Turn. (15 hdc)
Rows 63 and 64: Ch 1, hdc across. Turn. (15 hdc each row)
Fasten off. 15 stitches for shoulder seam.
Left Shoulder Back:
Return to Row 56. Skip center 24 stitches and rejoin yarn in stitch 44 with RS facing.
Row 57 (RS): Ch 1, hdc across remaining 19 sts. Turn. (19 hdc)
Row 58 (WS): Ch 1, hdc across. Turn. (19 hdc)
Row 59 (RS): Ch 1, hdc across to last 2 sts, hdc2tog. Turn. (18 hdc)
Row 60 (WS): Ch 1, hdc2tog, hdc across. Turn. (17 hdc)
Row 61 (RS): Ch 1, hdc across to last 2 sts, hdc2tog. Turn. (16 hdc)
Row 62 (WS): Ch 1, hdc2tog, hdc across. Turn. (15 hdc)
Rows 63 and 64: Ch 1, hdc across. Turn. (15 hdc each row)
Fasten off. 15 stitches for shoulder seam.
Back Panel Complete: Total height should be approximately 13 inches.
Assembly and Finishing
Joining the Panels
Align front and back panels with wrong sides together so right sides face outward. Using your yarn needle and matching yarn, join the shoulder seams using mattress stitch or whip stitch through the 15 shoulder stitches on each side. Seam both shoulders.
Then, with right sides together, seam the side seams from hem to armhole using mattress stitch. Leave armhole openings unsewn.
Try on the top at this point to confirm fit before adding edging.
Armhole Edging
With RS facing, join yarn at underarm seam. Work 1 round of sc evenly around the armhole opening. Work approximately 1 sc per stitch across the bound off stitches and 1 sc for every 1 to 2 rows along the curved edge. Adjust spacing to keep the edge flat. Join with sl st to first sc. Fasten off.
For a more structured cap sleeve look, work a second round of alternating fpdc and bpdc around the first round for a 1×1 rib effect. Join with sl st and fasten off.
Repeat for the second armhole.
Neckline Edging
With RS facing, join yarn at left shoulder seam. Work 1 round of sc evenly around the entire neckline. At the center bottom point of the sweetheart V, work 3 sc into the center stitch to allow the curve to lie flat. Mark this center point. Join with sl st to first sc.
Round 2: Ch 1, sc around, working sc2tog at the inner corners of the back square neckline and 3 sc at the sweetheart center point. Join with sl st. Fasten off.
Ribbed Hem Band
Work the ribbing as a separate rectangle and attach it to the lower edge of the body.
Foundation Chain: Chain 15.
Work rows of alternating fpdc and bpdc (around dc posts from the previous row) to create a 1×1 rib. Continue until the ribbing measures the same length as the total hem circumference of your joined body panels.
Attach the ribbing to the lower edge using whip stitch or mattress stitch, stretching slightly as needed for a snug fit.
Weave in all ends and block your finished top to measurements.
Tips for Success
Take your time with the cables. Use stitch markers to mark the 22 stitch cable zone on every cable row. This prevents miscounting and keeps your heart centered.
Block aggressively. Cotton has minimal memory, so blocking helps even out your stitches and allows the cables to really pop.
Try it on during construction. After seaming the shoulders and sides, try on your top before adding the edging. You can adjust the fit by taking in or letting out the side seams slightly.
Do not skip gauge. I know it is tempting to dive right in, but for a fitted garment, gauge makes or breaks the project.
Wrapping Up Your Cable Heart Crop Top
You did it. This blush pink cable heart crop top crochet pattern creates a stunning finished piece that looks far more complicated than it actually is. The dimensional cable heart, the flattering sweetheart neckline, and the fitted silhouette combine into something truly special.
Thank you so much for choosing this pattern for your next project. I hope you love making it as much as I loved designing it.
If you make this top, I would absolutely love to see it. Tag me on Instagram or share a photo in my Facebook group. Seeing your finished projects genuinely makes my day.
Save this pattern to your Pinterest boards so you can find it when you are ready to start. And please drop a comment below if you have any questions or want to share your progress. Happy hooking!
You Might Also Like
- Dusty Rose Bloom Capelet Free Crochet Pattern
- Dusty Rose Heart Cutout Crochet Top Free Pattern
- Rose Gold Monarch Crochet Mini Dress Free Pattern
- Galaxy Purple Chameleon Amigurumi Free Crochet Pattern