
Looking for a handmade baby gift that feels truly special? This sunflower granny square baby blanket combines cheerful golden blooms with soft lavender borders, creating an heirloom-quality piece that any new parent would treasure.
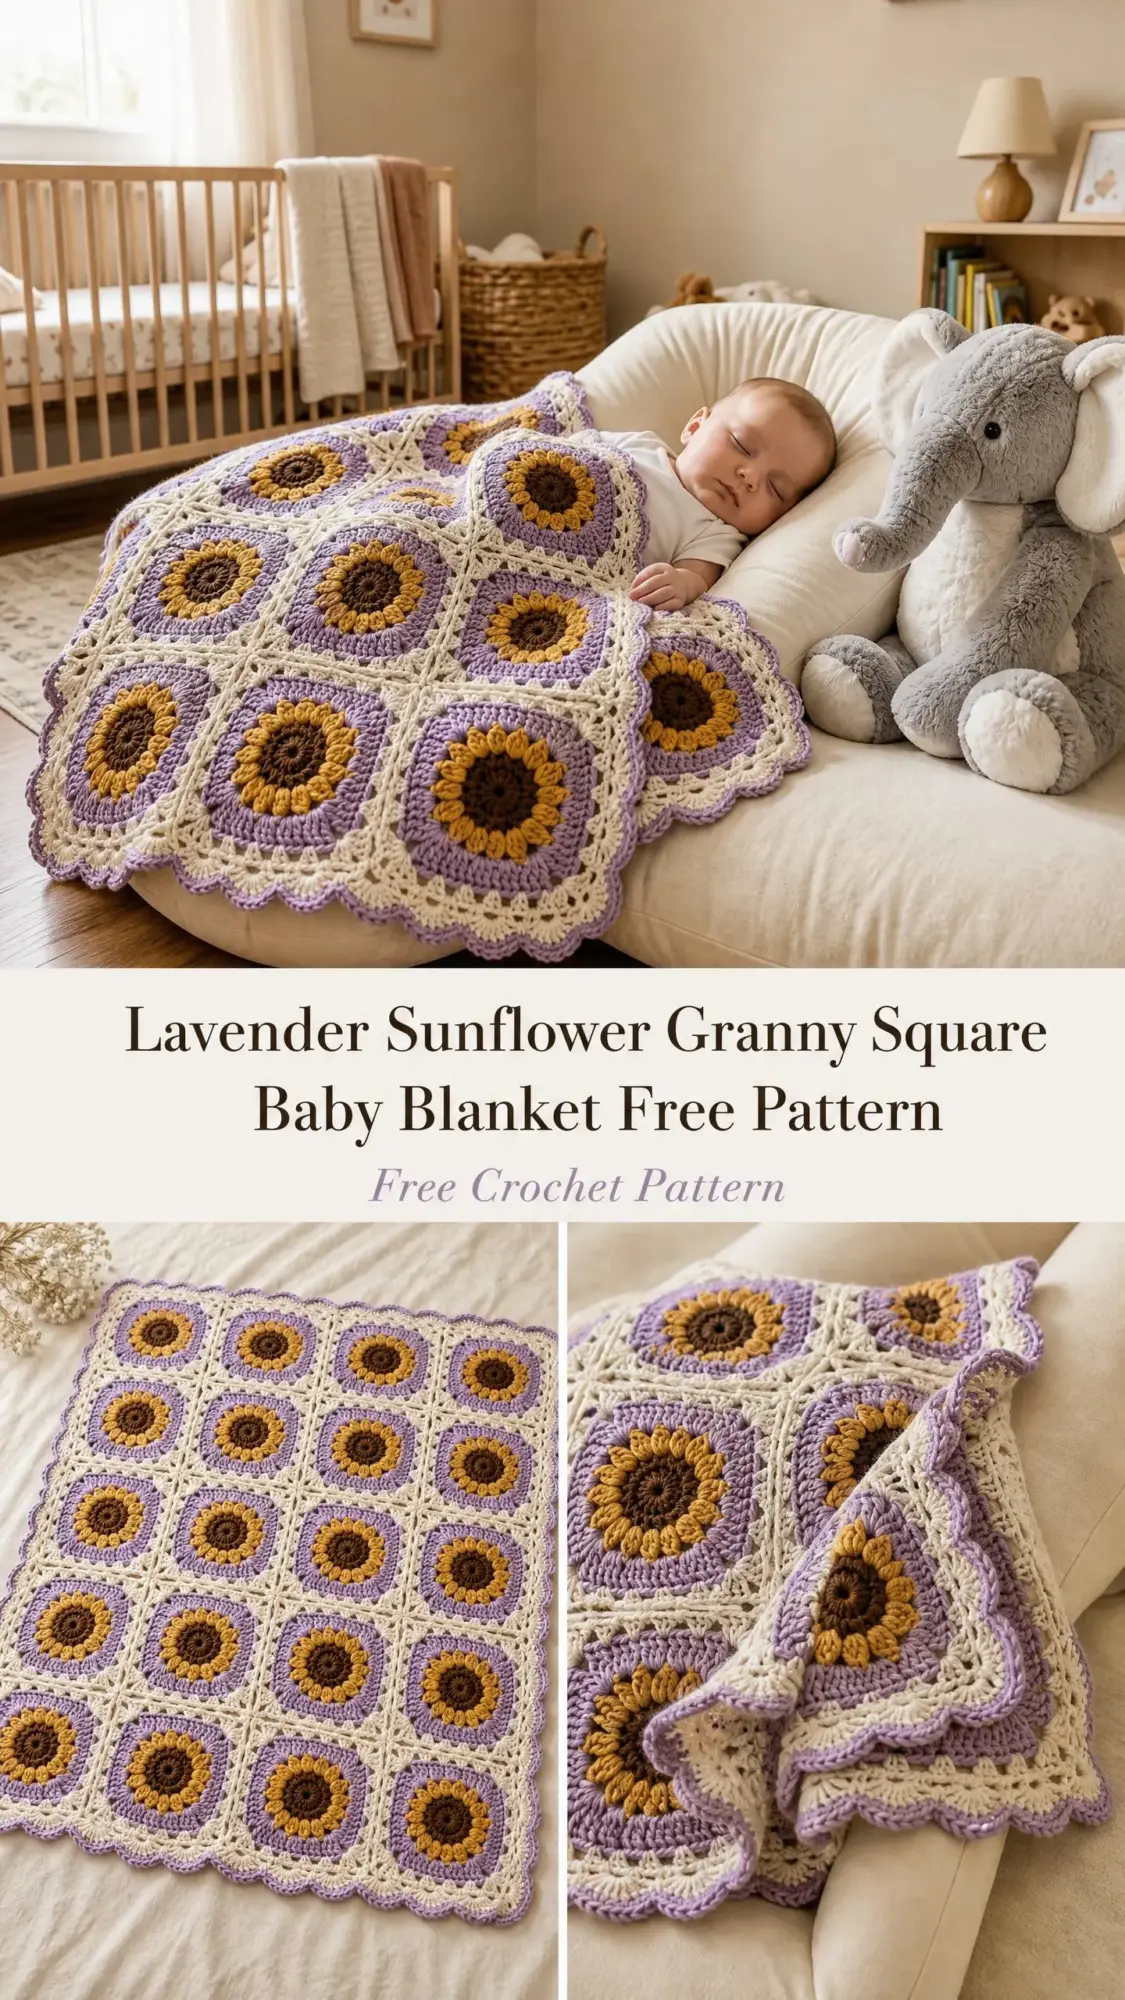
The construction uses basic stitches worked in rounds, making it approachable if you’ve completed a few granny square projects before. Each sunflower square works up in about 45 to 75 minutes, and the entire blanket takes roughly 20 to 30 hours from start to finish.
Whether you’re preparing for a baby shower, building your gift stash, or crocheting for a little one of your own, this pattern delivers a substantial 32-inch square receiving blanket perfect for strollers, car seats, or tummy time on the floor.
Why This Sunflower Granny Square Pattern Works So Well
I love how this design balances visual impact with manageable construction. You’re not committing to one giant project that takes months. Instead, you’re making 16 individual squares that join together at the end.
This approach has real advantages. You can work on squares during short pockets of time. You can catch mistakes early before they compound. And honestly, watching your stack of finished sunflowers grow feels incredibly satisfying.
The dimensional petals give each square real texture and personality. These aren’t flat, printed-looking flowers. They pop off the surface with a raised cluster stitch that catches the light beautifully.
Materials You’ll Need
Yarn: Worsted weight, Category 4. Choose a smooth yarn that shows stitch definition clearly. Cotton-acrylic blends or pure acrylic work wonderfully here.
Color A (Dark Brown): approximately 110 yards (101 m)
Color B (Golden Yellow): approximately 220 yards (201 m)
Color C (Lavender/Light Purple): approximately 300 yards (275 m)
Color D (Cream/Off-White): approximately 350 yards (320 m)
Total yardage: approximately 980 yards (897 m)
Hook: US Size J-10 / 6.0 mm crochet hook
Notions:
Yarn Suggestions That Work Beautifully
Lion Brand Pound of Love (100% acrylic, worsted weight, 1020 yards per skein) is soft enough for baby items, machine washable, and widely available in all four colors. Its smooth surface shows the sunflower detail clearly.
Paintbox Yarns Simply DK held double works as a budget-friendly alternative. It’s 100% acrylic, color-consistent, and produces a soft fabric suitable for babies.
Cascade 220 Superwash (100% superwash wool, worsted weight, 220 yards per skein) gives superior stitch definition and beautiful drape after blocking. It costs more but the results are stunning.
Avoid highly textured or fuzzy yarns. The sunflower petal detail will get lost. For baby items, always choose yarns labeled machine washable.
Gauge (Please Check This!)
Each completed and blocked square should measure 7 inches by 7 inches (18 cm by 18 cm).
In double crochet fabric: 14 dc and 8 rows = 4 inches (10 cm) with US J-10 / 6.0 mm hook.
Gauge matters here. If your squares run consistently too small or too large, your finished blanket will end up significantly different from the stated 32-inch dimensions. Go up a hook size if your squares are too small, down a hook size if they’re too large.
Finished Size
Before blocking: approximately 30 inches by 30 inches (76 cm by 76 cm)
After blocking: approximately 32 inches by 32 inches (81 cm by 81 cm)
Each individual square: approximately 7 inches by 7 inches (18 cm by 18 cm) blocked
Skill Level
This crochet pattern falls at the intermediate level. You’ll need comfort with working in the round, changing colors, and joining motifs together. The sunflower petal round uses a specific cluster technique that adds texture and requires attention to placement.
If you’re a confident beginner who has successfully completed granny square projects before, you can absolutely handle this. Take it one round at a time.
Abbreviations (US Terms)
Let me walk you through each abbreviation you’ll encounter:
ch: chain, the foundation loops that start most crochet
sl st: slip stitch, a flat stitch used for joining
sc: single crochet, a short basic stitch
hdc: half double crochet, slightly taller than sc
dc: double crochet, a tall stitch with one yarn over
tr: treble crochet, even taller with two yarn overs
st/sts: stitch/stitches
sp: space
ch-sp: chain space, the gap created by chain stitches
sk: skip
rep: repeat
pm: place marker
beg: beginning
yo: yarn over, wrapping yarn around your hook
rnd: round
RS: right side
Special Stitches Explained
Sunflower Petal (Petal)
This stitch creates one raised petal of the sunflower. It’s worked into the chain-1 spaces of the previous round, not into the top of stitches.
Step 1: Insert hook into designated ch-1 sp.
Step 2: Yo and pull up a loop (2 loops on hook).
Step 3: Yo and draw through both loops (this is a sc to anchor).
Step 4: Working into the same ch-1 sp, yo, insert hook, yo and pull up a loop, yo and draw through 2 loops (first leg of dc), yo and pull up a loop again into the same sp, yo and draw through 2 loops (second leg of dc), yo and draw through all 3 loops on hook.
Step 5: Chain 1 to close the petal.
In simpler terms: work 1 sc followed by a 2-dc cluster into the same ch-1 sp, then ch 1. This creates a plump, raised petal shape.
Shell Stitch (Shell)
Work 5 dc into the same stitch or space. This creates the scalloped border edge.
Sunflower Granny Square Instructions (Make 16)
Use Color A (Dark Brown) for Round 1.
Use Color B (Golden Yellow) for Rounds 2 and 3.
Use Color C (Lavender) for Round 4.
Use Color D (Cream) for Round 5.
Round 1: Center
With Color A, make a magic ring (or ch 4, join with sl st to form a ring).
Ch 3 (counts as first dc). Work 11 dc into the ring. Join with sl st to top of beginning ch-3. Pull magic ring tight.
(12 dc)
Checkpoint: You have a small, tight circle of 12 double crochet stitches. This is your sunflower center.
Fasten off Color A.
Round 2: Inner Petal Ring
Join Color B with sl st to any dc of Round 1.
Ch 1 (does not count as st). Work 1 sc into the same st. Ch 1. Work 1 sc into next dc, ch 1. Rep around, working 1 sc and ch 1 into each of the 12 dc of Round 1.
Join with sl st to first sc.
(12 sc, 12 ch-1 sps)
Checkpoint: You have a ring of 12 sc with ch-1 spaces between them, still in golden yellow.
Do not fasten off Color B.
Round 3: Petal Round
Sl st into first ch-1 sp. Ch 1 (does not count as st).
Work one Petal (see Special Stitches) into each ch-1 sp around. (12 Petals total.)
To work each Petal: In the ch-1 sp, work 1 sc, then work a 2-dc cluster into the same sp, then ch 1.
After completing all 12 Petals, join with sl st to first sc of first Petal.
(12 Petals: each consisting of 1 sc + 1 2-dc cluster + 1 ch)
Checkpoint: You have a full sunflower face with 12 raised golden petals around a brown center. The piece should look like a circular sunflower at this stage.
Fasten off Color B.
Round 4: Lavender Square Frame
This round transforms your circle into a square with four corner ch-2 spaces.
Join Color C with sl st to the ch-1 sp at the top of any Petal. This will become a corner petal. You will designate every 3rd petal as a corner petal, working 4 corners total from the 12 petals (3 petals per side, with 1 corner petal at each turn).
Setup: Identify 4 corner positions by spacing the 12 petals into 4 groups of 3. The first, fourth, seventh, and tenth petals (counting from your join) will be corner petals.
Begin at corner petal ch-1 sp:
Ch 3 (counts as first dc). Work 2 dc into same ch-1 sp. Ch 2 (corner). Work 3 dc into same ch-1 sp. (First corner complete.)
[Work 1 dc into next petal ch-1 sp. Work 1 dc into following petal ch-1 sp. Work 3 dc into next ch-1 sp, ch 2, work 3 dc into same sp (corner)] 3 times.
Work 1 dc into next petal ch-1 sp. Work 1 dc into next petal ch-1 sp.
Join with sl st to top of beginning ch-3.
(32 dc, 4 ch-2 corner spaces)
Checkpoint: Your sunflower now has a defined lavender square shape with four rounded corners. The piece should be flat. If it’s cupping, your tension is too tight. If it’s ruffling, your tension is too loose.
Fasten off Color C.
Round 5: Cream Outer Frame
Join Color D with sl st to any corner ch-2 sp.
Ch 3 (counts as first dc). Work 2 dc into same corner ch-2 sp. Ch 2. Work 3 dc into same sp.
[Work 1 dc into each dc across side (work into each of the 8 dc along the side, treating corner groups and side dc all as individual sts). At next corner ch-2 sp: work 3 dc, ch 2, 3 dc] 3 times.
Work 1 dc into each remaining dc across final side. Join with sl st to top of beginning ch-3.
(56 dc, 4 ch-2 corner spaces)
Checkpoint: Your completed square should measure approximately 6.5 to 7 inches before blocking. Make all 16 squares before joining.
Joining Your Sunflower Squares
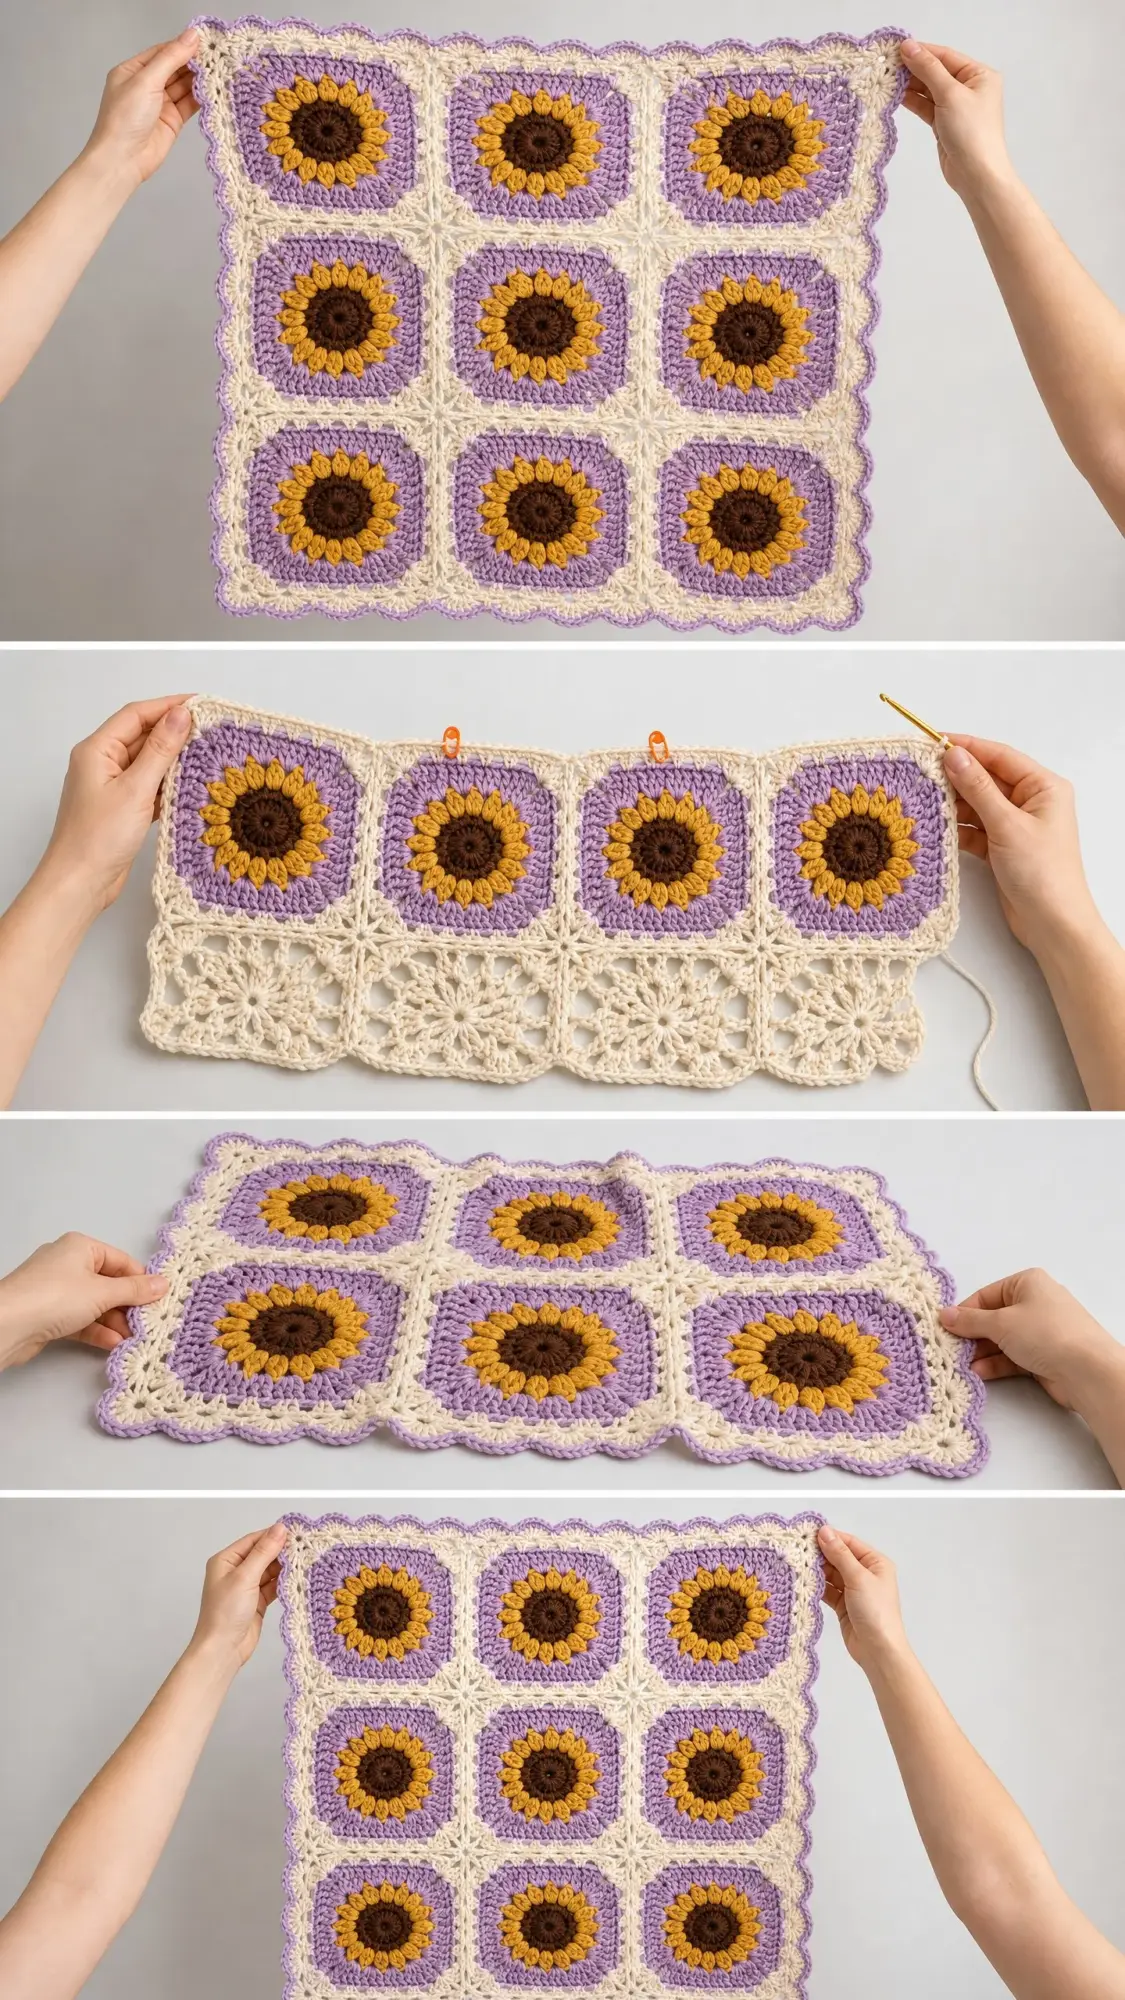
After completing all 16 squares, lay them out in a 4 by 4 grid on a flat surface. Arrange so all sunflowers face the same direction (right side up). This is your opportunity to confirm the layout before committing.
Flat Slip Stitch Join Method
Hold two squares with wrong sides together and right sides facing outward. Working through both layers simultaneously, join Color D with sl st to the corner ch-2 sp at the start of one edge.
Ch 1. Working through both layers, sl st into each dc along the shared edge, placing sl st through the back loop only of both corresponding stitches at once. At the corner ch-2 sp of both squares, work 1 sl st through both ch-2 sps together.
Fasten off and weave in end.
Join all squares in rows first (making 3 horizontal seam lines), then join the 4 rows together with 3 vertical seam lines. Total seams = 12.
At intersections where 4 squares meet, the seams will naturally cross. Work through all layers at the intersection with a single sl st.
Checkpoint: After all joins, your blanket should measure approximately 28 inches by 28 inches before the border.
Border Instructions
The border is worked in 2 rounds around the entire joined blanket.
Border Round 1: Lavender Foundation Round
Join Color C with sl st to any corner ch-2 sp of the blanket.
Ch 3 (counts as first dc). Work 2 dc into same corner sp. Ch 2. Work 3 dc into same sp.
Work along each side as follows:
(284 dc, 4 ch-2 corner spaces)
Fasten off Color C.
Border Round 2: Cream Scalloped Edge
Join Color D with sl st to any corner ch-2 sp.
Ch 1. Work 3 sc into corner ch-2 sp.
Across each side, work the scallop pattern as follows:
[Skip 2 dc, work 5 dc (Shell) into next dc, skip 2 dc, work 1 sc into next dc] rep across each side, ending at corner.
At each corner: work 3 sc into corner ch-2 sp, then continue scallop pattern along next side.
After completing all 4 sides with scalloped edging and 3 sc at each corner, join with sl st to first sc.
Fasten off Color D. Weave in all ends securely.
Checkpoint: The finished border should show a continuous row of shell-shaped scallops all around the blanket in cream, resting on the lavender foundation round.
Customizing the Size
Smaller lovey or car seat blanket: Make a 3 by 3 grid of 9 squares. Finished size will be approximately 22 inches by 22 inches.
Larger lap blanket: Make a 5 by 5 grid of 25 squares. Finished size will be approximately 37 inches by 37 inches.
Crib blanket: Make a 4 by 6 grid of 24 squares. Finished size will be approximately 30 inches by 44 inches. Add approximately 60 yards of each color per additional square.
Finishing and Blocking Your Blanket
Weave in all yarn ends on the wrong side using a yarn needle, working through several stitches in different directions to secure. Trim ends close.
Wet blocking is strongly recommended. It evens out stitch tension, opens up the lacy chain spaces, and produces crisp, professional-looking squares.
To wet block:
1. Fill a basin with cool water. Submerge the blanket fully and gently press to saturate. Do not wring.
2. Lift the blanket and gently press against the side of the basin to remove excess water. Roll in a clean dry towel and press.
3. Lay blocking mats on a flat surface. Place the blanket right side up.
4. Gently stretch each square to 7 inches by 7 inches. Use rust-proof pins at corners and midpoints.
5. Allow to dry completely before removing pins. This may take 12 to 24 hours.
Care Instructions
For machine washable yarn: wash on gentle cycle in cool water. Lay flat to dry. Do not tumble dry.
Store folded loosely away from direct sunlight to prevent color fading, especially in the lavender sections.
I hope you love making this sunflower baby blanket as much as I enjoyed designing it. If you found this crochet tutorial helpful, please pin it to your Pinterest boards so you can find it when you’re ready to start. And I’d absolutely love to see your finished blankets, so drop a comment below or tag me on social media when you complete yours!
You Might Also Like
- Boho Rainbow Granny Square Tote Free Crochet Pattern
- Lavender Dream Ankle Socks Free Crochet Pattern
- Mustard Yellow Duck Toilet Paper Cozy Free Crochet Pattern
- Charcoal Gray Modern Crochet Backpack Free Pattern