
Looking for a handmade gift that feels special without taking weeks to complete? These delicate butterfly lace earrings work up in just a couple of hours and make a stunning statement piece for weddings, birthdays, or everyday wear.
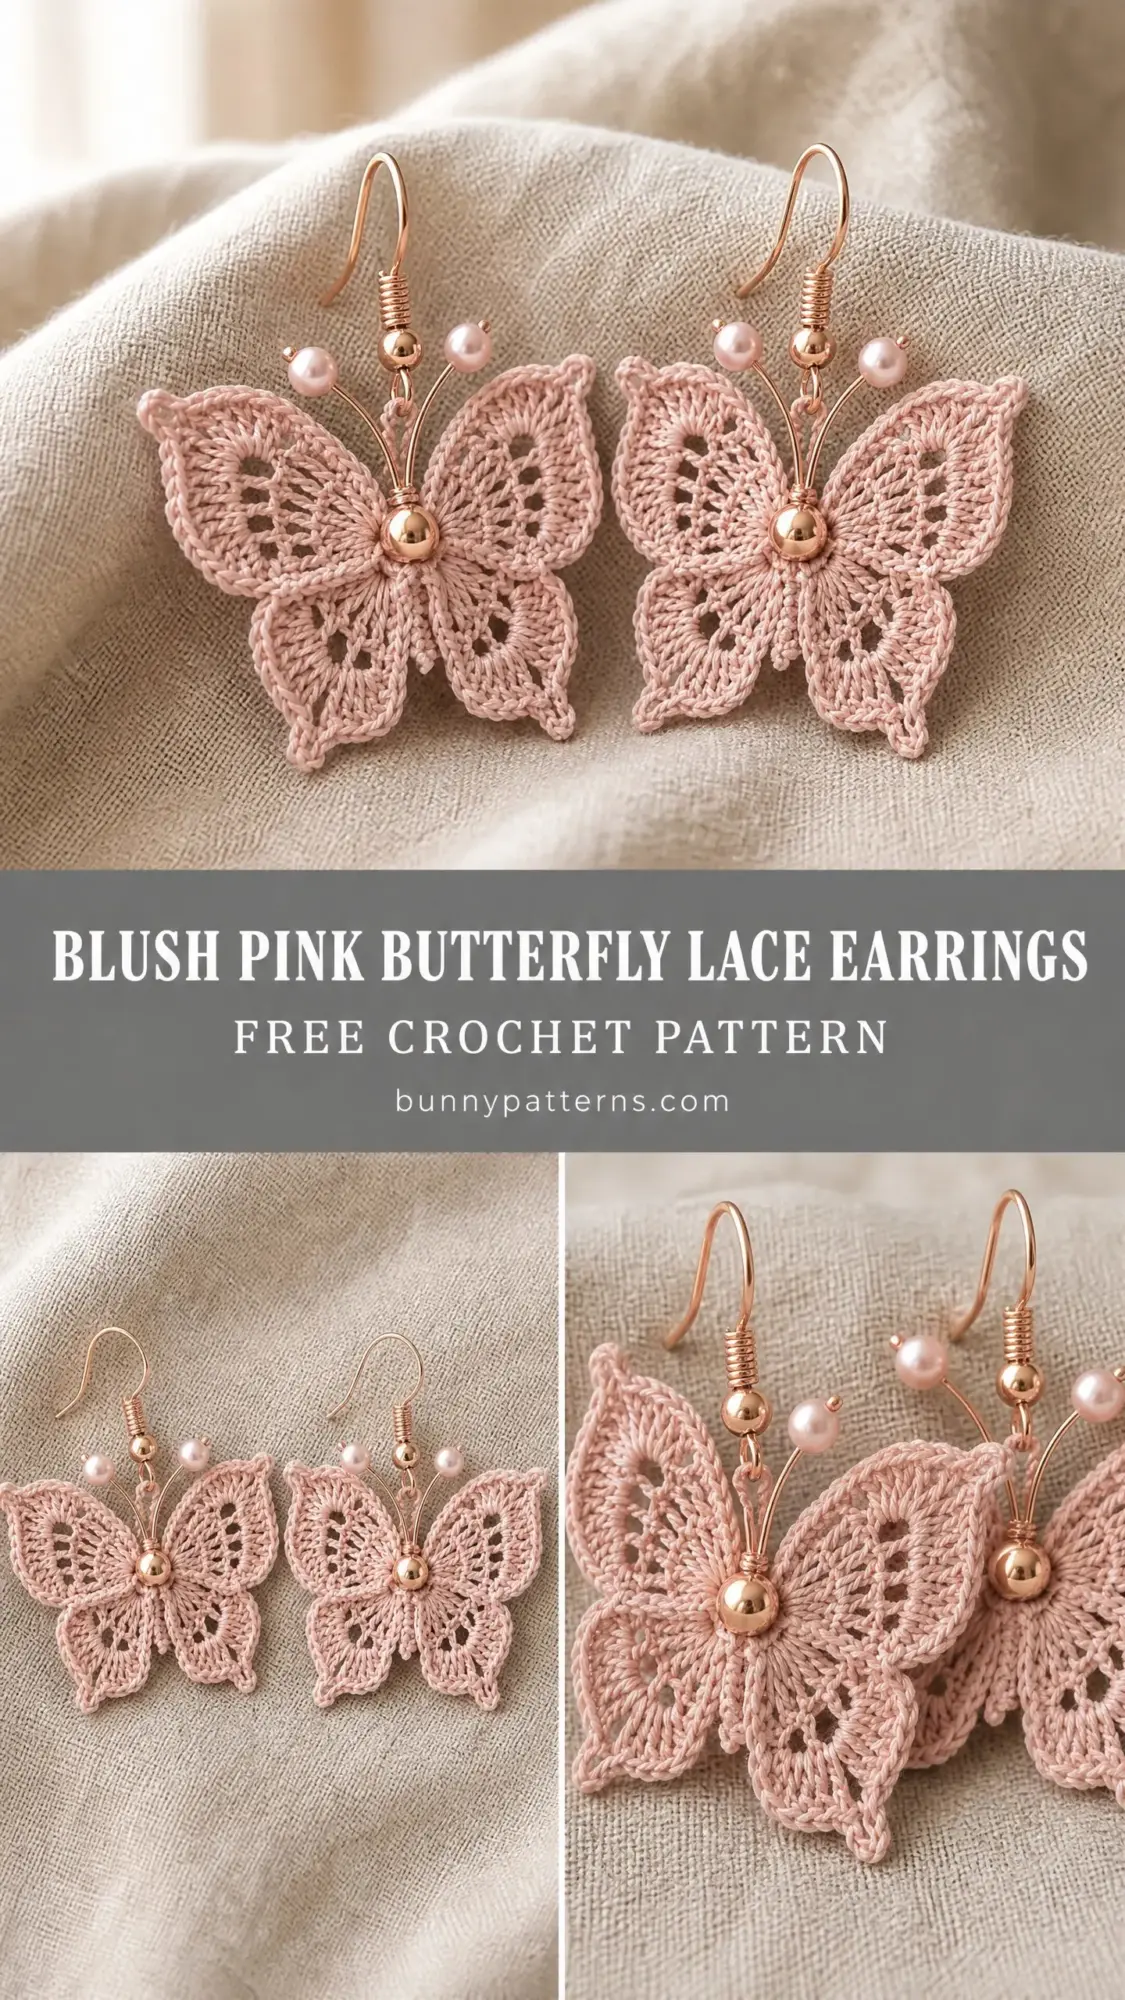
The construction uses basic stitches like single crochet, double crochet, and simple shell clusters. If you have worked any lace doily or small motif before, you can absolutely make these. Even if thread crochet is new to you, the small scale means you will see progress quickly and can start over without losing much time if needed.
The finished earrings measure approximately 2.75 inches from the top of the ear wire to the bottom wing tip. They are lightweight, surprisingly durable when blocked properly, and make an excellent charity auction item or bridesmaid gift.
Why You Will Love This Butterfly Earrings Crochet Pattern
Thread crochet intimidates a lot of people, but these butterfly motifs are genuinely manageable. Each wing section builds logically from a simple foundation chain. You work the upper wings first, then flip the piece and work the smaller lower wings from the back bump of that same foundation. No complicated joins, no confusing circular construction.
The romantic blush pink colorway paired with rose gold hardware gives these earrings a soft, vintage-inspired look. But you could easily swap the thread color for white, cream, or even a bold jewel tone to match a specific outfit or preference.
One pair requires only about 30 yards of size 10 crochet thread. That means you can make several pairs from a single ball, making this pattern perfect for craft fair inventory or gift-making sessions.
Materials You Will Need
Gather these supplies before you begin:
Thread: Size 10 crochet cotton thread in blush pink, approximately 30 yards for the pair. Recommended brands include Lizbeth Size 10 in Dusty Rose, DMC Traditions Size 10 shade 3354, or Aunt Lydia’s Classic Size 10 in Soft Mauve.
Hook: Steel crochet hook size 7 (1.65 mm)
Hardware and Embellishments:
Important substitution note: Any size 10 mercerized cotton thread will work beautifully. Avoid fuzzy or blended threads because the delicate lace openwork will lose definition. Do not substitute size 3 or size 5 thread, as the motif will become too large to read as jewelry.
Gauge
Using a size 7 (1.65 mm) steel hook and size 10 crochet cotton thread:
10 double crochets and 5 rows = 1 inch (2.5 cm)
One completed butterfly motif = 1.75 inches wide by 1.25 inches tall
Gauge matters for jewelry. If your motif comes out larger than stated, try a size 8 steel hook (1.50 mm). If smaller, move up to a size 6 steel hook (1.80 mm).
Finished Size
Each butterfly motif: approximately 1.75 inches wide by 1.25 inches tall
Full earring from top of ear wire to bottom of lower wing: approximately 2.75 inches
Skill Level
Intermediate. You should be comfortable working with fine thread at small scale, working into chain spaces, and maintaining even tension. No colorwork is involved, but clean, consistent stitches are essential because every stitch shows at this size.
Abbreviations
ch = chain: Yarn over, pull through loop on hook
sl st = slip stitch: Insert hook, yarn over, pull through stitch and loop on hook in one motion
sc = single crochet: Insert hook, yarn over, pull up a loop (2 loops on hook), yarn over, pull through both loops
hdc = half double crochet: Yarn over, insert hook, yarn over, pull up a loop (3 loops on hook), yarn over, pull through all 3 loops
dc = double crochet: Yarn over, insert hook, yarn over, pull up a loop (3 loops on hook), yarn over, pull through 2 loops, yarn over, pull through remaining 2 loops
tr = treble crochet: Yarn over twice, insert hook, yarn over, pull up a loop, (yarn over, pull through 2 loops) three times
sp = space
ch-sp = chain space
sk = skip
st(s) = stitch(es)
rep = repeat
yo = yarn over
Special Stitches
Shell Stitch: Work 5 dc all into the same stitch or chain space. This creates one shell unit and forms the rounded upper wing sections.
Picot: Chain 3, then slip stitch into the first chain made. This creates a small decorative loop at the wing edge.
Joining Picot: Chain 1, insert hook into corresponding picot or chain space of adjacent section, yarn over, pull through, chain 1, then continue pattern.
V-Stitch: Work 1 dc, ch 2, 1 dc all into the same stitch or chain space.
Pattern Notes Before You Begin
The butterfly is made of four wing sections: upper left, upper right, lower left, and lower right. The two upper wings are worked first as a continuous unit across a foundation chain, then the lower wings are worked downward from the same foundation.
All four wing sections are worked flat, not in the round. The finished motif is a single layer with a front and back that look nearly identical.
Leave a 6-inch tail when starting and ending for weaving in and securing the wire assembly.
When working into the foundation chain, work into the back bump for a cleaner, more symmetrical look on both faces of the motif.
Blocking is essential. The wet blocking step defines the wing shape and gives the finished piece its crisp, professional appearance.
These instructions are for one butterfly motif. Make two identical motifs for the pair.
Crochet Pattern Instructions
Foundation
Make a slip knot and leave a 6-inch tail.
Ch 7.
This 7-chain foundation forms the body spine. The upper wings grow from the top side and the lower wings grow from the underside.
Upper Right Wing
You will work into chains 1 through 4 of the 7-chain foundation, leaving chains 5, 6, and 7 for the upper left wing.
Row 1 (right side): Starting in the 2nd ch from hook, work 1 sc into that ch, 1 sc into the next ch, 1 hdc into the next ch, 1 dc into the next ch. Turn. (4 sts)
Row 2: Ch 3 (counts as first dc here and throughout upper wing), work 1 dc into the first dc, ch 1, sk 1 hdc, work Shell (5 dc) into the next sc, ch 1, work 2 dc into the last sc. Turn. (9 dc, 2 ch-1 sp)
Row 3: Ch 4 (counts as dc + ch 1), sk first 2 dc, sc into ch-1 sp, ch 3, sc into center dc of shell, ch 3, sc into next ch-1 sp, ch 1, sk next dc, dc into top of turning ch. Turn. (2 dc, 2 sc, 2 ch-3 sp, 2 ch-1 sp)
Row 4: Ch 1, sc into first dc, 3 sc into ch-1 sp, sc into next sc, work Shell (5 dc) into ch-3 sp, sc into next sc, work Shell (5 dc) into next ch-3 sp, sc into next sc, 3 sc into ch-1 sp, sc into 3rd ch of ch-4. Turn. (21 sts)
Row 5 (edging row): Ch 1, sc into first sc, Picot, sc into same sc, sk 1 sc, sc into next sc, Picot, sc into same sc, sk 1 sc, sc into first dc of shell, Picot, sc into same dc, sc into next 3 dc of shell, Picot, sc into last dc of shell, sk 1 sc, sc into first dc of second shell, Picot, sc into same dc, sc into next 3 dc, Picot, sc into last dc of second shell, sk 1 sc, sc into next sc, Picot, sc into same sc, sk 1 sc, sc into last sc, Picot, sc into same sc. Do not turn. Fasten off. (22 sc, 8 picots)
The upper right wing should now form a gently rounded fan shape approximately 0.75 inch wide at its widest point.
Upper Left Wing
Rejoin thread with a slip stitch into the opposite end of the foundation chain (chain 7).
Row 1L: Ch 1, work 1 sc into the joining chain, 1 sc into next ch, 1 hdc into next ch, 1 dc into the 4th ch. Turn. (4 sts)
Rows 2L through 5L: Work exactly as Rows 2 through 5 of the Upper Right Wing. All stitch counts are identical.
Both upper wings are now complete. The two upper wings should form a symmetrical butterfly upper wing pair, approximately 1.75 inches across at widest.
Lower Right Wing
The lower wings are smaller than the upper wings. Turn the upper wing assembly so the foundation chain spine faces you as a horizontal base.
Join thread with a slip stitch into the back bump of the 4th ch of the foundation.
Row A: Ch 1, sc into same ch, sc into next ch, hdc into next ch, dc into last remaining ch. Turn. (4 sts)
Row B: Ch 2 (counts as hdc), hdc into first dc, ch 1, work 3 dc into next hdc, ch 1, work 2 dc into last sc. Turn. (7 sts, 2 ch-1 sp)
Row C: Ch 3 (counts as dc), dc into first hdc, ch 1, sc into ch-1 sp, ch 2, sc into center dc of 3-dc group, ch 2, sc into next ch-1 sp, ch 1, 2 dc into top of ch-2 turning ch. Turn. (4 dc, 3 sc, 2 ch-2 sp, 2 ch-1 sp)
Row D (edging): Ch 1, sc into first dc, Picot, sc into same dc, sc into next dc, 3 sc into ch-1 sp, sc into next sc, 2 sc into ch-2 sp, Picot, sc into same last sc, sc into center sc, Picot, sc into same sc, 2 sc into next ch-2 sp, sc into next sc, 3 sc into ch-1 sp, sc into next dc, sc into turning ch top, Picot, sc into same st. Fasten off. (16 sc, 4 picots)
The lower right wing should be noticeably smaller than the upper right wing, approximately 0.6 inch wide.
Lower Left Wing
Join thread with a slip stitch into the back bump of the 4th ch of the foundation, working back in the opposite direction.
Rows A through D: Work exactly as Lower Right Wing Rows A through D, mirroring direction. All stitch counts are identical.
All four wings are now complete. The full motif should measure approximately 1.75 inches wide by 1.25 inches tall.
Body Center Reinforcement
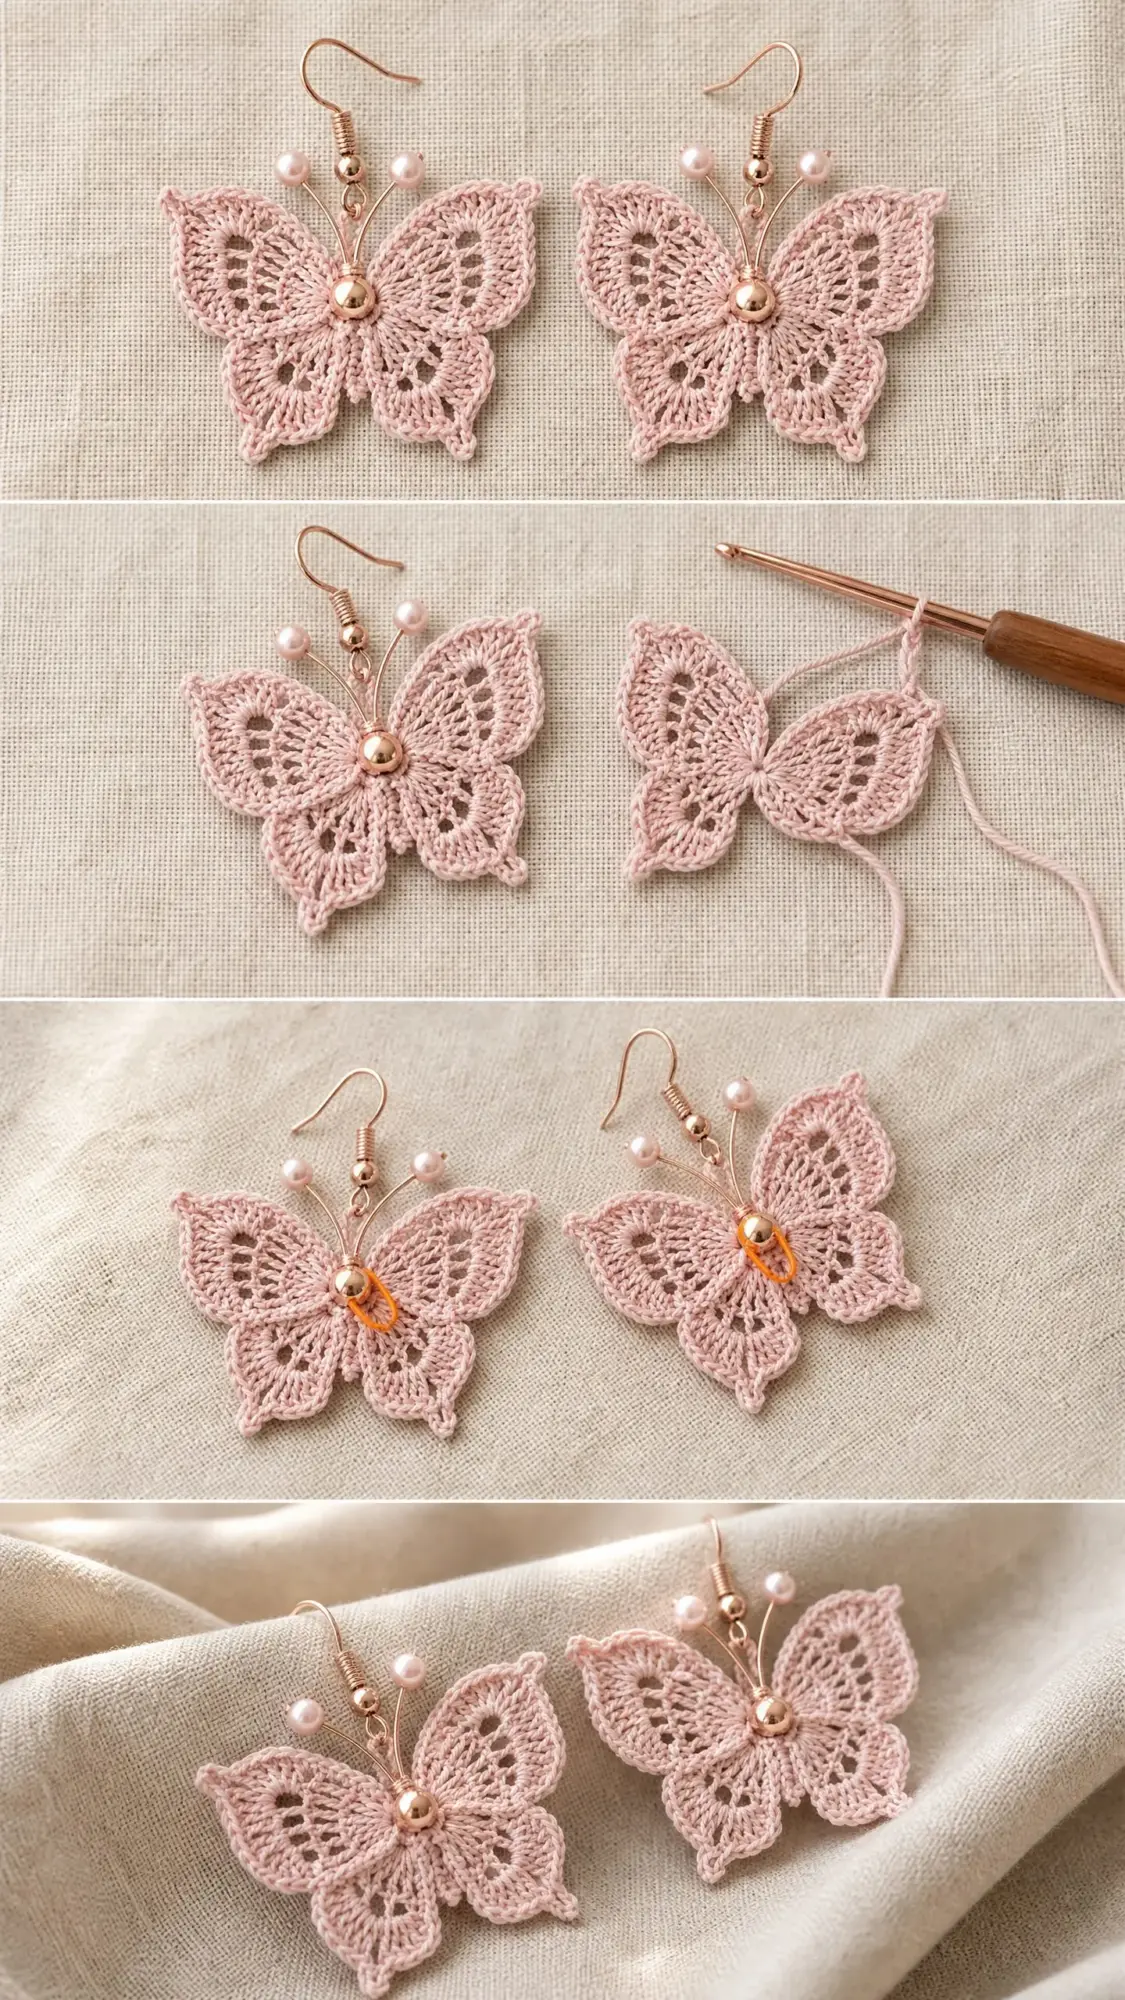
Thread your tapestry needle with a 12-inch length of matching blush pink thread. Working from the back, whipstitch through the center junction of all four wings approximately 4 to 6 times. Pull gently to cinch the wings slightly at the waist and define the butterfly body silhouette. Knot securely on the back side.
Weave in all thread ends securely. Trim tails to approximately 0.25 inch and use a dab of clear jewelry adhesive to tack ends to the back of the motif.
Blocking Your Butterfly Motif
This step is essential for a professional finish.
Soak the finished motif in cool water for 2 minutes. Gently press out excess water between two clean towels. Do not wring.
Place the motif face-up on a foam blocking mat. Using rust-proof pins, pin each wing tip and the outer arc of each wing to the correct dimensions: upper wings pinned to 1.75 inches total width, lower wing tips pinned downward to achieve 1.25 inches total height.
Allow to dry completely, minimum 2 hours but preferably overnight. Remove pins only when fully dry.
Hardware Assembly and Finishing
Step 1: Take one 4-inch piece of 26-gauge rose gold wire. Fold it in half to find the center point. Thread the center of the folded wire through the reinforced body center of the butterfly from front to back, then back through to the front approximately 2 mm above the entry point. Two equal wire tails should emerge from the top center, angled outward like antennae.
Step 2: Thread one 4 mm pale pink pearl bead onto each wire tail. Slide each pearl down to approximately 0.5 inch above the butterfly body.
Step 3: Using round-nose pliers, make a small curl at the very tip of each wire tail above the pearl. Angle each antenna outward at approximately 35 to 45 degrees from vertical.
Step 4: Attach the 4 mm rose gold round bead at the exact body center on the front face of the motif using jewelry adhesive or small wire wrapping.
Step 5: Open the loop of a rose gold French hook ear wire using flat-nose pliers (bend sideways, never outward). Thread the wire through the top center of the butterfly motif at the body-antennae junction. Close the ear wire loop securely.
Step 6: Check that the butterfly hangs level with antennae pointing upward and slightly outward, pearl tips visible, and no thread ends showing on the front face.
Repeat all steps for the second earring.
Care Instructions
Hand wash gently in cool water with mild soap if needed. Press flat between clean towels and reshape wings by hand. Allow to air dry flat. Do not machine wash, tumble dry, or iron. Remove earrings before swimming or bathing to preserve the rose gold hardware finish. Store flat in a jewelry box or zip-closure pouch to prevent bending of the wire antennae.
Tips for Success with This Butterfly Crochet Pattern
If this is your first time working with size 10 thread, practice your tension on a small swatch before starting the actual motif. Thread crochet requires a lighter touch than worsted weight projects.
Good lighting makes all the difference. A bright lamp positioned over your work helps you see the tiny stitches clearly.
Count your stitches at the end of each row. At this small scale, one missed stitch will throw off the symmetry of your wings.
Do not skip blocking. Seriously. An unblocked motif will look limp and the beautiful lace structure will not show properly.
I really hope you enjoy making these pretty butterfly earrings as much as I enjoyed designing them. If you give this pattern a try, save it to your Pinterest boards so you can find it again easily. And please drop a comment below to let me know how your earrings turned out. I would love to see your color choices and hear how the assembly went for you!
You Might Also Like
- Sage Green Boho Crochet Summer Dress Free Pattern
- Lavender Field Granny Square Pouch Free Crochet Pattern
- Ocean Friends Anklet Free Crochet Pattern
- Snuggly Nursery Snake Amigurumi Free Crochet Pattern