
I don’t know about you, but I have always been drawn to jewelry that feels like it belongs in a fairy tale. The kind of piece that makes people lean in closer and ask, "Wait, did you make that?"
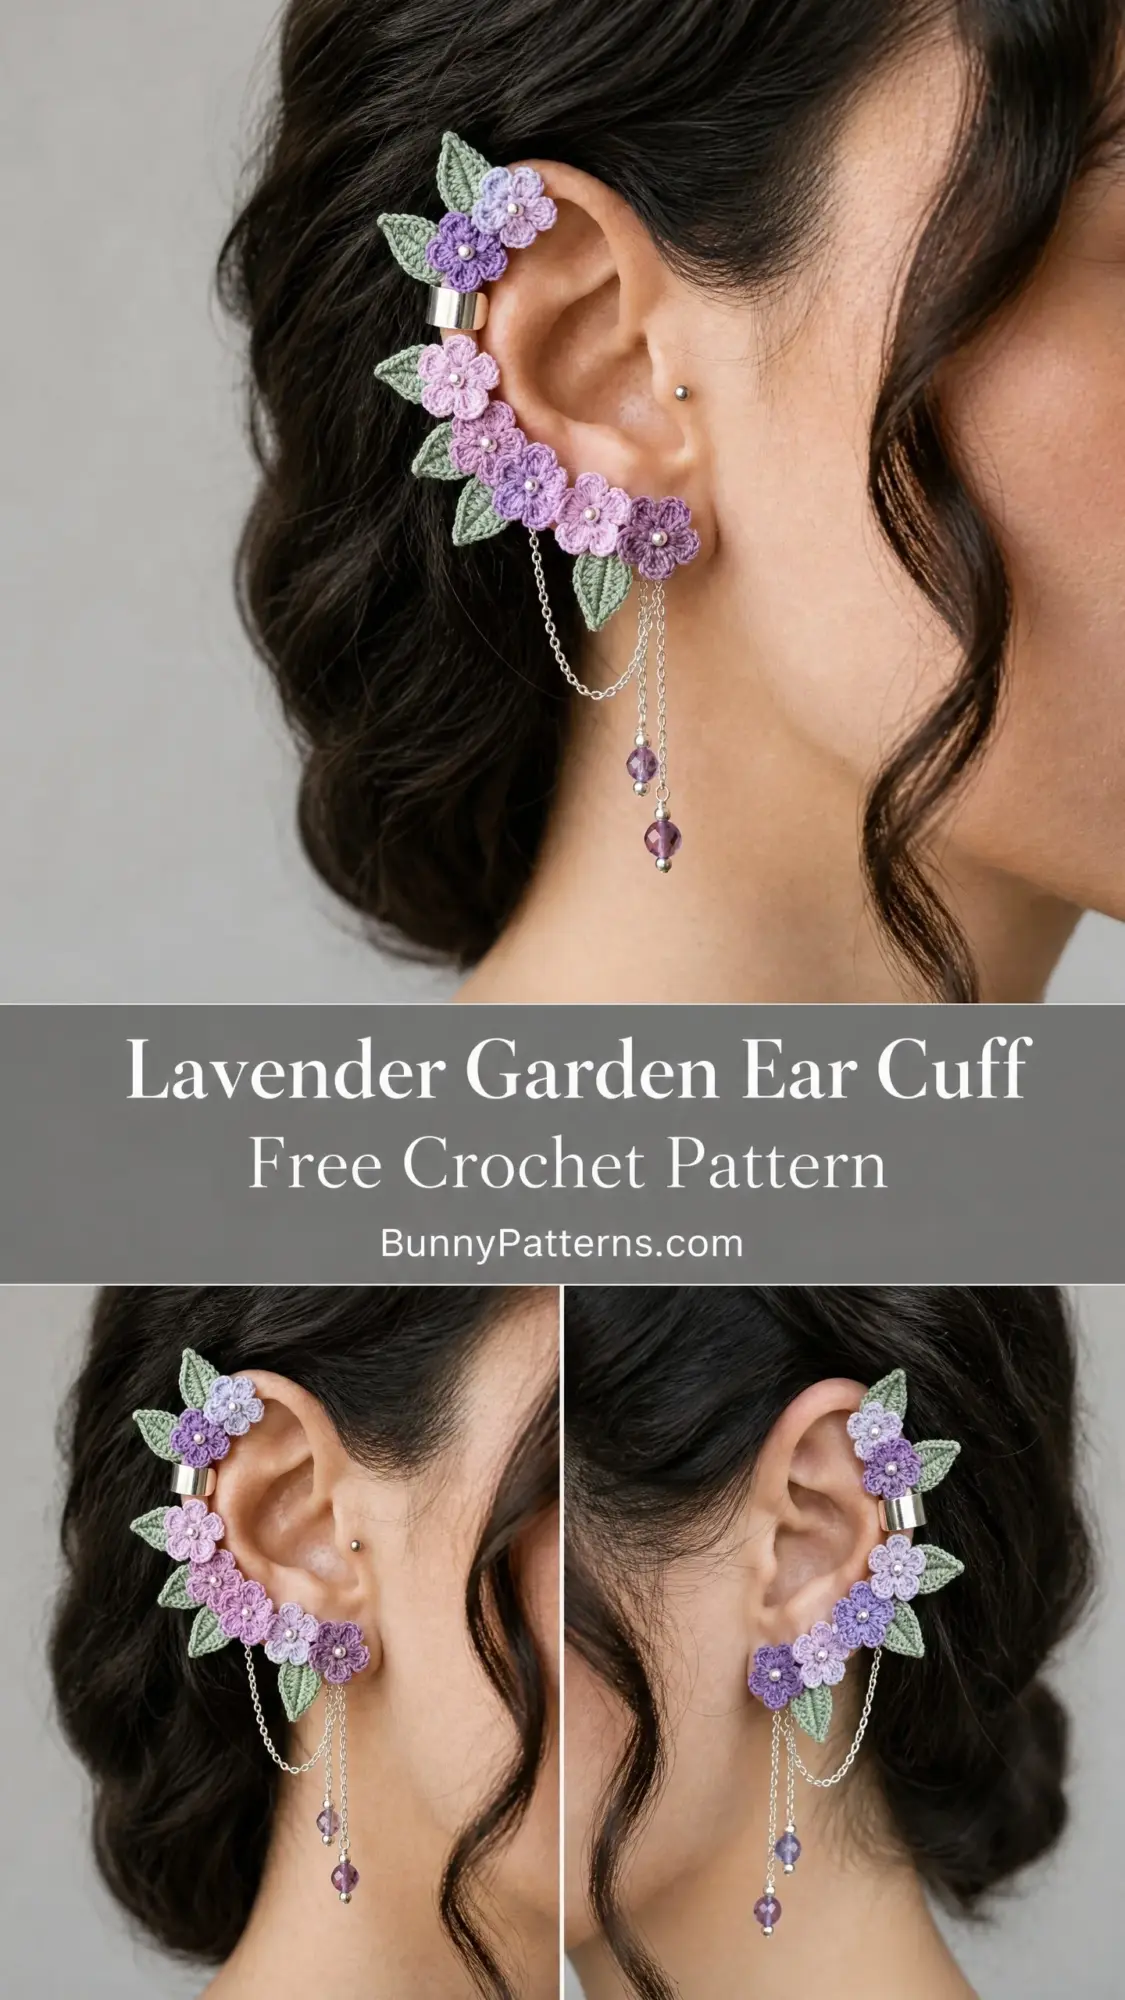
This Lavender Garden Ear Cuff is exactly that kind of project. It combines the delicate art of thread crochet with simple jewelry assembly to create something truly wearable and utterly unique. All the botanical beauty of a tiny flower garland, with none of the wilting.
If you have been curious about miniature crochet or wanted to try making your own accessories, this crochet pattern is the perfect place to start. The individual flower and leaf motifs are surprisingly straightforward, and the assembly process is more like crafting than complicated jewelry making. Let me walk you through every single step.
About This Ear Cuff Crochet Pattern
This ear cuff features five tiny crocheted flowers in two shades of purple, surrounded by eight sage green leaves. The flowers cascade down from the upper part of your ear to your earlobe, creating a botanical garland effect that looks far more complex than it actually is.
The entire piece attaches to a simple metal ear cuff finding, which means you do not need multiple piercings to wear it. Just one standard lobe piercing anchors the bottom flower, and a delicate silver chain drops down with amethyst crystal beads for movement and sparkle.
Each flower measures about half an inch across. Each leaf is roughly the same length. When assembled, the full garland spans approximately 3.5 inches long by 1.25 inches wide. It sits beautifully against the curve of an adult ear.
Skill level: Advanced beginner to intermediate. If you have crocheted small motifs like granny squares or simple appliques before, you can absolutely handle this. The tricky part is working with thin thread on a small steel hook, which requires patience and a tight, even tension.
Time estimate: Plan for 3 to 5 hours total, including making the motifs, blocking them, and assembling everything. Experienced thread crocheters might finish closer to 2.5 hours.
Materials You Will Need
Gather everything before you begin. Thread crochet projects are small, but they require specific supplies.
Thread:
Hook:
Jewelry Supplies:
Other Notions:
Thread Recommendations
Any smooth, tightly twisted size 10 cotton crochet thread will work beautifully. Here are three options I recommend:
1. Aunt Lydia’s Classic Crochet Thread Size 10 in Soft Mauve, Purple, and Sage. This is widely available, has consistent twist, and gives excellent stitch definition for tiny motifs.
2. DMC Petra Size 3 Crochet Cotton worked at a tighter tension on your Size 7 steel hook. It is slightly thicker but produces beautifully smooth petals with clean edges.
3. Lizbeth Size 10 Premium Cotton Thread in Lilac Medium, Purple Dark, and Leaf Green. This brand offers hand-dyed options and has an excellent sheen for a jewelry-quality finish.
Important: Do not substitute fingering weight yarn. The motifs will turn out too large to sit neatly on the ear cuff finding.
Gauge
One flower motif worked in Rounds 1 through 3 should measure 0.5 inch (1.25 cm) in diameter after blocking.
One leaf motif worked in Rows 1 through 5 should measure 0.5 inch long (1.25 cm) after blocking.
Gauge matters here. If your flower is larger than half an inch, try moving down one hook size. If it is smaller, move up. Consistent gauge across all your motifs ensures the garland lies flat and looks proportionate against your ear.
Abbreviations and Special Stitches
Let me define every abbreviation before we begin. Even if you know these by heart, a quick refresher helps when working at this tiny scale.
Special Stitches You Will Use
Picot: Chain 3, then slip stitch into the first chain you made. This creates a small decorative loop at the base of each leaf.
Petal: Work the following stitches all into the same stitch or space: 1 hdc, 2 dc, 1 hdc. This rounded four-stitch cluster forms one flower petal. Each petal is bordered by slip stitches on either side.
Beginning Petal: Chain 2 (this counts as your first hdc), then work 2 dc into the same stitch, then 1 hdc into the same stitch.
Pattern Notes Before You Begin
Read through these notes first. They will save you confusion later.
1. You will crochet 5 flowers total: 3 in Color A (medium lavender) and 2 in Color B (deep purple).
2. You will crochet 8 leaves total in Color C (sage green).
3. All flowers are worked in the round starting from a magic ring. Do not turn at the end of rounds.
4. Leaves are worked flat, back and forth, with a slip stitch edging around the perimeter.
5. Leave a 6-inch tail when fastening off each motif. You will use these tails to sew everything together.
6. The flowers will look slightly cupped when first crocheted. Blocking with stiffener flattens and opens them to their full diameter.
7. Assembly layout from top to bottom: Flower, two leaves, flower, two leaves, flower, two leaves, flower, two leaves, flower. The metal ear cuff finding sits between the second and third flower from the top.
8. Color order from top to bottom: Color B, Color A, Color B, Color A, Color A. This creates the two-tone lavender effect.
9. Work all rounds with tight, even tension. Thread crochet benefits from pulling firmly after each stitch.
Flower Motif Instructions
Make 5 flowers total: 3 in Color A and 2 in Color B.
Round 1: Make a magic ring. Chain 1. Work 5 sc into the ring. Pull the ring closed. Slip stitch to the first sc to join. Do not turn. (5 sc)
Round 2: Chain 1. Work 2 sc into each sc around. Slip stitch to the first sc to join. (10 sc)
Round 3 (Petal Round): Slip stitch into the first sc. Now work each petal as follows:
Petal 1: Sl st into next st. Work Beginning Petal into same st (ch 2, 2 dc, 1 hdc all into this st). Sl st into next st.
Petal 2: Sl st into next st. Work Petal into same st (1 hdc, 2 dc, 1 hdc all into this st). Sl st into next st.
Petal 3: Sl st into next st. Work Petal into same st. Sl st into next st.
Petal 4: Sl st into next st. Work Petal into same st. Sl st into next st.
Petal 5: Sl st into next st. Work Petal into same st. Sl st to join at base of first ch-2.
You now have 5 petals total, each sitting between two slip stitches.
Fasten off, leaving a 6-inch tail.
Add the bead center: Using your beading needle and thread, sew one pearl seed bead into the center of each flower, right over the magic ring. Set flowers aside.
Checkpoint: Each finished flower, before blocking, should be slightly cupped and measure approximately 0.4 inch across. After stiffening and blocking, it will open to 0.5 inch.
Leaf Motif Instructions
Make 8 leaves in Color C.
Foundation: Chain 6.
Row 1 (right side): Starting in the second ch from hook, work 1 sc. Work 1 hdc into next ch. Work 1 dc into next ch. Work 1 hdc into next ch. Work 3 sc into the last ch (this forms the tip of the leaf).
Do not turn. Now work back along the opposite side of the foundation chain: 1 hdc into next ch. 1 dc into next ch. 1 hdc into next ch.
Work Picot (ch 3, sl st into first ch of the ch-3) into the final ch (this is the base of the leaf).
Sl st to the starting sc at the beginning of the leaf to close the oval shape.
You now have a complete leaf outline with two long sides, a rounded tip with 3 sc, and a picot at the base. (Approximately 14 sts around the perimeter, plus picot)
Fasten off, leaving a 6-inch tail.
Checkpoint: Each leaf should measure approximately 0.5 inch long and 0.25 inch wide. The picot at the base is what you will use when sewing to the cuff.
Optional Base Strip
This narrow crocheted spine runs the length of the garland and gives you a clean backing surface. If you prefer to sew motifs directly onto the ear cuff finding, you can skip this section.
Foundation: Chain 18 in Color C.
Row 1: Sc in the second ch from hook and in each ch across. Turn. (17 sc)
Row 2: Ch 1. Sc in each sc across. Turn. (17 sc)
Fasten off, leaving a 10-inch tail.
Checkpoint: The strip should measure approximately 2 inches long and 0.2 inch wide.
Blocking Your Motifs
This step is essential. Do not skip it.
Pin each flower open on a foam board, gently spreading the five petals evenly. Pin each leaf flat, straightening the center spine.
Apply fabric stiffener according to product instructions, or lightly brush with a 50/50 mixture of craft glue and water.
Allow to dry completely. This takes at least 2 hours, though overnight is even better. Do not proceed to assembly until motifs are fully dry and hold their shape on their own.
Assembly Instructions
Step 1: Arrange Your Layout
Lay the five flowers in a vertical line, alternating colors from top to bottom:
Space them approximately 0.5 inch apart, center to center.
Assign two leaves to each flower position, one to the left and one to the right. Angle them outward at 30 to 45 degrees.
Step 2: Attach Base Strip to Ear Cuff Finding
If using the optional base strip, slide the metal ear cuff finding through the center of the strip lengthwise so the strip wraps around the cuff. Using coordinating thread, whip stitch the strip snugly around the cuff finding.
If skipping the base strip, proceed to Step 3.
Step 3: Sew Flowers to Cuff
Using the tail from each flower and a sewing needle, sew each flower to the base strip or directly to the garland body. Start with Flower 1 at the top (helix end). Use 4 to 6 small stitches through the back of the flower center and through the strip or adjacent flower.
The metal cuff finding should fall at approximately the position between Flower 2 and Flower 3.
Step 4: Sew Leaves to Cuff
Using each leaf’s tail, sew the leaves into position flanking each flower. The picot at the base of each leaf should tuck behind the flower. Secure with 3 to 4 stitches. Angle each leaf so it fans outward.
Once all leaves are placed, sew adjacent flowers and leaves together at their edges with one or two connecting stitches.
Step 5: Secure the Ear Cuff Finding
If the finding is not already integrated via the base strip, thread it through the assembled garland at the correct helix position now. Secure with additional whip stitches around the metal band using green thread.
Step 6: Attach the Lobe Post
Thread a stud earring post through the center of Flower 5 from front to back. Secure the post with a small dot of jewelry adhesive between the post backing and the back of the flower. Allow to cure for 30 minutes.
Alternatively, loop a 22-gauge headpin through the base of the flower and create a wrapped loop at the back using round nose pliers.
Step 7: Attach Chain and Beads
Cut a 3-inch length of fine silver chain. Open a small jump ring and attach one end of the chain to the lobe post or to a small loop at the base of Flower 5. Close the jump ring securely with flat nose pliers.
Thread the free end of the chain through your 4 mm amethyst bead, then your 6 mm amethyst bead. Insert a headpin through both beads from the bottom. Create a small wrapped loop at the top of the headpin and attach it to the bottom link of the chain. Trim any excess wire.
Step 8: Final Check
Hold your assembled ear cuff up and examine it from the front. The flowers should cascade in a gentle curved line. The leaves should fan out naturally on both sides. The chain should hang freely below the lobe flower.
If anything has shifted, add a small stitch to adjust. Apply a tiny drop of clear nail polish or fray check to all thread knots on the back of the piece.
Size Customization Tips
For a longer garland: Add one or two additional flower motifs and corresponding leaves. Extend the base strip by approximately 4 chains per additional motif.
For a shorter garland: Remove one flower from the bottom and omit two leaves. Reattach the chain drop to Flower 4 instead.
For larger motifs: Use size 5 crochet thread with a size 6 steel hook (1.8 mm). Each flower will measure approximately 0.75 inch in diameter.
For different ear sizes: Replace the fixed ear cuff finding with an adjustable wire-wrap cuff finding.
Care Instructions
Hand wash only if needed. Submerge gently in cool water with a drop of mild soap. Do not wring or twist. Lay flat to dry on a clean towel.
Remove the ear cuff before sleeping, swimming, or showering. Store flat in a small jewelry box or wrapped gently in tissue paper to prevent petals from bending.
You Made Wearable Art
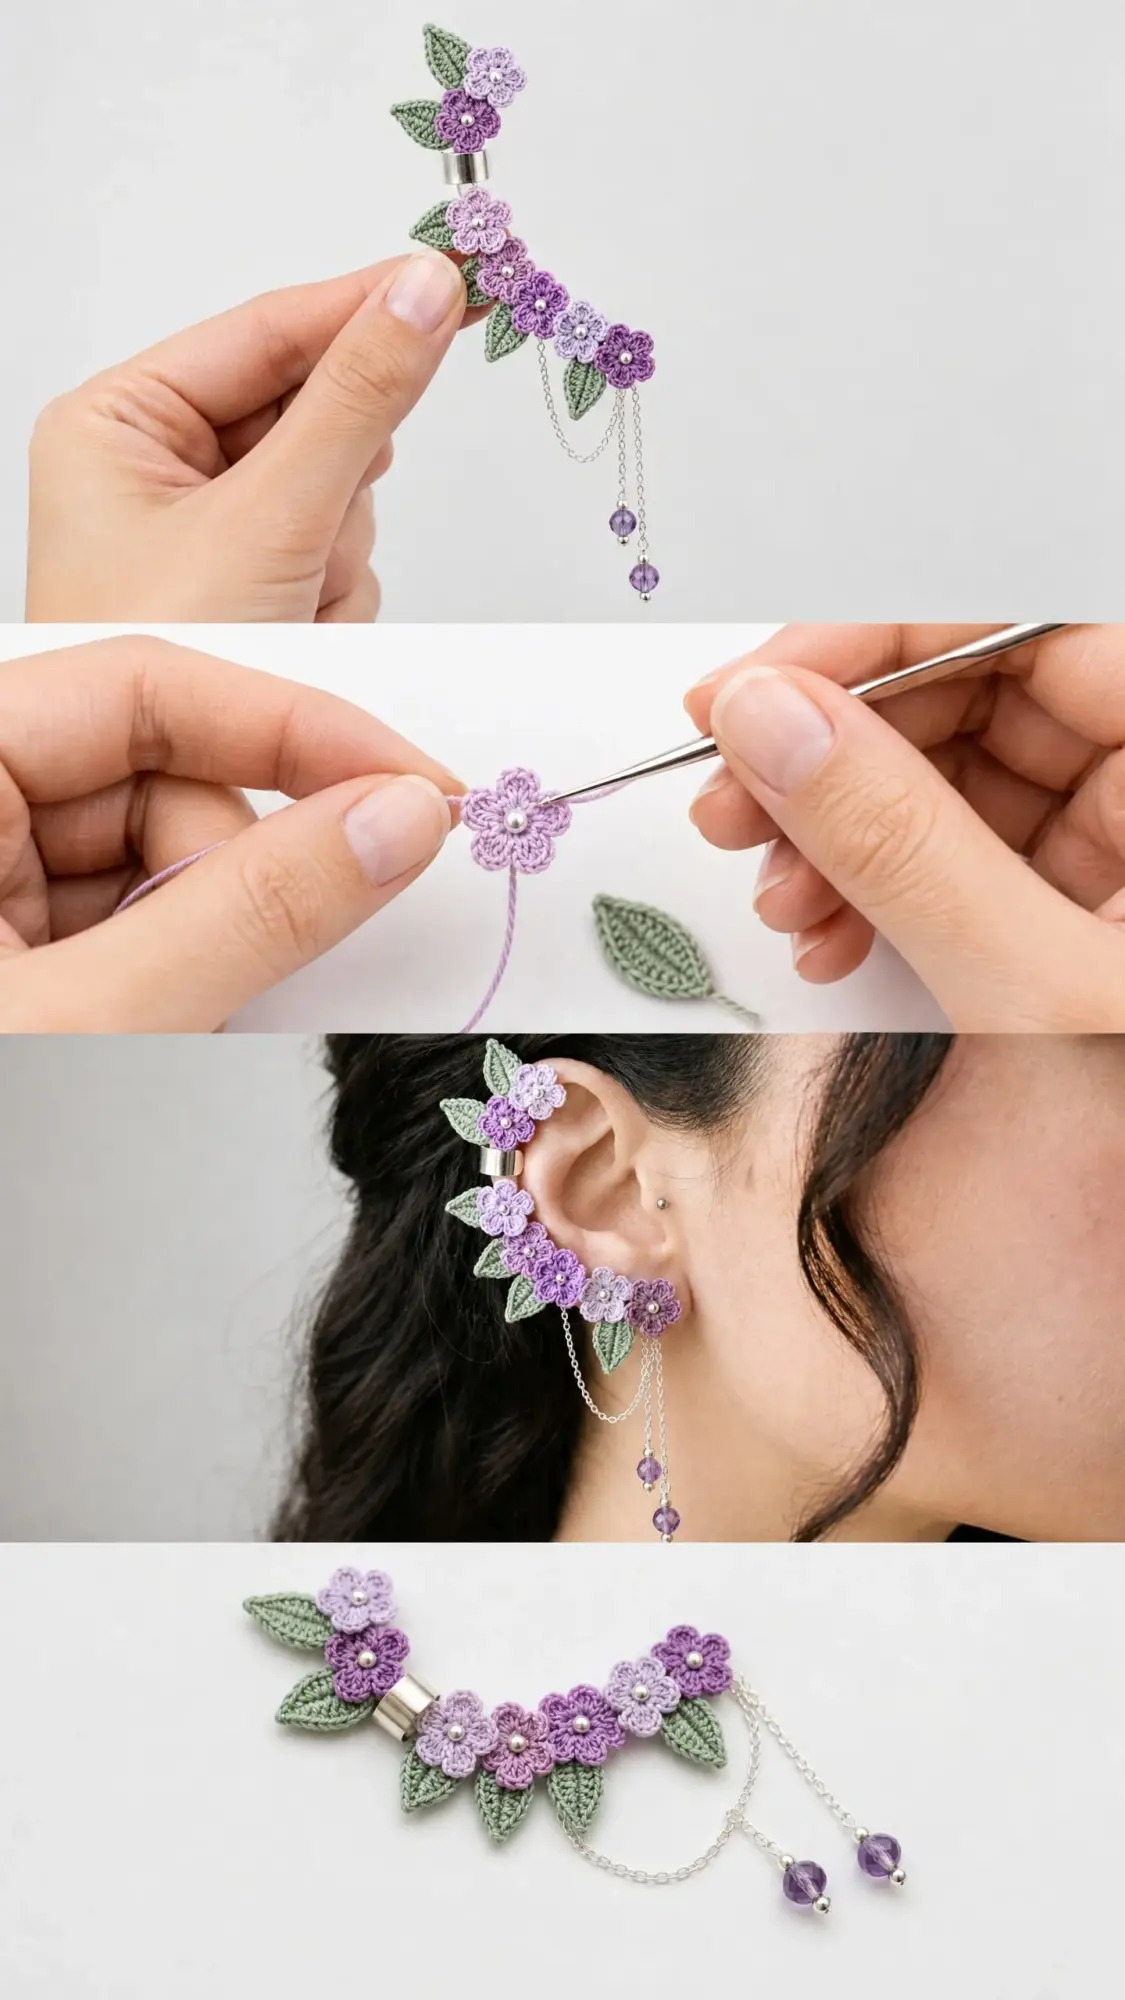
This Lavender Garden Ear Cuff crochet tutorial is one of those projects that looks impossibly intricate but breaks down into simple, manageable steps. Five tiny flowers. Eight little leaves. Some beads, some chain, and a bit of patience. That is all it takes to create something people will ask about every single time you wear it.
Thank you so much for choosing this pattern. I hope you love making it as much as I loved designing it. If you finish your ear cuff, I would absolutely love to see it. Tag me on Instagram or share a photo in my Facebook group. Nothing makes my day quite like seeing your finished projects.
If this pattern inspired you, go ahead and save it to your Pinterest boards so you can find it easily when you are ready to start. And please drop a comment below if you make one. I read every single comment, and I genuinely want to hear how yours turns out.
You Might Also Like
- Sage Green Halter Peplum Dress Free Crochet Pattern
- Pastel Daisy Crochet Hoodie Free Crochet Pattern
- Cozy Gray Hexagon Sofa Throw Free Crochet Pattern
- Sage Green Botanical Lace Maxi Skirt Free Crochet Pattern