
This crochet bracelet features a structured cream band with an adjustable sliding closure and a coral peach butterfly motif topped with pearl beads. You will use single crochet for the band and double crochet clusters for the wings. The whole project takes about three to five hours from start to finish.
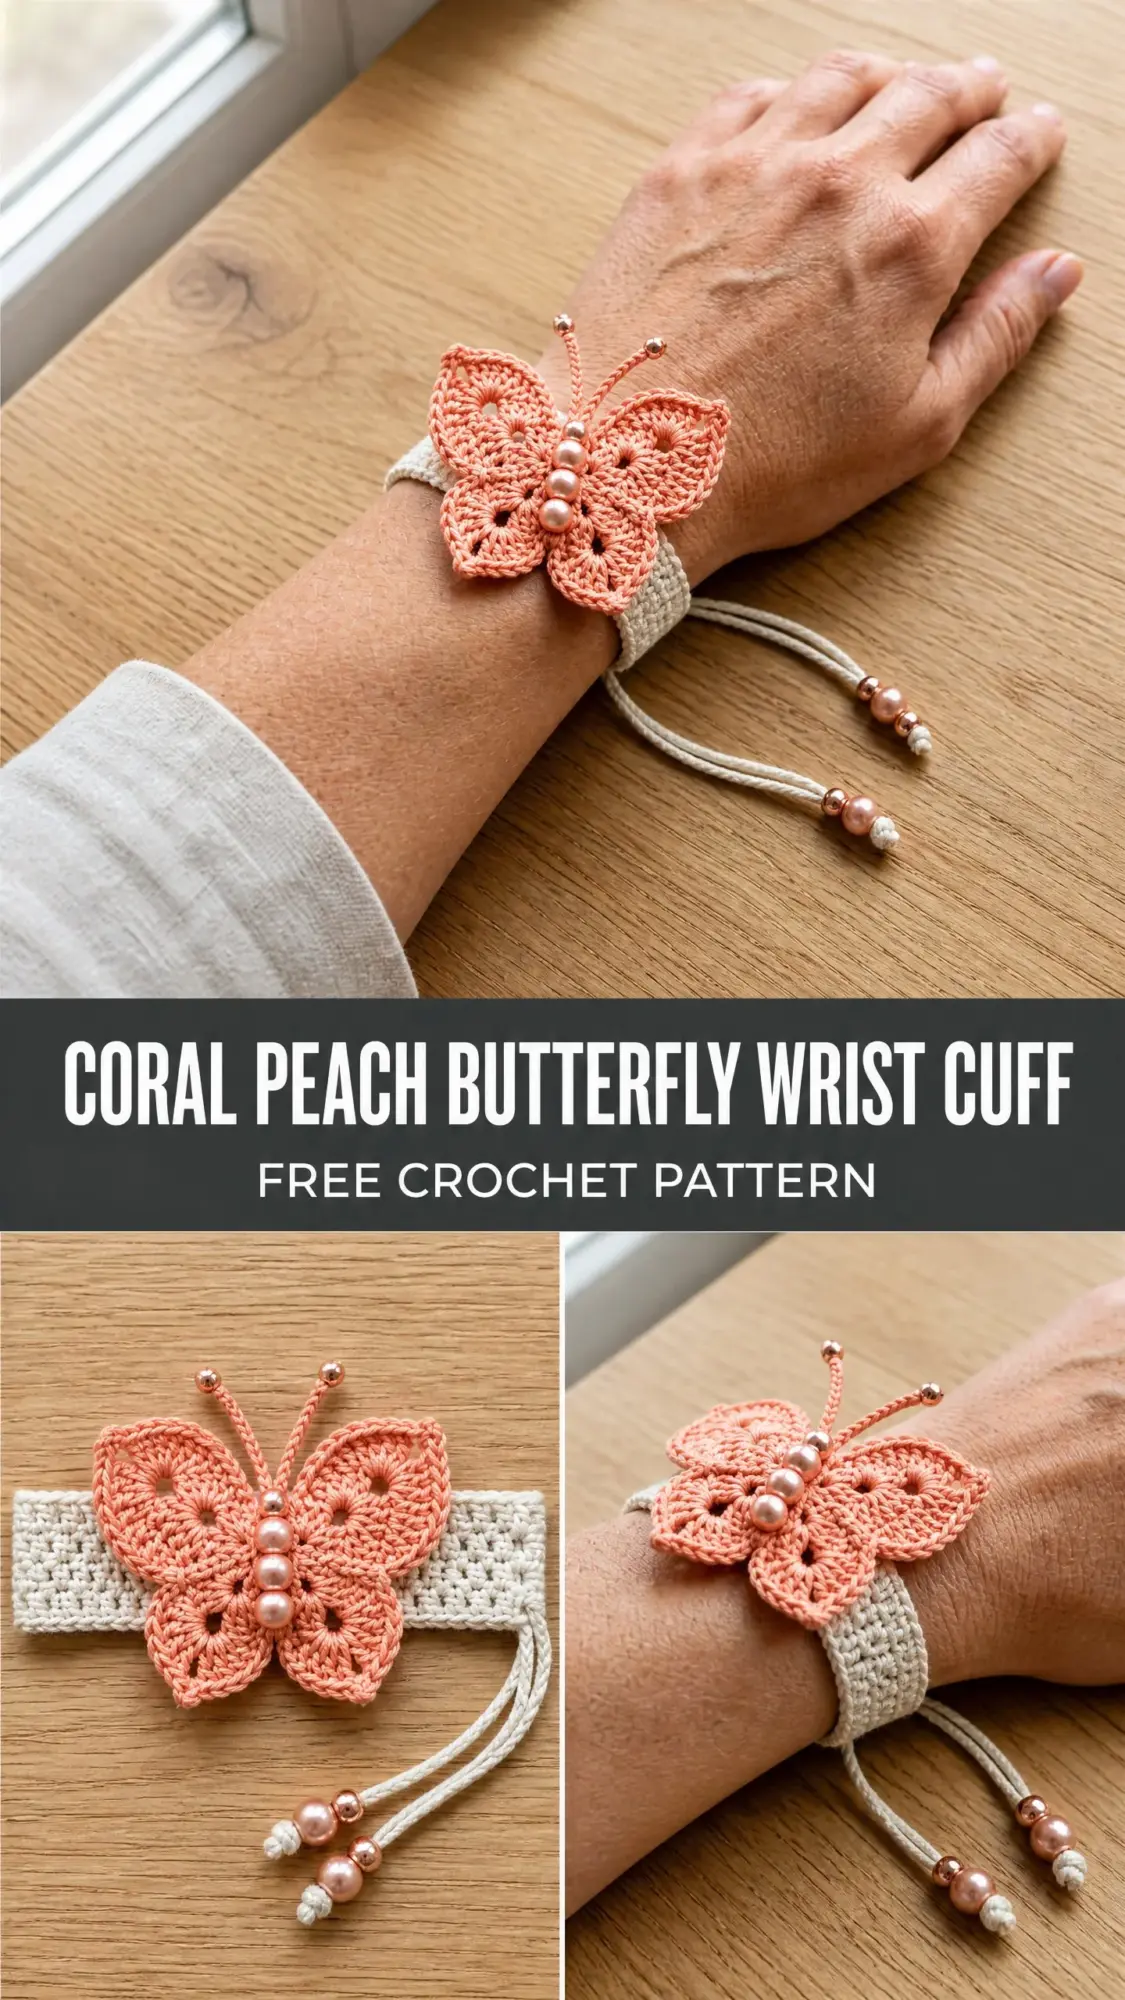
I love how this piece sits flat against the wrist without any bulk or fuss. The butterfly adds dimension and visual interest while the sliding knot closure means it fits almost any adult wrist size.
If you are comfortable with basic stitches and willing to follow assembly steps carefully, you can absolutely make this beautiful cuff bracelet.
Why You Will Love This Butterfly Wrist Cuff Crochet Pattern
This project combines simple stitchwork with eye-catching results. The band itself uses nothing more than single crochet (sc) worked in rows, which creates a dense, fabric-like texture that holds its shape beautifully on the wrist. The butterfly motif looks intricate but breaks down into manageable pieces. You work each wing separately, then join them at the center with beads forming the body.
The adjustable sliding knot closure is borrowed from macrame jewelry making. It lets the wearer tighten or loosen the cuff with a simple pull, so you do not need to worry about measuring wrists precisely before gifting.
This crochet tutorial walks you through every step, from creating the firm band to assembling those delicate wings. Whether you are making this for yourself or as a gift, the coral peach color and rose gold beads create a piece that looks far more complicated than it actually is.
Skill Level
This pattern is rated intermediate. The stitches themselves are beginner-friendly, but you need to be comfortable with a few techniques:
If you have never worked with crochet thread before, know that it requires tighter tension and a smaller hook than typical yarn projects. Take your time and work slowly until you find your rhythm.
Finished Measurements
Materials Needed
Yarn A (Band):
Size 10 crochet thread or fine fingering weight cotton in cream or natural white, approximately 25 yards or 23 meters
Yarn B (Butterfly):
Size 10 crochet thread or fine fingering weight cotton in coral peach, approximately 20 yards or 18 meters
Hook:
US Steel 7 or 1.65 mm for size 10 thread, OR US B-1 or 2.25 mm if using fingering weight cotton
Beads:
Notions:
Yarn Suggestions
Option 1: Aunt Lydia’s Classic Crochet Thread Size 10 in Ecru for Yarn A and Coral for Yarn B. This widely available mercerized cotton produces a crisp, structured fabric perfect for this project.
Option 2: DMC Natura Just Cotton in Nacar (cream) for Yarn A and Amaranto or Lobelia for Yarn B. This 4-ply mercerized cotton offers excellent stitch definition with a subtle sheen.
Option 3: Hobbii Elite Lace 2-ply in White and Coral for an heirloom-quality result.
Substitution note: Any mercerized cotton thread or 2-ply to 4-ply cotton fingering yarn will work as long as you match gauge. Avoid wool or acrylic because the stiff, structured texture of this piece depends on cotton’s low elasticity.
Gauge
Using Yarn A and appropriate hook:
20 sc x 22 rows = 2 inches or 5 cm in single crochet worked in rows with turning chain 1
Exact gauge matters for the band length and width. The butterfly motif is not gauge-critical but should match the band proportionally.
Abbreviations
Before we dive into the step by step instructions, let me define every abbreviation you will encounter:
Special Stitches and Techniques
Picot
Chain 3, slip stitch into the third chain from hook. This creates a small decorative bump.
Shell Stitch
Work 5 dc into the same stitch or space. This creates a fan-shaped cluster used in the butterfly wings.
V-Stitch
Work (dc, ch 2, dc) into the same stitch or space.
Adjustable Sliding Knot Closure
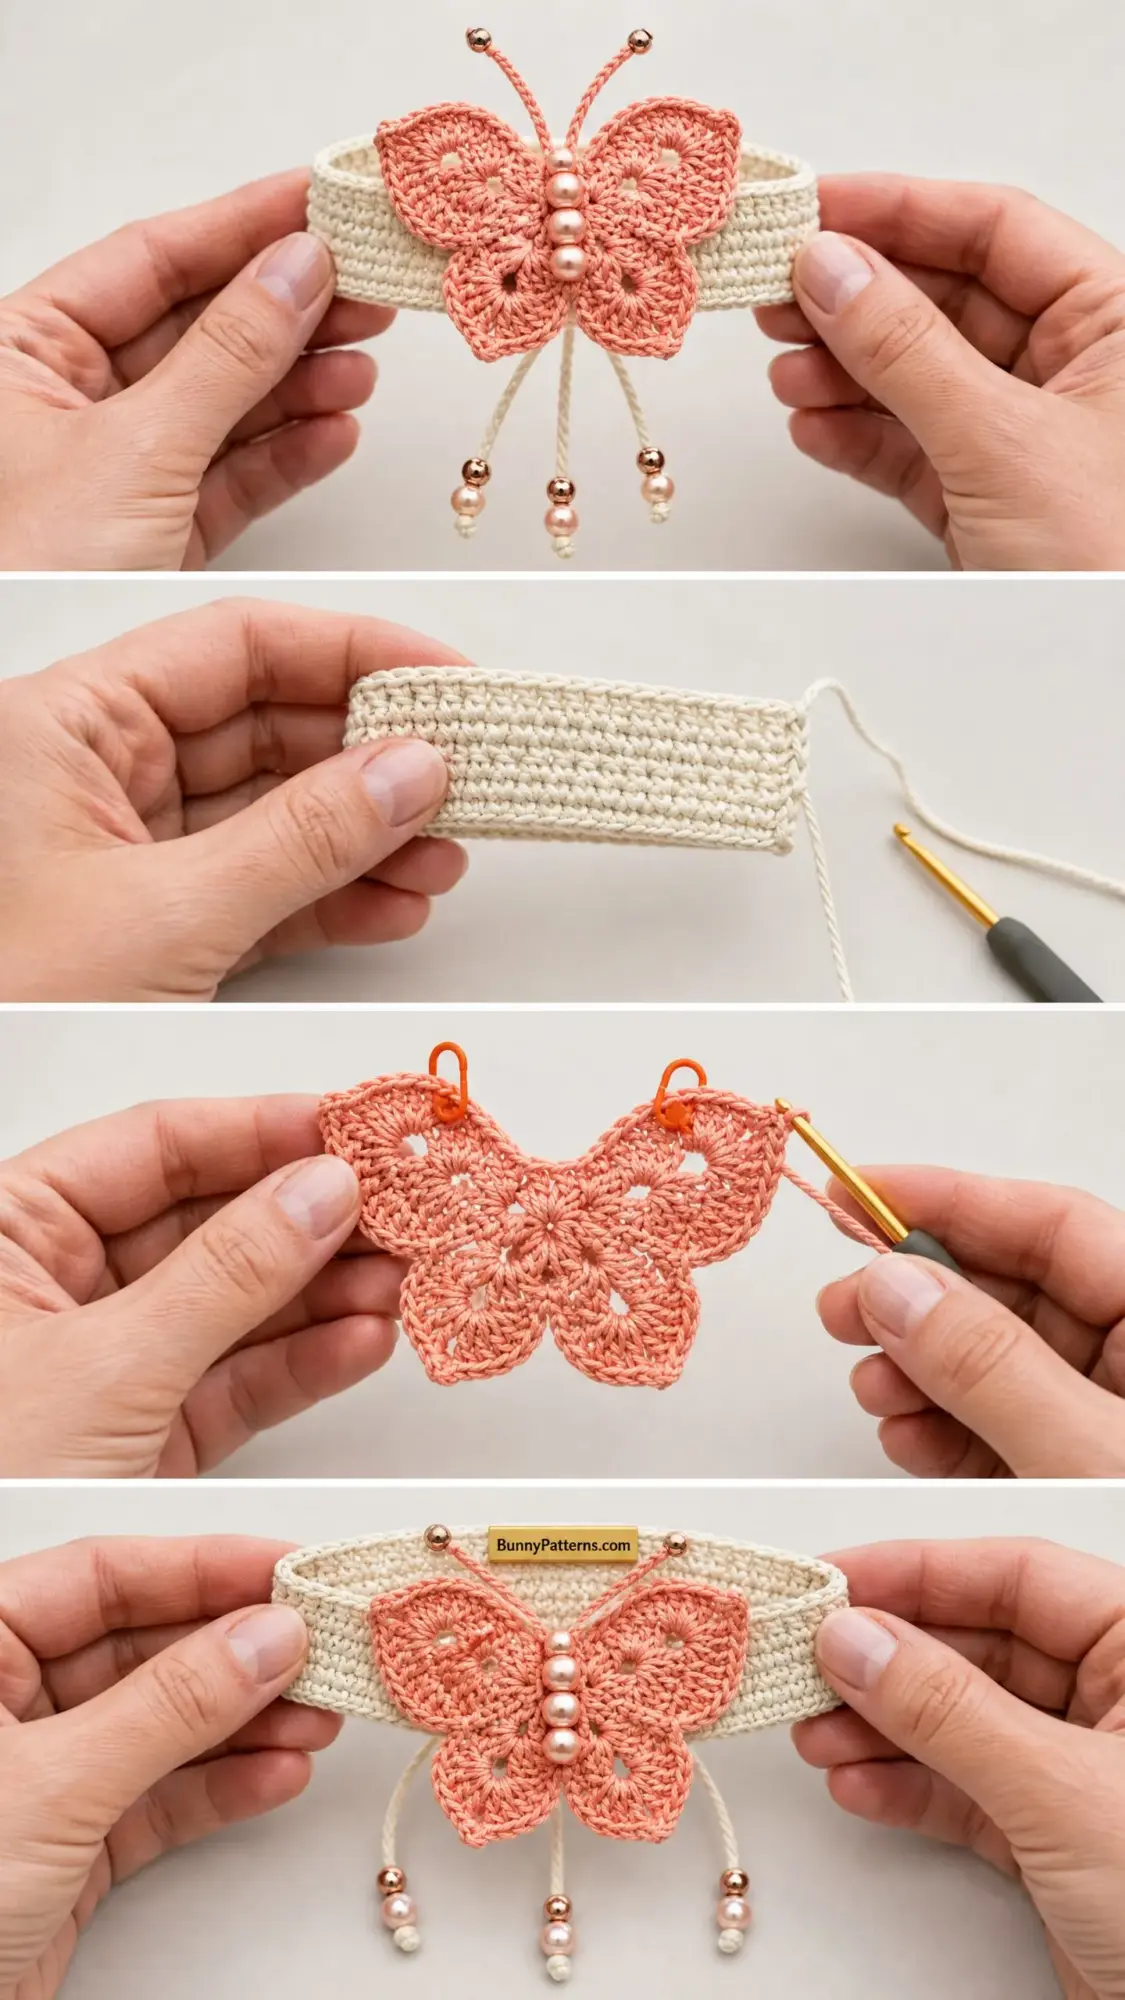
This macrame-style technique creates an adjustable band. Cut two lengths of Yarn A each approximately 8 inches or 20 cm long. Thread one bead onto each tail end of the band. Tie an overhand knot below each bead to secure it. Lay the two band tails parallel to each other but pointing in opposite directions. Take one of the 8-inch lengths of Yarn A and wrap it around both tails 4 to 5 times, then pass the working end through the wraps and pull tight to form a sliding barrel knot. Repeat on the other side with the second 8-inch length. When both knots are made, pulling the tails tightens the cuff, and pushing the knots together loosens it.
Pattern Notes
1. The band is worked flat in rows, turning at the end of each row. Work each stitch through both loops unless BLO or FLO is specified.
2. Keep tension firm for the most structured result. The finished band should have minimal stretch.
3. The butterfly is worked in separate pieces: two upper wings and two lower wings. Each wing is worked individually, then all four are joined at the center body.
4. Thread 2 rose gold metal beads onto Yarn A at the start of the band before beginning. This ensures the beads are on the yarn tail and cannot be added later if the bead holes are too small.
5. All rounds of the butterfly wings are joined rounds unless otherwise stated. Work does not turn between rounds unless specified.
6. This pattern uses US crochet terminology throughout.
Step by Step Instructions
Section One: The Band
Before starting, thread 2 rose gold metal beads onto the starting tail of Yarn A. Slide them down approximately 12 inches or 30 cm from the cut end and leave them there. You will also leave a 12-inch starting tail on the opposite end.
Using Yarn A and appropriate hook, chain 13.
Row 1 (RS): Starting in the 2nd ch from hook, sc across. Turn. (12 sc)
Row 2 (WS): Ch 1, sc in each st across. Turn. (12 sc)
Rows 3 through 52: Rep Row 2. Turn at the end of each row. (12 sc per row)
Continue repeating Row 2 until the band measures approximately 5.5 inches or 14 cm from the starting chain. The sliding knot closure will add adjustability of approximately 1 to 2 inches.
After completing the final row, fasten off leaving a 12-inch or 30 cm tail. Do not trim.
Thread 2 rose gold metal beads onto this finishing tail, sliding them down to the end of the tail. Secure each bead with an overhand knot below it. Repeat with the starting tail on the opposite end.
Checkpoint: The band should measure approximately 5.5 inches or 14 cm long and 1.25 inches or 3.2 cm wide. It should be flat, firm, and rectangular with no curling or twisting.
Set the band aside. Complete the sliding knot closure after the butterfly is attached.
Section Two: The Butterfly Upper Wings (Make 2)
The upper wings are larger and appear at the top of the butterfly. They are worked in rounds from a magic ring.
Using Yarn B, make a magic ring.
Rnd 1: Ch 3 (counts as first dc), work 2 dc in MR, ch 2, work 3 dc in MR, ch 2, sl st to top of beginning ch-3 to join. Pull MR closed. (6 dc, 2 ch-2 sps)
Rnd 2: Sl st into next 2 dc and into ch-2 sp. Ch 3 (counts as first dc), work 4 dc in same ch-2 sp, ch 2, work 5 dc in same ch-2 sp, sl st to move to second ch-2 sp. Work 5 dc in second ch-2 sp, ch 2, work 5 dc in same ch-2 sp, sl st to top of beginning ch-3 to join. (20 dc, 2 ch-2 sps)
Rnd 3: Ch 1, sc in each dc around, working (sc, ch 2, sc) in each ch-2 sp at the lobe tip. Join with sl st to first sc. (22 sc plus 2 ch-2 sps)
Fasten off leaving a 6-inch tail for sewing.
Make a second upper wing the same way. (2 upper wings total)
Section Three: The Butterfly Lower Wings (Make 2)
The lower wings are slightly smaller and rounder than the upper wings.
Using Yarn B, make a magic ring.
Rnd 1: Ch 3 (counts as first dc), work 2 dc in MR, ch 2, work 2 dc in MR, ch 1, work 2 dc in MR, ch 2, work 2 dc in MR, ch 1, sl st to top of beginning ch-3 to join. Pull MR closed. (8 dc, 2 ch-2 sps, 2 ch-1 sps)
Rnd 2: Sl st into first ch-2 sp. Ch 3 (counts as first dc), work 3 dc in ch-2 sp, ch 2, work 4 dc in same ch-2 sp, sl st across 2 dc to reach ch-1 sp. Work 2 dc in ch-1 sp, sl st across 2 dc to reach next ch-2 sp. Work 4 dc in ch-2 sp, ch 2, work 3 dc in same ch-2 sp, sl st across 2 dc to reach final ch-1 sp. Work 2 dc in ch-1 sp, sl st to top of beginning ch-3 to join. (18 dc, 2 ch-2 sps)
Rnd 3: Ch 1, sc in each dc around, working (sc, ch 2, sc) in each ch-2 sp at the lobe tip. Join with sl st to first sc. Fasten off leaving a 6-inch tail for sewing. (20 sc plus 2 ch-2 sps)
Make a second lower wing the same way. (2 lower wings total)
Section Four: The Butterfly Antennae (Make 2)
Using Yarn B, leave a 4-inch tail and chain 18. Fasten off leaving a 4-inch tail at the other end. Thread one rose gold metal bead onto one tail end of each antenna and tie an overhand knot to secure the bead at the tip. This bead-tipped end will be the antenna top. The plain tail end will be anchored at the butterfly body center during assembly. Make 2 antennae.
Section Five: Butterfly Assembly
Lay the 4 wings flat with the RS facing up. Position the 2 upper wings side by side with their magic ring centers touching. Position the 2 lower wings below and slightly overlapping the inner base of the upper wings, again with centers touching. The arrangement should mirror a butterfly with the larger lobes at top and smaller rounder lobes at bottom.
Using Yarn B and a tapestry needle, sew all 4 wings together at the center point where all magic rings meet, passing the needle back and forth through the center of all 4 wings several times to create a firm anchor. Do not cut yarn yet.
Using the same length of yarn, or a fresh length of Yarn B, sew the 2 antenna plain tail ends securely to the top of the center join, positioning them so they angle outward and slightly apart, mirroring the V-shape of antennae on a butterfly.
Thread 5 pearl beads onto a 10-inch length of Yarn B. Anchor one end of this beaded strand at the very top of the wing center join (just below where the antennae attach) and sew it vertically down the center of the wing join, tacking the strand between each bead so all 5 beads form a vertical line down the butterfly body. Anchor the tail at the bottom of the join. This bead strand forms the butterfly body. Weave in all ends on the WS.
Checkpoint: The finished butterfly should measure approximately 2.75 inches or 7 cm wide across all 4 wings and approximately 2.25 inches or 5.7 cm tall from the bottom edge of the lower wings to the top of the antenna beads. The wings should lie flat with no puckering at the center join.
Section Six: Attaching Butterfly to Band
Lay the band flat with the RS facing up. Find the center of the band lengthwise and mark it with a stitch marker. Position the butterfly WS down on the RS of the band, centering the butterfly body over the center marker. The lower edge of the butterfly should align approximately with one long edge of the band, and the butterfly body column should run perpendicular to the band.
Using Yarn B threaded on a tapestry needle, whipstitch around the center of the butterfly body, catching the band fabric beneath it. Make several passes to ensure the butterfly is firmly secured and does not shift during wear. Sew through the base of the wing structure only, not through the individual wing lobe edges, so the wings remain three-dimensional and lift off the band.
Weave in all ends. Fasten the band ends and complete the sliding knot closure as described in Special Stitches.
Finishing and Blocking
Blocking: Lightly mist the butterfly wings with water and gently pin each wing lobe flat on a foam blocking mat or folded towel. Allow to dry completely before unpinning. The band does not require blocking if worked at firm gauge, but you may lightly steam block it flat if desired. Do not steam the beads.
Weaving ends: All ends should be woven in a minimum of 1 inch or 2.5 cm in multiple directions to secure them. Trim close after weaving.
Size Customization Tips
To make the band wider, add more starting chains in multiples of 1. Add 2 chains for each additional 0.2 inches or 5 mm of width desired.
To make the band longer or shorter before adding the closure, add or subtract rows. Each 2 rows adds approximately 0.18 inches or 4.5 mm to the band length.
The sliding knot closure provides approximately 2 inches or 5 cm of adjustability. For very small or very large wrists, adjust the base band length accordingly.
To make the butterfly larger, work an additional round of sc on each wing, increasing evenly at each lobe tip by working 3 sc into the ch-2 sp instead of (sc, ch 2, sc).
Care Instructions
Hand wash in cool water with mild detergent. Lay flat to dry away from direct sunlight to prevent color fading in the coral peach yarn. Do not wring or twist. Do not machine wash, as the beads and sliding knot closure are not machine-safe. Store flat or loosely coiled to maintain the shape of the butterfly wings.
Thank you so much for choosing this butterfly wrist cuff crochet pattern! I truly hope you enjoy making it as much as I enjoyed designing it. The combination of structured stitchwork and delicate beading creates something really special that looks gorgeous on any wrist.
If you found this crochet tutorial helpful, please save it to your Pinterest boards so you can find it easily when you are ready to start. And I would absolutely love to see your finished cuffs! Drop a comment below or tag me on Instagram or Facebook with your photos. Seeing your creations always makes my day.
You Might Also Like
- Stormy Gray Neutral Granny Square Blanket Free Crochet Pattern
- Lavender Sunflower Granny Square Tote Free Crochet Pattern
- Arctic Ice Mermaid Plush Doll Free Crochet Pattern
- Charcoal Gray Modern Crochet Backpack Free Pattern