
Last summer, I watched a blue butterfly land on my hydrangea bush and stay there for a full five minutes. I stood frozen at my kitchen window, coffee getting cold, completely transfixed. When it finally flew away, I grabbed my hook and thread before I even finished my breakfast. I needed to capture that moment somehow.
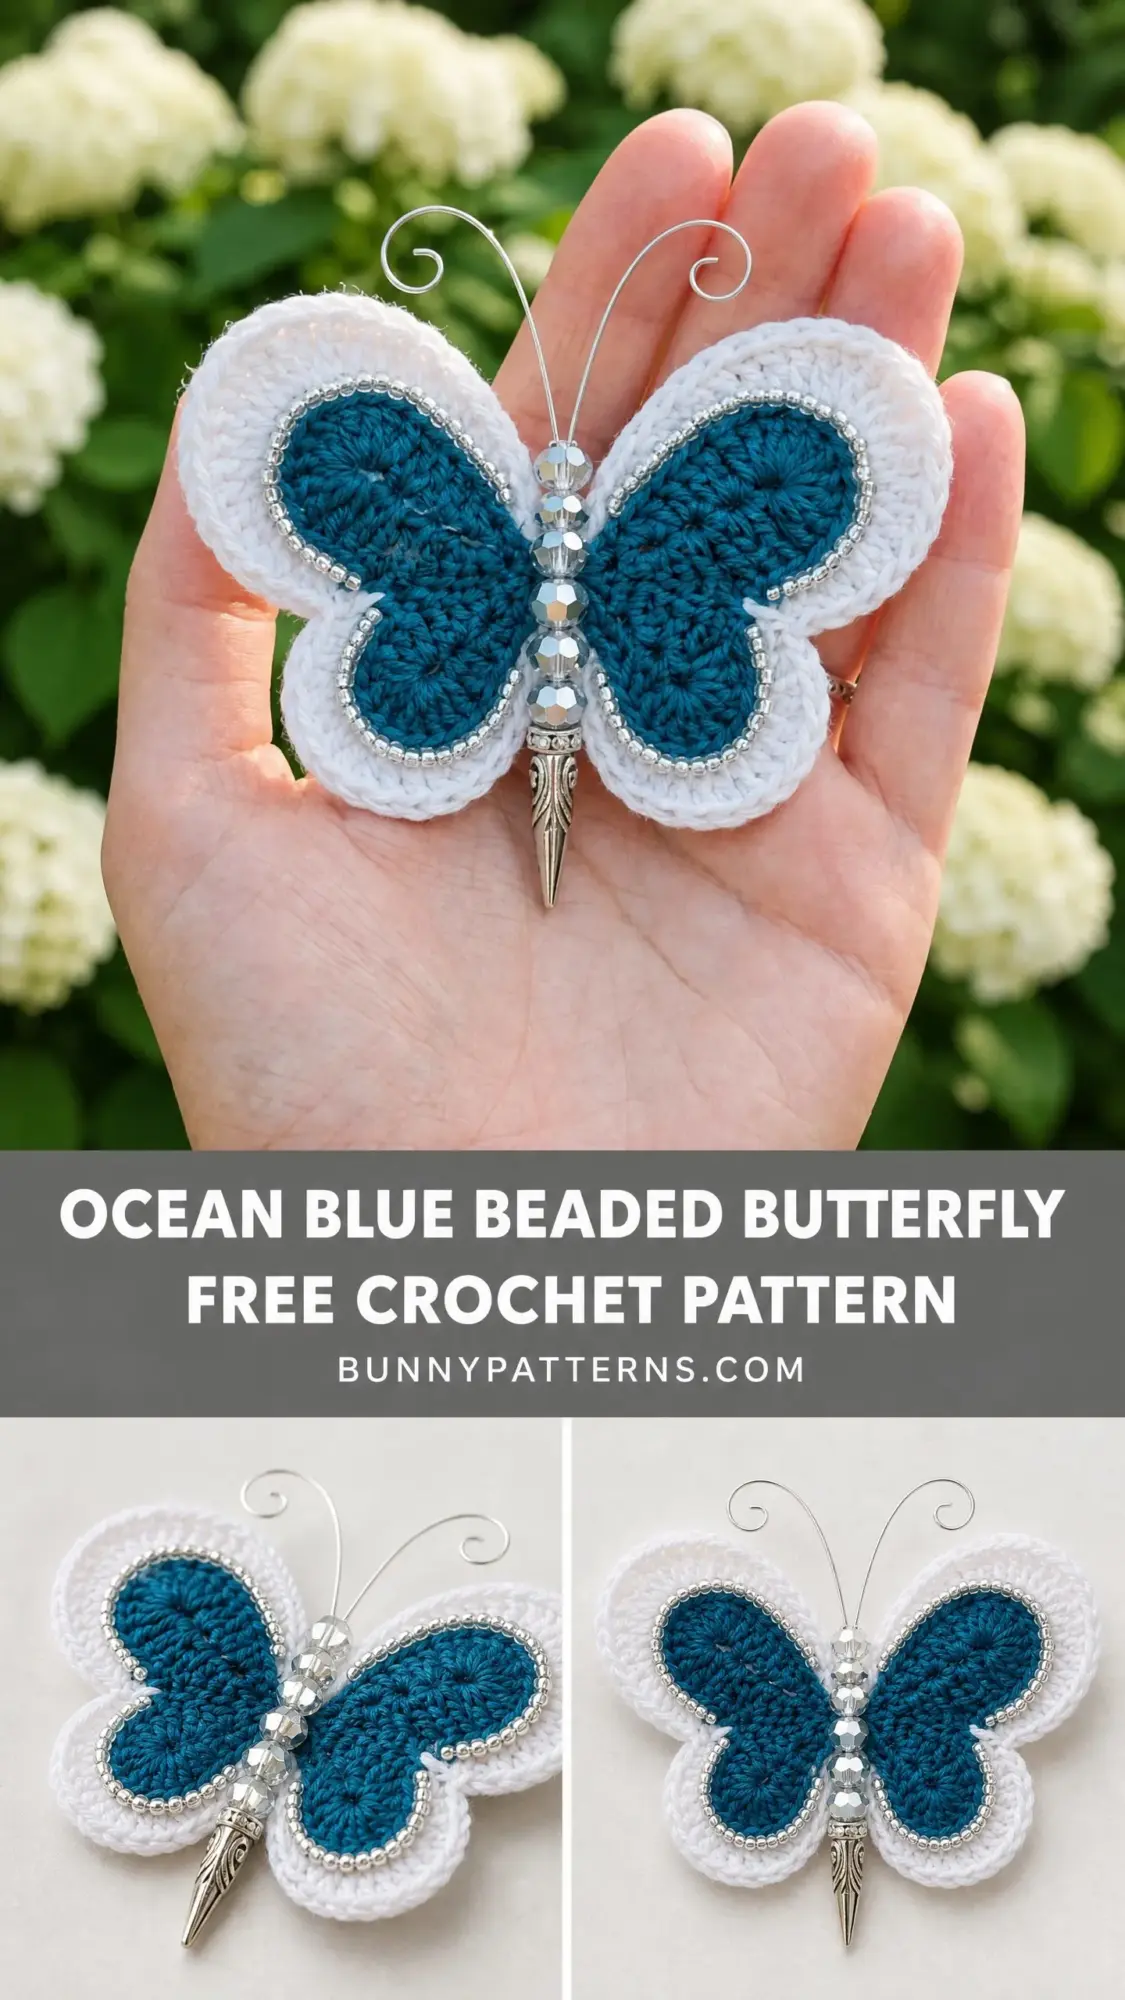
This beaded butterfly has become one of my favorite things I have ever designed. The teal against white reminds me of that morning every single time I look at it. And the silver bead details catch the light in a way that feels genuinely magical.
Whether you want to make a brooch, an ornament, a gift topper, or just a pretty thing to sit on your shelf, this palm-sized butterfly works up beautifully. Let me walk you through every step.
What Makes This Beaded Butterfly Pattern Special
This is not your typical flat crochet motif. The two-layer construction creates depth and dimension that really makes the design pop. You will work a smaller teal upper wing set, then a larger white lower wing set, and stack them together. The result looks far more complex than it actually is.
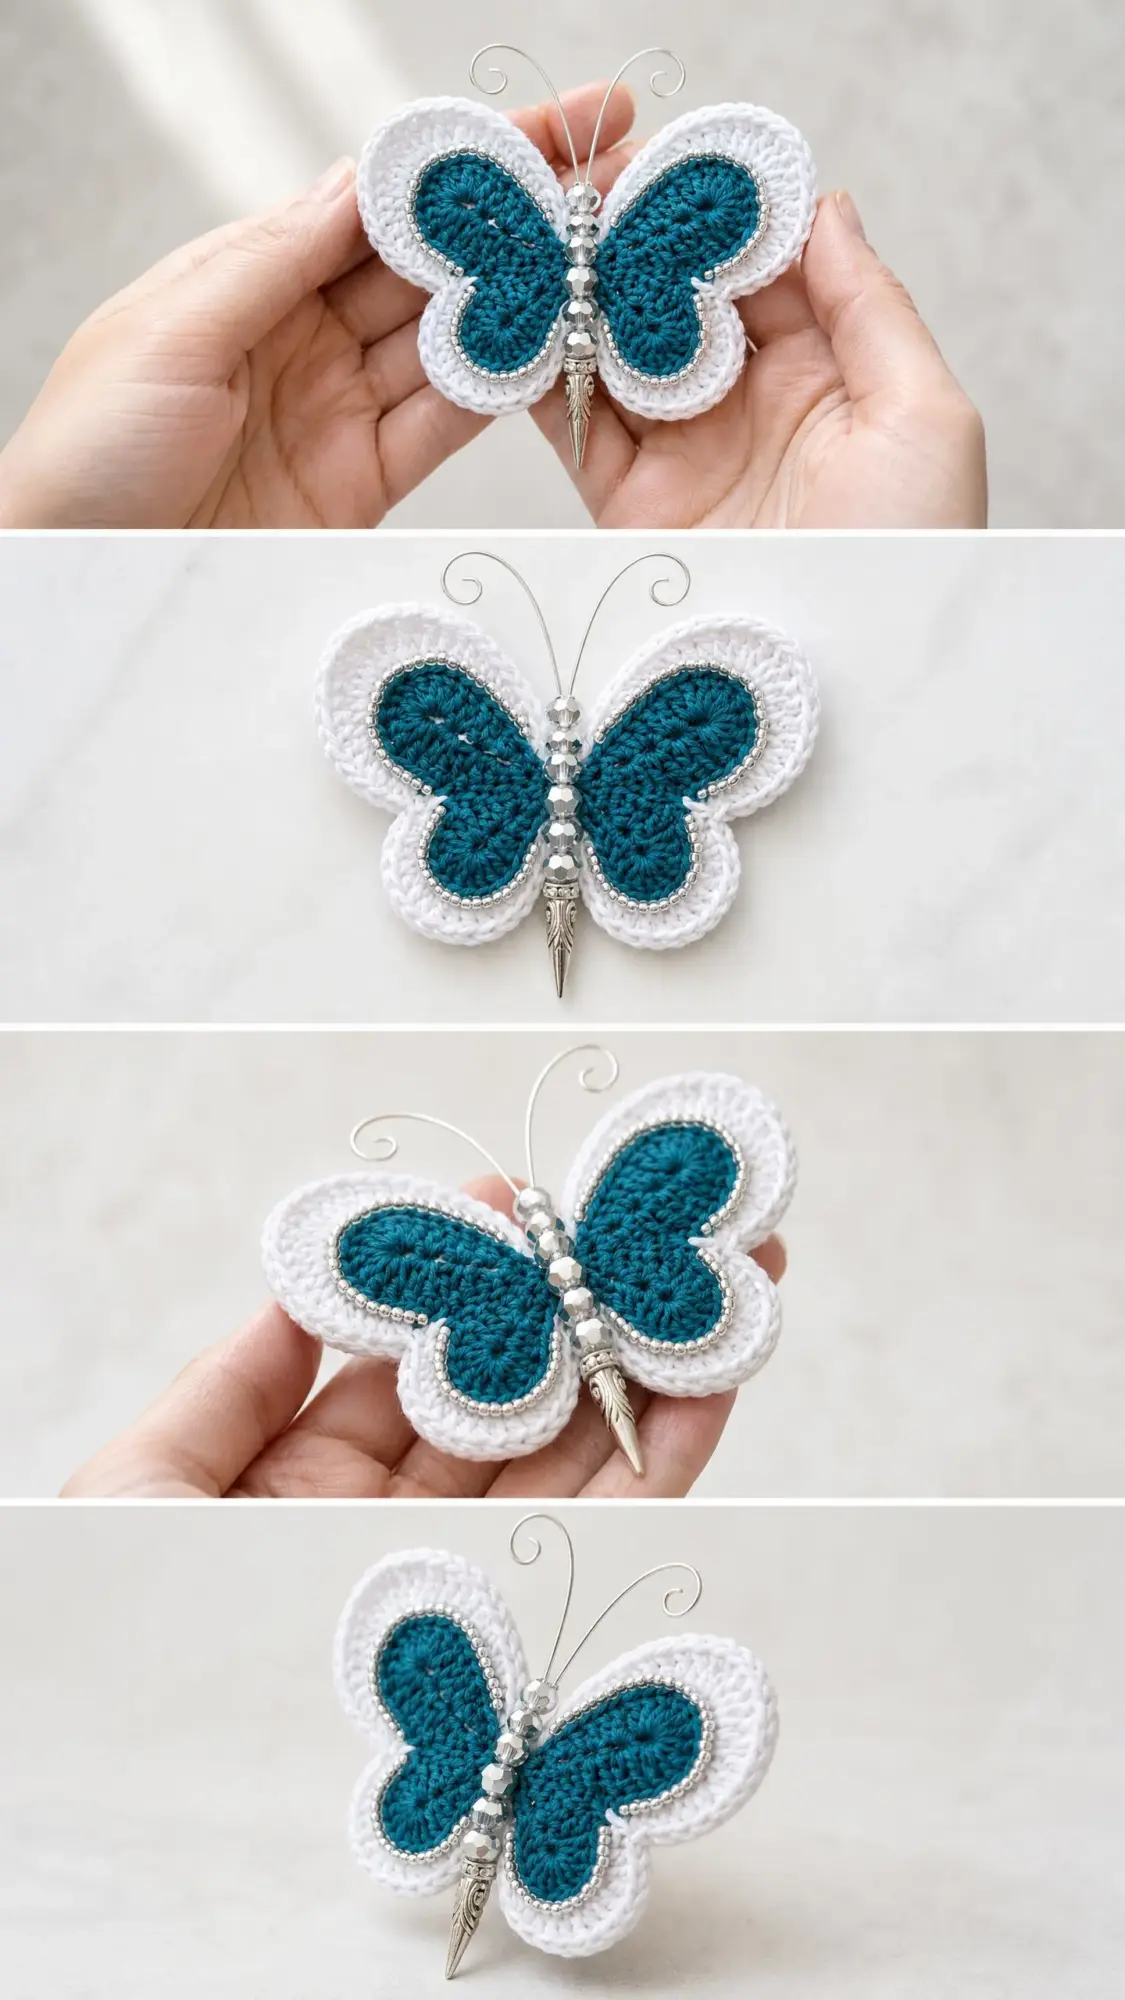
The bead embellishments take this project from nice to stunning. Silver seed beads outline the inner wing edges. Crystal faceted beads form the thorax. A decorative spike charm becomes the abdomen. Wire antennae with curled ends complete the look.
If you have never worked with beads or wire before, do not worry. I will explain every step in detail, and none of it is as scary as it sounds.
Skill Level and Time Estimate
I would call this an intermediate level project. The crochet itself uses basic stitches that beginners can handle. What bumps up the difficulty is working with fine thread, assembling multiple pieces, and adding the embellishments.
Plan for 3 to 5 hours total, including assembly and bead work. If you are an experienced crocheter, you might finish closer to 2 hours. Take your time with the wire antennae, especially your first time.
Finished Size
Your completed butterfly will measure approximately 4.5 inches wide by 3.25 inches tall (11.5 cm by 8.5 cm). That is about palm-sized, perfect for holding and admiring. This measurement goes across the full wingspan and from the antenna base to the abdomen tip, not including the spike charm or the wire extensions.
Materials You Will Need
Yarn
Color A (Teal or Ocean Blue):
Size 10 crochet thread or fingering weight cotton, approximately 25 yards (23 m)
Color B (White):
Size 10 crochet thread or fingering weight cotton, approximately 40 yards (37 m)
Hook
US Steel 7 / 1.65 mm for size 10 crochet thread, or US B-1 / 2.25 mm for fingering weight cotton
Notions
Yarn Suggestions That Work Beautifully
Lizbeth Premium Crochet Thread Size 10 in Turquoise Med or Ocean Teal for Color A, and White for Color B. This Egyptian cotton produces a smooth, firm fabric that holds the wing shape perfectly.
DMC Petra Crochet Cotton Thread Size 5 in shade 5322 (teal) and 5B5200 (white) works well too. This is slightly heavier than size 10 and will give you a butterfly about 10 to 15 percent larger.
Paintbox Yarns Cotton DK in Kingfisher Blue and Paper White is great if you want a bigger butterfly. Use a US D-3 / 3.25 mm hook and expect a finished size around 6 inches wide.
Substitution note: Any smooth cotton thread or yarn works. Avoid fuzzy or textured fibers because you need a clean surface for the bead embellishment and visible stitch definition.
Gauge
With size 10 crochet thread and Steel 7 hook:
Gauge is not critical for this decorative item. Just keep your tension consistent so both wing layers align properly when you stack them.
Abbreviations (US Terms)
Before we begin, let me define every stitch you will use:
Special Stitches Explained
Magic Ring (MR)
This creates an adjustable center that you can pull completely closed. Make a loop with your yarn, crossing the working end over the tail. Insert your hook into the center, yarn over with the working end, and pull up a loop. Chain the number specified, then work your stitches into the ring. After completing the first round, pull the tail firmly to close the center hole.
Double Crochet Two Together (dc2tog)
This decrease combines two stitches into one. Yarn over, insert hook into next stitch, yarn over and pull up a loop, yarn over and pull through two loops. You now have two loops on your hook. Yarn over, insert hook into the following stitch, yarn over and pull up a loop, yarn over and pull through two loops. You now have three loops on your hook. Yarn over and pull through all three loops. Done.
Treble Crochet (tr)
Yarn over twice before inserting your hook. Pull up a loop so you have four loops on your hook. Then yarn over and pull through two loops, three separate times, until one loop remains.
Pattern Notes Before You Begin
1. The butterfly has two separate flat motifs: upper wings in Color A (teal) and lower wings in Color B (white). Upper wings are smaller and sit on top.
2. Each wing set is worked as a continuous piece with a common center starting point.
3. Read all instructions for a round before starting it.
4. Join rounds with a slip stitch to the top of the starting chain unless told otherwise.
5. Stitch counts refer to total stitches across both wings combined.
6. A ch-3 at the start of a round counts as one dc throughout.
7. Right side faces you throughout all rounds. Do not turn unless instructed.
Section 1: Upper Wings (Color A, Teal)
The upper wings are made as two separate identical circles, then sewn together at the inner edges.
Make 2 identical circles:
Round 1: MR, ch 3 (counts as dc), 9 dc in ring, join with sl st to top of ch-3. Pull ring closed. (10 dc)
Round 2: Ch 3, dc in same st, 2 dc in each of next 9 sts, join. (20 dc)
Round 3: Ch 3, dc in same st, dc in next st, [2 dc in next st, dc in next st] 9 times, join. (30 dc)
Round 4: Ch 3, dc in same st, dc in each of next 2 sts, [2 dc in next st, dc in each of next 2 sts] 9 times, join. (40 dc)
Fasten off both circles, leaving long tails.
Assembly: Lay the two circles side by side with right sides facing up. Using Color A and a tapestry needle, whipstitch approximately 8 stitches together along the inner adjacent edges to join them. This seam becomes the center top where your antennae will go.
Checkpoint: Your completed upper wing set should measure approximately 3.5 inches wide by 2 inches tall (9 cm by 5 cm).
Section 2: Lower Wings (Color B, White)
The lower wings have four separate pieces: two large lobes and two small lobes.
Make 2 Large Lower Lobes
Round 1: Using Color B, MR, ch 3 (counts as dc), 11 dc in ring, join with sl st to top of ch-3. Pull ring closed. (12 dc)
Round 2: Ch 3, dc in same st, 2 dc in each of next 11 sts, join. (24 dc)
Round 3: Ch 3, dc in same st, dc in next st, [2 dc in next st, dc in next st] 11 times, join. (36 dc)
Round 4: Ch 3, dc in same st, dc in each of next 2 sts, [2 dc in next st, dc in each of next 2 sts] 11 times, join. (48 dc)
Round 5: Ch 3, dc in same st, dc in each of next 3 sts, [2 dc in next st, dc in each of next 3 sts] 11 times, join. (60 dc)
Fasten off, leaving a long tail on one circle and a short tail on the other.
Make 2 Small Lower Lobes
Round 1: Using Color B, MR, ch 3 (counts as dc), 9 dc in ring, join. Pull ring closed. (10 dc)
Round 2: Ch 3, dc in same st, 2 dc in each of next 9 sts, join. (20 dc)
Round 3: Ch 3, dc in same st, dc in next st, [2 dc in next st, dc in next st] 9 times, join. (30 dc)
Round 4: Ch 3, dc in same st, dc in each of next 2 sts, [2 dc in next st, dc in each of next 2 sts] 9 times, join. (40 dc)
Fasten off both small lobes, leaving long tails.
Assemble the Lower Wing Set
Step 1: Take one large lobe and one small lobe. Hold them side by side with the small lobe positioned below the large lobe, right sides facing up. Using Color B and a tapestry needle, whipstitch approximately 6 stitches together along adjacent inner edges. The small lobe sits at the lower outer position. Repeat for the second pair.
Step 2: Take both assembled wing halves and place them side by side, right sides up, large lobes at top. Whipstitch the two halves together at the center inner edge, joining approximately 8 stitches between the two large lobes at the top center. Leave a slight gap between the small lobes at the lower center.
Checkpoint: Your completed lower wing set should measure approximately 4.5 inches (11.5 cm) across and 3.25 inches (8.5 cm) tall. You should see that classic four-wing butterfly silhouette.
Section 3: Assembly
Step 1: Place your white lower wing set on a flat surface, right side up. Center the teal upper wing set on top, aligning the center joins. The teal wings should sit above the horizontal midline, covering the top two lobes partially.
Step 2: Pin or clip in place. Check symmetry from the front.
Step 3: Using Color B and a tapestry needle, tack the two layers together at the center join point only. Take 4 to 6 small stitches through both layers. Do not sew the outer edges together. The layers should remain separate so the white border frames the teal.
Step 4 (Antennae): Cut a single piece of silver wire approximately 8 inches (20 cm) long. Fold in half to find the center. Using round-nose pliers, curl each end into a small spiral, about 2 to 3 full rotations. Insert the folded center down through the center join at the top of the butterfly, between both layers. Pull through until the antennae extend upward approximately 2 inches above the wings. Bend the wire slightly outward so the antennae spread at a gentle V angle. Secure by wrapping 3 to 4 times around itself or stitching tightly with beading thread.
Section 4: Bead Embellishment
This is where your butterfly transforms from pretty to absolutely stunning.
Inner Wing Border Beads
Thread a beading needle with approximately 24 inches (60 cm) of beading thread. Knot securely and anchor at the inner edge of one teal upper wing where it meets the center body. String one size 8/0 silver seed bead and sew it down by passing the needle through the next stitch on the teal wing edge, one stitch to the left. Continue adding one bead per stitch around the inner curved border of each teal wing lobe. You will use approximately 15 to 20 beads per inner wing edge, about 30 to 40 beads total for both upper wings. Fasten off securely on the back.
Body Beads (Thorax)
Thread your beading needle again with fresh thread. Anchor at the center join. String 2 to 4 crystal or clear faceted beads onto the thread, stacking them vertically to form the thorax above the center body. Pass the thread through the center join several times to anchor the bead stack so it sits upright between the antennae wire.
Spike Charm (Abdomen)
Thread beading thread through the loop or bail of the spike charm. String 1 to 2 seed beads onto the thread above the charm if desired. Pass the thread up through the center join of the lower wing assembly and through to the back. Knot securely. The spike should hang freely and point downward below the butterfly.
Optional Accent Row
Add a row of silver seed beads along the seam between the teal upper wings and white lower wings on the front face. This neatens the join line and creates that beautiful silver outline separating the colors. Add approximately 20 to 30 beads evenly spaced along this border.
Finishing Your Butterfly
Weave in all yarn ends securely using a tapestry needle. A small drop of washable fabric glue or fray check on each tail prevents unraveling in delicate thread.
Blocking: Lightly mist both wing layers with water or hold briefly over steam. Pin the butterfly flat onto a foam blocking board, spreading the wings fully. Allow to dry completely, at least 2 hours. Do not press with an iron as this will flatten the stitch texture.
For a brooch: Sew or glue a brooch pin bar to the back of the white lower wing layer.
For an ornament: Attach a loop of ribbon or monofilament through the antennae wire above the curled ends.
Size Customization Tips
Larger butterfly: Work additional increase rounds on each lobe before shaping. Each extra round adds approximately 0.25 to 0.3 inches using size 10 thread. For a 6-inch wingspan, add 2 more increase rounds to each lobe.
Smaller butterfly: Use finer thread, size 20 or 30, with an appropriately smaller hook. Size 20 thread at the same round count produces a butterfly approximately 30 percent smaller.
Worsted weight version: Use a US G-6 / 4 mm hook and work only Rounds 1 through 3 for small lobes and Rounds 1 through 4 for large lobes. Your finished butterfly will be approximately 7 to 8 inches wide.
Care Instructions
Hand wash gently in cool water with mild soap. Do not wring. Roll in a clean towel to remove excess moisture, then re-pin to shape and air dry flat. Do not machine wash or tumble dry. Spot cleaning works best for finished pieces with beads and wire. Store flat or hanging, and never fold along the center body.
You Did It!
Thank you so much for making this butterfly with me. I hope the process brought you as much joy as it brought me when I first designed it. Every time I see one of these finished, I think of that summer morning and my cold coffee.
If you make this pattern, I would absolutely love to see it. Tag me on Instagram or share a photo in my Facebook group. Seeing your creations is honestly the best part of my day.
Go ahead and pin this pattern to your Pinterest boards so you can find it whenever inspiration strikes. And if you have any questions or just want to share how yours turned out, drop a comment below. I read every single one.
You Might Also Like
- Ocean Blue Ombre Crochet Backpack Free Crochet Pattern
- Ocean Blue Daisy Granny Square Blanket Free Crochet Pattern
- Strawberry Fields Granny Square Tote Free Crochet Pattern
- Pink Strawberry Couple Amigurumi Free Crochet Pattern