
I don’t know about you, but I absolutely love a good mini backpack. There’s something so practical about having both hands free while still looking completely put together.
Get the Ad-Free PDF Pattern
You can find the free pattern below, or you can purchase the ad-free printable PDF from my shop.
Get the Printable PDF →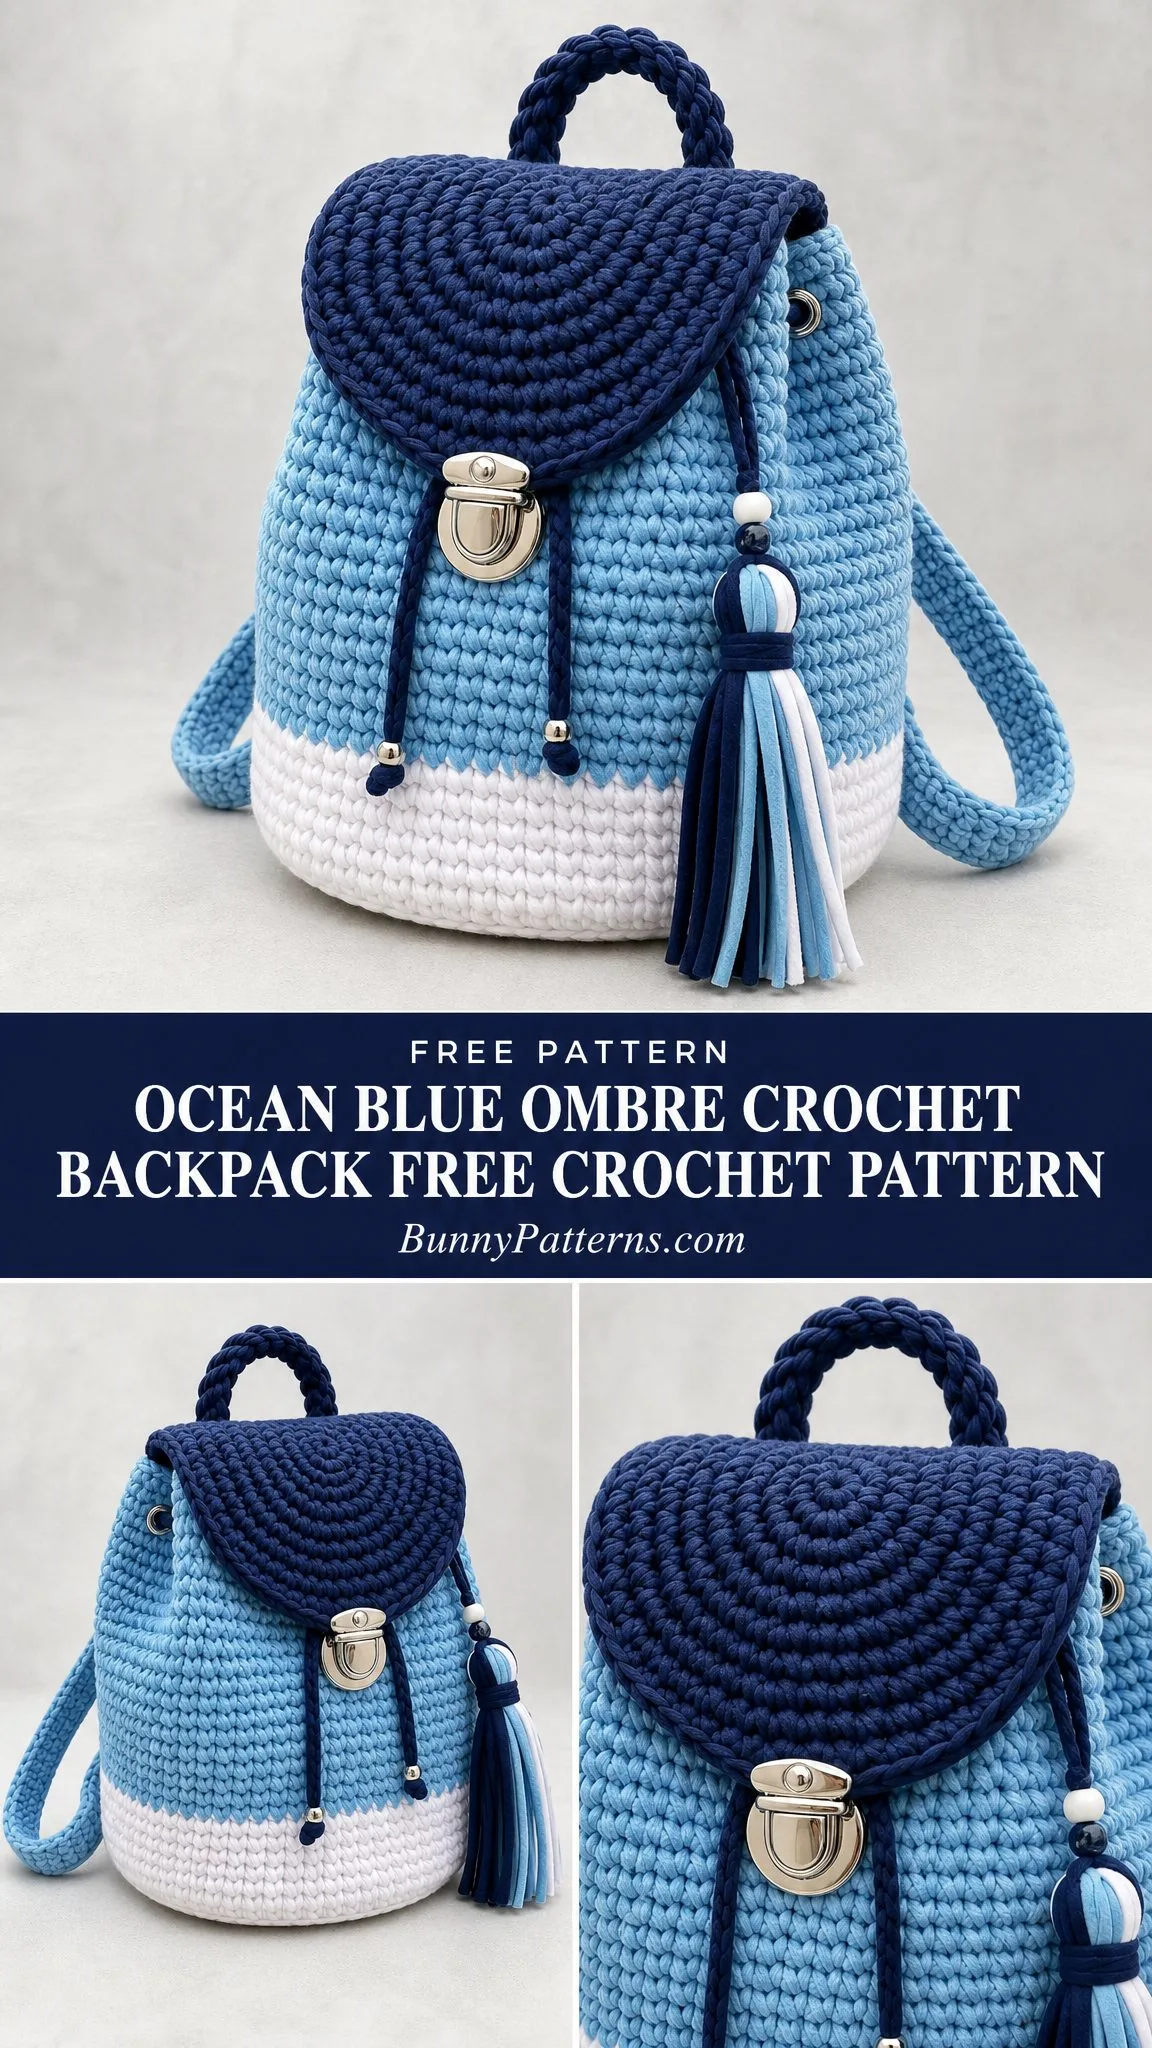
This Ocean Blue Ombre Crochet Backpack gives you all the boutique style with none of the boutique price tag. The ombre color blocking from white to sky blue to navy creates such a fresh, modern look that works for everything from farmers market trips to casual days out.
And honestly? It’s way more approachable than it looks. If you can single crochet in the round and follow a simple increase pattern, you’ve got this.
About This Crochet Backpack Pattern
This polished mini backpack is worked from a firm oval base upward in continuous rounds. The body uses dense single crochet (sc) with color-blocked ombre bands. You’ll start with a white base, transition to a gorgeous sky blue body, and finish with deep navy details at the top.
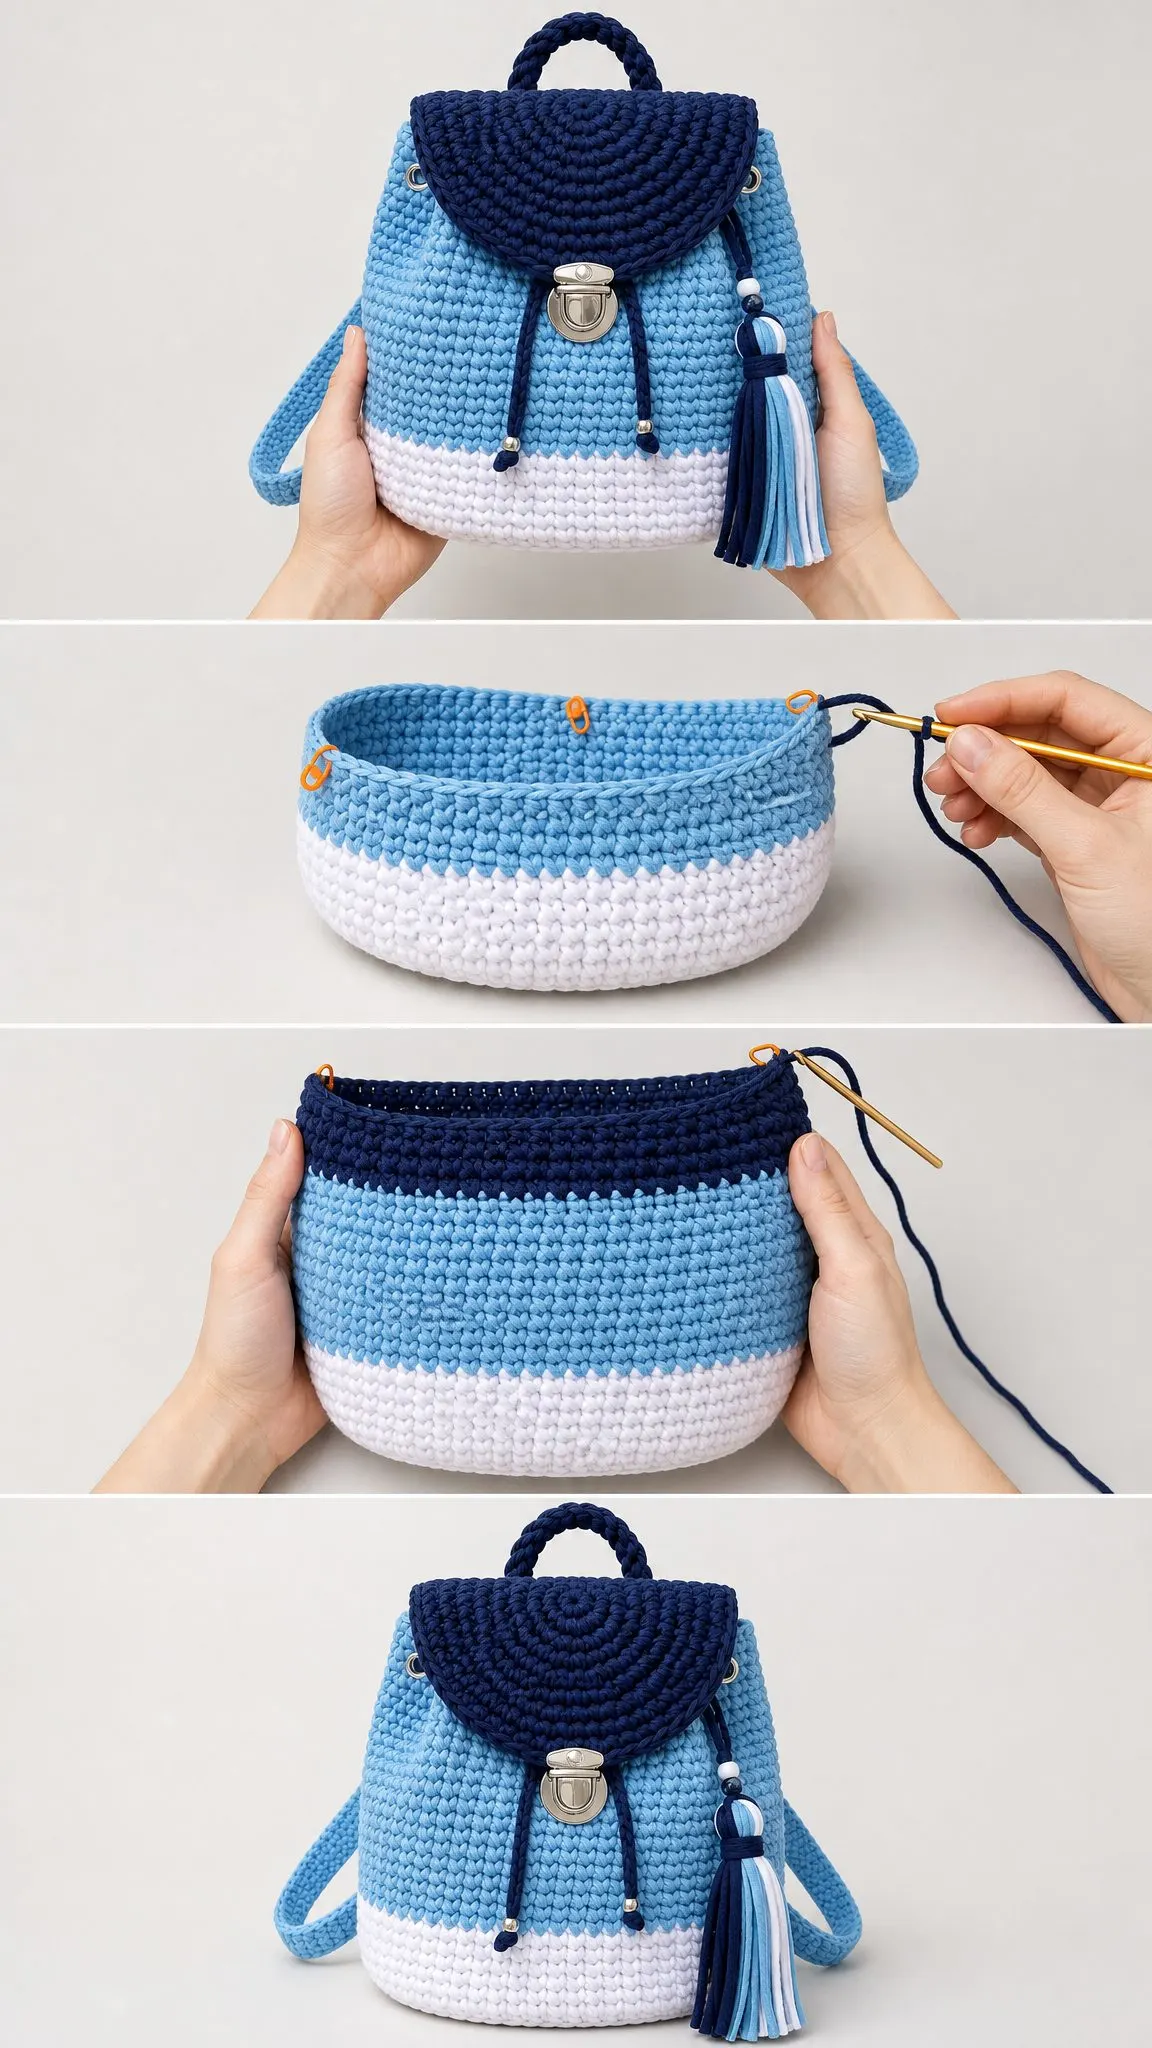
The finished backpack includes a rounded flap, drawstring closure, braided handle, adjustable shoulder straps, and a layered tassel. Every detail comes together to create that finished boutique look you see in high-end shops.
Skill Level: Intermediate. You’ll need to be comfortable with shaping in the round, making neat color changes, working flap rows, and basic hardware placement.
Finished Size: Approximately 9 inches wide x 10.5 inches tall x 4 inches deep (23 x 27 x 10 cm).
Time to Complete: About 6 to 8 relaxed hours, plus finishing and drying time after blocking.
Materials You’ll Need
Gathering your materials before you start makes the whole process smoother. Here’s everything you’ll need for this crochet backpack pattern:
Yarn:
Yarn Suggestions:
Substitute with a smooth, low-stretch cord yarn that creates a stiff fabric. Avoid loosely plied yarns unless you plan to line the bag.
Tools:
Hardware:
Gauge
Getting your gauge right is essential for this crochet backpack pattern. You want a firm fabric that holds its shape.
9 sc x 8 rounds = 4 inches / 10 cm in firm single crochet, worked in the round after light steaming.
Flap rows: 9 sc x 8 rows = 4 inches / 10 cm.
Make a swatch and adjust your hook size before starting. If your swatch is too loose, go down a hook size. Too tight? Go up.
Stitch Guide and Abbreviations
Let me break down all the stitches and terms you’ll encounter in this pattern:
Basic Abbreviations:
Special Stitches:
Invisible join: Cut yarn, pull tail through final stitch, thread needle under both loops of first stitch of round, then back down through the center of the last stitch. Tighten gently. This creates a seamless finish.
Firm single crochet: Insert hook under both loops, yarn over, pull up a loop, yarn over, pull through both loops. Keep loops snug but not tight.
Standing sc color join: Place a slip knot on hook, insert hook in indicated stitch, yarn over, pull up a loop, yarn over and pull through both loops. This lets you join a new color without a slip stitch.
Cord row for straps: Ch 1, sc across. Turn. Repeat rows until strap length is reached, keeping edges straight.
Pattern Notes
Work the base and body in continuous rounds unless instructed otherwise. Move your stitch marker up at the first stitch of each round so you don’t lose your place.
Join color changes at the back center of the bag. This keeps all your color joins hidden.
For a bag that stands upright, crochet firmly and avoid stretching the cord as you work. The stiffness comes from your tension.
Left-Handed Note: Left-handed makers can follow the same stitch counts. Your spiral will travel in the opposite direction, so place the clasp and tassel after trying the flap on the bag.
UK Terms: US sc = UK dc.
Oval Base Instructions (White)
The base creates the foundation for your entire backpack. Take your time here to get it flat and even.
Rnd 1: Ch 13. Sc in 2nd ch from hook and next 10 ch, 3 sc in last ch; working on other side of chain, sc in next 10 ch, 2 sc in first ch. (26 sc)
Rnd 2: Inc in first st, sc 10, inc in each of next 3 sts, sc 10, inc in each of next 2 sts. (32 sc)
Rnd 3: Inc, sc 4; repeat from 6 times, inc, sc 1. (38 sc)
Rnd 4: Inc, sc 5; repeat from 6 times, inc, sc 1. (44 sc)
Rnd 5: Inc, sc 6; repeat from 6 times, inc, sc 1. (50 sc)
Rnd 6: Inc, sc 7; repeat from 6 times, inc, sc 1. (56 sc)
Rnd 7: Sc 3, inc, sc 6; repeat from 7 times, inc, sc 4. (64 sc)
Your oval base should lay flat at this point. If it cups upward, your tension is too tight or you need more increases. If it ruffles, your tension is too loose.
Body Instructions
Now we’ll build the walls of the backpack by working into the back loops only on the first round, then continuing in regular single crochet.
Rnd 8: BLO sc around to turn the base upward. (64 sc)
Working in back loop only creates that nice defined ridge where the base meets the sides.
Rnds 9-13: Sc around in white. (64 sc)
Rnd 14: Join sky blue with standing sc at back center. Sc around. (64 sc)
Rnds 15-28: Sc around in sky blue. (64 sc)
Checkpoint: Body should measure approximately 9 inches / 23 cm wide, 4 inches / 10 cm deep, and 10 inches / 25.5 cm tall from the bottom edge.
Rnds 29-30: Join navy. Sc around. (64 sc)
Top Opening and Eyelet Round
The eyelet round creates spaces for your drawstring to weave through. This is what gives the backpack its classic cinched closure.
Rnd 31: Sc 6, ch 1, skip 1 st, sc 1; repeat from 8 times. (56 sc + 8 ch-1 spaces)
Rnd 32: Sc in each sc and ch-1 space around. Invisible join. (64 sc)
Mark the back center and front center. The flap will be sewn to the back over Rnds 30-32.
Rounded Flap Instructions (Navy)
The flap is worked flat in rows, starting from a magic ring and increasing outward to create that beautiful rounded shape.
Row 1: Make a magic ring, ch 1, work 6 sc in ring. Pull ring snug. Turn. (6 sc)
Row 2: Ch 1, inc in each st across. Turn. (12 sc)
Row 3: Ch 1, sc 1, inc; repeat from across. Turn. (18 sc)
Row 4: Ch 1, sc 2, inc; repeat from across. Turn. (24 sc)
Row 5: Ch 1, sc 3, inc; repeat from across. Turn. (30 sc)
Row 6: Ch 1, sc 4, inc; repeat from across. Turn. (36 sc)
Row 7: Ch 1, sc 5, inc; repeat from across. Turn. (42 sc)
Row 8: Ch 1, sc across evenly for a firm outer edge. Do not turn. (42 sc)
Edging: Work 21 sc evenly along the straight top edge, then sl st to fasten off. Leave a 24 inch / 61 cm sewing tail.
Checkpoint: Flap should be approximately 9.25 inches / 23.5 cm wide and 4.5 inches / 11.5 cm deep.
Shoulder Straps (Sky Blue, Make 2)
The straps are simple rectangles worked back and forth in rows. Make two identical straps.
Ch 7.
Row 1: Sc in 2nd ch from hook and each ch across. Turn. (6 sc)
Rows 2-78: Ch 1, sc across. Turn. (6 sc)
Fasten off, leaving a long sewing tail.
Each strap measures approximately 34 to 36 inches / 86 to 91 cm before hardware adjustment. For shorter straps, remove rows in pairs.
Top Handle (Navy)
The braided handle adds both function and style to your crochet backpack.
Make 3 cords: ch 22 with navy and fasten off.
Braid the 3 cords together, knotting both ends securely.
Sew the handle ends to the top back, spacing them 3.25 inches / 8 cm apart.
Drawstring (Navy)
Ch 110, keeping the chain even and flexible.
Weave through the 8 eyelets, starting and ending at the front.
Add beads or cord tips to the ends for a polished finish.
Layered Tassel
The tassel uses all three colors for a coordinated look.
Cut 16 strands, each 10 inches / 25 cm long:
Fold all strands together over a 12 inch / 30 cm hanging cord.
Wrap tightly with navy yarn 0.75 inches / 2 cm below the fold.
Knot securely, trim ends straight, and attach to a side ring or flap cord.
Assembly Instructions
Now it’s time to bring all the pieces together.
Step 1: Center the straight edge of the flap over the back top edge. Sew through the flap edge and top band, keeping the seam flat and strong.
Step 2: Close the flap over the front. Mark clasp placement, then attach the lower clasp to the bag front and the upper clasp to the flap. Reinforce the inside with a small felt or fabric square if your hardware has prongs.
Step 3: Sew top handle ends securely at the back top edge.
Step 4: Attach shoulder straps to the upper back and lower back corners. Add D-rings or adjusters if desired.
Step 5: Weave drawstring through eyelets, tie ends, and add cord tips.
Step 6: Attach tassel at the right front side or to the drawstring, matching the project photo styling.
Blocking Your Backpack
Blocking helps your crochet backpack hold its shape beautifully.
Stuff the backpack with towels until the sides stand evenly. Steam lightly without touching the yarn directly with the iron or steamer head.
Shape the flap curve while warm and let dry completely before use.
Optional Lining
For daily use, consider adding a simple fabric lining to protect your belongings and add structure.
Cut an oval base and a rectangle that matches the inner circumference plus seam allowance. Sew the lining separately, then whipstitch it just below the eyelet round.
Troubleshooting Tips
Base cups upward: Your increases are too few or your tension is tight. Redo the last base round with a larger hook.
Base ruffles: Your increases are too many or your tension is loose. Block firmly or remove one increase round.
Bag leans: Place the color joins and flap seam at the back center and stuff while steaming.
Flap curls: Add one extra sc edging row along the curved edge, working 2 sc into each corner.
Straps stretch: Sew grosgrain ribbon to the wrong side of each strap or use non-stretch cord yarn.
Size Customization
To widen the bag, continue increasing the oval base in the established rhythm until you reach the desired circumference, then keep the final body count divisible by 8 so the eyelets remain evenly spaced.
To make the bag taller, add or remove plain body rounds before the navy top band.
To adjust strap length, add or remove strap rows in pairs.
Progress Checkpoints
Use these checkpoints to make sure you’re on track:
Care Instructions
Spot clean with cool water and mild soap. Reshape while damp and dry flat, stuffed with towels to maintain shape.
Do not machine dry.
Remove detachable tassel or metal charms before cleaning.
Final Thoughts on This Crochet Backpack Pattern
This Ocean Blue Ombre Crochet Backpack is one of those projects that looks so impressive when finished, but breaks down into totally manageable steps. The firm cord yarn does most of the work in creating structure, and the color blocking gives you natural stopping points to celebrate your progress.
Whether you make it for yourself or as a gift, this backpack is sure to get compliments wherever you go.
Thank you so much for choosing this pattern! I really hope you enjoy making your own Ocean Blue Ombre Backpack. If you give it a try, I would absolutely love to see your finished project. Tag me on Instagram or share a photo in our Facebook group.
If you loved this crochet backpack pattern, go ahead and save it to your Pinterest boards so you can find it again whenever you’re ready to start. And please drop a comment below if you make one. I can’t wait to see your color combinations!
Want a Quick & Easy Printable Version?
Get a clean, beautifully formatted PDF of this pattern — easy to follow step by step, ready to print or save on any device. No scrolling, no distractions, just the pattern.
Get the Printable PDF →You Might Also Like
- Ocean Wave Candy Bolster Pillow Free Crochet Pattern
- Berry Blossom Lace Cardigan Free Crochet Pattern
- Dusty Rose T-Shirt Yarn Backpack Free Crochet Pattern
- Ocean Wave Hexagon Throw Free Crochet Pattern