
When I sat down to design this dress, I had a clear vision. I wanted a garment that felt romantic and dramatic without being fussy to construct. I wanted that gorgeous gradient color shift that makes you look twice. And I wanted those statement ruffle sleeves that photograph beautifully but do not require a PhD in garment construction to achieve.
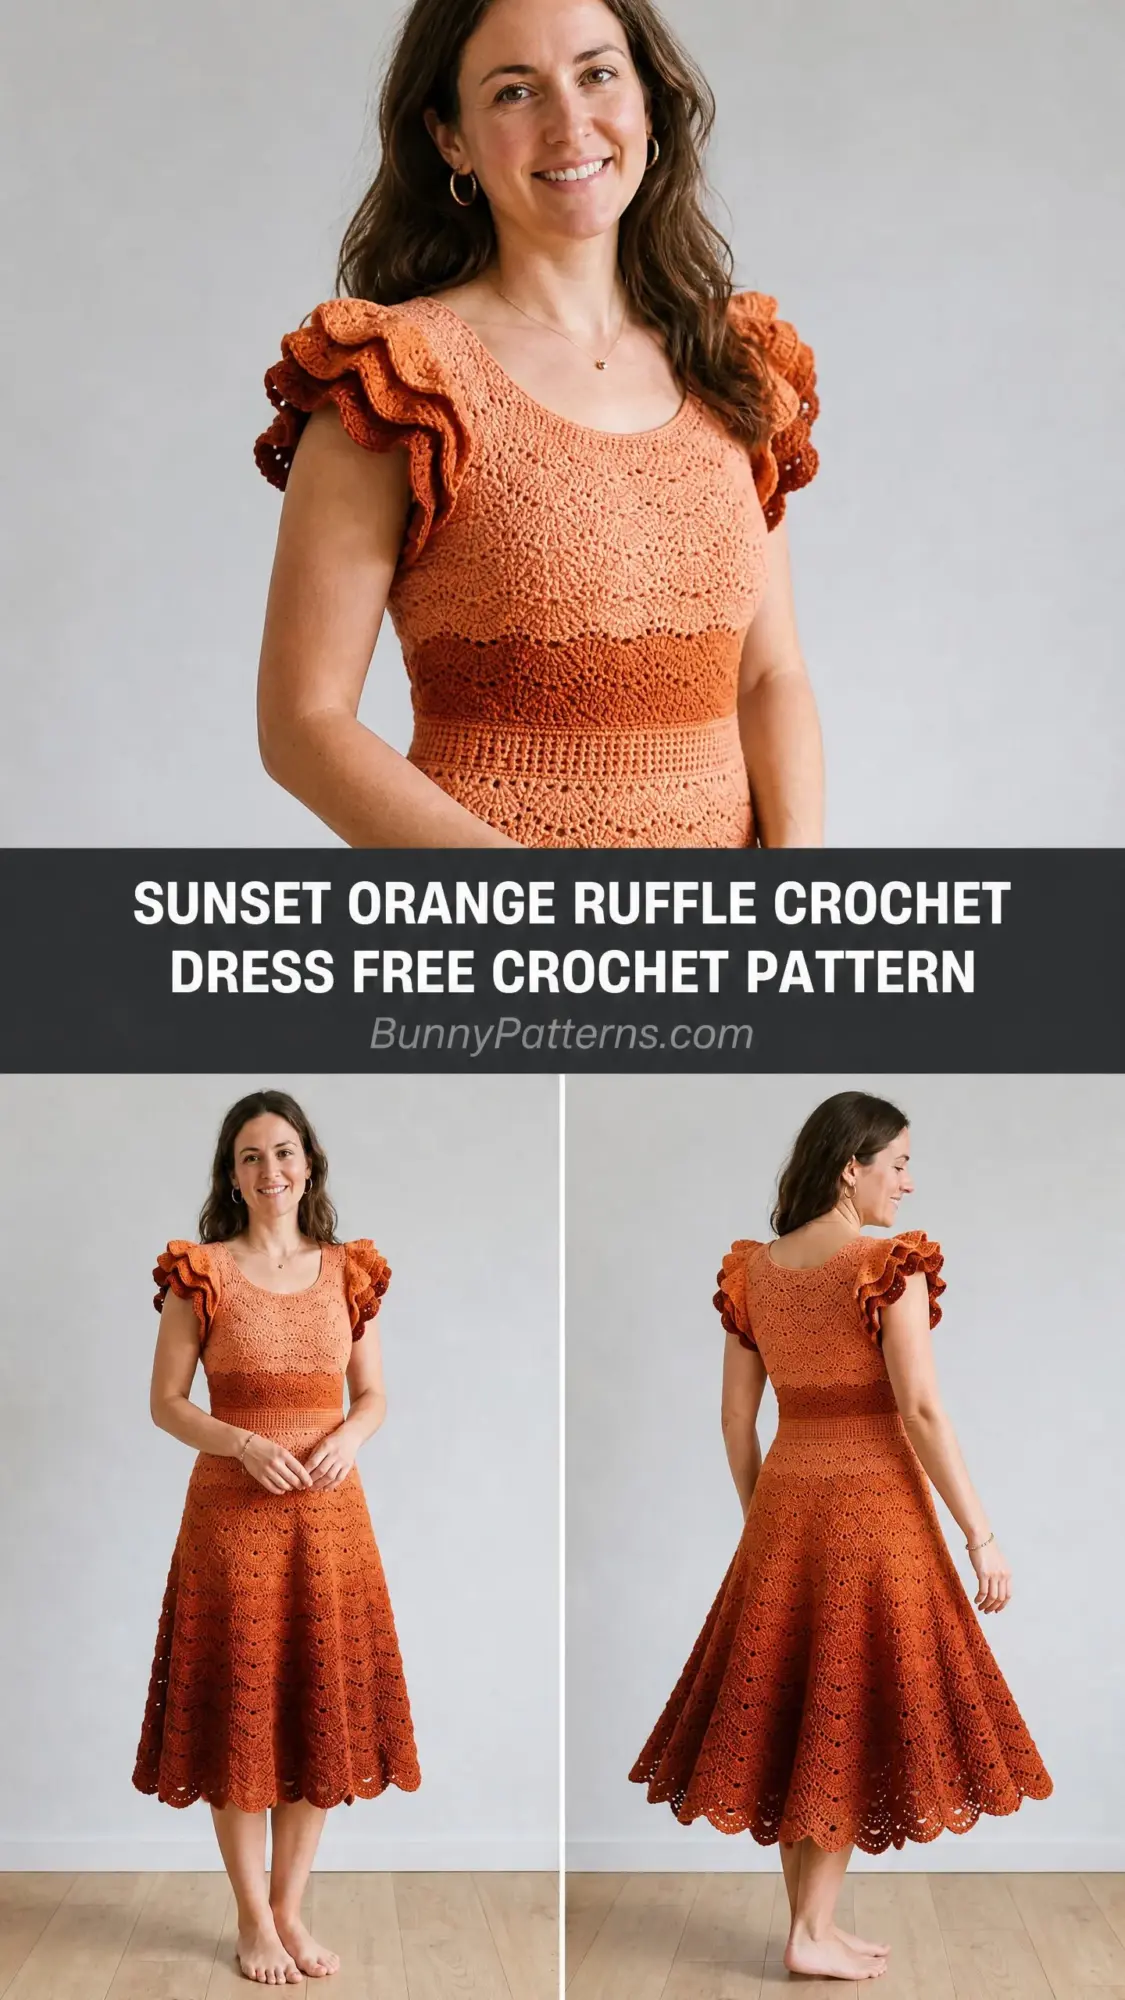
The result? This Sunset Orange Ruffle Crochet Dress with its fitted bodice, cinched waist, and flowing A-line skirt. The color journey from soft peach-coral at the neckline down to rich burnt terracotta at the hem creates that stunning sunset effect I was dreaming about.
I am SO pleased with how this turned out. The shell lace pattern creates texture without overwhelming the silhouette. The construction method, working from the top down and joining the bodice panels at the underarms, means minimal seaming. And those double-ruffle cap sleeves? They are worked separately and attached at the very end, so you can try on the dress body and adjust fit before committing to finishing touches.
About This Crochet Dress Pattern
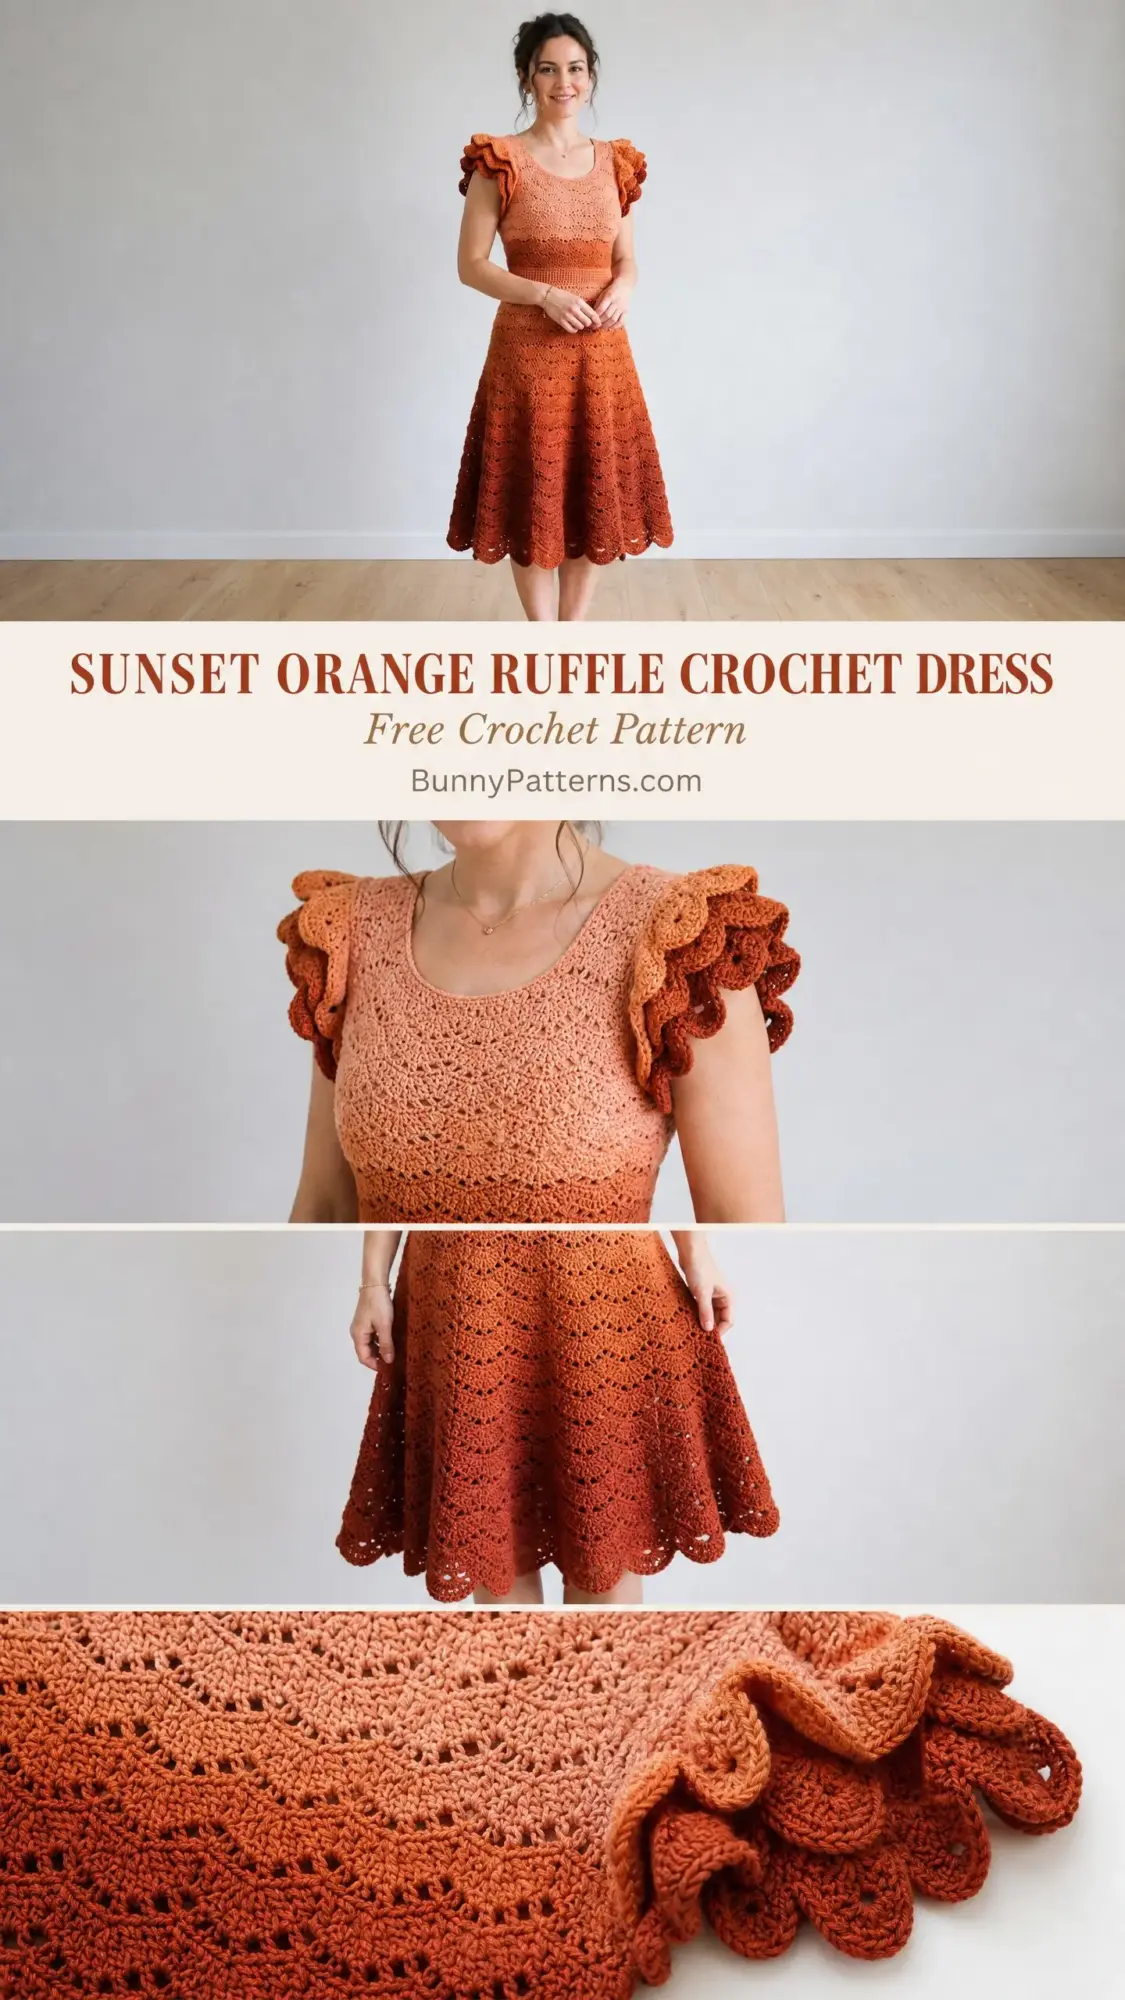
This midi-length dress showcases everything I love about crocheted garments. You get a fitted bodice with a flattering scoop neckline on both the front and back. A dense waistband worked in single crochet creates that defined waist without needing an elastic casing. The full A-line skirt flares gracefully with regular increases, and a scalloped hem finishes the bottom edge beautifully.
The construction is entirely seamless from the waist down. You work the front and back bodice panels separately as flat pieces to shape those neckline curves, then join them at the underarms with a simple chain bridge. From there, everything is worked in continuous rounds.
This is an advanced intermediate project. You should be comfortable working in the round, managing increases for shaping, and executing a repeating lace stitch pattern. If you have made fitted garments before, you will find this pattern logical and satisfying. If this is your first garment, I would recommend starting with something simpler to build your confidence first.
Materials You Will Need
Yarn: DK weight (CYCA 3 / Light) in a gradient colorway. The color shifts from peach-coral at the top to burnt orange terracotta at the bottom.
Total yardage required by size:
Hooks:
Additional supplies:
Yarn Suggestions
WeCrochet Chroma DK (70% superwash wool, 30% nylon, 200 yards per 100g skein) in colorway Autumn or Terracotta gradient. This yarn already shifts from peach through orange into rust naturally, which eliminates the need to manage separate color balls.
Paintbox Yarns Simply DK (100% acrylic, 137 yards per 50g skein) in Peach Orange and Burnt Terracotta purchased separately. This is affordable, widely available, and machine washable. You will manage the color transition yourself.
Drops Safran (100% cotton, 175 yards per 50g skein) in shades 02 and 50. Cotton provides excellent drape and structure for the A-line skirt. Note that cotton has no memory, so swatch carefully as your gauge may differ from wool blends.
Choose any DK weight yarn with a smooth texture. Avoid fuzzy or highly textured yarns because the shell lace pattern details will get lost.
Gauge (Please Do Not Skip This)
Gauge is critical for a fitted garment. One stitch off per inch across a 36-inch circumference equals a 3-inch error in final size. That is the difference between a perfect fit and a dress that does not work at all.
With E-4 (3.5 mm) hook in single crochet (used for waistband):
With F-5 (3.75 mm) hook in the Shell Lace Pattern:
Swatch at least 20 stitches wide and 20 rows tall in both stitch patterns. Block your swatch before measuring. I know swatching feels tedious when you are excited to start, but it will save you heartbreak later.
Finished Measurements
Sizes are written as XS / S / M / L / XL / 2XL throughout.
Bust circumference (relaxed): 30 / 33 / 36 / 39 / 42 / 45 inches (76 / 84 / 91.5 / 99 / 107 / 114 cm)
Waist circumference (relaxed): 24 / 27 / 30 / 33 / 36 / 39 inches (61 / 68.5 / 76 / 84 / 91.5 / 99 cm)
Hip circumference at fullest skirt point: 48 / 51 / 54 / 57 / 60 / 63 inches (122 / 130 / 137 / 145 / 152 / 160 cm)
Total length (shoulder to hem): 42 / 42.5 / 43 / 43.5 / 44 / 44.5 inches (107 / 108 / 109 / 110 / 112 / 113 cm)
Bodice length (neckline to waist): 13 / 13 / 13.5 / 13.5 / 14 / 14 inches
Skirt length (waist to hem): 29 / 29.5 / 29.5 / 30 / 30 / 30.5 inches
The dress is designed with approximately 2 inches of negative ease at the bust for a fitted look. Choose a size 2 inches smaller than your actual bust measurement for a fitted result, or match your actual measurement for a relaxed fit.
Abbreviations and Stitch Definitions
ch = chain: yarn over, pull through loop on hook
sl st = slip stitch: insert hook, yarn over, pull through stitch and loop on hook in one motion
sc = single crochet: insert hook, yarn over, pull up loop (2 loops on hook), yarn over, pull through both loops
sc2tog = single crochet two together (a decrease): insert hook into next stitch, yarn over, pull up a loop. Insert hook into following stitch, yarn over, pull up a loop. Yarn over, pull through all 3 loops on hook. This decreases by 1 stitch.
dc = double crochet: yarn over, insert hook, yarn over, pull up loop (3 loops on hook), yarn over, pull through 2 loops (2 loops remain), yarn over, pull through remaining 2 loops
ch-sp = chain space: the gap created by a chain in the previous row
sk = skip: pass over the indicated stitch without working into it
st(s) = stitch(es)
rnd(s) = round(s)
RS = right side
WS = wrong side
PM = place marker
Special Stitches for This Pattern
Shell Stitch
Work 5 dc (double crochet) all into the same stitch or chain space. This creates a fan-shaped cluster that forms the primary decorative texture throughout the dress.
V-Stitch
Work 1 dc, ch 1, 1 dc all into the same stitch or chain space. This creates a small open V with a chain-1 space at its center.
Shell Lace Pattern (Worked in Rounds)
This 4-round repeat produces the beautiful wave-and-shell texture visible throughout the bodice and skirt. Your stitch count must be a multiple of 6.
Round 1 (RS): Ch 3 (counts as first dc), 2 dc in same st (half shell at beg), sk 2 sts, sc in next st, sk 2 sts, Shell in next st, sk 2 sts, sc in next st, sk 2 sts repeat to last 3 sts, 2 dc in same st as beg ch-3 (completes opening shell when joined), sl st to top of beg ch-3 to join.
Round 2: Ch 1, sc in same st, ch 2, sc in center dc of Shell, ch 2, sc in sc between Shells, ch 2 repeat around, end sc in center dc of last Shell, ch 2, sl st to first sc to join.
Round 3: Sl st into first ch-2 sp, ch 3 (counts as dc), 4 dc in same ch-2 sp (half shell), sc in next ch-2 sp, Shell in next ch-2 sp, sc in next ch-2 sp repeat around, sl st to top of beg ch-3 to join.
Round 4: Ch 1, sc in same st, ch 2, sc in center dc of Shell, ch 2, sc in sc between Shells, ch 2 repeat around, end sc in center dc of last Shell, ch 2, sl st to first sc to join.
Repeat Rounds 1 through 4 for pattern.
Scallop Edging (Used at Hem)
Round 1: Sc evenly around edge, 1 sc per st, sl st to join.
Round 2: Sl st into first sc, ch 3, 2 dc in same sc, sk 2 sc, sl st in next sc, sk 2 sc, 3 dc in next sc repeat around, sl st to join.
Pattern Instructions
All instructions are written for size Medium. Stitch counts for other sizes appear in brackets in the order XS / S / M / L / XL / 2XL wherever they differ.
Section 1: Front Bodice Panel
The front panel is worked flat, beginning at the center neckline chain. You will build up to shoulder width, then work downward to the underarm.
Front Neckline Setup:
With E-4 hook and Color A, ch 61 [53 / 57 / 61 / 65 / 69 / 73].
Row 1 (RS): Sc in 2nd ch from hook and in each ch across. Turn.
(60 sc) [52 / 56 / 60 / 64 / 68 / 72 sc]
Row 2 (WS): Ch 1, 2 sc in first st (inc), sc in each st to last st, 2 sc in last st (inc). Turn.
(62 sc) [54 / 58 / 62 / 66 / 70 / 74 sc]
Row 3: Ch 1, 2 sc in first st, sc to last st, 2 sc in last st. Turn.
(64 sc) [56 / 60 / 64 / 68 / 72 / 76 sc]
Row 4: Ch 1, 2 sc in first st, sc to last st, 2 sc in last st. Turn.
(66 sc) [58 / 62 / 66 / 70 / 74 / 78 sc]
Row 5: Ch 1, 2 sc in first st, sc to last st, 2 sc in last st. Turn.
(68 sc) [60 / 64 / 68 / 72 / 76 / 80 sc]
Row 6: Ch 1, 2 sc in first st, sc to last st, 2 sc in last st. Turn.
(70 sc) [62 / 66 / 70 / 74 / 78 / 82 sc]
Row 7: Ch 1, 2 sc in first st, sc to last st, 2 sc in last st. Turn.
(72 sc) [64 / 68 / 72 / 76 / 80 / 84 sc]
Row 8: Ch 1, sc in each st across (no increase). Turn.
(72 sc) [64 / 68 / 72 / 76 / 80 / 84 sc]
This completes the neckline curve. Rows 2 through 7 shape the gradual U-curve of the scoop neck.
Front Bodice Body:
Rows 9 through 11: Ch 1, sc in each st across. Turn.
(72 sc each row)
Row 12: Begin Shell Lace Pattern Row 1 worked flat:
Ch 3 (counts as dc), 2 dc in same st (half shell at beg edge), sk 2 sts, sc in next st, sk 2 sts, Shell in next st, sk 2 sts, sc in next st across to last 3 sts, sk 2 sts, 3 dc in last st. Turn.
(12 shells for M)
Row 13 (Shell Lace Row 2):
Ch 1, sc in first st, ch 2, sc in center dc of each Shell, ch 2, sc in sc between Shells, ch 2 across, sc in top of t-ch. Turn.
Row 14 (Shell Lace Row 3):
Sl st into first ch-2 sp, ch 3 (counts as dc), 4 dc in same sp (half shell), sc in next ch-2 sp, Shell in next ch-2 sp, sc in next ch-2 sp across, 3 dc in last ch-2 sp (half shell), ch 1. Turn.
Row 15 (Shell Lace Row 4):
Ch 1, sc in first st, ch 2, sc in center dc of Shell, ch 2, sc in sc, ch 2 across, sc in top of last st. Turn.
Rows 16 through 27: Repeat Shell Lace rows 1 through 4 three more times.
Set aside. Do not fasten off.
Section 2: Back Bodice Panel
The back panel mirrors the front with a slightly shallower scoop (4 increase rows instead of 6).
With E-4 hook and Color A, ch 67 [59 / 63 / 67 / 71 / 75 / 79].
Row 1 (RS): Sc in 2nd ch from hook and in each ch across. Turn.
(66 sc) [58 / 62 / 66 / 70 / 74 / 78 sc]
Row 2: Ch 1, 2 sc in first st, sc to last st, 2 sc in last st. Turn.
(68 sc)
Row 3: Ch 1, 2 sc in first st, sc to last st, 2 sc in last st. Turn.
(70 sc)
Row 4: Ch 1, 2 sc in first st, sc to last st, 2 sc in last st. Turn.
(72 sc)
Row 5: Ch 1, sc in each st across. Turn.
(72 sc)
Rows 6 through 27: Work exactly as Rows 8 through 27 of the Front Bodice Panel.
Do not fasten off.
Section 3: Joining at Underarms
Lay the two panels with RS facing outward. You will join them at the side edges using a chain-bridge method.
With the back panel active yarn, ch 6 [6 / 6 / 8 / 8 / 8 / 10] for the underarm chain. Sl st into first st of the Front panel edge, continue working across all 72 front sts in sc, ch 6 for second underarm, sl st into first st of Back panel, continue across all 72 back sts.
Total round count after joining: 72 (front) + 6 (underarm ch) + 72 (back) + 6 (underarm ch) = 156 sts [136 / 146 / 156 / 164 / 174 / 184]
Join with sl st to first st of round. PM at each underarm chain center.
Section 4: Bust and Upper Torso
Continue Shell Lace Pattern in joined rounds.
Rounds 1 through 16: Work Shell Lace Pattern Rounds 1 through 4 four times total.
(156 sts each round for M)
Section 5: Waistband
Switch to E-4 hook. Work in sc only.
Transition round: Ch 1, sc in each st around. Join.
(156 sc)
Waistband Round 1: Ch 1, sc in each st around. Join.
(156 sc)
Waistband Round 2: Ch 1, sc in each st around. Join.
(156 sc)
Waistband Round 3: Ch 1, sc in next 24 sts, sc2tog 6 times. Join.
(150 sc)
Waistband Round 4: Ch 1, sc in each st around. Join.
(150 sc)
Waistband Round 5: Ch 1, sc in next 23 sts, sc2tog 6 times. Join.
(144 sc)
Waistband Rounds 6 and 7: Ch 1, sc in each st around. Join.
(144 sc)
Waistband Round 8: Ch 1, sc in next 22 sts, sc2tog 6 times. Join.
(138 sc)
Waistband Rounds 9 and 10: Ch 1, sc in each st around. Join.
(138 sc)
Section 6: Skirt
Switch to F-5 hook. The skirt uses Shell Lace Pattern with regular increases every 4 rounds.
Skirt Setup Round: Ch 1, sc in each st around, placing markers at 6 evenly spaced points. Join.
(138 sc)
Work Shell Lace Pattern continuously. After every complete 4-round repeat, work an increase round.
Skirt Rounds 1 through 4: Shell Lace Pattern.
(138 sts)
Increase Round A: Ch 1, sc in next 22 sts, 2 sc in next st 6 times. Join.
(144 sts)
Skirt Rounds 5 through 8: Shell Lace Pattern.
(144 sts)
Increase Round B: Ch 1, sc in next 23 sts, 2 sc in next st 6 times. Join.
(150 sts)
Continue this pattern, adding 6 stitches every increase round until you reach the desired length. For size M, continue through:
Finish with Scallop Edging at the hem.
Finishing and Blocking
Weave in all ends securely before blocking. For wool or wool blends, wet block by soaking the dress in lukewarm water with a drop of wool wash, then gently squeeze out excess water and lay flat to dry. For acrylic, spray blocking works well.
Pin the skirt flat to shape the A-line silhouette. Allow to dry completely before wearing or attaching the ruffle sleeves.
The ruffles are worked separately following the Ruffle Row technique described in the Special Stitches section, then seamed to the armhole openings. Work the ruffle into the armhole edge, creating that beautiful double-ruffle cap sleeve effect visible in the finished dress.
Tips for Success
Take your time with this project. At 60 to 80 hours of work, this is not a weekend make. But the result is a stunning handmade garment you will treasure.
Try the bodice on before joining the skirt to check the fit at the waist. You can add or remove a waistband round if needed.
If you are nervous about the lace pattern, practice on a small swatch first until the 4-round repeat feels automatic.
I hope you absolutely love making this Sunset Orange Ruffle Crochet Dress as much as I loved designing it. If you create your own version, please share photos with me on Instagram or Facebook. I would love to see your color choices and how the gradient looks in different yarn brands.
If this pattern caught your eye, save it to your Pinterest boards so you can find it when you are ready to cast on. And please drop a comment below if you make one. Hearing about your projects truly makes my day.
You Might Also Like
- Lavender Lace Baby Dress Free Crochet Pattern
- Wildflower Meadow Crochet Pot Free Crochet Pattern
- Emerald Diamond Lattice Mermaid Gown Free Crochet Pattern
- Coral Sunset Pineapple Lace Maxi Free Crochet Pattern