
Got yarn sitting in your stash that feels too special for just anything? This is the project for it. That gorgeous crochet thread you’ve been saving, the one you keep moving from bin to basket without finding the right pattern, deserves to become something you’ll actually wear and love.
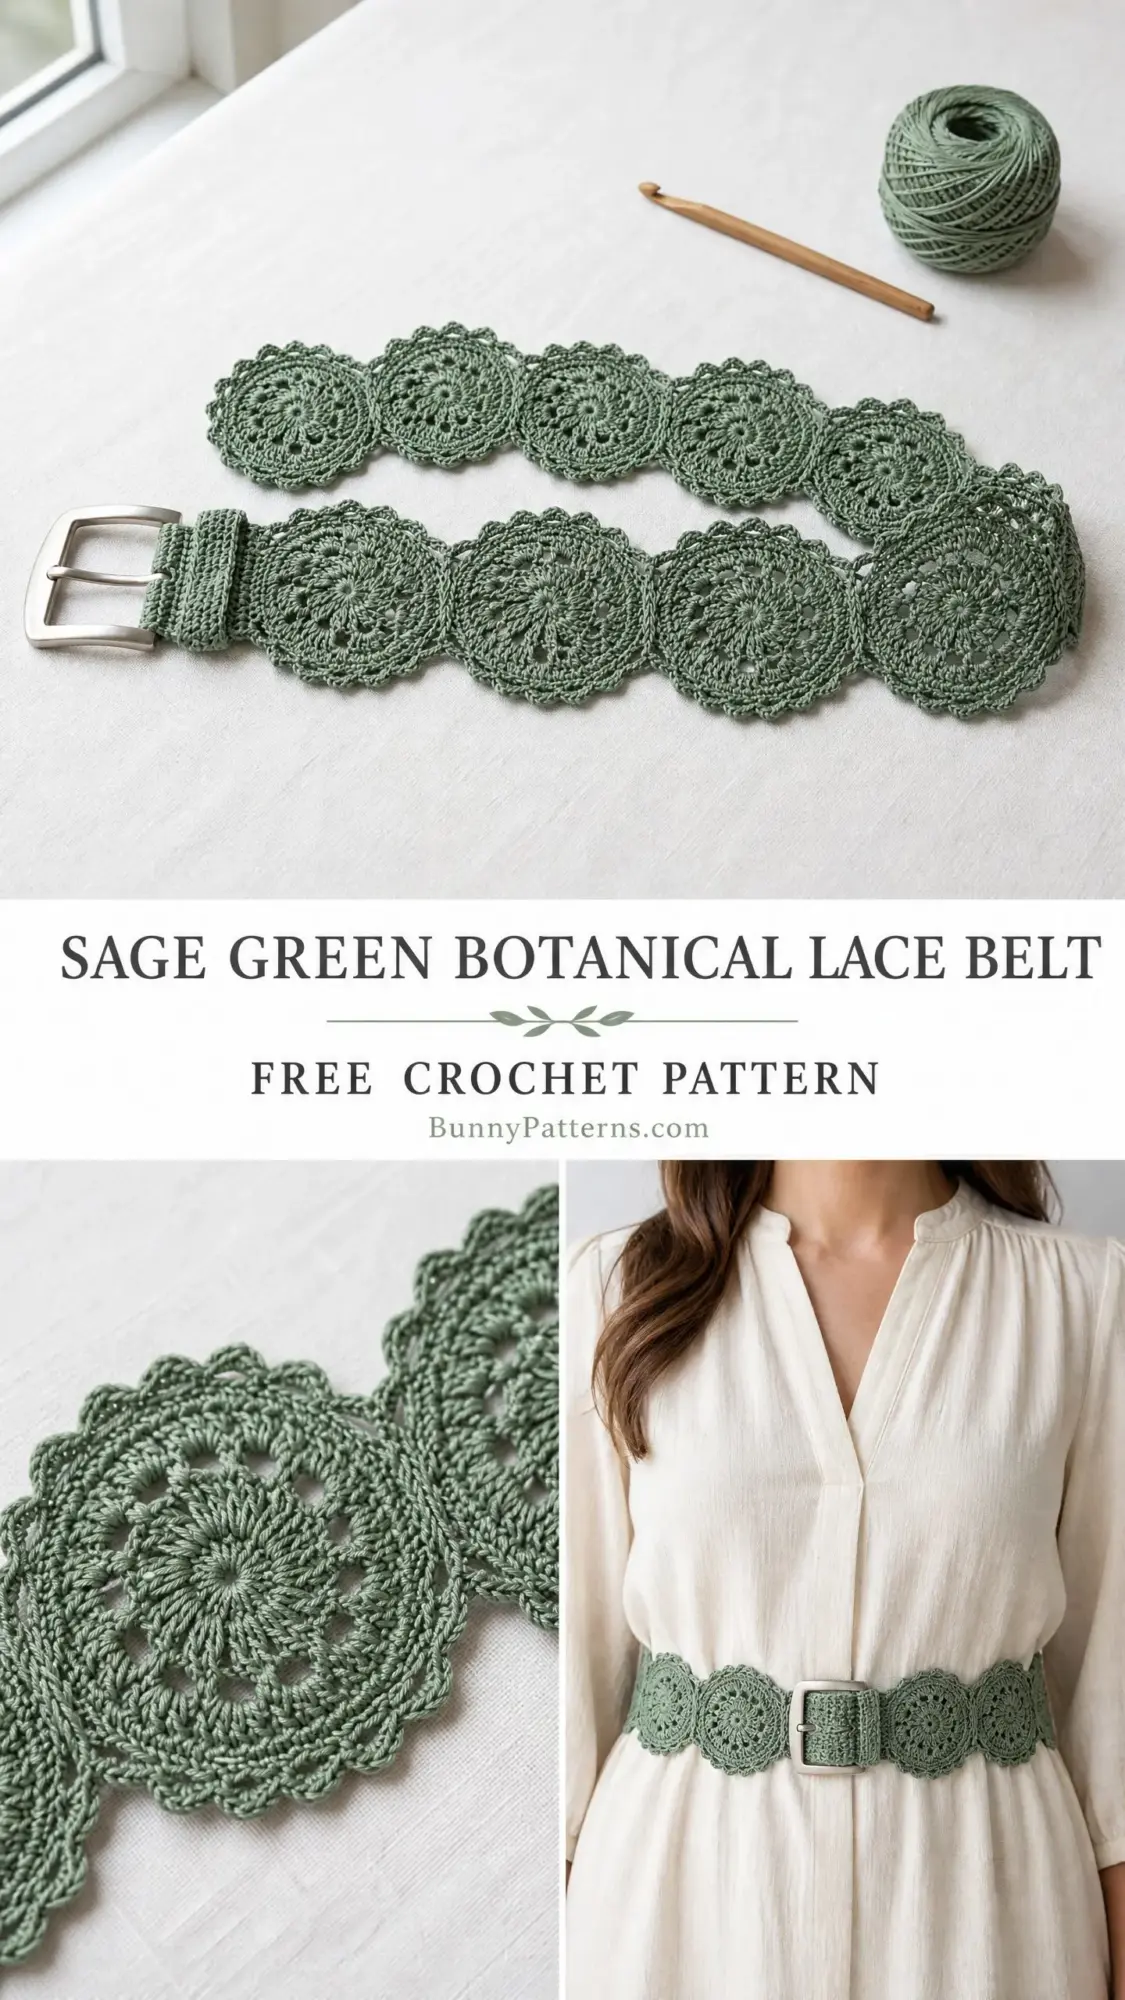
This botanical lace belt is made from individual medallions joined as you go, creating a seamless band of delicate floral lace. The construction is genuinely clever. You work each circular motif from the center outward, then connect it to the previous one during the final round. No sewing medallions together afterward, no fussy assembly.
I’ll be honest with you about the skill level here. This is an intermediate project. If you’re comfortable working in the round, know your shells and picots, and can maintain consistent tension, you’re ready. If those terms make you nervous, keep reading anyway. I’ll walk you through everything.
Why You’ll Love This Lace Belt Crochet Pattern
This belt sits somewhere between jewelry and clothing. It’s substantial enough to cinch a dress or cardigan, yet delicate enough to feel like a statement accessory. The overlapping medallion design creates dimension and visual interest that flat belts simply can’t match.
The vintage aesthetic is undeniable. Think romantic garden parties, boho wedding accessories, or that perfect finishing touch on a linen sundress. But here’s what I really appreciate about this design: it’s adjustable. You can add or subtract medallions to fit any waist size, and the construction method means you never have to rip back your entire project if you miscalculate.
Each medallion takes roughly 45 to 70 minutes depending on your experience. For a standard seven medallion belt, plan for about 6 to 10 hours of total work. That’s substantial, but you can easily break it into medallion sized chunks. Perfect for carrying to appointments or working during your favorite show.
Materials You’ll Need
Yarn: Size 10 crochet cotton thread in your chosen color. You’ll need approximately 300 to 400 yards for a seven medallion belt plus the buckle strap. The sample uses a muted sage green, which reads as soft and botanical.
Hook: US size 7 steel crochet hook, which is 1.65 mm. This is smaller than what many crocheters are used to, so double check you have the right one. Steel hook sizing runs opposite to regular hooks.
Notions:
Recommended Yarn Options
Aunt Lydia’s Classic Crochet Thread Size 10 is widely available and comes in Sage or Soft Sage colorways that match the sample beautifully. At 350 yards per ball, one ball gives you plenty of room.
DMC Petra Crochet Cotton Size 5 produces gorgeous stitch definition but runs slightly thicker. If you choose this option, switch to a US size 6 steel hook (1.8 mm) and swatch carefully.
Lizbeth Egyptian Cotton Thread Size 10 is a premium choice known for smooth twist and vibrant color retention. You’ll need 3 balls at 122 yards each.
Whatever you choose, avoid fuzzy or stretchy fibers. Lace demands crisp stitch definition to really shine.
Gauge Information
One completed medallion through Round 7 should measure 3.5 inches (9 cm) in diameter after blocking.
I cannot stress enough how important gauge is for this project. Since the belt length comes from joining multiple medallions, even a small size difference per medallion adds up quickly across seven of them.
Work one full medallion, block it flat, and measure across the widest point. If your medallion is larger than 3.5 inches, go down a hook size. If it’s smaller, go up a hook size. This step takes maybe an hour but saves potential heartbreak later.
Finished Measurements
Abbreviations and Special Stitches
Let me walk you through every abbreviation and special technique before we start. Refer back to this section whenever you need a refresher.
Basic Abbreviations:
Special Stitches:
Shell: Work 5 double crochet stitches all into the same stitch or space. This creates a fan shaped cluster that forms the body of each medallion’s petals.
Picot (p): Chain 3, then slip stitch into the first chain you made (the one closest to the hook). This creates a small decorative knot that sits at the top of your work. Picots give the medallion edges their delicate, botanical appearance.
Join Picot (jp): This is how you connect medallions together. Instead of working a regular picot, chain 1, slip stitch into the corresponding picot of the neighboring medallion, chain 1, then slip stitch back into the base stitch on your current medallion. One join picot replaces one standard picot and locks the two medallions together.
Beginning Shell: Chain 3 (this counts as your first double crochet), then work 4 more double crochet into the same space. You use this at the start of a round when a shell is your first stitch.
Pattern Notes Before You Begin
Read through these notes before starting. They’ll answer questions before they arise.
1. All rounds are worked on the right side. Do not turn at the end of rounds unless I specifically tell you to.
2. Form your starting ring using either a magic ring or by chaining 6 and joining with a slip stitch.
3. Chain 3 at the beginning of a round counts as the first double crochet throughout this pattern.
4. Leave a 6 inch tail at the beginning and end of every medallion for weaving in later.
5. The construction order is: complete Medallion 1 fully, then work each subsequent medallion through Round 6 before joining it during Round 7.
6. Blocking is not optional. The lace pattern needs blocking to open up and lie flat. Skip this step and your belt will look bunched and underwhelming.
Step by Step Instructions
Medallion 1 (Worked Completely Without Joining)
This first medallion establishes your technique. Take your time here.
Starting Ring: Make a magic ring, or chain 6 and join with slip stitch to form a ring.
Round 1: Chain 1 (does not count as a stitch), work 12 single crochet into the ring, join to first single crochet. (12 sc)
Round 2: Chain 1, single crochet in same stitch, chain 4, skip 1 stitch, [single crochet in next stitch, chain 4, skip 1 stitch] 5 times, join to first single crochet. (6 sc, 6 ch-4 spaces)
Round 3: Slip stitch into first chain 4 space, chain 3 (counts as first double crochet), work 4 more double crochet into same space (beginning shell made), chain 2, [shell into next chain 4 space, chain 2] 5 times, join to top of beginning chain 3. (6 shells of 5 dc each, 6 ch-2 spaces; 30 dc total)
Round 4: Slip stitch across to first chain 2 space, chain 1, single crochet in same chain 2 space, chain 5, [single crochet in next chain 2 space, chain 5] 5 times, join to first single crochet. (6 sc, 6 ch-5 spaces)
Round 5: Slip stitch into first chain 5 space, chain 3 (counts as first double crochet), work 6 more double crochet into same space (7 dc shell), chain 3, [7 double crochet into next chain 5 space, chain 3] 5 times, join to top of beginning chain 3. (6 shells of 7 dc each, 6 ch-3 spaces; 42 dc total)
Round 6: Chain 1, single crochet in same stitch (top of chain 3), single crochet in each of next 3 double crochet, chain 3, single crochet in next double crochet (center double crochet of shell), chain 3, single crochet in each of next 3 double crochet, single crochet in last double crochet of shell, [single crochet in each of next 3 double crochet of next shell, chain 3, single crochet in center double crochet, chain 3, single crochet in each of next 3 double crochet, single crochet in last double crochet of shell] 5 times, join to first single crochet. (48 sc, 12 ch-3 spaces)
Round 7: Slip stitch to first chain 3 space, chain 1, [single crochet in chain 3 space, picot, single crochet in same chain 3 space, chain 4, single crochet in next chain 3 space (center space), chain 4, single crochet in next chain 3 space, picot, single crochet in same space, chain 3] 6 times, join to first single crochet. Fasten off and weave in ends. (24 sc, 12 picots, 12 ch-4 spaces, 6 ch-3 spaces)
Checkpoint: Your completed medallion should measure 3.5 inches across at its widest point after light blocking. All 6 outer picots should be visible and evenly spaced around the edge.
Medallion 2 (Joined to Medallion 1 During Round 7)
Before you begin, identify where you’ll join. Look at your completed Medallion 1 lying flat. You’ll connect Medallion 2 at two adjacent outer picots on the right edge of Medallion 1. These two picots are in the same petal section.
Rounds 1 through 6: Work exactly as Medallion 1.
Round 7 (With Joining):
Work the first 3 full repeats with standard picots (these form the free, unjoined side):
[Single crochet in chain 3 space, picot, single crochet in same chain 3 space, chain 4, single crochet in next chain 3 space, chain 4, single crochet in next chain 3 space, picot, single crochet in same space, chain 3] 3 times.
Now work the joining repeat (the petal section facing Medallion 1):
Single crochet in chain 3 space, join picot to the first target picot on Medallion 1, single crochet in same chain 3 space, chain 4, single crochet in next chain 3 space, chain 4, single crochet in next chain 3 space, join picot to the second target picot on Medallion 1, single crochet in same space, chain 3.
Complete the remaining 2 full repeats with standard picots:
[Single crochet in chain 3 space, picot, single crochet in same chain 3 space, chain 4, single crochet in next chain 3 space, chain 4, single crochet in next chain 3 space, picot, single crochet in same space, chain 3] 2 times.
Join to first single crochet. Fasten off and weave in ends.
Checkpoint: When both medallions are laid flat, they should sit side by side touching at their join points. No gap between them, no puckering. The belt band should lie flat and straight.
Medallions 3 Through 7
Repeat the Medallion 2 process for each subsequent medallion. Work Rounds 1 through 6 as written, then complete Round 7 joining to the previous medallion at its two right edge outer picots.
The joining repeat placement stays consistent: 3 free repeats, 1 joining repeat, 2 free repeats, join.
Final Checkpoint: Your assembled belt body should measure approximately 24.5 inches from the outer edge of Medallion 1 to the outer edge of Medallion 7. The band is approximately 3.5 inches tall.
Buckle Strap Tab
The buckle strap is a narrow rectangle of single crochet rows that attaches to Medallion 1 and threads through your buckle.
Setup: With right side facing, join yarn with slip stitch to the bottom center area of Round 1 on Medallion 1. If the foundation ring isn’t easily accessible, create a separate strap instead: chain 9, single crochet in 2nd chain from hook and in each chain across. (8 sc)
Row 1 (RS): Chain 1, work 8 single crochet evenly along the medallion edge to establish strap width. (8 sc)
Row 2: Chain 1, turn, single crochet in each stitch across. (8 sc)
Rows 3 through 16: Repeat Row 2. (8 sc each row)
After Row 16, your strap should measure approximately 2.5 inches in length.
Fasten off, leaving a 12 inch tail for sewing.
Assembly: Thread the strap through the center bar of your belt buckle. Fold the strap back on itself and use your tapestry needle and tail to whipstitch the folded end securely to the back of Row 1. The buckle bar should sit snug inside the fold. Weave in all remaining ends.
Optional Eyelets for Traditional Buckle Closure
If you want functional belt holes on the opposite end, you can add an eyelet strap to Medallion 7.
Work a separate strap attached to the last medallion, following the same method as the buckle strap but working only 8 rows (approximately 1.25 inches). At Row 5, create an eyelet by working: chain 1, single crochet in 2 stitches, chain 2, skip 2 stitches, single crochet in 2 stitches. On the next row, work 2 single crochet into the chain 2 space.
Add 2 to 3 additional eyelets spaced 0.75 inch apart if desired.
Size Customization Tips
To lengthen the belt: Add more medallions. Each medallion adds 3.5 inches to your total length.
To shorten the belt: Reduce the number of medallions. A 5 medallion belt measures approximately 19.5 inches and suits smaller waists.
Standard adult waist guide:
To adjust strap width: Increase or decrease your foundation chain by 2 stitches at a time, ensuring the strap width matches your buckle bar exactly.
Finishing and Blocking Your Lace Belt
Blocking transforms this project from "nice crochet" to "actual lace." Do not skip this step.
1. Weave in all ends on every medallion using your tapestry needle. Pull tails through the wrong side of stitches in at least two directions.
2. Submerge the assembled belt in cool water for 10 to 15 minutes.
3. Gently press out excess water without wringing. Roll the belt in a clean towel and press to remove more moisture.
4. Lay the belt flat on your foam blocking mat. Pin each medallion into a perfect circle, pulling the picots outward to their full extent. The medallions should form a straight horizontal line with no gaps between joined picots.
5. Allow to dry completely. This typically takes 12 to 24 hours depending on humidity.
Once dry, your lace will be significantly more open, crisp, and defined. This is when the botanical pattern truly emerges.
Care Instructions
Hand wash your finished belt in cool water with gentle detergent. Do not wring or twist. Lay flat to dry, pinning if needed to restore shape. Avoid machine washing, machine drying, or direct ironing. Store flat or loosely rolled. Keep away from prolonged direct sunlight to prevent color fading.
Final Thoughts on This Botanical Lace Belt Crochet Pattern
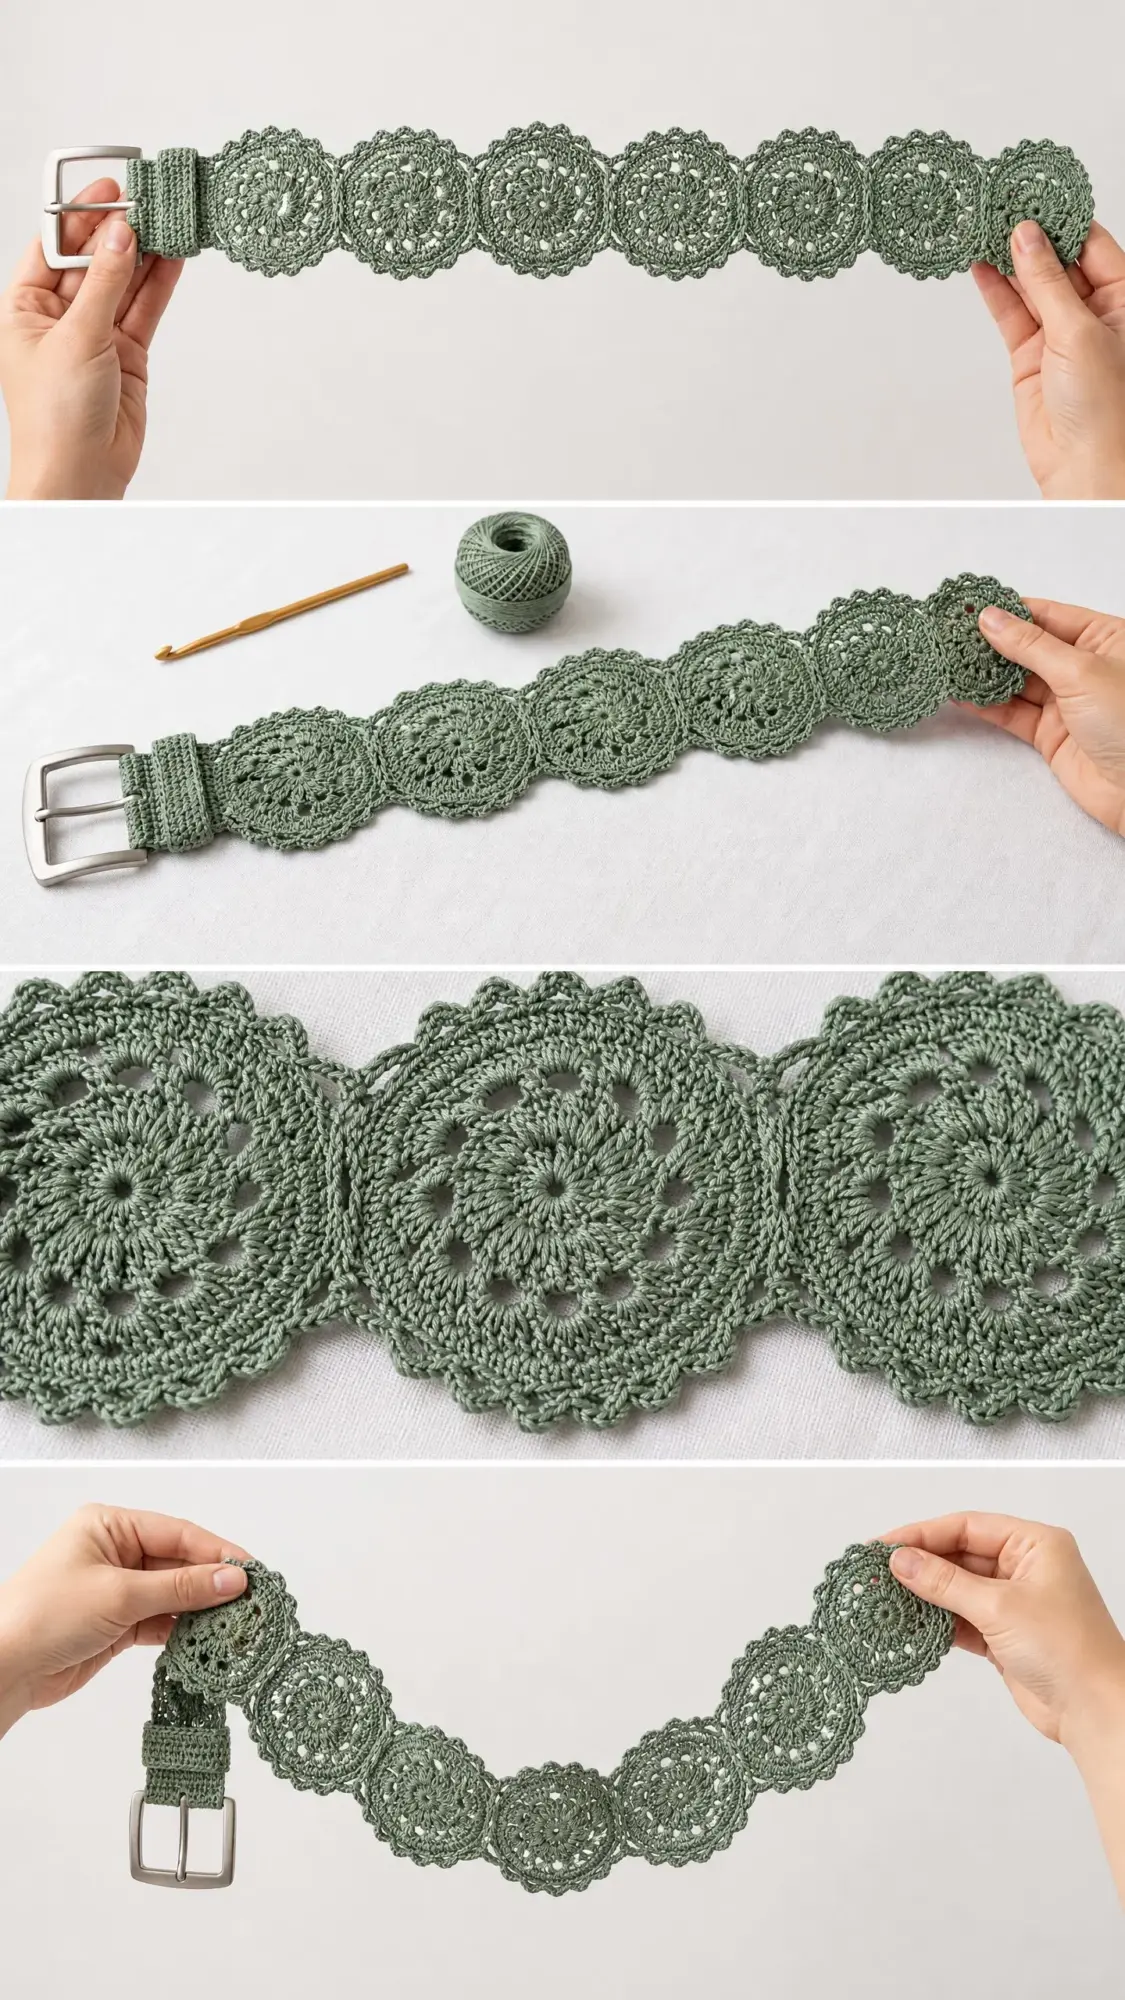
This belt is the kind of project that feels like an accomplishment when you finish it. The medallion construction keeps things interesting, the join as you go technique means no tedious assembly at the end, and the finished piece looks far more complicated than it actually is.
Wear it with a flowy dress, over a cardigan, or cinched at the waist of a tunic. Gift it to someone who appreciates handmade beauty. Or honestly, just make it because you want to create something lovely with your hands.
I hope you enjoy making this as much as I enjoyed designing it. If you have questions along the way, don’t hesitate to reach out.
Happy crocheting!
If this lace belt pattern caught your eye, go ahead and save it to your Pinterest boards so you can find it when you’re ready to start. And if you make one, I would absolutely love to see it. Drop a comment below with your color choices or any questions. Seeing your finished projects genuinely makes my day.
You Might Also Like
- Lavender Sunflower Granny Square Tote Free Crochet Pattern
- Ocean Wave Tapestry Tote Bag Free Crochet Pattern
- Dusty Rose Floral Granny Square Tote Free Crochet Pattern
- Mustard Yellow Duck Toilet Paper Cozy Free Crochet Pattern