
I don’t know about you, but I have a serious weakness for a beautiful bag. Something about carrying a handmade tote that you crocheted yourself just hits different. The compliments alone are worth every hour of work.
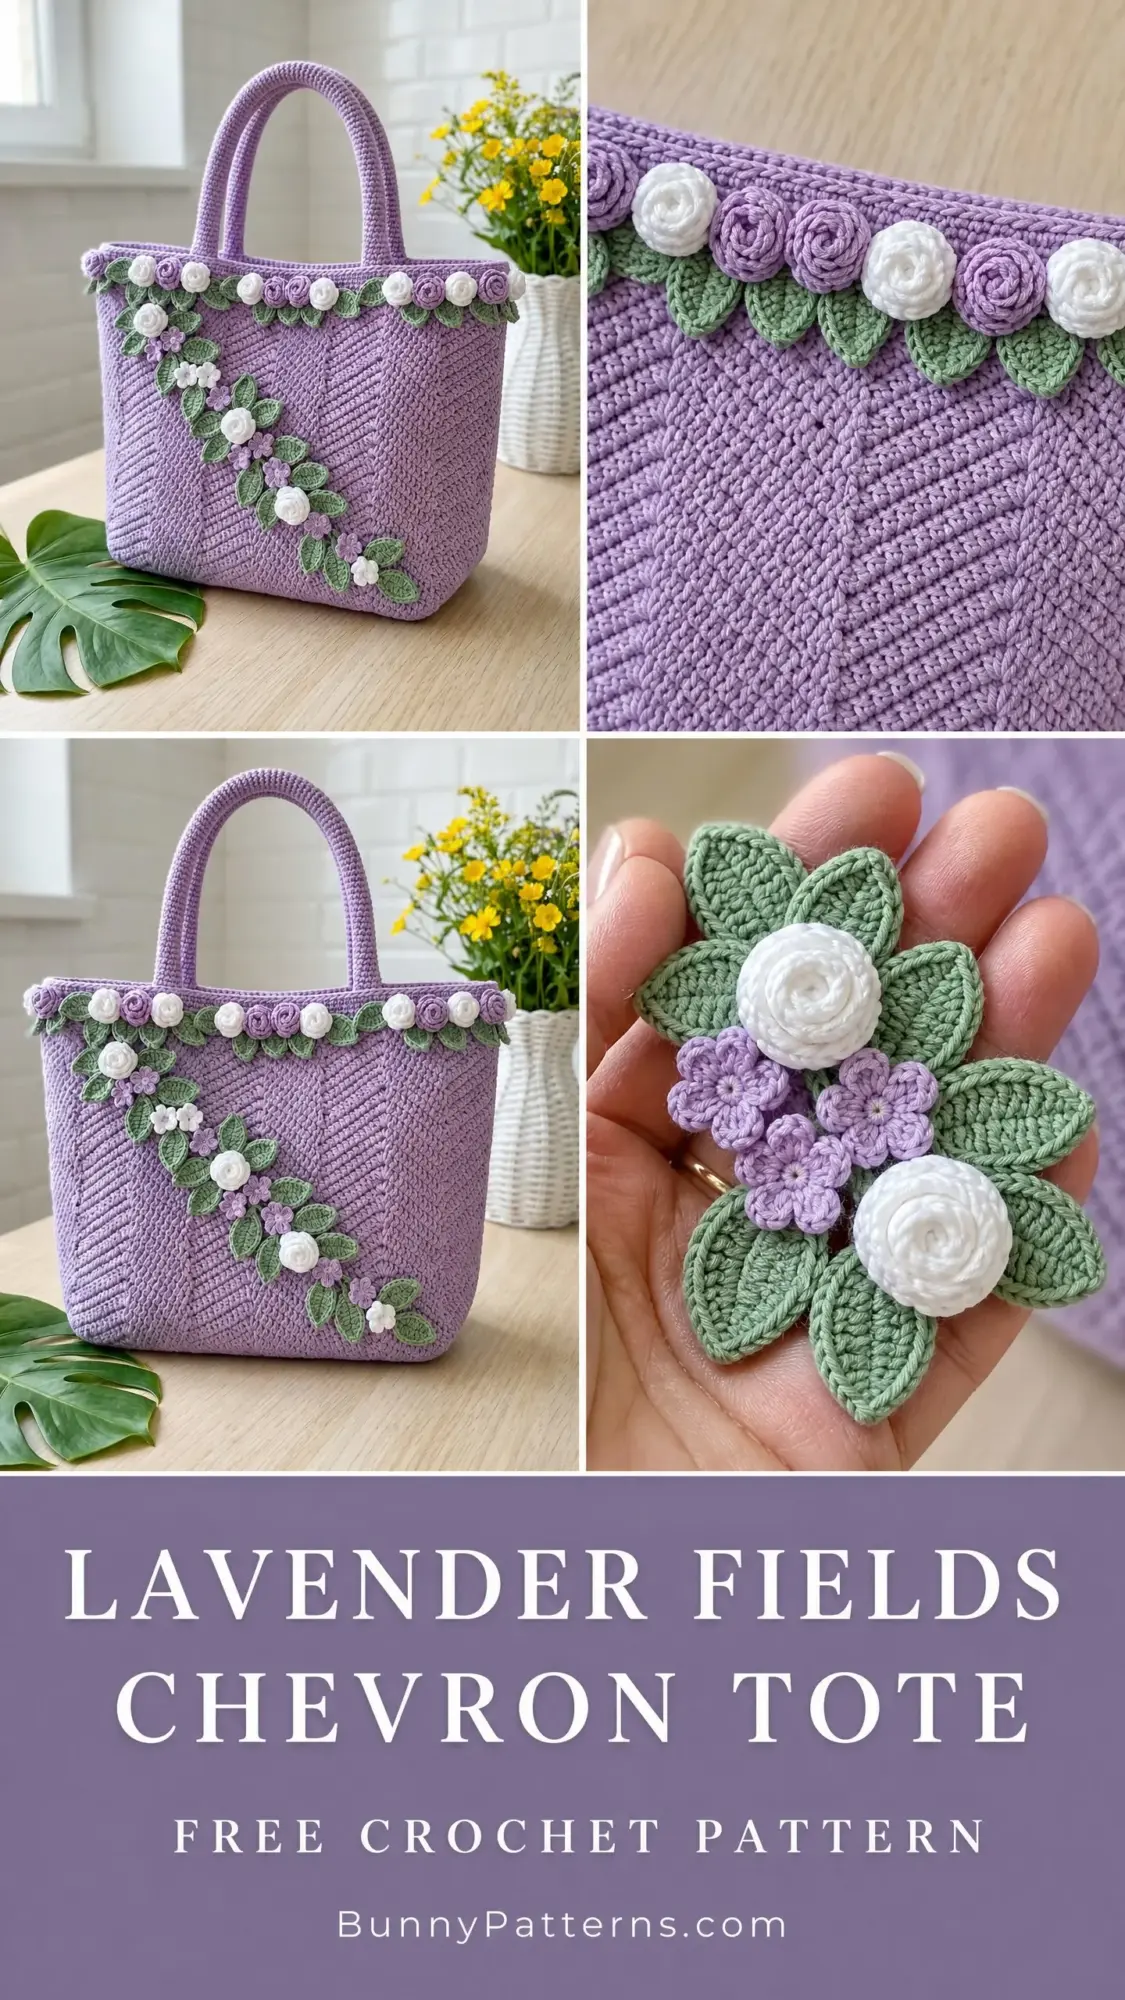
This Lavender Fields Chevron Tote is the kind of project that looks like it belongs in a boutique window. But here’s the thing. You made it. With your own hands. And the dense herringbone texture combined with those romantic dimensional flowers creates something truly special.
If you’ve been searching for a structured bag pattern that feels elevated without being impossibly complicated, this is your project. Let me walk you through every single step.
Why This Crochet Tote Pattern Stands Out
The magic of this bag lives in its texture. The herringbone slip stitch creates a dense, woven appearance that mimics expensive basketweave fabric. Unlike regular single crochet, this technique produces diagonal lines that reverse direction on alternating rounds. The result? A chevron effect that catches light beautifully.
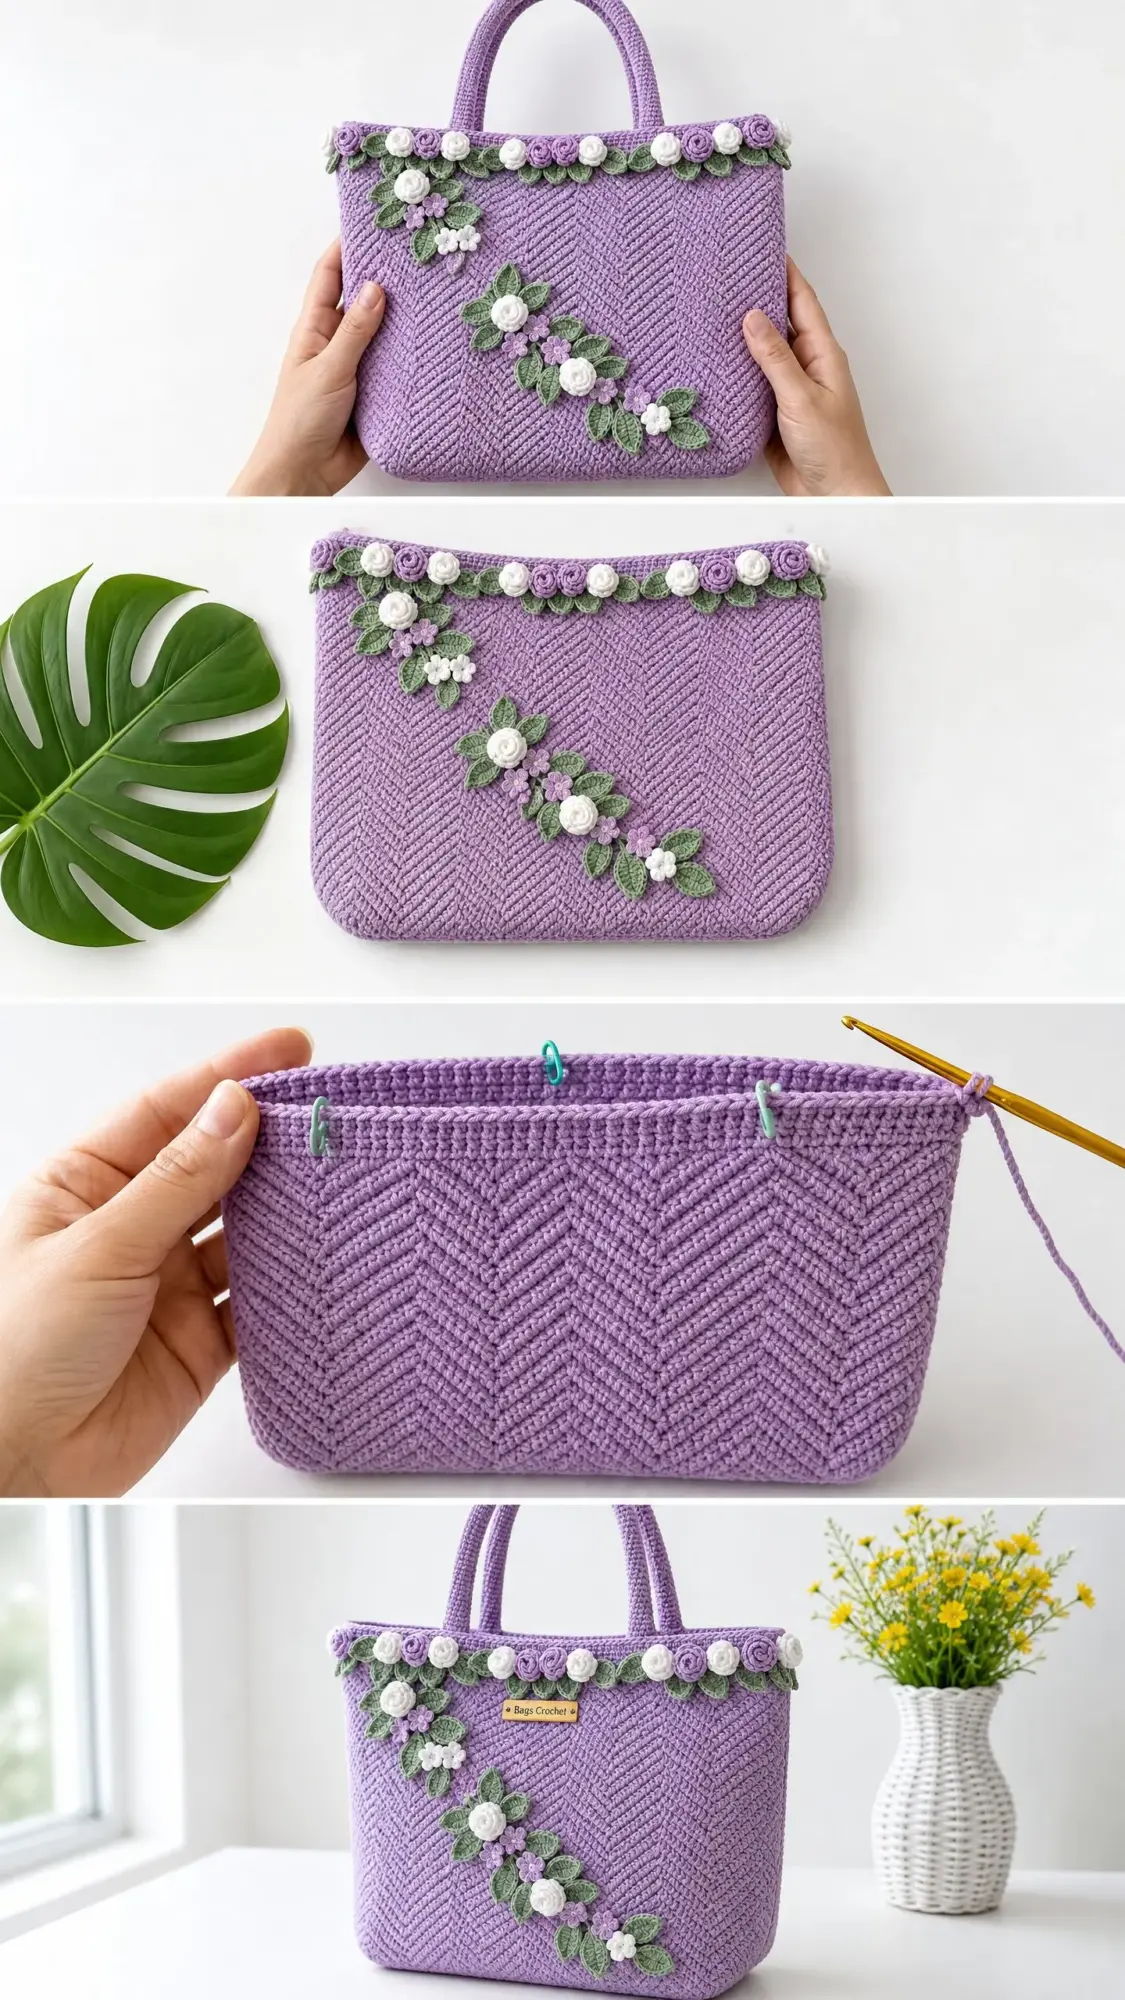
The construction is smarter than it looks. You’ll work from the bottom up in the round, starting with a solid oval base. Then the sides grow straight upward with zero shaping until you reach the top. The handles attach separately, giving you full control over their placement.
And those flowers? They’re all made as individual appliques. You’ll create puff roses, rolled rosebuds, flat five-petal flowers, and pointed leaves. Then you arrange and sew them on at the end. This means you can customize the embellishment placement to your heart’s content.
Skill Level and Time Investment
I’d call this pattern intermediate to advanced. The herringbone slip stitch requires consistent tension and a bit of practice to master. You’ll also need comfort working small dimensional pieces and attaching them neatly.
That said, nothing here is scary. If you can single crochet, work in the round, and follow detailed instructions, you can absolutely make this bag. The techniques just need patience and attention.
Time estimate: Approximately 25 to 35 hours total. This includes the body, handles, and all those gorgeous embellishments. Break it into sessions. Maybe a few rows of the body while watching your favorite show, then an evening dedicated to rolling rosebuds.
Finished Dimensions
Your completed tote will measure approximately:
This is a generous everyday bag. It’ll hold your tablet, a water bottle, your wallet, and still have room for a light sweater.
Materials You’ll Need
Yarn
Hook
US size E-4 / 3.5 mm for tight, structured fabric
If your gauge runs loose, drop to a US D-3 / 3.25 mm. You want fabric dense enough to hold its shape without a liner.
Yarn Suggestions
Lion Brand 24/7 Cotton in Lavender, White, Sage, and Purple works beautifully. This 100% mercerized cotton holds structure well and comes in the exact colors you need.
Paintbox Yarns Simply DK doubled for worsted weight gauge is another excellent option. Try Dusty Lilac, Pure White, Grass Green, and Wisteria.
Drops Paris 100% Cotton in Lavender, Off White, Pistachio, and Lilac gives an affordable matte finish that photographs beautifully.
Important: Choose yarn with a firm, smooth twist and minimal fuzz. Fluffy yarns will hide your beautiful herringbone texture.
Notions
Gauge
18 stitches x 22 rows = 4 inches x 4 inches in the Herringbone Slip Stitch pattern, worked flat, blocked.
Please swatch before starting. This bag relies on tight, structured fabric. If your swatch is too loose, go down a hook size.
Abbreviations
Let me define every abbreviation you’ll encounter:
Special Stitches
Herringbone Slip Stitch (hbss)
This creates the diagonal chevron texture. For each stitch, insert your hook into the back loop only of the next stitch at a slight forward angle. Yarn over, draw up a loop, then draw that loop through both loops on your hook as a slip stitch.
When working in the round: Do not turn at the end of rounds. On even-numbered rounds, insert your hook into the back loop and pull through normally. On odd-numbered rounds, insert your hook from back to front into the back loop before drawing through. This alternation creates the opposing diagonal lines.
Work firmly and consistently. The texture will look like diagonal ribs crossing in alternating directions.
Puff Rose (Large, approximately 0.75 inch)
Rnd 1: MR, ch 2, work 9 dc into ring, sl st to top of ch-2 to join. (9 dc plus ch-2)
Rnd 2: Ch 1, work 2 sc in each dc around, sl st to first sc. (18 sc)
Rnd 3: (Ch 4, sk 2 sts, sl st to next st) repeat around. (6 ch-4 loops)
Rnd 4: Into each ch-4 loop work (sc, hdc, 3 dc, hdc, sc). (6 petals)
Fasten off, leaving a 10-inch tail.
Rolled Rosebud (Small, approximately 0.5 inch)
Foundation: Ch 14.
Row 1: Dc in 4th ch from hook, 2 dc in same ch, 3 dc in each ch across to last ch, 2 dc in last ch. Fasten off leaving a 10-inch tail.
Roll the strip tightly from one end with the taller edge on the outside. Stitch through the base several times to secure.
Flat Five-Petal Flower (approximately 0.5 inch)
Rnd 1: MR, ch 1, work 5 sc into ring, sl st to first sc. (5 sc)
Rnd 2: (Ch 3, sl st to next sc) 5 times. (5 petals)
Fasten off leaving a tail.
Leaf (approximately 1 inch)
Ch 9.
Row 1: Sc in 2nd ch from hook, hdc in next, dc in next 3, hdc in next, sc in next, sl st in last ch. Do not turn. Working along opposite side: sc in same ch as last sl st, sc in next, hdc in next, dc in next 3, hdc in next, sc in next, sl st to first sc. Fasten off leaving a tail.
Pattern Instructions
Base
The base is a flat oval worked in single crochet.
Foundation: With MC, ch 39.
Rnd 1: Sc in 2nd ch from hook, sc in next 36 ch (37 sc across), 3 sc in last ch (corner). Now working along opposite side of foundation chain: sc in next 36 ch, 2 sc in same ch as first sc. Sl st to first sc to join. (78 sc)
Rnd 2: Ch 1, 2 sc in first st (inc), sc in next 36 sts, 2 sc in next st, 2 sc in next st, sc in next 36 sts, 2 sc in last st. Sl st to first sc. (82 sc)
Rnd 3: Ch 1, 2 sc in first st, sc in next 37 sts, 2 sc in next st, 2 sc in next st, sc in next 37 sts, 2 sc in last st. Sl st to first sc. (86 sc)
Rnd 4: Ch 1, 2 sc in first st, sc in next 38 sts, 2 sc in next st, 2 sc in next st, sc in next 38 sts, 2 sc in last st. Sl st to first sc. (90 sc)
Rnd 5: Ch 1, 2 sc in first st, sc in next 39 sts, 2 sc in next st, 2 sc in next st, sc in next 39 sts, 2 sc in last st. Sl st to first sc. (94 sc)
Rnd 6: Ch 1, 2 sc in first st, sc in next 40 sts, 2 sc in next st, 2 sc in next st, sc in next 40 sts, 2 sc in last st. Sl st to first sc. (98 sc)
Rnd 7: Ch 1, sc evenly around without increasing. Sl st to first sc. (98 sc)
Checkpoint: Your base should measure approximately 14 inches long by 5 inches wide and lie flat without curling.
Sides
Now you transition to the herringbone slip stitch texture.
Rnd 1: Ch 1, do not turn. Work hbss into blo of each st around. Sl st to first st. (98 sts)
Rnd 2: Ch 1, work hbss into blo using alternate insertion angle. Sl st to first st. (98 sts)
Rnds 3 through 58: Continue alternating even and odd round herringbone slip stitch as established. Work all 58 rounds straight without shaping. (98 sts each round)
Checkpoint: The bag body from base to working edge should measure approximately 11 inches. The herringbone diagonal texture should be clearly visible.
Top Edge
Mark these stitch positions:
Top Edge Round: Ch 1, sc in each st around. Sl st to first sc. (98 sc)
Handles (Make 2)
With MC, ch 5.
Rnd 1: Sc in 2nd ch from hook, sc in next 3 ch, 3 sc in last ch. Working along opposite side: sc in next 3 ch, 2 sc in same ch as first sc. Sl st to first sc. (10 sc)
Rnds 2 through 60: Ch 1, sc in blo of each st around. Sl st to join. (10 sc)
Fasten off leaving an 18-inch tail. Flatten the tube and sew to the inside of the bag at the marker positions.
Garland Embellishment
Make:
Pin roses alternating colors along the top edge. Tuck 2 leaves between each pair of roses. Sew everything in place.
Diagonal Spray Embellishment
Make:
Arrange in a diagonal line from upper left to lower right on the front panel. Pin everything before sewing permanently.
Finishing
Wet block your bag before attaching embellishments. Submerge in cool water for 10 to 15 minutes. Press out water gently with a towel. Stuff with plastic bags to maintain the rectangular shape while drying.
Weave in all ends securely. Consider adding a fabric stiffener spray or a cardboard insert at the bottom for extra structure.
Care Instructions
Hand wash in cool water with gentle soap. Never wring. Reshape while damp and air dry. Store stuffed with tissue paper to maintain shape.
I really hope you love making this Lavender Fields Chevron Tote as much as I loved designing it. If you found this crochet pattern helpful, save it to your Pinterest boards so you can find it easily when you’re ready to start. And please drop a comment below if you make one. I would absolutely love to see your version!
You Might Also Like
- Pink Valentine Highland Cow Amigurumi Free Crochet Pattern
- Coral Sunset Tiered Ruffle Crochet Dress Free Pattern
- Mint Chocolate Daisy Granny Square Blanket Free Crochet Pattern
- Pastel Rainbow Shell Stitch Bodysuit Free Pattern