
This is a classic granny stitch tote bag worked in three shades of green with a removable daisy charm. The construction is straightforward. You start at the base, work upward in joined rounds, then add simple single crochet straps at the top.
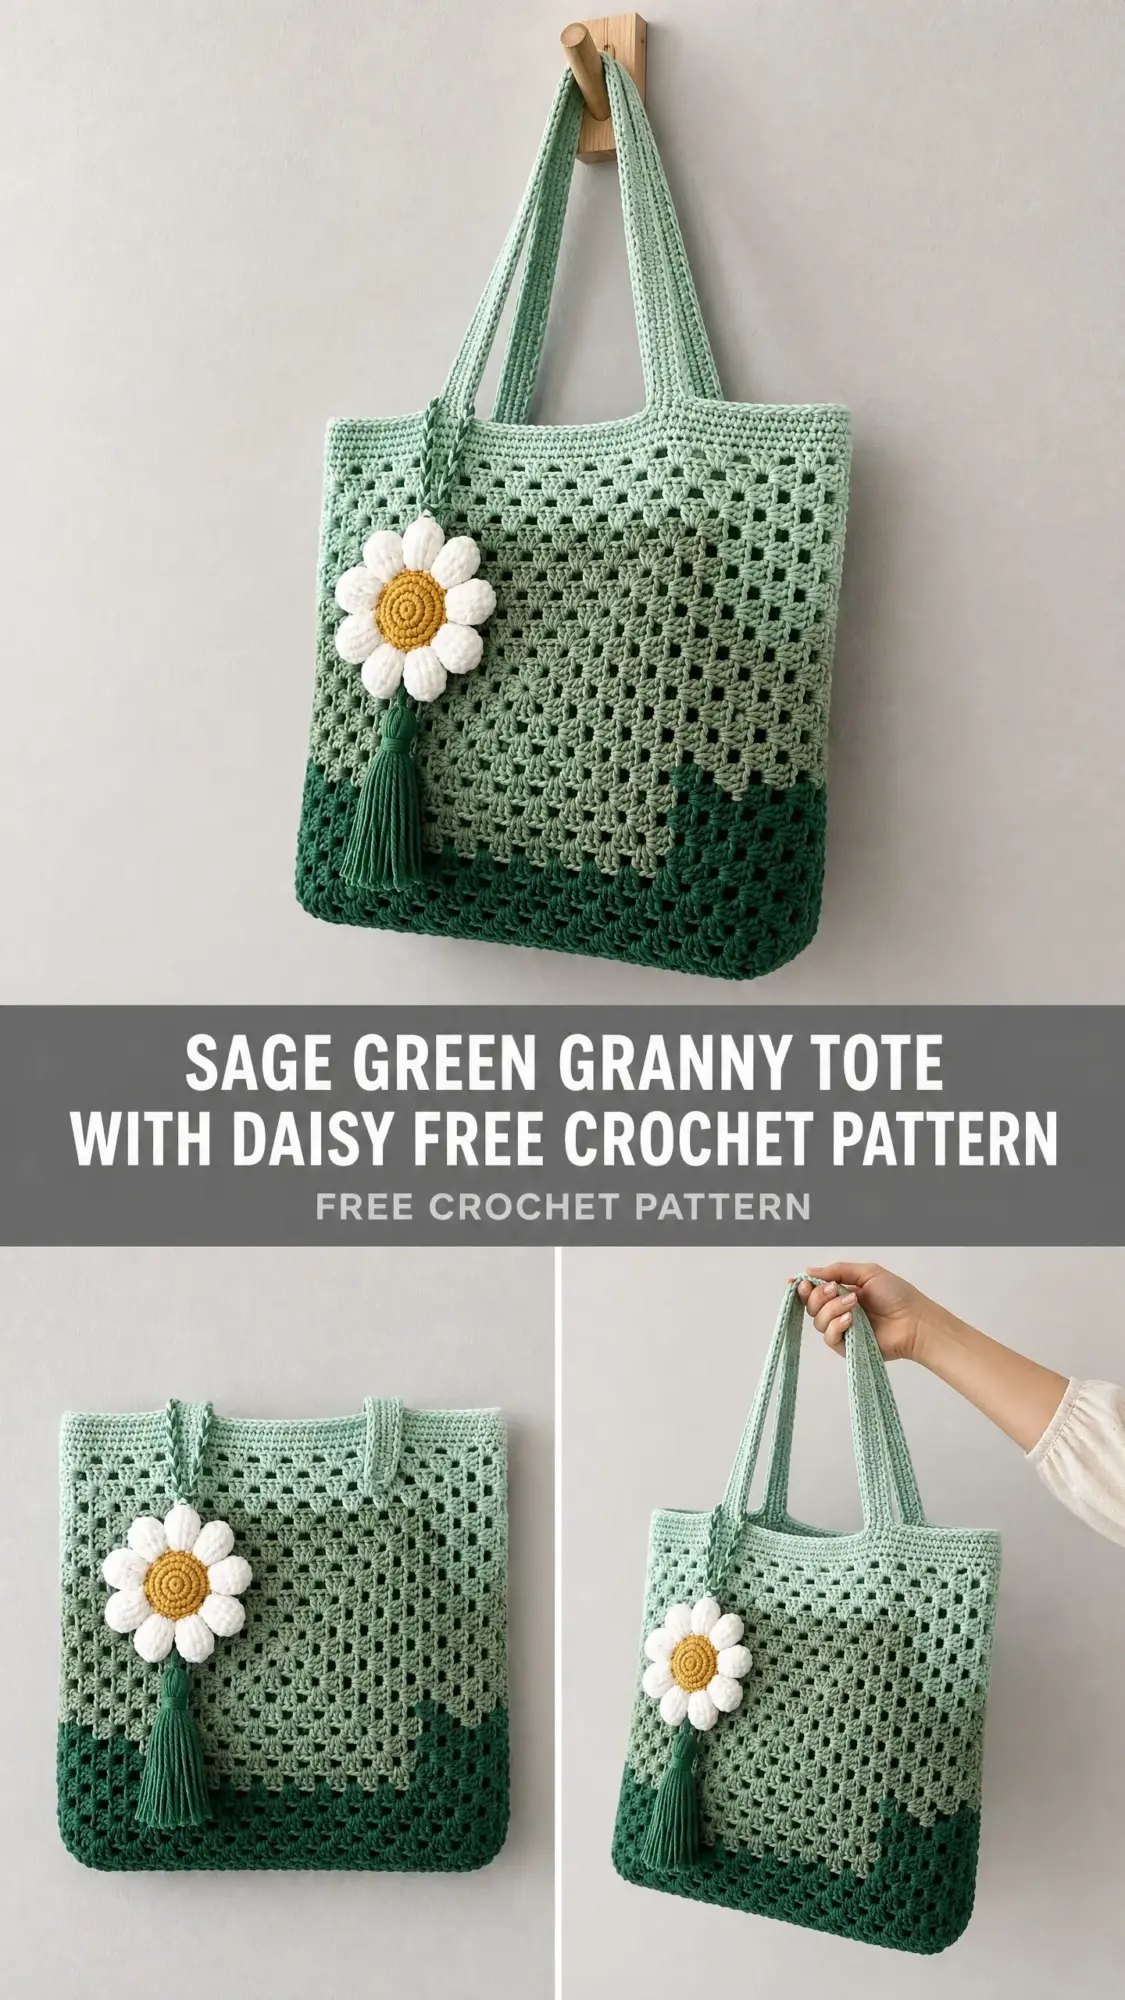
If you know how to make a granny square, you already have the main skill you need. The bag is essentially one giant granny rectangle that grows from the bottom up. No complicated seaming. No fussy assembly. Just satisfying rows of clusters that build into a sturdy, beautiful tote.
The ombre effect from deep forest green at the base through mid sage and into pale mint at the top gives this bag a modern feel while keeping that beloved vintage granny texture. Let me walk you through every step.
Pattern Overview and Skill Level
This pattern is rated intermediate. The granny cluster stitch itself is beginner-accessible, but you will need to manage color changes across rounds, maintain a clean rectangular shape, and keep consistent tension at the corners. If you have completed a few projects beyond basic dishcloths or scarves, you are ready for this one.
Time estimate: Approximately 10 to 14 hours for an average-pace crocheter, including the daisy and tassel. The bag body alone typically takes 7 to 10 hours.
Finished Measurements
Materials You Will Need
Yarn: Worsted weight cotton or cotton-blend yarn (Category 4), approximately 800 to 900 yards / 730 to 823 meters total across three colors
Hook: US size G-6 / 4.0 mm (or size needed to obtain gauge)
Additional supplies:
Yarn Suggestions
Lion Brand 24/7 Cotton in Grass (Color A), Sage (Color B), and Mint (Color C) works beautifully here. This yarn is 100% mercerized cotton, 186 yards per 3.5 oz skein, and produces clean stitch definition ideal for granny clusters. It is machine washable and holds its shape well in structured bags.
WeCrochet Dishie in Aloe (Color A), Jade (Color B), and Mint (Color C) is another excellent choice. It is 100% cotton, 190 yards per 100g skein, and launders exceptionally well.
Substitution note: Any smooth Category 4 cotton yarn will work. Avoid fuzzy or textured yarns as they obscure the lace-like holes that define the granny cluster grid. If substituting, swatch to gauge before beginning.
Gauge
One granny cluster repeat (1 shell of 3 double crochet plus chain space) = approximately 1.25 inches / 3.2 cm wide
4 rows of granny cluster pattern = approximately 2 inches / 5 cm tall
Gauge swatch: Work a flat granny square for 4 rounds with Color B and measure across 8 cluster-shell repeats horizontally and 4 rows vertically. Adjust hook size up or down one size if your swatch is outside the 10% tolerance of stated finished dimensions.
Abbreviations (US Terms)
Before we dive into the instructions, let me define every stitch abbreviation you will encounter:
Brackets [ ] = work all instructions within brackets into the same stitch or space
Parentheses ( ) at end of row/round = total stitch or shell count for that row/round
Special Stitches
Granny Shell (GS): Work 3 dc into the designated ch-sp or stitch, creating one shell cluster. This is the foundational unit of the granny grid throughout the bag body.
Corner Shell (CS): Work [3 dc, ch 2, 3 dc] into the designated corner ch-2 sp. This places two shells at each corner with a ch-2 turning space between them, expanding the fabric outward in all four directions for flat growth.
Invisible Join: Cut yarn leaving a 6-inch tail. Thread tail on yarn needle. Insert needle under both loops of the first dc of the round, then back down through the center of the last dc made (between the two loops at top). Pull snug to mimic a stitch. This replaces the final sl st join and creates a seamless look at color transitions.
Pattern Notes Before You Begin
1. The bag body is worked in joined rounds from the bottom up. The base begins flat with increases at four corners to create a rectangle, then the sides are worked straight upward without corner increases.
2. Color sequence (worked from base upward):
3. Each granny shell round on the side portion works into ch-1 spaces between shells and ch-2 spaces at corners. Do not work into the tops of dc stitches when working the granny pattern.
4. Stitch counts in the body section are expressed as shell counts (number of GS units per round) rather than individual dc counts. Each shell = 3 dc.
5. Right side (RS) faces outward throughout. When joining each round, the visible join sits on the inside of the bag.
6. The bag is not self-supporting without contents or an insert. A flexible plastic base insert or a piece of stiff interfacing cut to the bag bottom dimensions will help it stand upright when displayed empty.
Crochet Pattern Instructions
Bag Base
The base is worked flat in joined rounds, expanding at four corners to create a rectangle. The starting chain determines the long axis of the bag.
Round 1 (Color A):
Ch 20.
Into the 4th ch from hook work [3 dc, ch 2, 3 dc] (this is the first corner CS).
Sk 2 ch, [3 dc, ch 1] into next ch. Rep [sk 2 ch, 3 dc, ch 1] 3 more times across the chain. (You will have worked 5 shell positions across the long side.)
Into the last ch of the foundation work [3 dc, ch 2, 3 dc] (second corner CS).
Now work along the opposite side of the foundation chain:
Sk 2 ch of foundation underside, [3 dc, ch 1] into next ch. Rep [sk 2 ch, 3 dc, ch 1] 3 more times.
Join with sl st to top of beg ch-3 (counts as first dc).
(2 corner shells + 8 side shells = 10 GS units total, 4 ch-2 corner spaces, 8 ch-1 side spaces)
Note: Throughout the base rounds and side rounds, ch 3 at the start of each round counts as the first dc of a 3-dc shell group. The ch-3 plus 2 dc = one GS.
Round 2 (Color A):
Sl st into ch-2 corner sp. Ch 3, [2 dc, ch 2, 3 dc] into same ch-2 corner sp (CS made).
Ch 1, [3 dc, ch 1] into each ch-1 sp across long side (4 shells).
[3 dc, ch 2, 3 dc, ch 1] into next ch-2 corner sp (CS made, ch 1 after).
[3 dc, ch 1] into each ch-1 sp across short side (2 shells).
[3 dc, ch 2, 3 dc, ch 1] into next ch-2 corner sp (CS made).
[3 dc, ch 1] into each ch-1 sp across long side (4 shells).
[3 dc, ch 2, 3 dc, ch 1] into next ch-2 corner sp (CS made).
[3 dc, ch 1] into each rem ch-1 sp across short side (2 shells).
Join with sl st to top of beg ch-3.
(4 corner shells + 12 side shells = 16 GS units total)
Note: Each base round adds 4 shells total (1 per corner increase), and the side shell count grows by 1 per long side and 1 per short side each round.
Round 3 (Color A):
Sl st to ch-2 corner sp. Ch 3, [2 dc, ch 2, 3 dc] into same sp.
Ch 1, [3 dc, ch 1] into each ch-1 sp across long side (5 shells).
[3 dc, ch 2, 3 dc, ch 1] into next corner sp.
[3 dc, ch 1] into each ch-1 sp across short side (3 shells).
[3 dc, ch 2, 3 dc, ch 1] into next corner sp.
[3 dc, ch 1] into each ch-1 sp across long side (5 shells).
[3 dc, ch 2, 3 dc, ch 1] into next corner sp.
[3 dc, ch 1] into each rem ch-1 sp across short side (3 shells).
Join with sl st to top of beg ch-3.
(4 corner shells + 16 side shells = 20 GS units total)
CHECKPOINT: After Round 3 (the base), the flat rectangle should measure approximately 5 inches / 12.5 cm wide by 13 inches / 33 cm long. If it is significantly larger or smaller, adjust hook size and restart from Round 1.
Bag Sides
From Round 4 onward, stop increasing at the corners. Instead of working a CS into the corner ch-2 spaces, work a single GS with ch-1 before and after it. This shifts construction from flat to tubular-straight.
At each corner ch-2 sp from the base: work [3 dc, ch 1] into the ch-2 sp (single shell only, no expansion corner). This creates a consistent ch-1 sp at each corner and produces 4 straight sides rising vertically.
Each side round: 20 GS units total, each separated by ch-1 spaces.
Round 4 (Color B):
Cut Color A after completing Round 3 invisible join. Join Color B with sl st into any corner ch-2 sp of the base top edge.
Ch 3, 2 dc into same corner sp. Ch 1.
[3 dc, ch 1] into each ch-1 sp around (including working [3 dc, ch 1] into each base corner ch-2 sp as a regular shell now).
Join with sl st to top of beg ch-3.
(20 shells total)
Rounds 5 through 10 (Color B):
Rep Round 4 pattern exactly. No increases. Work [3 dc, ch 1] into every ch-1 sp all the way around.
(20 shells per round)
Rounds 11 through 18 (Color C):
Join Color C at end of Round 10. Rep the side round pattern: [3 dc, ch 1] into every ch-1 sp around.
Join each round with sl st or invisible join.
(20 shells per round)
CHECKPOINT: After completing Round 18, the bag body should measure approximately 11 to 12 inches / 28 to 30.5 cm tall from the top of the base to the top working edge.
Top Edge Stabilization Row
This round of sc firms the top rim and creates a clean edge for strap attachment.
Round 19 (Color C):
Join Color C with sl st to any ch-1 sp at top of Round 18. Ch 1 (does not count as sc here).
Work 3 sc into each ch-1 sp around the entire top opening.
(20 ch-1 sps x 3 sc = 60 sc total around the top opening)
Join with sl st to first sc.
(60 sc)
Straps
The two straps are worked as sc strips directly on the top edge. They sit on the front and back faces, not across the side edges.
Locate the center section on the FRONT face of the bag. Each strap begins 6 sc in from each side of the front face and is 6 sc wide, leaving 6 sc between the two straps at the center top of each face.
Strap 1 (Left Strap, Front):
Mark sc positions 7 through 12 on the front face (counting from left corner sc of front face). These 6 sc are the base of Strap 1 front panel.
Join Color C with sl st to sc position 7.
Row 1: Ch 1, sc in same st, sc in next 5 sts. Turn. (6 sc)
Row 2: Ch 1, sc across. Turn. (6 sc)
Rep Row 2 until strap measures approximately 22 inches / 56 cm from the top edge.
Fasten off, leaving a 12-inch tail for seaming.
Strap 1 (Left Strap, Back):
Count around to the back face. Mark the corresponding sc positions 7 through 12 on the back face (mirroring the front). Join Color C and work an identical 22-inch sc strip.
Fasten off, leaving a 12-inch tail.
With RS facing outward and yarn needle, seam the two strap halves together by whipstitching or mattress stitching them along all three open edges (two long sides and one short top end), creating one tube-like flattened strap. Weave in all ends.
Strap 2 (Right Strap):
Mark sc positions 19 through 24 on the front face.
Work exactly as for Strap 1, creating two 22-inch strips (one from front face, one from back face) and seaming them together.
Weave in all ends.
CHECKPOINT: Each completed strap should be approximately 1.5 inches / 3.8 cm wide and 11 inches / 28 cm long from the top edge of the bag when hanging.
Daisy Medallion
The daisy is worked in two parts: the center disk and the petals.
Daisy Center
With Golden Yellow and G hook, make a MR.
Round 1: Ch 3 (counts as dc), 11 dc into ring. Join with sl st to top of ch-3. Pull ring closed. (12 dc)
Round 2: Ch 1, sc in same st, sc in each st around. Join with sl st to first sc. (12 sc)
Fasten off Golden Yellow. Join White.
Round 3: Ch 1, 2 sc in each st around. Join with sl st to first sc. (24 sc)
Daisy Petals
The petals are worked into the sc sts of Round 3 of the center disk. There are 8 petals evenly spaced, using every 3rd sc as a petal anchor.
With White, join with sl st to any sc of Round 3.
Petal 1: Ch 10. Sl st into 2nd ch from hook. Sc in next ch. Hdc in next ch. Dc in next 3 ch. Hdc in next ch. Sc in next ch. Sl st in last ch. Sl st back into the base sc on the center disk (same st you started from) to secure the petal base. Sl st into the next 2 sc on the center disk edge.
(1 petal complete)
Repeat Petal sequence 7 more times, anchoring each petal into every 3rd sc of Round 3.
After Petal 8, sl st to the first petal base to close the round. Fasten off, weave in ends.
The finished daisy should have 8 white petals radiating from the golden center and measure approximately 4 inches / 10 cm tip to tip.
Tassel
Cut 30 strands of Sage or Teal yarn each measuring 8 inches / 20.5 cm long.
Bundle strands together and fold in half. Cut one additional 12-inch strand. Tie the 12-inch strand firmly around all folded strands approximately 0.75 inches / 2 cm below the fold loop, wrapping 3 times and knotting securely. This forms the tassel head.
The fold loop at the top is the attachment loop.
Trim tassel ends evenly to approximately 3.5 inches / 9 cm below the tie.
Assembly and Finishing
Step 1: Thread the attachment loop of the tassel through the center back of the daisy medallion (through the MR center) and pull the tassel body through the loop to lark’s head the tassel onto the daisy.
Step 2: Attach the daisy-tassel charm to the left strap of the bag by passing the daisy’s center or a short ch loop around the strap and securing with a locking stitch marker, a small safety pin, or by crocheting a small ch loop and sl sting it through the strap. Make it removable for washing if desired.
Step 3: Weave in all remaining yarn ends on the bag body.
Step 4: Block the bag by lightly misting with water and pressing flat by hand. Stuff with plastic bags or towels to hold the rectangular shape while drying. Allow to dry fully before use.
Optional liner: Cut a rectangle of cotton fabric 28 x 14 inches / 71 x 35.5 cm. Fold in half to create a 14 x 14-inch pocket. Seam the two side edges with a 0.5-inch seam. Fold the top edge down 1 inch and press. Insert into bag and slip stitch the folded top edge to the interior of the sc rim on Round 19.
Optional base insert: Cut stiff plastic canvas or craft foam to 5 x 12 inches / 12.5 x 30.5 cm and slip into the bottom of the bag before lining to keep the base flat.
Size Customization Tips
To make the bag wider: Add more repeats to the starting foundation chain. Each additional 3-ch added to the foundation adds approximately 1.25 inches / 3.2 cm to the width of each long side. Remember to adjust strap placement proportionally.
To make the bag taller: Add more side rounds between the base and the top edge. Each round adds approximately 0.5 inches / 1.25 cm of height.
To make a smaller market tote: Stop side rounds at Round 12 or 13 instead of Round 18.
To make the bag in a single solid color: Simply use one color throughout all rounds and the straps.
Blocking and Care Instructions
Blocking: Cotton yarns respond well to wet blocking. Fill a sink with cool water, submerge the bag, gently squeeze (do not wring), roll in a clean towel to remove excess water, and then shape the bag by hand on a flat surface or over a box that matches the desired interior dimensions. Pin corners square if needed. Allow to air dry completely.
Care: Machine wash cold, gentle cycle, inside a mesh laundry bag to protect the open granny structure. Lay flat or hang to dry. Do not tumble dry on high heat as cotton can shrink. The daisy charm should be removed before machine washing.
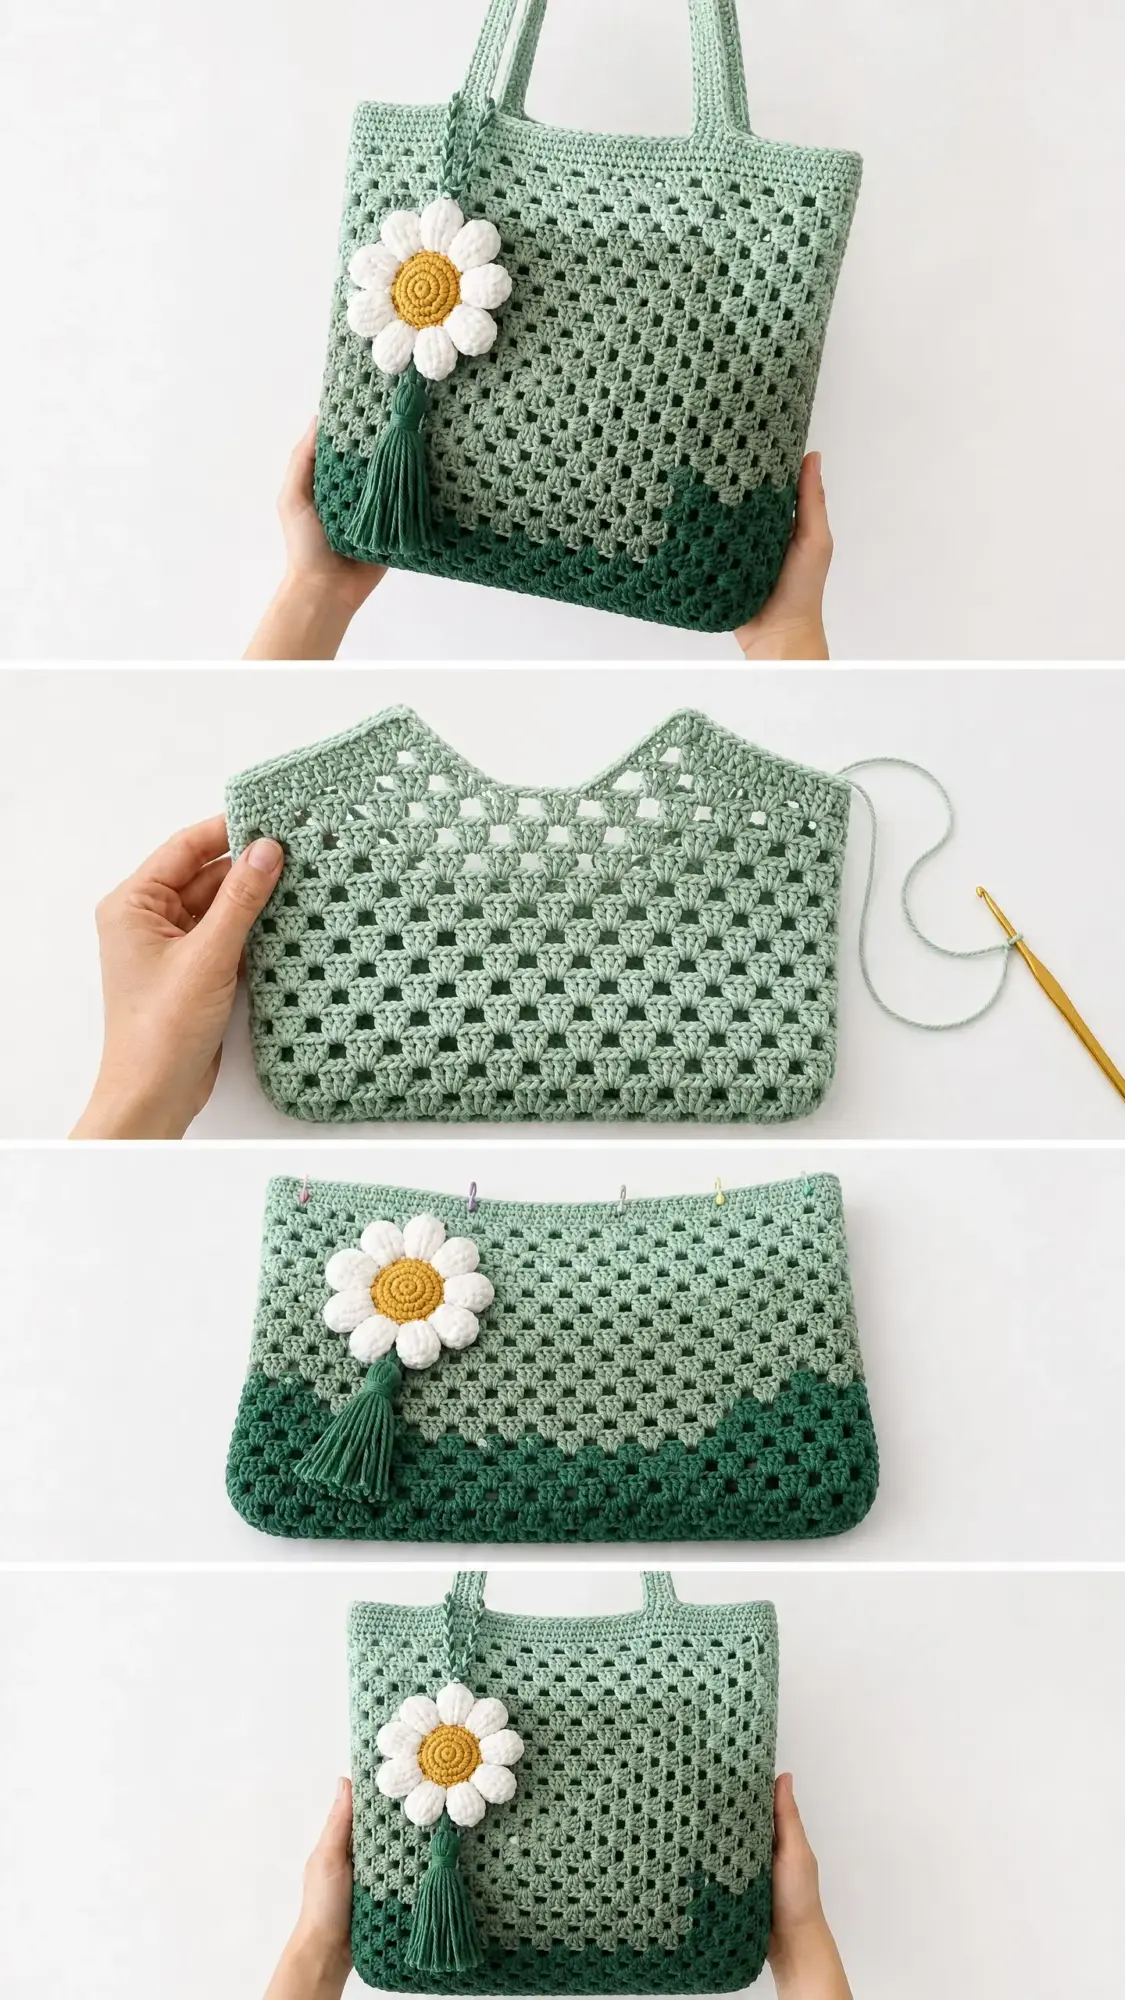
Final Thoughts on This Granny Tote Crochet Pattern
This sage green granny tote is one of those projects that looks impressive but is genuinely enjoyable to make. The repetitive granny stitch pattern is almost meditative once you get into a rhythm, and watching the colors shift from dark to light as you work upward is so satisfying. The daisy charm adds a sweet finishing touch that makes this bag feel special.
I hope this step by step crochet tutorial gives you everything you need to create your own beautiful tote. Whether you stick with the green ombre or choose your own color combination, you are going to end up with a bag you will want to carry everywhere.
Thank you so much for choosing this pattern. If you make one, I would absolutely love to see it. Tag me on Instagram or share a photo in our Facebook group. Nothing makes my day like seeing your finished projects.
If you loved this granny tote pattern, go ahead and pin it to your Pinterest boards so you can find it when you are ready to start. And please drop a comment below if you give it a try. I read every single one and would love to hear how yours turns out!
You Might Also Like
- Gray and Pink Heart Granny Square Blanket Free Crochet Pattern
- Dusty Rose Openwork Draped Poncho Free Crochet Pattern
- Ocean Blue Daisy Granny Square Blanket Free Crochet Pattern
- Wildflower Meadow Crochet Pot Free Crochet Pattern