
Last summer, I found myself wandering through a farmers market with a flimsy plastic bag that ripped before I even made it back to my car. Tomatoes rolling across the parking lot. A jar of honey that thankfully survived. I stood there thinking, "I literally make things with my hands for a living, and I’m carrying groceries in this?"
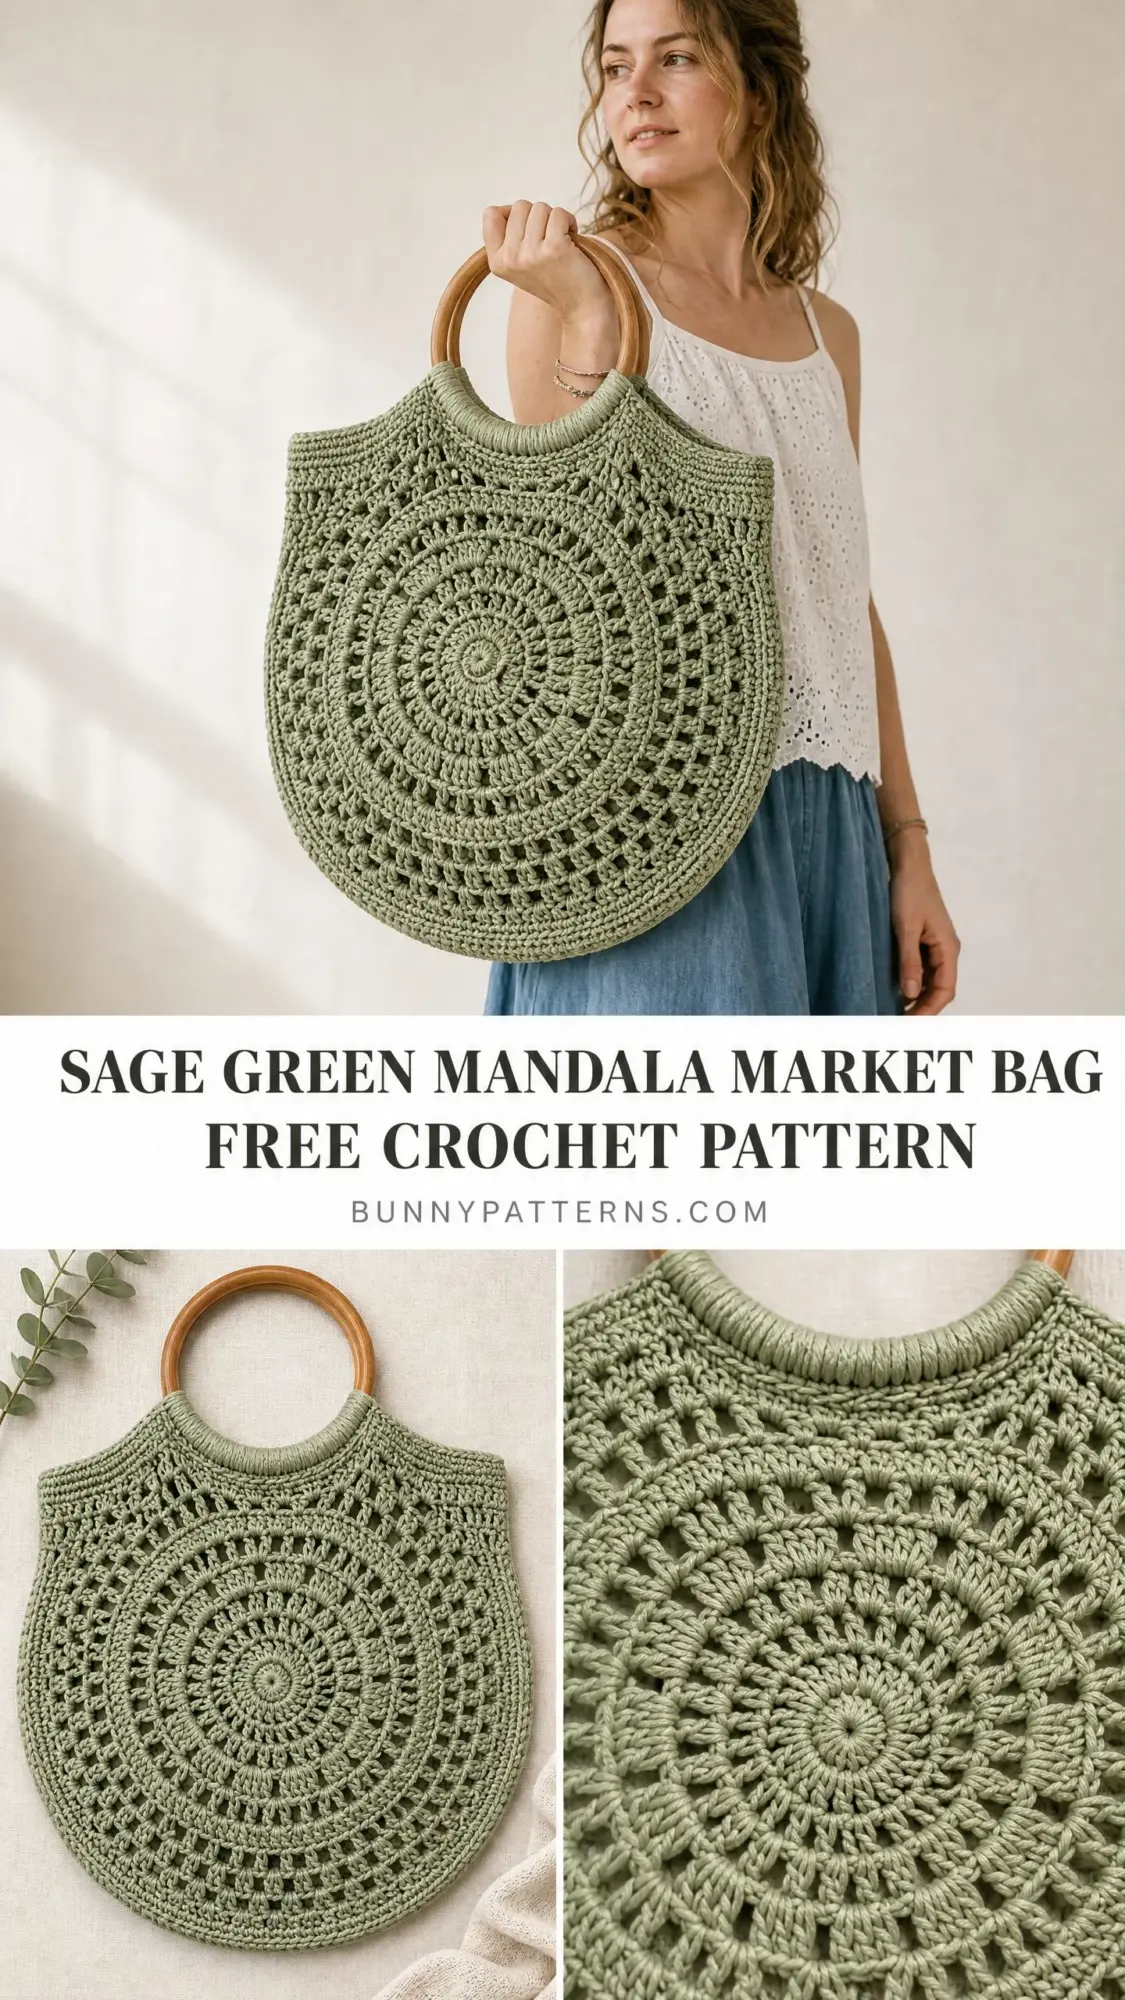
That moment stuck with me. I wanted something beautiful enough to feel special, sturdy enough to handle real life, and interesting enough to keep me engaged while making it. This mandala market bag became my answer.
The circular medallion design starts from a tiny magic ring and radiates outward through shells, lacework, and fans until you have two stunning panels that join into a bag with actual depth and structure. Those bamboo ring handles? They make the whole thing feel like something you would find in a boutique, not something you crocheted on your couch. I am genuinely proud of how this one turned out.
Why This Mandala Bag Pattern Works
This is not your average market tote. The construction method creates two identical mandala panels that form the front and back of the bag, connected by a gusset that gives you real carrying capacity. We are talking about 3 inches of depth here, which means your produce, library books, or beach day essentials actually fit inside without bulging awkwardly.
The sage green color photographs beautifully, but honestly, this pattern shines in any solid cotton yarn where you can really see the lacework detail. The radiating spiral medallion becomes the star of the show, and you want those stitches to pop.
Skill level: Intermediate. You should be comfortable working in continuous rounds, reading a radial pattern, and joining pieces neatly. Nothing here is complicated on its own, but the mandala construction requires consistent tension throughout.
Time estimate: Approximately 12 to 18 hours total. That accounts for both panels, the gusset strip, and handle finishing.
Finished Measurements
Your completed bag will measure approximately 14 inches wide by 14 inches tall, not including handles. The bamboo ring handles add about 6 more inches of height, bringing the total to around 20 inches from bottom to top. The gusset creates about 3 inches of depth, so this bag actually holds things instead of squishing them flat.
Materials You Will Need
Yarn: Approximately 600 to 700 yards of DK weight (light worsted, #3) 100% cotton yarn in sage green. Cotton is essential here for stitch definition in the open lacework and for structural integrity. The bag needs to hold its shape when filled.
Yarn suggestions that work beautifully:
Avoid blends containing acrylic or wool. These will stretch out under weight or felt with washing. Hairy or textured yarns will obscure your lovely lacework.
Hook: US size G-6 (4.0 mm) crochet hook. This is slightly smaller than what your yarn label might suggest, and that is intentional. We want a firmer fabric that will not stretch out of shape when you load up the bag.
Notions:
Gauge (Please Check This)
Using your G-6 hook: 16 double crochet stitches and 8 rows should equal 4 inches by 4 inches in solid double crochet fabric.
More importantly for this pattern: after completing Round 10, your mandala panel should measure approximately 9 inches in diameter. After all 14 rounds, each panel should measure approximately 14 inches across.
Gauge matters here because you are making two panels that must match exactly. If they do not match, your seams will pucker and pull. Take the time to swatch.
Abbreviations and Stitch Definitions
Let me walk you through every stitch you will use in this pattern. If you are newer to crochet, read through this section before starting.
ch = chain. The foundation stitch that creates your starting row or adds height.
sl st = slip stitch. A flat joining stitch with no height, used to close rounds.
sc = single crochet. Insert hook, yarn over, pull up a loop, yarn over, pull through both loops. A short, dense stitch.
dc = double crochet. Yarn over, insert hook, yarn over, pull up a loop, yarn over, pull through two loops, yarn over, pull through remaining two loops. A taller stitch that creates the body of your shells.
tr = treble crochet. Yarn over twice before inserting hook, then work off two loops at a time until complete.
sk = skip. Pass over the indicated stitch without working into it.
sp = space. The gap created by chain stitches.
ch-sp = chain space. Work into the gap under the chains, not the chains themselves.
MR = magic ring (also called magic loop or adjustable ring). An adjustable starting loop that can be pulled tight to close the center hole.
Shell = Work 5 dc into the same stitch or space. This creates a fan-shaped cluster.
Large shell = Work 7 dc into the same stitch or space. Used in wider outer rounds.
Special Techniques
Standing double crochet: Begin with a slip knot on hook, yarn over, insert hook into indicated stitch or space, yarn over and draw up a loop, yarn over and draw through two loops, yarn over and draw through remaining two loops. This starts a round without a chain-2, creating an invisible join.
Joined dc cluster (dc-cl): [Yarn over, insert hook into indicated stitch, yarn over, draw up loop, yarn over, draw through 2 loops] 3 times in the same stitch, yarn over, draw through all 4 loops on hook.
Pattern Notes Before You Begin
Each mandala panel is worked in continuous rounds from center outward. Do not turn unless I tell you to. Do not join rounds unless instructed. Use a stitch marker at the beginning of each round and move it up as you go.
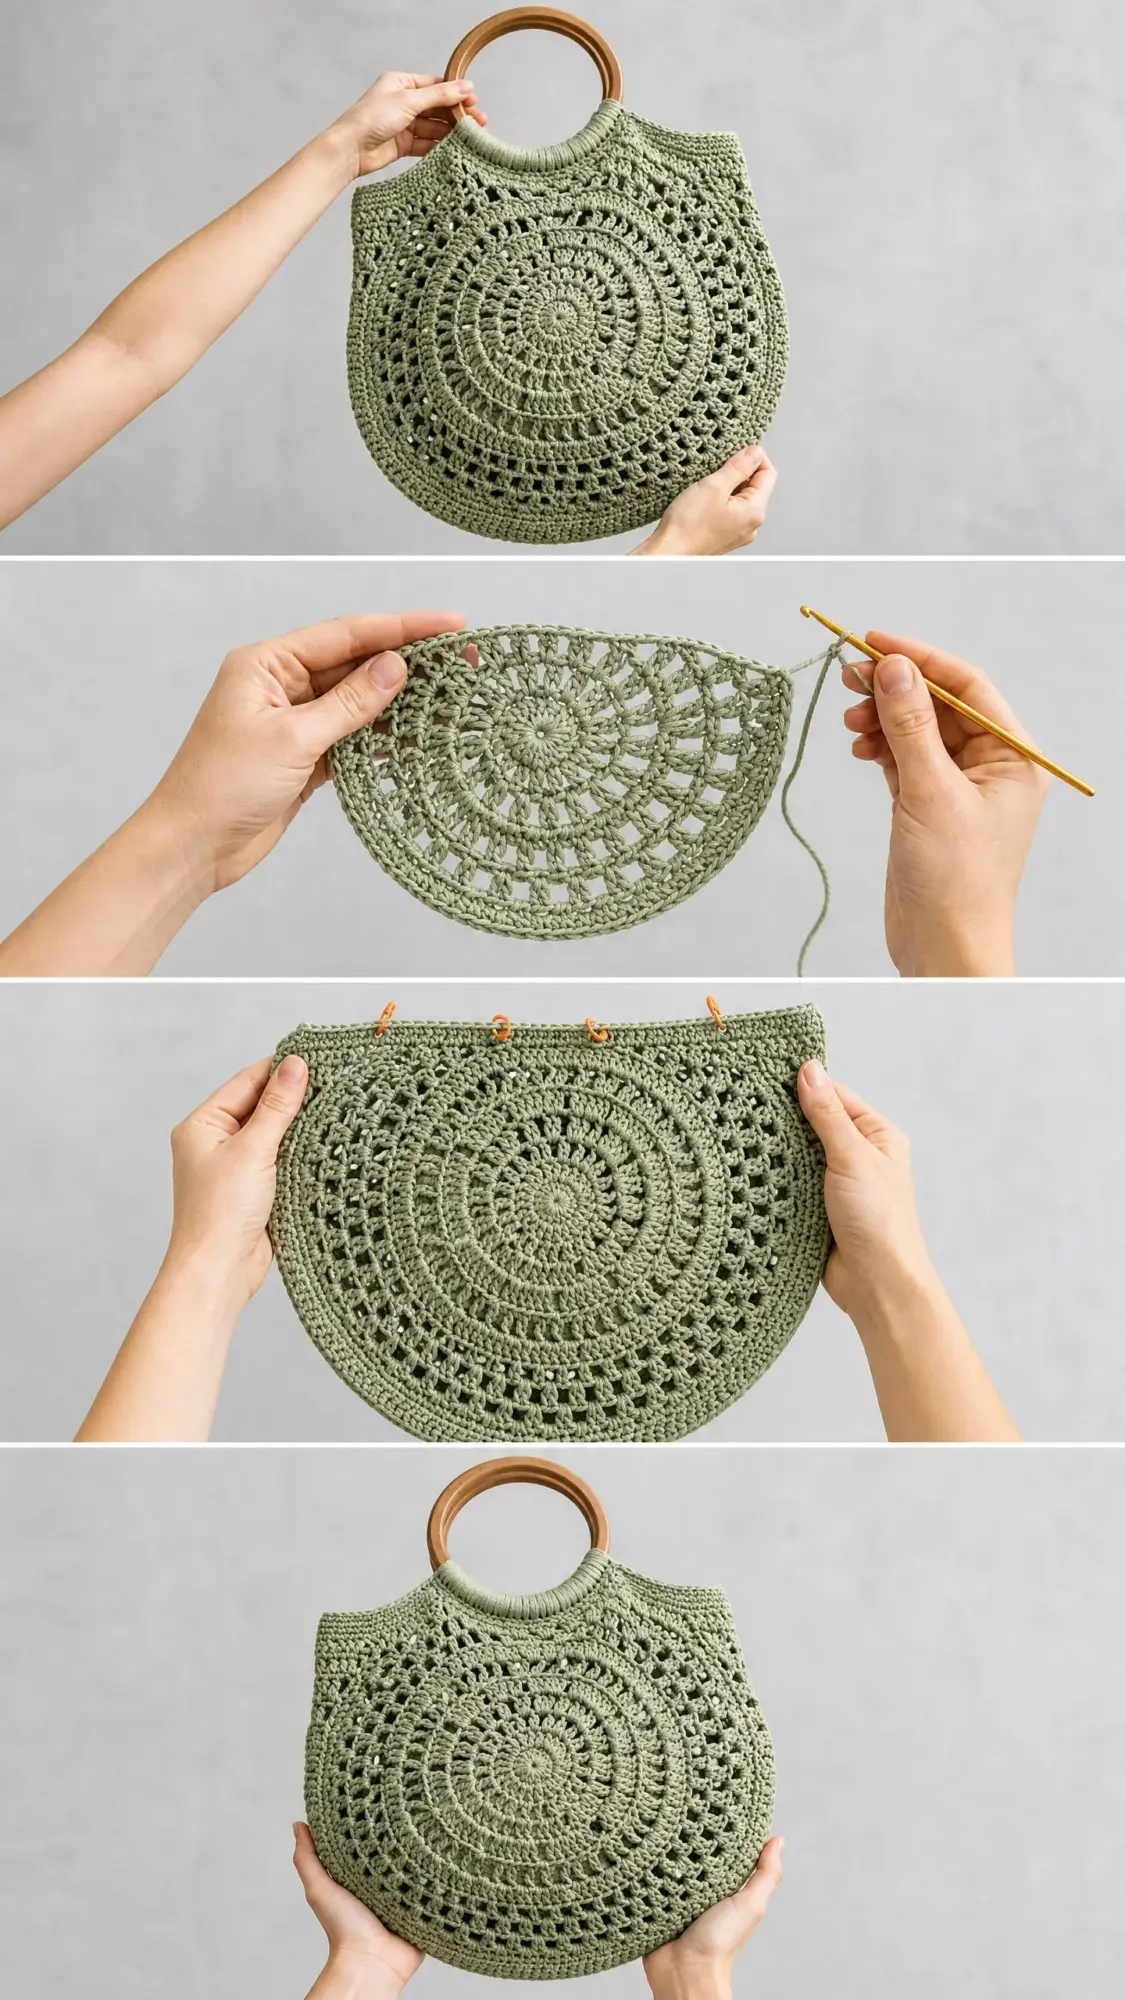
You will make two identical panels, then connect them with a gusset strip. The panels should lie completely flat after blocking. If yours starts to ruffle or cup, adjust your hook size before continuing.
All yarn ends should be woven in securely on the wrong side before assembly. Cotton has minimal grip, so weave in at least 2 to 3 inches in multiple directions.
Mandala Panel Instructions (Make 2)
Round 1: Make a magic ring. Ch 3 (counts as first dc here and throughout), work 11 dc into the ring. Pull ring closed. Join with sl st to top of beginning ch-3. (12 dc)
Round 2: Ch 1. Work 2 sc into each dc around. Join with sl st to first sc. (24 sc)
Round 3: Ch 4 (counts as dc plus ch 1). [Dc into next sc, ch 1] around. Join with sl st to third ch of beginning ch-4. (24 dc, 24 ch-1 spaces)
Round 4: Sl st into first ch-1 space. Ch 3 (counts as dc). Work 2 dc into same ch-1 space. Work 3 dc into each ch-1 space around. Join with sl st to top of beginning ch-3. (72 dc)
Round 5: Ch 1. Sc into same stitch. Ch 3. [Sk 2 dc, sc into next dc, ch 3] around, ending sk 2 dc. Join with sl st to first sc. (24 sc, 24 ch-3 spaces)
Round 6: Sl st into first ch-3 space. Ch 3 (counts as dc). Work 4 more dc into same ch-3 space (first shell made). Ch 2. [Work 5 dc into next ch-3 space, ch 2] around. Join with sl st to top of beginning ch-3. (24 shells of 5 dc each, 24 ch-2 spaces)
Round 7: Sl st to center dc of first shell (third dc of that shell). Ch 1. Sc into same stitch. Ch 5. [Sc into center dc of next shell, ch 5] around. Join with sl st to first sc. (24 sc, 24 ch-5 spaces)
Round 8: Sl st into first ch-5 space. Ch 3 (counts as dc). Work 6 more dc into same ch-5 space (first large shell of 7 dc made). Ch 3. [Work 7 dc into next ch-5 space, ch 3] around. Join with sl st to top of beginning ch-3. (24 large shells of 7 dc each, 24 ch-3 spaces)
Round 9: Sl st to center dc of first large shell (fourth dc). Ch 1. Sc into same stitch. Ch 4. Sc into next ch-3 space. Ch 4. [Sc into center dc of next large shell, ch 4. Sc into next ch-3 space. Ch 4] around. Join with sl st to first sc. (48 sc, 48 ch-4 spaces)
Round 10: Sl st into first ch-4 space. Ch 1. Work 5 sc into same ch-4 space. Work 5 sc into each ch-4 space around. Join with sl st to first sc. (240 sc)
Checkpoint
After Round 10, your panel should measure approximately 9 inches in diameter when laid flat. If it measures more than 9.5 inches, switch to a smaller hook. If it measures less than 8.5 inches, switch to a larger hook. Restart if needed to ensure both panels match.
Round 11: Ch 1. Sc into same stitch. Ch 3. Sk 4 sc. [Sc into next sc, ch 3. Sk 4 sc] around. Join with sl st to first sc. (48 sc, 48 ch-3 spaces)
Round 12: Sl st into first ch-3 space. Ch 3 (counts as dc). Work 4 more dc into same ch-3 space (shell). Ch 1. [Work 5 dc into next ch-3 space, ch 1] around. Join with sl st to top of beginning ch-3. (48 shells of 5 dc; 240 dc plus 48 ch-1 spaces)
Round 13: Ch 1. Sc into same stitch (top of beg ch-3). Ch 2. Sc into next dc. Ch 2. Sk 1 dc (center dc of shell). Sc into next dc. Ch 2. Sc into next dc. Ch 2. Sc into ch-1 space. Ch 2. [Sc into first dc of next shell. Ch 2. Sc into next dc. Ch 2. Sk 1 dc. Sc into next dc. Ch 2. Sc into last dc of shell. Ch 2. Sc into ch-1 space. Ch 2] around. Join with sl st to first sc. (240 sc, 240 ch-2 spaces)
Round 14: Sl st into first ch-2 space. Ch 1. Work 3 sc into each ch-2 space around. Join with sl st to first sc. (720 sc)
Final Checkpoint
After Round 14, your panel should measure approximately 14 inches in diameter. Both panels must match within one quarter inch before proceeding.
Fasten off. Weave in all ends securely on the wrong side.
Gusset Strip Instructions
The gusset runs along the bottom and both sides of the bag, connecting your two panels and creating interior depth. It does not run across the top opening.
Measure the circumference of one panel from the top left corner of the opening, down around the bottom, and up to the top right corner. This should be approximately 36 to 38 inches. Mark the top corners on each panel with stitch markers before beginning.
Foundation: Ch 13.
Row 1: Sc into second ch from hook and into each ch across. Turn. (12 sc)
Rows 2 onward: Ch 1. Sc into each sc across. Turn. (12 sc)
Repeat Row 2 until the gusset strip measures 37 inches or the length needed to span from marker to marker on your panel.
Fasten off, leaving a 20-inch tail for seaming.
Assembly Instructions
Step 1: Block both panels and the gusset strip before assembly. Wet block by washing gently in cool water, rolling in a towel to remove excess moisture, then pinning flat to a 14-inch diameter circle. Allow to dry completely.
Step 2: Hold one panel with wrong side facing up. Align the start of the gusset strip with the stitch marker at the top left corner of the opening. Using the long tail and a yarn needle, whipstitch the long edge of the gusset to the outer edge of the panel, working stitch by stitch around the bottom and up to the top right corner marker.
Step 3: Place the second panel wrong side down against the free long edge of the gusset. Align carefully so the mandala centers match. Using a new length of yarn, whipstitch the second panel to the gusset the same way.
Step 4: At the side seams, fold the gusset end inward and whipstitch closed neatly.
Top Opening Edging and Handle Attachment
Step 1: With right side facing, join yarn at the top right corner seam. Ch 1. Work approximately 56 sc evenly across the top edge of the back panel.
Step 2: Repeat along the top edge of the front panel. (56 sc each side)
Step 3: Hold one bamboo ring behind the 56 sc along the back panel top. Fold the sc edging strip over the ring toward the wrong side. Whipstitch the strip to the inside of the bag edge, encasing the bamboo ring.
Step 4: Repeat for the front panel and second ring.
Step 5: Wrap the base of each bamboo ring where it meets the crochet with several tight wraps of yarn. Secure with a knot and weave in ends.
Care Instructions
Machine wash on gentle cycle in a mesh laundry bag using cold water, or hand wash. Do not tumble dry. Lay flat or hang to dry away from direct sunlight. If reshaping is needed after washing, re-block following the method above.
You Did It!
Thank you so much for choosing this pattern. I hope your finished bag brings you as much joy as mine has brought me. Every time I grab it for a market run or a beach day, I remember why I fell in love with crochet in the first place. Making beautiful, functional things with just yarn and a hook never gets old.
If you make this bag, I would absolutely love to see it! Tag me on Instagram or share a photo in my Facebook group. Seeing your finished projects genuinely makes my day.
And if you want to come back to this pattern later, go ahead and pin it to your favorite Pinterest board so it is easy to find. I would also love to hear from you in the comments below, whether you have questions before you start or want to show off your finished mandala market bag. Happy crocheting!
You Might Also Like
- Ocean Blue Floral Shoulder Dress Free Crochet Pattern
- Dusty Rose Boho Crochet Three-Piece Set Free Pattern
- Coral Sunset Textured Handbag Free Crochet Pattern
- Tinkerbell Green Fairy Baby Dress Free Crochet Pattern