
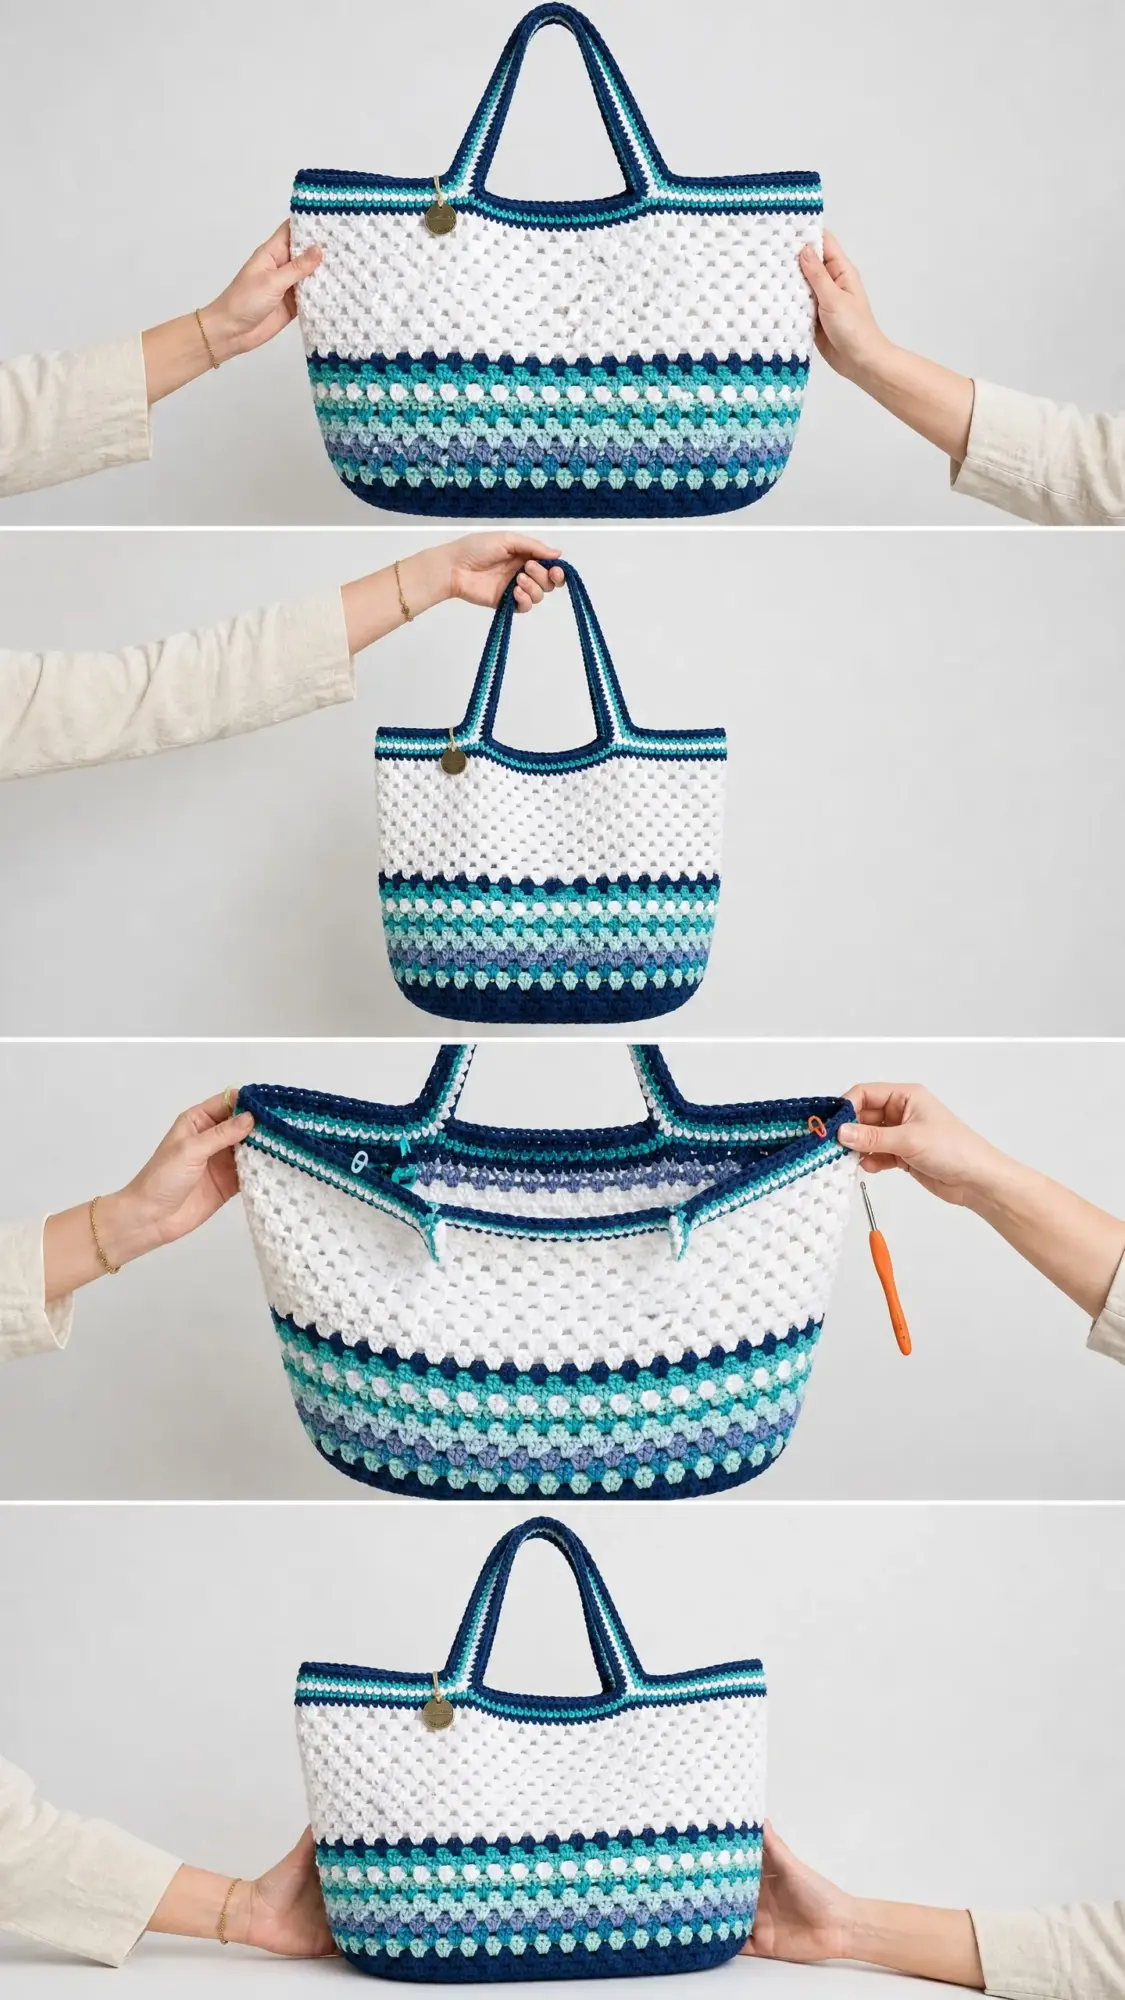
This is a structured tote bag worked in granny stitch from the bottom up. It uses basic double crochet clusters, an oval base, and seamless sides. The colorful stripes at the bottom fade into a clean white body, and the twisted rope handles give it a polished finish.
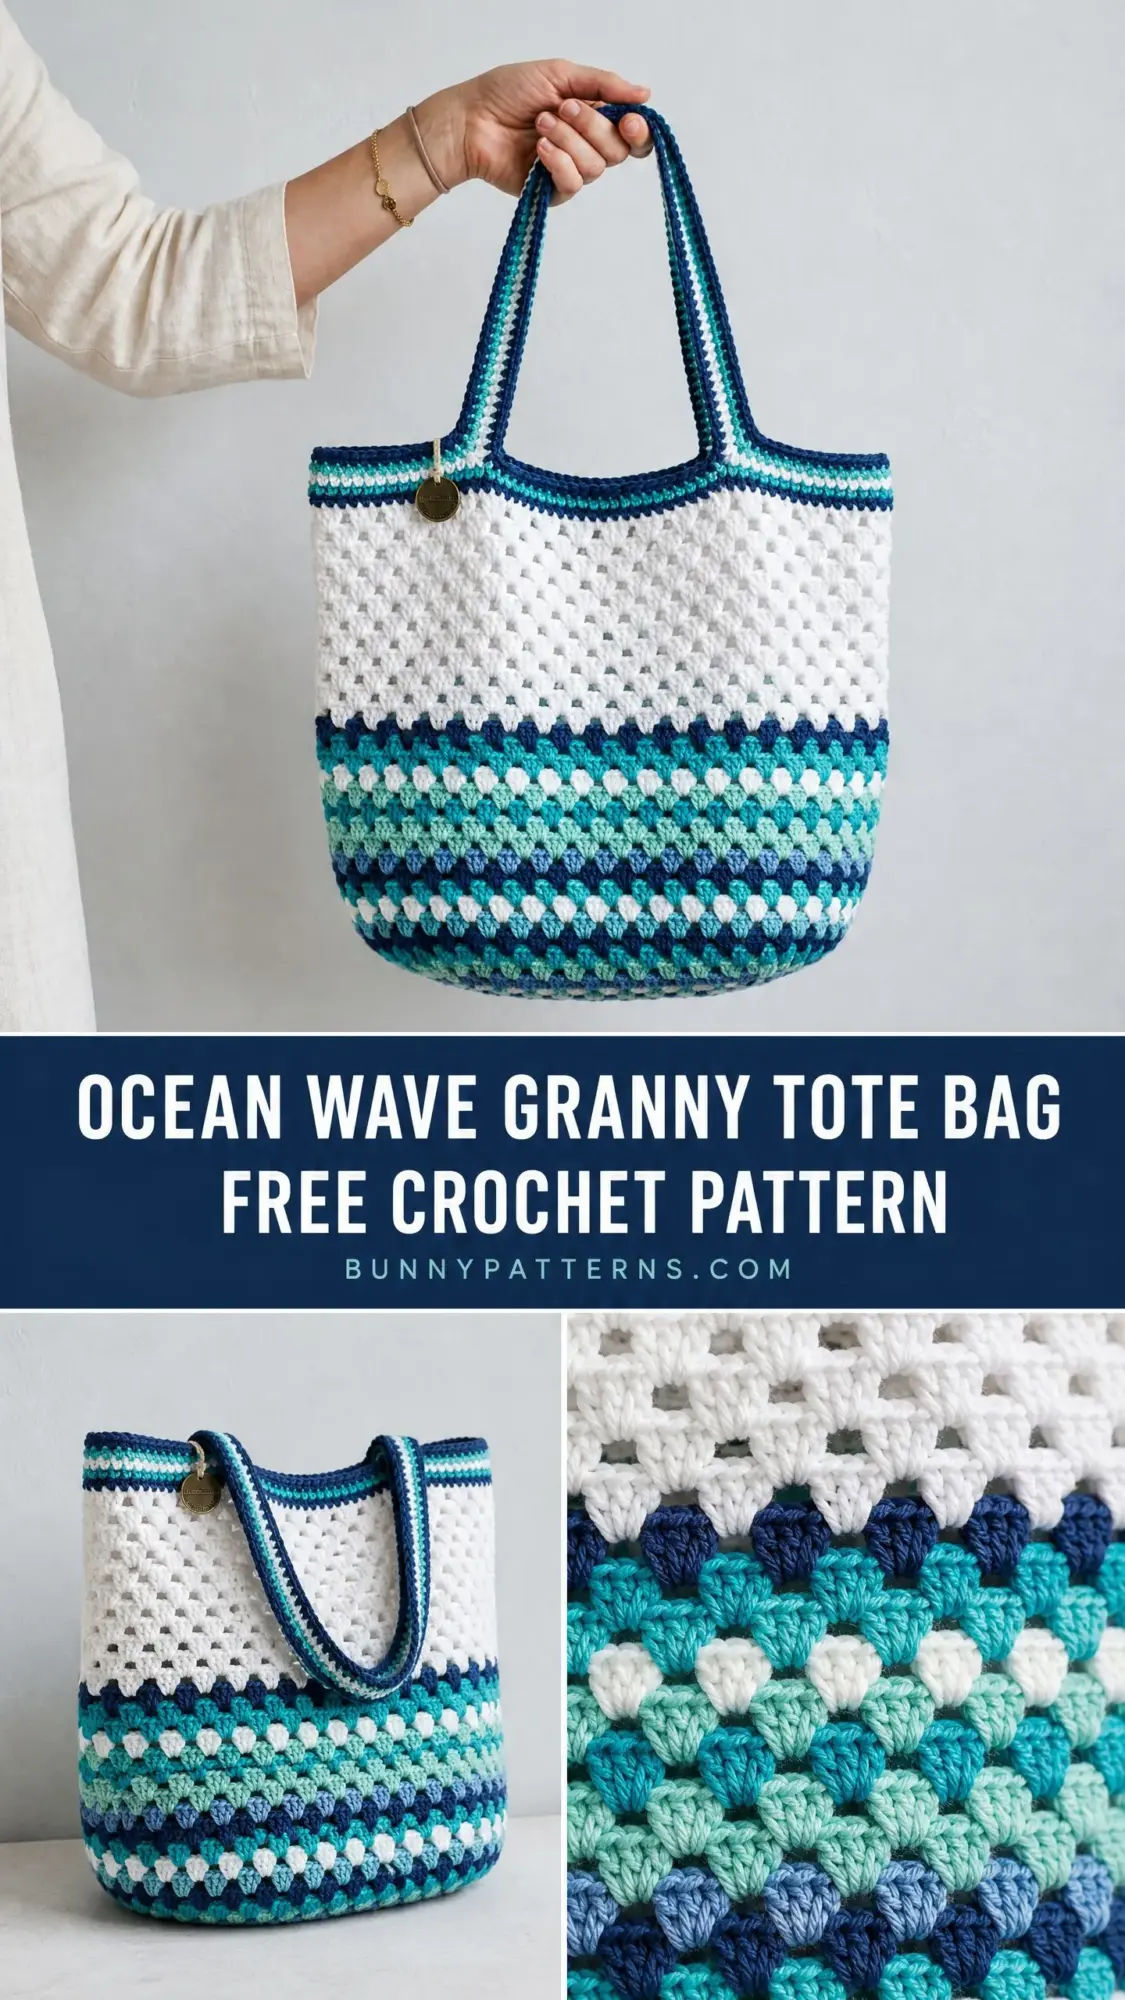
If you can work a granny square, you can absolutely make this bag. The construction is straightforward once you understand the rhythm. You will work the flat oval base first, then build the sides in continuous rounds without turning.
The finished bag measures approximately 13 inches wide by 14 inches tall, not including the handles. It is roomy enough for farmers market trips, beach days, or everyday errands. The cotton yarn holds its shape beautifully and gets softer with every wash.
Why You Will Love This Crochet Tote Bag Pattern
The granny stitch creates an open, textured fabric that looks intricate but works up quickly. Each round follows the same simple rhythm: three double crochets into a chain space, chain one, repeat. Once you get going, you will find it almost meditative.
The color gradient gives this bag its personality. You will start with ocean-inspired stripes at the base, using navy, teal, aqua, mint, and a touch of periwinkle. Then the bag transitions to a large white section that really shows off the lacy stitch pattern. A colorful band near the top ties everything together.
I love that this tote does not require a liner to look finished, though I have included optional lining instructions if you prefer a more polished interior. The twisted rope handles add durability and visual interest without complicated macramé techniques.
Materials Needed
Yarn:
You will need worsted weight cotton yarn (category 4) in six colors. Here are the approximate yardage requirements:
Total yardage: approximately 600 yards / 549 meters
Recommended Yarns:
Lion Brand 24/7 Cotton works beautifully for this project. The mercerized cotton creates excellent stitch definition and holds up well to washing. Paintbox Yarns Simply DK is another great option if you prefer a slightly lighter fabric.
Hook:
Notions:
Gauge
Getting gauge right matters for this project because it affects the finished size.
With US G-6 / 4.0 mm hook and worsted weight cotton:
Gauge swatch: Work a flat granny square of approximately 20 rounds. After blocking, it should measure about 6 inches / 15 cm square. If your swatch is too small, go up a hook size. If it is too large, go down a hook size.
Finished Size
Abbreviations and Stitch Definitions
Let me walk you through every abbreviation you will encounter. I know abbreviation lists can feel overwhelming, but I promise these are straightforward.
Special Stitches for This Crochet Tote Pattern
Granny Cluster (GC)
Work 3 double crochets into the same chain space or stitch. This group of 3 dc forms one cluster unit. Think of it as a little bundle of stitches that creates that classic granny square texture.
Corner Increase (for oval base only)
In the designated corner chain space, work: GC, ch 2, GC. This creates a double cluster corner that expands the oval shape outward. You will only use this during the base rounds.
Color Join
At the start of each new color round, join new yarn with a slip stitch into any chain 1 space. Chain 3 (this counts as your first double crochet), then work 2 more dc into the same space to complete your first GC. Continue the granny stitch pattern around from there.
Twisted Handle Cord
I will explain this in detail in the handle section, but essentially you will create three separate slip stitch cords, twist them together, fold them in half, and let them spiral back on themselves. It sounds complicated but it is actually quite satisfying to do.
Pattern Notes Before You Begin
1. The bag is worked from the bottom up. You will make the oval base in joined rounds, then the sides in continuous joined rounds without turning.
2. Throughout the body, you work into chain spaces, not into the tops of stitches.
3. Change colors at the beginning of new rounds. Always join new colors with a slip stitch and begin with chain 3.
4. Chain 3 at the beginning of a round counts as the first double crochet of your first GC throughout this pattern.
5. The right side of the bag faces outward throughout. Do not turn between rounds.
6. Stitch counts represent the total number of GC clusters in each round. Each GC contains 3 dc stitches.
Step by Step Instructions
Section 1: Oval Base
The base creates the foundation for your bag. You will work flat, joined rounds that expand outward to form an oval shape.
Foundation Chain:
With Color A (Navy), ch 16.
Round 1 (RS):
Starting in the 4th ch from hook (the skipped 3 ch count as first dc of first GC), work 2 dc into the same ch (first GC complete). [Ch 1, sk 1 ch, GC in next ch] 5 times. Ch 1, sk 1 ch. In the last ch, work GC, ch 2, GC (this is the first oval end turn). Now work along the opposite side of the foundation chain. [Ch 1, sk 1 ch, GC in next ch] 5 times. Ch 1, sk 1 ch. In the first ch (same ch as beginning GC), work GC, ch 2. Join with sl st to top of beg ch-3. (14 GC total, 2 ch-2 corner spaces at each end of oval)
Round 2:
Join Color B (Teal) with sl st in any ch-1 sp along the long side. Ch 3, 2 dc in same sp (GC). [Ch 1, GC in next ch-1 sp] across to ch-2 corner sp. In the ch-2 sp work: GC, ch 2, GC (corner increase). [Ch 1, GC in next ch-1 sp] across long side to next ch-2 corner sp. GC, ch 2, GC in corner sp. Ch 1. Join with sl st to top of beg ch-3. (18 GC total, 2 ch-2 corner spaces)
Round 3:
Join Color C (Aqua) with sl st in any ch-1 sp. Ch 3, 2 dc in same sp. [Ch 1, GC in each ch-1 sp] across to corner ch-2 sp. GC, ch 2, GC in corner sp. [Ch 1, GC in each ch-1 sp] across to next corner ch-2 sp. GC, ch 2, GC in corner sp. Ch 1. Join. (22 GC total)
Round 4:
Join Color D (Mint) with sl st in any ch-1 sp. Ch 3, 2 dc in same sp. Work as established, adding GC in each ch-1 sp across each long side and Corner Increase at each ch-2 corner sp. Join. (26 GC total)
Round 5:
Join Color E (White) with sl st in any ch-1 sp. Ch 3, 2 dc in same sp. Work as established. Join. (30 GC total)
Checkpoint: Your oval base should measure approximately 8 inches long x 4 inches wide when laid flat. If the edges are pulling up (cupping), go up one hook size. If it is ruffling, go down one hook size.
Section 2: Bag Body (Sides)
Now comes the fun part. Starting with Round 6, you stop working Corner Increases. Work GC into every chain space around, including the corner spaces. This causes the sides to turn upward and form the bag walls.
Here is the stripe color sequence for the lower body:
Round 6: Color A (Navy). GC in every ch-sp around. Join. (30 GC)
Round 7: Color F (Periwinkle). GC in every ch-sp around. Join. (30 GC)
Round 8: Color D (Mint). GC in every ch-sp around. Join. (30 GC)
Round 9: Color C (Aqua). GC in every ch-sp around. Join. (30 GC)
Round 10: Color E (White). GC in every ch-sp around. Join. (30 GC)
Round 11: Color B (Teal). GC in every ch-sp around. Join. (30 GC)
Round 12: Color A (Navy). GC in every ch-sp around. Join. (30 GC)
Round 13: Color C (Aqua). GC in every ch-sp around. Join. (30 GC)
Round 14: Color D (Mint). GC in every ch-sp around. Join. (30 GC)
Round 15: Color E (White). GC in every ch-sp around. Join. (30 GC)
Round 16: Color B (Teal). GC in every ch-sp around. Join. (30 GC)
Round 17: Color A (Navy). GC in every ch-sp around. Join. (30 GC)
Checkpoint: After Round 17, your bag sides should measure approximately 5 inches tall from the base. The colorful stripe section is complete.
Now for the white body section:
Rounds 18 through 25: Color E (White). GC in every ch-sp around. Join. (30 GC each round)
Work 8 rounds total in white. This creates the large open granny stitch section that really shows off the texture.
Checkpoint: The white body section should measure approximately 6 inches tall. Total bag height from base should be approximately 11 inches.
Now add the decorative band near the top:
Round 26: Color B (Teal). GC in every ch-sp around. Join. (30 GC)
Round 27: Color E (White). GC in every ch-sp around. Join. (30 GC)
Round 28: Color C (Aqua). GC in every ch-sp around. Join. (30 GC)
Round 29: Color A (Navy). GC in every ch-sp around. Join. (30 GC)
Checkpoint: Total bag body should measure approximately 13 to 14 inches tall. The body is complete.
Section 3: Top Border and Handle Attachment
The top border stabilizes the opening and creates a firm edge for attaching handles.
Round 30:
Join Color A (Navy) with sl st in any ch-1 sp at the top of Round 29. Work sc evenly around the top opening. Work 2 sc into each ch-1 sp and approximately 2 sc over the top of each GC cluster. The goal is a clean, even edge. Join with sl st to first sc. (Approximately 60 sc)
Round 31:
Ch 1, sc in each sc around. Join. (60 sc)
Round 32:
Ch 1, sc in each sc around. Join. (60 sc)
Handle Placement:
On the front of the bag, find the center and place a stitch marker. Measure 3 stitches to the left and 3 stitches to the right of center. Mark these two stitches (6 stitches apart) as your front handle attachment points. Repeat on the back.
Round 33 (Handle Reinforcement Round):
Ch 1. Sc around, working in BLO for this round only. When you reach a handle attachment marker, work 3 sc tightly together in that stitch to reinforce it. Continue around. Join. (60 sc)
Fasten off Color A. Weave in all ends.
Section 4: Handles (Make 2)
Each handle is made from three twisted cord strands.
Strand 1: With Color A (Navy), ch 120. Sl st in each ch from hook back to beginning. Fasten off with 12 inch tail. (119 sl st)
Strand 2: With Color B (Teal), ch 120. Sl st in each ch from hook back to beginning. Fasten off with 12 inch tail. (119 sl st)
Strand 3: With Color E (White), ch 120. Sl st in each ch from hook back to beginning. Fasten off with 12 inch tail. (119 sl st)
Assembling One Handle:
Align all three strands parallel to one another. Hold one end firmly (a binder clip helps). Twist all three strands together tightly in one direction. When fully twisted, fold the cord in half while holding both ends together. Release and let the cord twist back on itself naturally. The finished handle should measure approximately 21 to 23 inches total. Knot both ends securely.
Repeat for the second handle.
Attaching Handles:
Thread your tapestry needle with about 24 inches of Color A. Position one end of Handle 1 over the left front handle marker. The knotted end should sit just inside the top edge, with the main handle looping outward. Whipstitch through the knot and through each sc in the border at least 8 to 10 times in a tight box pattern. Repeat for the right front marker with the other end of Handle 1. Repeat for Handle 2 at the back markers.
Section 5: Decorative Charm
Thread a short length of Color A through the loop of your brass charm. Position it at the front of the bag, approximately 0.5 inch below the top border, centered between the handle attachment points. Tie securely and weave ends to the inside.
Size Customization Options
For a smaller tote (approximately 10 inches wide x 11 inches tall):
For a larger market bag (approximately 16 inches wide x 17 inches tall):
For a taller bag with the same width:
Finishing and Blocking
Weave in all remaining ends, burying each tail at least 1 inch through the wrong side clusters and changing direction twice to prevent unraveling.
Wet Blocking:
Submerge the finished bag in cool water for 10 to 15 minutes. Gently press out excess water without wringing. Roll the bag in a clean towel and press to remove moisture. Shape the bag on a flat surface or over a box that matches your finished dimensions. Gently stretch the white granny stitch section to open up the pattern. Allow to dry completely before removing from the form.
Optional Lining:
Cut fabric to match the inside of the bag, adding 0.5 inch seam allowance on all sides. Sew side and base seams. Fold the top edge under by 0.5 inch and press. Insert lining into the bag and hand stitch the folded top edge to the inside of the sc border.
Care Instructions
Machine wash cold on gentle cycle or hand wash in cool water with mild detergent. Do not bleach. Lay flat to dry. Do not put in dryer. Iron on low heat if needed, avoiding the handles. Remove charm before washing if it is not rust proof.
Tips for Crochet Beginners
If this is your first granny stitch project, here are a few things that might help:
The rhythm is always the same: 3 dc into the space, chain 1, move to the next space. Once you get that down, the rounds fly by.
When joining colors, make sure your slip stitch goes into the top of the beginning chain 3, not into the first double crochet beside it. This keeps your joins neat.
If your bag is twisting as you work, try relaxing your tension slightly. Cotton yarn can be unforgiving, so take breaks to stretch your hands.
Do not skip the blocking step. It really opens up the granny stitch texture and evens out any tension inconsistencies.
Wrapping Up This Ocean Wave Granny Tote Bag Crochet Pattern
I hope you are excited to start this project. The combination of colorful stripes, open lacework, and sturdy construction makes this bag a true workhorse that also happens to look beautiful.
Thank you so much for choosing this pattern. I genuinely appreciate you being here and trusting me to guide you through this project.
If you make this tote, I would absolutely love to see it. Tag me on Instagram or share a photo in my Facebook group. Seeing your finished projects is honestly the best part of sharing patterns.
If you love this Ocean Wave Granny Tote Bag pattern, save it to your Pinterest boards so you can find it easily when you are ready to start. And please drop a comment below if you make one. I love hearing which color combinations you choose and seeing how these projects come to life in your hands.
You Might Also Like
- Lavender Sunflower Granny Square Tote Free Crochet Pattern
- Sage Green Textured Baby Outfit Set Free Crochet Pattern
- Blush Pink Shell Clutch with Pearl Accents Free Crochet Pattern
- Dusty Rose Romantic Crochet Lace Dress Free Pattern