
Let me guess. You saw this bag and thought, "That looks way too complicated for me." I get it. Dimensional flowers, granny square assembly, leather hardware, a lining, a zipper. It sounds like a lot. But here’s the truth: if you can make a basic granny square and work a double crochet, you can absolutely make this bag.
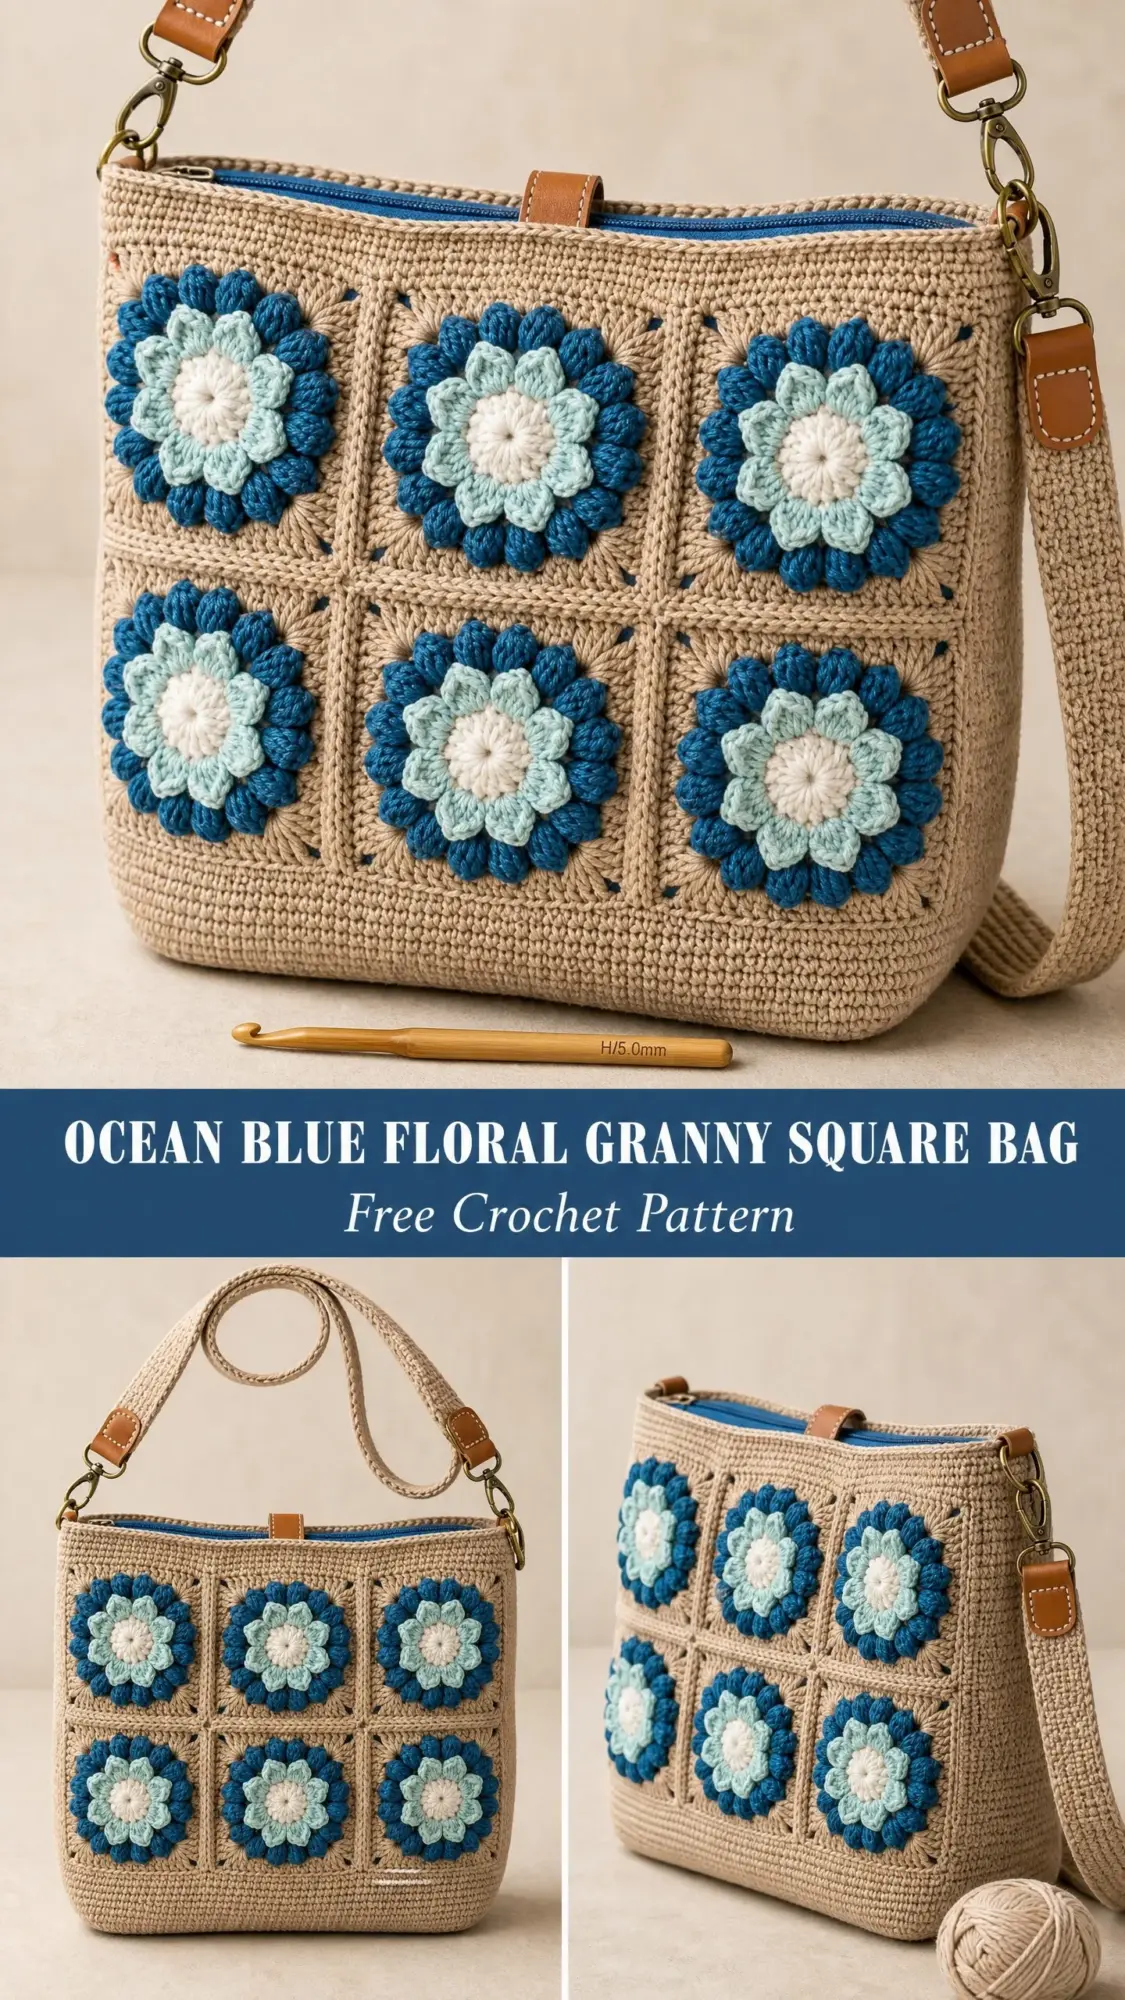
The flower motifs look intricate, but they’re built from simple petal clusters that I’ll walk you through step by step. The granny square background is the classic version you probably already know. And the assembly? It’s just seaming rectangles together. Nothing scary here.
This Ocean Blue Floral Granny Square Bag breaks down into manageable pieces. You make 12 identical squares. You sew them together. You add some side panels. That’s the core of it. The fancy bits like the zipper and lining are optional finishing touches that take the project from handmade to professional. Whether you’re an intermediate crocheter ready for a satisfying challenge or a confident beginner looking to level up, this pattern meets you where you are.
Why You’ll Love This Crochet Bag Pattern
This crossbody bag is the perfect blend of vintage charm and modern function. The raised three-dimensional flowers in ocean blue, light aqua, and white pop against the sandy tan background. Each bloom sits up off the fabric, creating texture you can actually feel.
The finished bag measures approximately 12 inches wide by 9 to 10 inches tall by 3.5 inches deep. That’s plenty of room for your phone, wallet, keys, a small notebook, and all the little things you carry daily. The structured shape holds up beautifully thanks to the dense single crochet side panels and the fabric lining inside.
The adjustable crossbody strap with leather tabs and antique brass hardware gives this bag a polished, boutique-quality look. People will ask where you bought it. You get to say you made it yourself.
Skill Level
Intermediate. You should be comfortable with working granny squares in the round, changing colors, and basic seaming. The dimensional petal clusters are a special stitch, but I explain them completely below. If you’ve made granny squares before and you’re willing to try something new, you’ll do great.
Time Estimate
Plan for 15 to 22 hours total. Each floral granny square takes about 45 to 60 minutes. Assembly, finishing, lining, and hardware attachment add another 4 to 6 hours. This is a lovely project to work on over a few weeks, one square at a time.
Finished Measurements
Materials
Yarn
You’ll need worsted weight yarn (CYCA 4) in four colors:
| Color | Name | Yardage Needed |
|---|---|---|
| A | Sandy Tan | 350 yards (320 m) |
| B | Deep Ocean Blue | 200 yards (183 m) |
| C | Light Aqua | 100 yards (91 m) |
| D | White or Cream | 60 yards (55 m) |
Yarn Suggestions:
Substitution tip: Choose smooth yarn with good stitch definition. Avoid fuzzy or fluffy yarns because they’ll hide your beautiful dimensional petals. Cotton blends work wonderfully for bags since they hold their shape and resist stretching.
Hooks
Notions
Gauge
With Color A and a 6.0 mm hook in single crochet (sc):
16 stitches and 18 rows = 4 inches (10 cm)
One completed floral granny square = 4 inches by 4 inches (10 cm by 10 cm) blocked.
Gauge matters here. If your squares come out larger than 4 inches, try a smaller hook. If they’re smaller, go up a hook size. Your squares need to match so the panels line up correctly during assembly.
Abbreviations
Let me define every abbreviation before we start. If you’re new to reading patterns, this list is your best friend.
Special Stitches
Petal Cluster (PC)
This creates one raised, dimensional petal. It sounds complicated, but it’s really just four unfinished double crochets joined at the top. Here’s exactly how to do it:
1. Yarn over, insert hook into the indicated stitch or space.
2. Yarn over and pull up a loop. You now have three loops on your hook.
3. Yarn over and draw through two loops. You now have two loops on your hook. This is one unfinished double crochet.
4. Repeat steps 1 through 3 three more times in the same stitch or space. You’ll have five loops on your hook (four unfinished double crochets).
5. Yarn over and draw through all five loops at once.
6. Chain 1 to close and secure the cluster. This chain 1 does NOT count as a stitch.
The resulting petal cluster puffs up off the fabric and forms one gorgeous petal. Once you make your first one, the rest will fly by.
Granny Corner
In one corner chain-2 space, work (3 dc, ch 2, 3 dc). This creates the classic granny square mitered corner that gives squares their shape.
Granny Side Cluster
Work 3 dc in a chain-1 space along the side of the square. Simple as that.
Pattern Notes
Read these before you start. They’ll save you confusion later.
1. The bag front and back panels each contain six floral granny squares arranged in a 3-wide by 2-tall grid. You’ll make 12 squares total.
2. All granny squares are worked in the round from the center outward. Do NOT turn between rounds. Every round begins on the right side.
3. The flower is worked first (Rounds 1 through 4), then attached to a separate granny square base. The petals are three-dimensional and sit forward off the fabric.
4. For cleaner color changes, fasten off and join new color at the beginning of each color-change round. Join with a standing stitch rather than a slip stitch for crisp transitions.
5. Finished squares should be blocked to exactly 4 inches by 4 inches before assembly. This ensures your panels line up perfectly.
6. All stitch counts at the end of rounds reflect the total number of stitches, counting each dc individually. Corner chain-2 spaces are not counted as stitches.
Step-by-Step Instructions
Section 1: Floral Granny Square (Make 12)
You’ll make 6 squares for the front panel and 6 for the back panel. Each square has two parts: the dimensional flower and the granny square base.
Part A: The Dimensional Flower
Round 1 (Center Ring) with Color D (White):
Make a magic ring (adjustable loop).
Ch 3 (counts as first dc), work 11 dc into the ring. Pull the ring closed. Sl st to the top of the beginning ch-3 to join. (12 dc)
Checkpoint: You have a small, flat disc of 12 double crochets. The ring should lie completely flat.
Round 2 (Inner Petals, continuing with Color D):
Ch 1, do not turn.
Working in the same stitches of Round 1: PC in next st, ch 1 repeat around all 12 stitches.
Sl st to the top of the first PC to join. Fasten off Color D. (12 Petal Clusters, 12 ch-1 spaces)
Checkpoint: You now have a raised white flower center with 12 petals pointing upward. The work is dimensional and rounded. This is supposed to look puffy!
Round 3 (Outer Petal Ring) with Color C (Light Aqua):
Join Color C with a standing sc in any ch-1 space between petals of Round 2.
Ch 3 (counts as first dc), work 2 more dc in the same ch-1 space to make a 3-dc group. This is your first outer petal cluster.
Ch 1, skip next PC, 3 dc in next ch-1 space around.
Final repeat: Ch 1, skip last PC. Sl st to the top of beginning ch-3 to join. (6 groups of 3 dc, 6 ch-1 spaces)
Note: You’re working in every OTHER ch-1 space from Round 2, skipping over the PC tops. This gives you 6 larger outer petal groups.
Fasten off Color C.
Round 4 (Outer Petal Definition) with Color B (Deep Ocean Blue):
Join Color B with a standing sc in any ch-1 space between the 3-dc groups of Round 3.
Ch 3 (counts as first dc), work 4 dc in the same ch-1 space (5 dc total in this space).
Ch 1, skip next 3-dc group, 5 dc in next ch-1 space around.
Final repeat: Ch 1, skip last 3-dc group. Sl st to the top of beginning ch-3 to join. (6 groups of 5 dc, 6 ch-1 spaces)
Fasten off Color B.
Checkpoint: Your dimensional flower is complete! The center is white, surrounded by aqua petals, surrounded by a ring of large deep blue petal clusters. It should measure approximately 2.25 to 2.5 inches in diameter. Set it aside without flattening it.
Part B: The Granny Square Base
Work this separately with Color A (Sandy Tan).
Round 5A (Base Round 1):
Make a magic ring.
Ch 3 (counts as first dc), 2 dc in ring, ch 2, 3 dc in ring, ch 2 3 times. Sl st to top of beginning ch-3. Pull ring closed. (4 groups of 3 dc, 4 ch-2 corner spaces)
Round 5B (Base Round 2):
Sl st to the first ch-2 corner space. Ch 3 (counts as first dc), (2 dc, ch 2, 3 dc) in same corner space.
Ch 1, (3 dc, ch 2, 3 dc) in next ch-2 corner space 3 times. Ch 1. Sl st to top of beginning ch-3. (8 groups of 3 dc, 4 ch-2 corner spaces, 4 ch-1 side spaces)
Round 5C (Base Round 3):
Sl st to the first ch-2 corner space. Ch 3, (2 dc, ch 2, 3 dc) in same corner space.
Ch 1, 3 dc in next ch-1 space, ch 1, (3 dc, ch 2, 3 dc) in next ch-2 corner space 3 times.
Ch 1, 3 dc in last ch-1 space, ch 1. Sl st to top of beginning ch-3. (12 groups of 3 dc, 4 ch-2 corner spaces, 8 ch-1 side spaces)
Checkpoint: Your base square measures approximately 3.75 to 4 inches across. It’s a classic 3-round granny square in sandy tan.
Part C: Attach the Flower to the Base
Center the completed flower on top of the granny square base with both right sides facing up.
Using Color B and a yarn needle (or a slip stitch join with your hook), tack the flower to the base at approximately 8 evenly spaced points around the outer edge of Round 4 of the flower. Catch only the back of the petal loops and the top surface of the base square. The flower should be firmly attached, but the petals should remain free and dimensional.
Alternative: Use a thin layer of fabric glue appropriate for yarn to bond the flower to the base. Press firmly and allow to dry completely.
One complete square = one Color A base + one attached 3D flower.
Block each square to exactly 4 inches by 4 inches before assembly.
Section 2: Assemble Front Panel
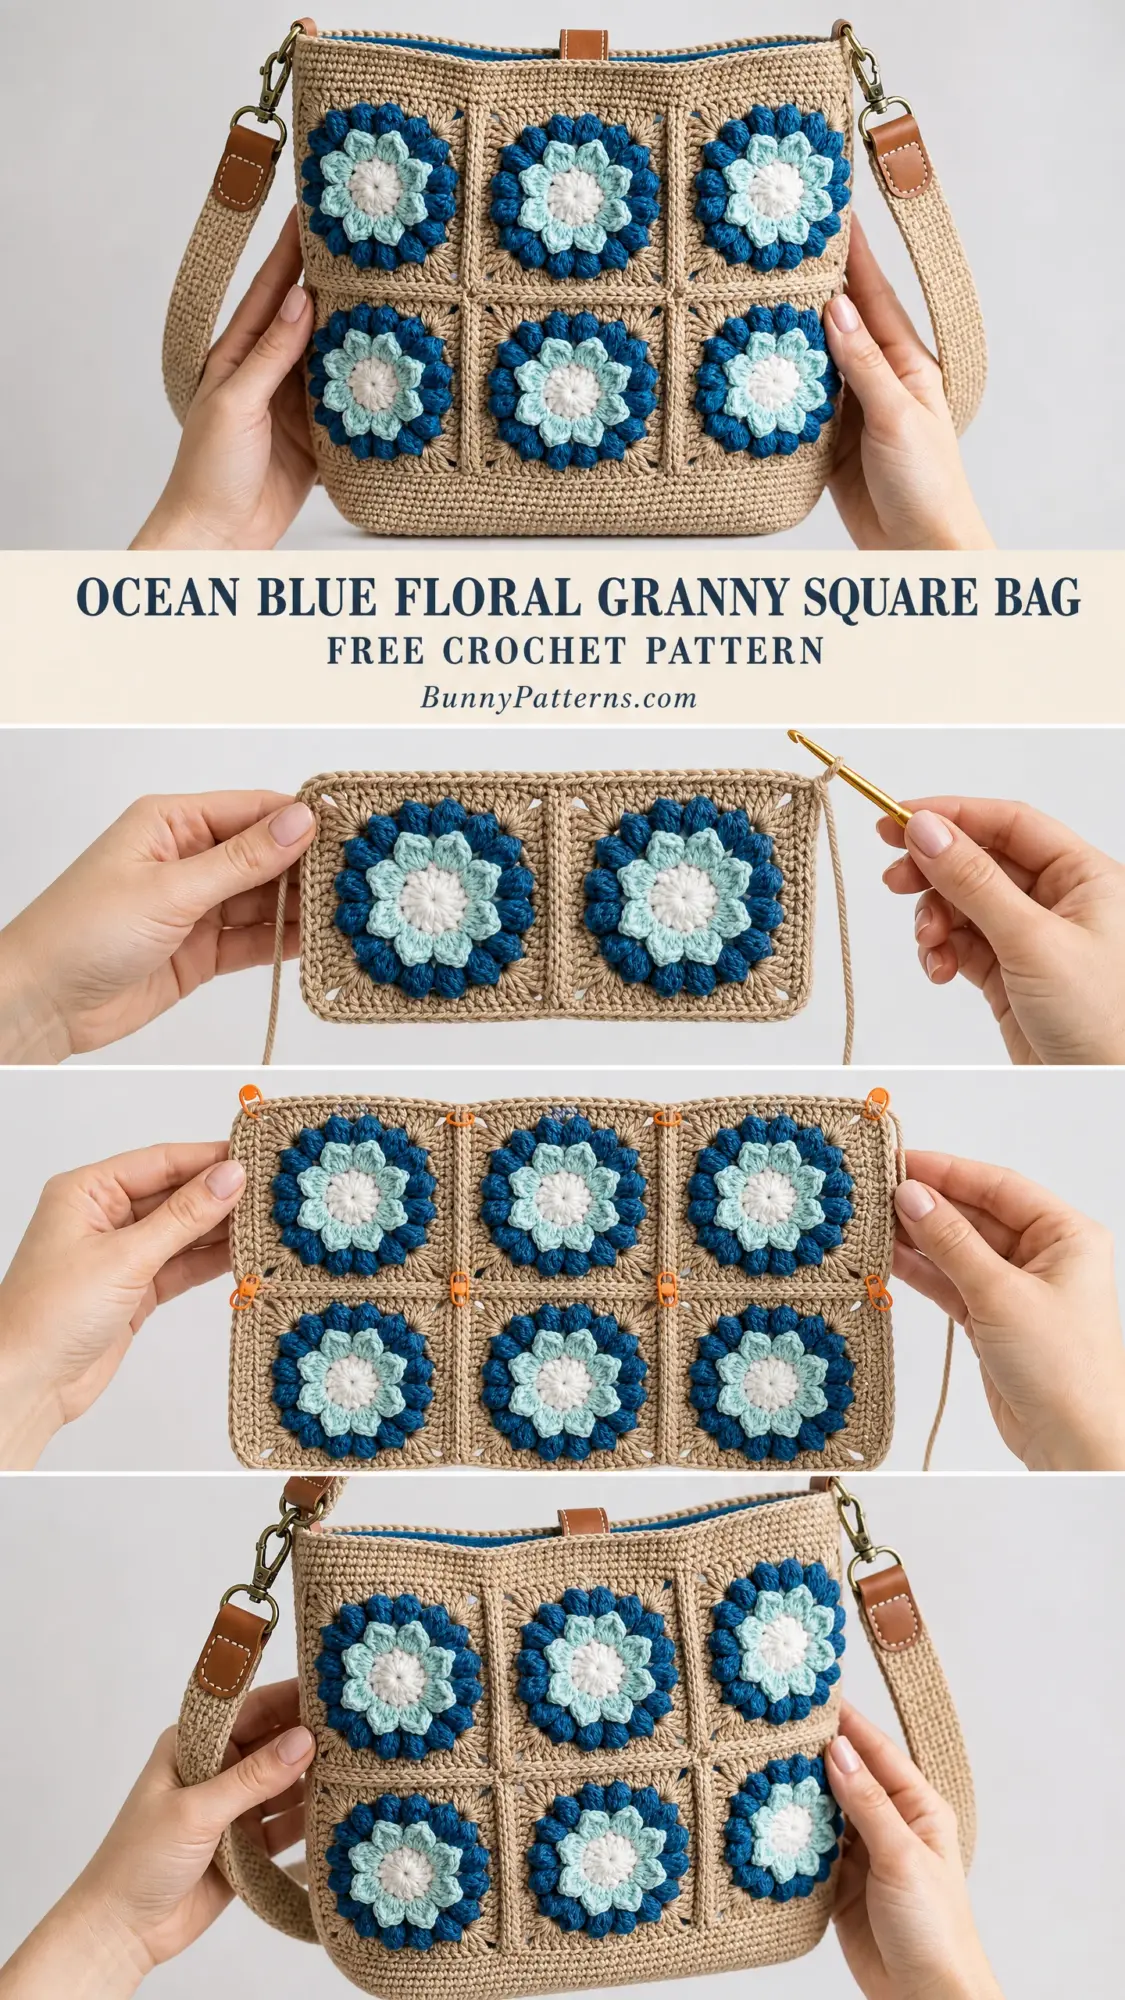
Arrange 6 squares in a 3-wide by 2-tall grid with right sides facing up.
To seam: Hold two squares with wrong sides together. Using Color A and a 5.0 mm hook, sl st through the outermost dc or space of both squares along the shared edge. This creates a ridge on the wrong side that won’t show from the front.
Join Row 1 squares: Seam Square 1 to Square 2 along their shared edge. Seam Square 2 to Square 3.
Join Row 2 squares: Seam Square 4 to Square 5, then Square 5 to Square 6.
Join Rows 1 and 2 together along their horizontal shared edge.
Your completed front panel measures approximately 12 inches wide by 8 inches tall.
Repeat to assemble the back panel with the remaining 6 squares.
Section 3: Side and Base Panels
These are worked in single crochet with Color A for a dense, structured fabric.
Side Panel (Make 2)
With Color A and 6.0 mm hook, ch 16.
Row 1 (RS): Sc in 2nd ch from hook and in each ch across. Turn. (15 sc)
Rows 2 through 55: Ch 1, sc in each st across. Turn. (15 sc)
After Row 55, fasten off, leaving a long tail for seaming.
Checkpoint: Your side panel should measure approximately 3.5 inches wide by 12 inches tall. Hold it up against your assembled front panel to check the height matches.
Make 2 side panels.
Base Panel
With Color A and 6.0 mm hook, ch 50.
Row 1 (RS): Sc in 2nd ch from hook and in each ch across. Turn. (49 sc)
Rows 2 through 15: Ch 1, sc in each st across. Turn. (49 sc)
After Row 15, fasten off, leaving a long tail.
Checkpoint: Your base panel should measure approximately 12 inches long by 3.5 inches wide.
Section 4: Assembly
Step 1: Seam the base
With wrong sides facing out (right sides together), pin the long edge of the base panel to the bottom edge of the front panel. Seam with slip stitch or whip stitch using Color A, catching both layers securely.
Repeat for the back panel along the other long edge of the base panel. The base panel now connects the front and back at the bottom.
Step 2: Attach side panels
Pin one side panel between the front and back panels along one short side of the bag. Seam in place, first joining the front panel edge to the front edge of the side panel, then the back panel edge to the back edge of the side panel.
Repeat for the second side panel on the opposite side.
Step 3: Turn right side out
Turn the assembled bag body right side out. Check all seams. Your bag should be a structured rectangular shape approximately 12 inches wide, 9 to 10 inches tall, and 3.5 inches deep.
Section 5: Top Edge Finishing
With Color A and 6.0 mm hook, join yarn at any point along the top opening.
Rnd 1: Work 1 sc evenly around the entire top opening, placing sc into each stitch or chain space around the perimeter. Work 2 sc in corners as needed to lie flat. Sl st to first sc to join. Do not turn. (approximately 84 to 90 sc)
Rnd 2: Ch 1, sc in each sc around. Sl st to join. (same count)
Rnd 3: Ch 1, sl st in each sc around for a firm, non-stretchy edge. Sl st to join. Fasten off.
Section 6: Leather Tabs and Strap Attachment
Fold one leather rectangle in half lengthwise (short end to short end) to create a loop approximately 0.5 inch by 2 inches.
At the center of one side panel’s top edge, insert the folded tab between the last sc round and the bag body so approximately 0.5 inch of the loop extends above the top edge.
Using a sewing needle and sturdy thread, sew the leather tab firmly to the bag side, stitching in a rectangle through all layers for strength.
Repeat for the second tab on the opposite side.
Clip or thread the adjustable crossbody strap hardware through the leather tab loops.
Section 7: Zipper Installation
Pin the zipper tape along the inside top edge of the bag with the right side of the zipper facing the interior. Center the zipper across the 12-inch top opening. Fold any excess zipper tape to the inside at the ends.
Using a sewing needle and matching thread, backstitch the zipper tape to the sc top edge. Work slowly and keep stitches even.
Once both sides are attached, open and close the zipper to test smooth movement.
Section 8: Lining
Cut lining fabric into two rectangles, each measuring 13 inches wide by 13.5 inches tall (allowing 0.5 inch seam allowance on all sides).
With right sides together, sew the two lining rectangles along the sides and bottom, leaving a 0.5-inch seam allowance. Leave the top open and a 4-inch opening in the bottom seam for turning. Trim corners and press seams open.
To create the boxed bottom: After sewing the sides and bottom, pinch each bottom corner so the side seam aligns with the bottom seam, forming a triangle. Stitch across 1.75 inches from the corner point to form a 3.5-inch gusset.
Turn lining right side out through the bottom opening. Press. Slip stitch the bottom opening closed.
Insert lining into the bag. Fold the top edge of the lining 0.5 inch to the wrong side. Pin lining just below the zipper tape. Slip stitch the lining to the bag interior using a sewing needle and matching thread.
Section 9: Final Finishing
Weave in all remaining yarn ends securely on the wrong side. Work each end in at least two directions for at least 1 inch each way.
Using a yarn needle and Color A, reinforce any seam joints (where horizontal and vertical seam lines cross) with a figure-eight stitch on the inside.
Blocking
Wet blocking is recommended for this project.
Fill a basin with cool water and gently submerge the completed bag. Press out air and allow the bag to soak for 10 minutes. Do not wring or twist.
Remove and gently press water out by rolling the bag in a clean towel.
Shape the bag to the finished measurements. Stuff the interior lightly with dry towels or plastic bags to maintain the shape.
Lay flat on a blocking mat and allow to dry completely. This may take 24 to 48 hours.
The 3D flowers do not need to be pinned flat. Allow them to retain their natural dimension.
Size Customization Tips
For a larger bag: Add a fourth column of squares (4 wide by 2 tall) to each panel. This increases width by approximately 4 inches and requires 8 additional squares total. Increase the base panel length to match. Add approximately 80 to 90 extra yards of Color A.
For a smaller clutch: Use 4 squares per panel (2 wide by 2 tall). Omit the side panels and seam front and back together at the sides with only the base panel for depth. Finished size will be approximately 8 inches wide by 8 inches tall by 2 inches deep. Add a wrist strap instead of the crossbody strap.
For more height: Add a third row of squares (3 wide by 3 tall per panel). This increases height by 4 inches and requires 6 additional squares. Extend the side panels to match.
Care Instructions
You’ve Got This
This Ocean Blue Floral Granny Square Bag crochet pattern looks impressive, but now you know the secret: it’s built from simple pieces you already know how to make. Granny squares. Single crochet rectangles. Basic seaming. The dimensional flowers are just petal clusters stacked in rounds. Take it one square at a time, and before you know it, you’ll have a stunning handmade bag that looks like it came from a boutique.
Thank you so much for choosing this pattern. I truly hope you enjoy making it as much as I enjoyed designing it. If you create your own version, I would absolutely love to see it! Tag me on Instagram or share a photo in my Facebook group. Seeing your makes is the best part of my day.
If this pattern caught your eye, go ahead and save it to your Pinterest boards so you can find it when you’re ready to start. And if you make this bag, please drop a comment below. I’d love to hear how it turned out for you!
You Might Also Like
- Coral Sunset Tiered Ruffle Crochet Dress Free Pattern
- Boho Monstera Crochet Plant for Bedroom Shelf Decor
- Blush Pink Tiered Baby Dress Free Crochet Pattern
- Sage Green Botanical Barrel Bag Free Crochet Pattern