
If you have been searching for a meaningful handmade gift or a special project that combines crochet with embroidery, this journal cover pattern delivers on both fronts. The construction uses single crochet throughout, making it approachable for confident beginners who want to stretch their skills. The embroidered wildflowers add a personal, heirloom quality that transforms a simple notebook into something truly treasured. This works up in about 7 to 11 hours total, and it fits a standard A5 hardcover journal perfectly.
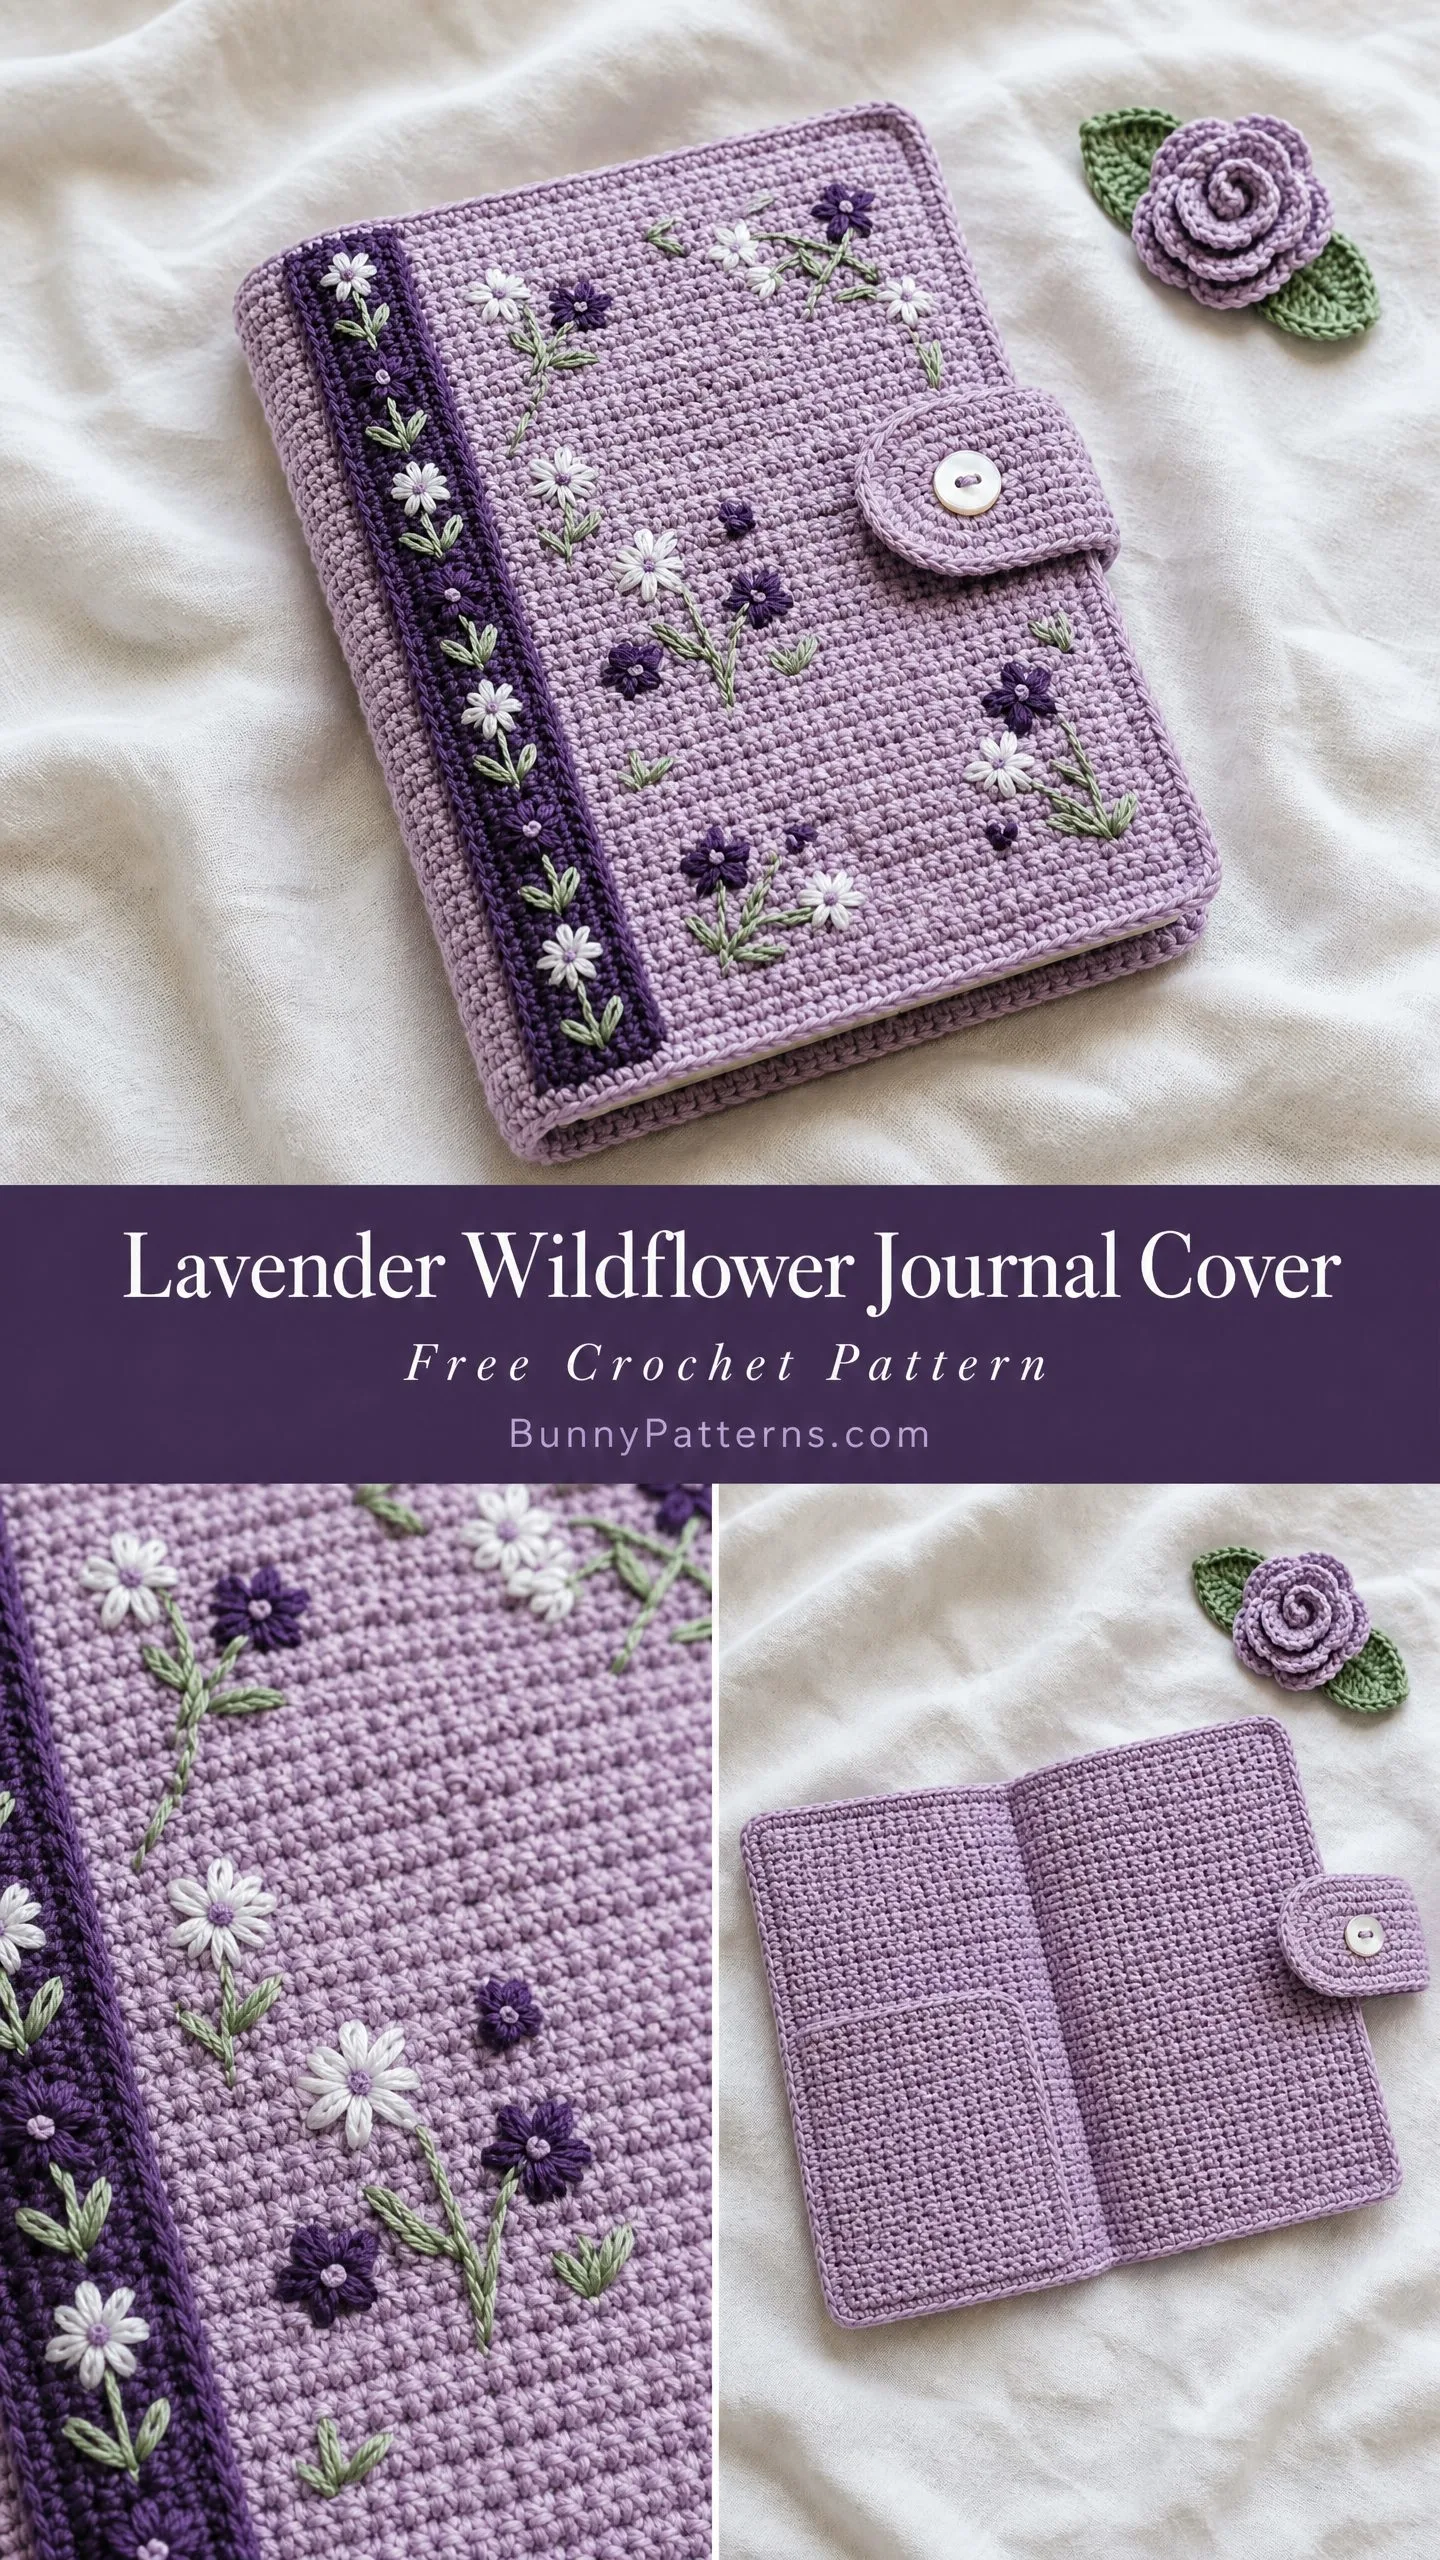
I designed this pattern for crafters who love adding delicate handmade details to everyday objects. Whether you are making it for yourself, gifting it to a friend who journals, or creating a thoughtful present for a teacher or book lover, this cover makes an impression.
The lavender and violet color combination feels soft and romantic, but you could easily adapt the palette to suit anyone’s taste. Let me walk you through everything you need to know.
Why You Will Love This Crochet Journal Cover Pattern
This project hits a sweet spot between straightforward crochet and creative embellishment. The body of the cover is worked entirely in single crochet (sc), which creates a dense, fabric-like texture that holds its structure around the journal. No complicated stitch patterns to memorize here.
The real magic happens after the crocheting is done. You will add surface embroidery using simple stitches like lazy daisy and straight stitch to create the scattered wildflower effect. If you have never tried embroidery on crochet fabric before, do not worry. The cotton yarn recommended for this project has excellent stitch definition, which makes it easy to see exactly where to place your needle.
The finished cover wraps snugly around the journal with interior slip pockets that hold the front and back covers in place. A cute button tab keeps everything secure when the journal is closed. Plus, there is an optional crocheted rose embellishment you can make as a bookmark or decorative pin.
Materials You Will Need
Gathering your supplies before you start will make this project flow smoothly. Here is everything required.
Yarn
Main Color (MC): Light lavender worsted weight cotton or cotton-blend yarn, approximately 220 yards or 200 meters.
Contrast Color A (CA): Deep violet worsted weight cotton or cotton-blend yarn, approximately 40 yards or 37 meters.
Embroidery Floss: White (1 skein), deep purple or violet (1 skein), sage green (1 skein).
Recommended Yarn Brands
Paintbox Yarns Cotton DK used at worsted tension on a slightly smaller hook works beautifully. It has excellent stitch definition and comes in a wide lavender palette.
Lion Brand 24/7 Cotton in Lilac and Eggplant is widely available and has a smooth, mercerized finish that takes embroidery nicely.
Scheepjes Catona 4-ply held double gives a worsted-weight equivalent with an exceptional color range for precise lavender and violet matching.
Choose a smooth, tightly plied cotton with low fuzz. Fuzzy yarns will obscure your embroidery work, and stretchy yarns will not hold the rigid journal in place properly.
Hook
US size E-4 / 3.5 mm crochet hook. Adjust if needed to achieve gauge.
Notions
Finished Size
Flat (open): approximately 13.5 inches wide x 8.75 inches tall (34.5 cm x 22 cm)
Closed (wrapped around A5 journal): approximately 6 inches wide x 8.75 inches tall (15 cm x 22 cm)
Spine width: approximately 1 inch (2.5 cm)
Button tab extension: approximately 0.75 inch (2 cm) beyond the right edge when closed
Gauge
22 single crochet x 26 rows = 4 inches x 4 inches (10 cm x 10 cm), measured after light blocking.
Gauge is critical for this project. A looser gauge will produce a cover that feels floppy and too large. A tighter gauge will make it too stiff to open and close smoothly. Work a 5-inch swatch, block it, and measure the center 4 inches before beginning.
Skill Level
Intermediate. The crochet stitches are basic single crochet throughout, so even confident beginners can handle the crocheting portion. However, you will need to be comfortable with seaming, working flat pockets, attaching a button, and surface embroidery in multiple stitches. If you are new to embroidery, I recommend practicing on a swatch first.
Abbreviations and Stitch Definitions
Understanding these abbreviations before you begin will help everything make sense.
ch: chain. Wrap yarn over hook and pull through the loop on your hook.
sl st: slip stitch. Insert hook, yarn over, pull through both the stitch and the loop on your hook in one motion.
sc: single crochet. Insert hook into stitch, yarn over, pull up a loop (2 loops on hook), yarn over, pull through both loops.
sc2tog: single crochet two together. A decrease that joins two stitches into one.
st(s): stitch(es)
RS: right side. The public-facing side of your work.
WS: wrong side. The inside or back of your work.
rep: repeat
blo: back loop only. Insert hook under only the back loop of the stitch.
tch: turning chain
Special Techniques
Single Crochet in Back Loop Only (sc blo)
Insert your hook under the back loop only of the indicated stitch. This is the loop farther from you as the work faces you. Yarn over, pull up a loop. Yarn over, pull through both loops on hook. This creates a subtle ridge and is used for joining seams.
Button Loop Tab
Row 1: With MC, chain 7. Sc in second ch from hook and in each ch across. (6 sc)
Rows 2 through 8: Ch 1, turn. Sc in each st across. (6 sc per row)
At end of Row 8, do not fasten off. Fold the piece in half lengthwise to form the tab body (approximately 0.75 inch wide and 1 inch long).
Joining round: Ch 1, sl st along the long open edge to close, creating a flat oval tab.
Button loop extension: Ch 8, sl st into the first ch to form a small loop. Fasten off, leaving a 12-inch tail for sewing.
Step by Step Instructions for the Crochet Journal Cover
Section 1: Main Body
The main body is worked as one long flat rectangle. When folded at two marked points, it creates the front cover pocket and back cover pocket.
Foundation: With MC, chain 109. (109 ch)
Row 1 (RS): Sc in second ch from hook. Sc in each ch across. Ch 1, turn. (108 sc)
Rows 2 through 57: Sc in each st across. Ch 1, turn. (108 sc per row)
After Row 57, do not turn. Fasten off, leaving a 24-inch sewing tail.
Checkpoint: Your piece should measure approximately 19.5 inches wide and 8.75 inches tall.
Pocket Fold Markers:
Place a stitch marker between stitches 16 and 17 on Row 1. This marks the right pocket fold line at approximately 3 inches from the right edge.
Place a second stitch marker between stitches 92 and 93 on Row 1. This marks the left pocket fold line at approximately 3 inches from the left edge.
Section 2: Folding and Seaming
Fold the right edge inward at the right marker so stitches 1 through 16 overlap the WS of the rectangle. This creates a 3-inch pocket on the right. Pin in place.
Fold the left edge inward at the left marker so stitches 93 through 108 overlap the WS of the left edge. Pin in place.
Using your sewing tail and yarn needle, whipstitch or sc seam the top edges of the pockets closed (along Row 57) at both folded ends. Work through both layers. Repeat for the bottom edges (along Row 1) at both folded ends.
Checkpoint: Slide your A5 journal into the pockets. The journal board should slip in snugly without gaping or pulling.
Section 3: Spine Strip
The spine strip adds the contrasting dark violet band on the left side of the front cover.
Foundation: With CA, chain 8. (8 ch)
Row 1: Sc in second ch from hook. Sc in each ch across. Ch 1, turn. (6 sc)
Rows 2 through 57: Sc in each st across. Ch 1, turn. (6 sc per row)
After Row 57, fasten off, leaving a 20-inch tail.
Attaching the Spine Strip:
Position the spine strip vertically along the left edge of the front of the assembled cover, approximately 0 to 0.1 inch from the left edge, with RS of strip facing out. The strip should align exactly with the top and bottom of the cover. Pin in place.
Using the tail and yarn needle, whipstitch all four edges of the strip to the cover, keeping stitches small and even.
Section 4: Button Tab
Work the Button Loop Tab as described in the Special Techniques section above.
Position the tab on the right side edge of the assembled cover, centered vertically (approximately 4.25 inches from the top or bottom edge). The tab body sits flat against the RS of the cover and the button loop extends beyond the right edge.
Stitch the tab body firmly to the cover using the tail. Take at least 8 passes through the base of the tab for security.
Sew the button to the back cover. To position correctly, close the cover around the journal, loop the button loop around where it falls naturally on the back cover, and mark that point. Open the cover and sew the button at the marked point.
Section 5: Embroidery
All embroidery is worked with 2 strands of embroidery floss. Thread your embroidery needle and work from the RS of the cover.
Spine Strip Embroidery:
The spine strip carries a vertical column of alternating white daisy blossoms and small purple four-petal flowers, each spaced approximately 0.6 inch apart, for approximately 13 to 14 flowers total.
White Daisy Blossoms: Work lazy daisy stitch. Bring needle up at center point. Insert needle back down into the same hole, leaving a small loop. Bring needle up approximately 0.2 inch away inside the loop. Pull through until loop lies flat. Insert needle down over the tip of the loop to anchor it. Repeat to make 5 to 6 petals radiating from the same center. Use white floss. Add 2 straight stitches in green for small leaves at the base.
Purple Four-Petal Flowers: Work exactly as daisy blossoms but with 4 petals in deep purple floss. Petals are slightly shorter (0.15 inch). Add a small white straight stitch dot at the center.
Front Cover Embroidery:
The front cover carries approximately 10 to 12 small flower groupings scattered across the front panel. Use the photograph as a placement guide. The groupings have a natural, organic distribution, with more flowers in the upper half and a few larger clusters toward the lower right.
Each grouping consists of:
There is no rigid grid. Work intuitively for the scattered wildflower effect.
Section 6: Optional Crocheted Rose
Foundation: With CA, ch 36.
Row 1: 3 sc in second ch from hook. 3 sc in each ch across. Fasten off, leaving a 10-inch tail.
Roll the strip tightly from one end to the other, forming a rose shape. Use the tail to stitch through the base several times to secure. The finished rose is approximately 1 inch in diameter.
Leaf (make 2): With green embroidery floss or a small amount of green yarn, ch 8. Sl st in second ch from hook. Sc in next ch. Hdc in next 2 ch. Sc in next ch. Sl st in last ch. Fasten off, leaving a tail. Attach both leaves to the base of the rose.
The rose is shown as a separate accessory. It can be pinned to the cover, attached to a hair clip, or used as a bookmark.
Blocking and Finishing Your Journal Cover
Before embroidery, wet block the assembled cover. Dampen with cool water, press out excess moisture with a clean towel, and pin to a blocking mat at 13.5 inches x 8.75 inches. Allow to dry completely, 8 to 24 hours depending on humidity.
After embroidery, lightly steam the front of the cover from 1 to 2 inches away with a steam iron set to low cotton. Do not press directly onto the embroidery, as this will flatten the lazy daisy loops.
Weave in all crochet yarn tails securely on the WS before the embroidery step. Trim any floss tails to 0.1 inch after securing.
Size Customization Tips
For a standard composition notebook (7.5 x 9.75 inches): Chain 75 for approximately 74 sc. Work 64 rows. Adjust spine strip to 64 rows.
For a pocket-sized journal (3.5 x 5.5 inches): Chain 43 for approximately 42 sc. Work 36 rows. Adjust spine strip to 36 rows.
For any custom journal: Calculate working stitch count as (journal width + pocket allowance left + pocket allowance right) x stitch gauge. Row count equals journal height x row gauge.
Care Instructions
Machine wash on a gentle cycle in cool water inside a mesh laundry bag. Use a mild detergent. Do not tumble dry. Reshape and lay flat to dry. Do not wring. Store lying flat or standing upright to avoid creasing the embroidery.
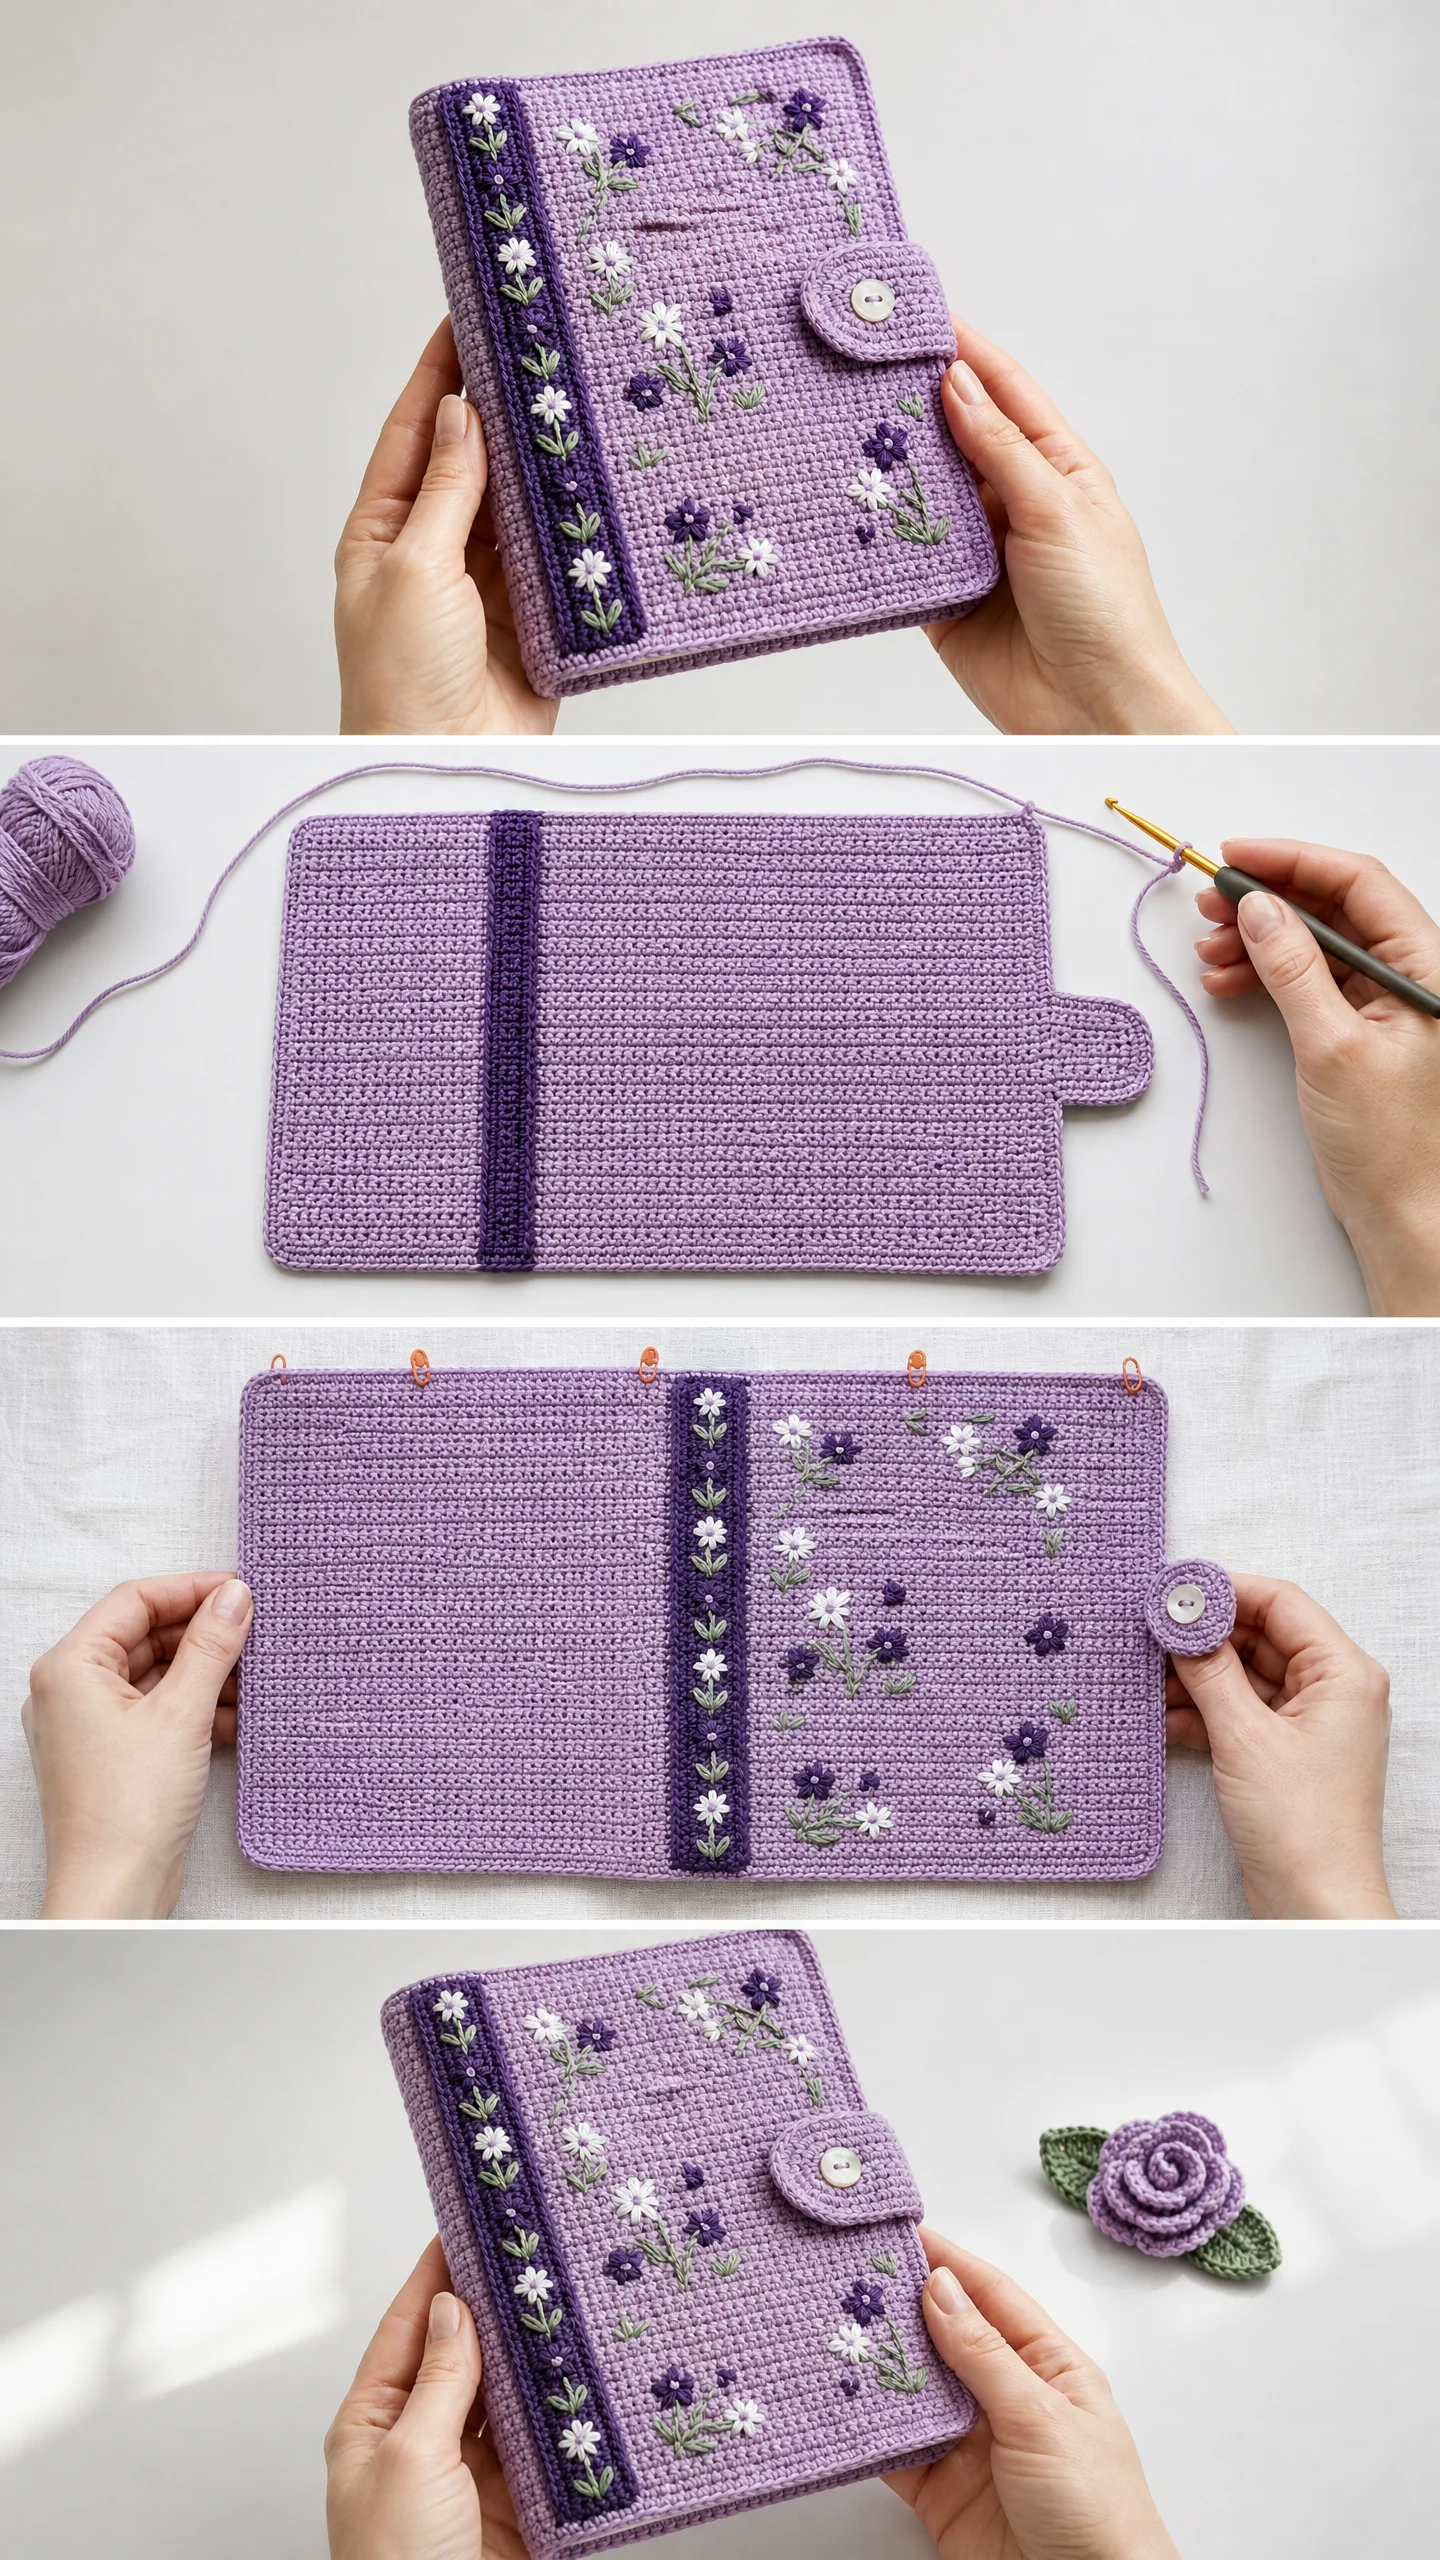
You Did It!
I hope this crochet journal cover pattern brings you as much joy to make as it will to give or keep. The combination of simple single crochet construction with delicate embroidered wildflowers creates something that feels special without being overwhelming to create. Thank you so much for choosing this pattern for your next project.
I would absolutely love to see your finished journal covers! Share your photos on Instagram or Facebook and tag me so I can admire your work.
If this pattern is calling your name, go ahead and save it to your Pinterest boards so you can find it when you are ready to start. And please drop a comment below if you make one. I always love hearing how projects turn out and seeing the color combinations you choose!
You Might Also Like
- Pink Strawberry Couple Amigurumi Free Crochet Pattern
- Mint and Peach Baby Dress Free Crochet Pattern
- Dusty Rose Pineapple Lace Halter Free Crochet Pattern
- Dusty Rose Lace Panel Crochet Sweater Free Pattern