
This is a two-piece crochet bikini set featuring triangle cups and boy-short bottoms. The construction uses single crochet throughout. The ombre effect comes from a simple two-strand color swap technique. If you can work single crochet and basic decreases, you can make this set.
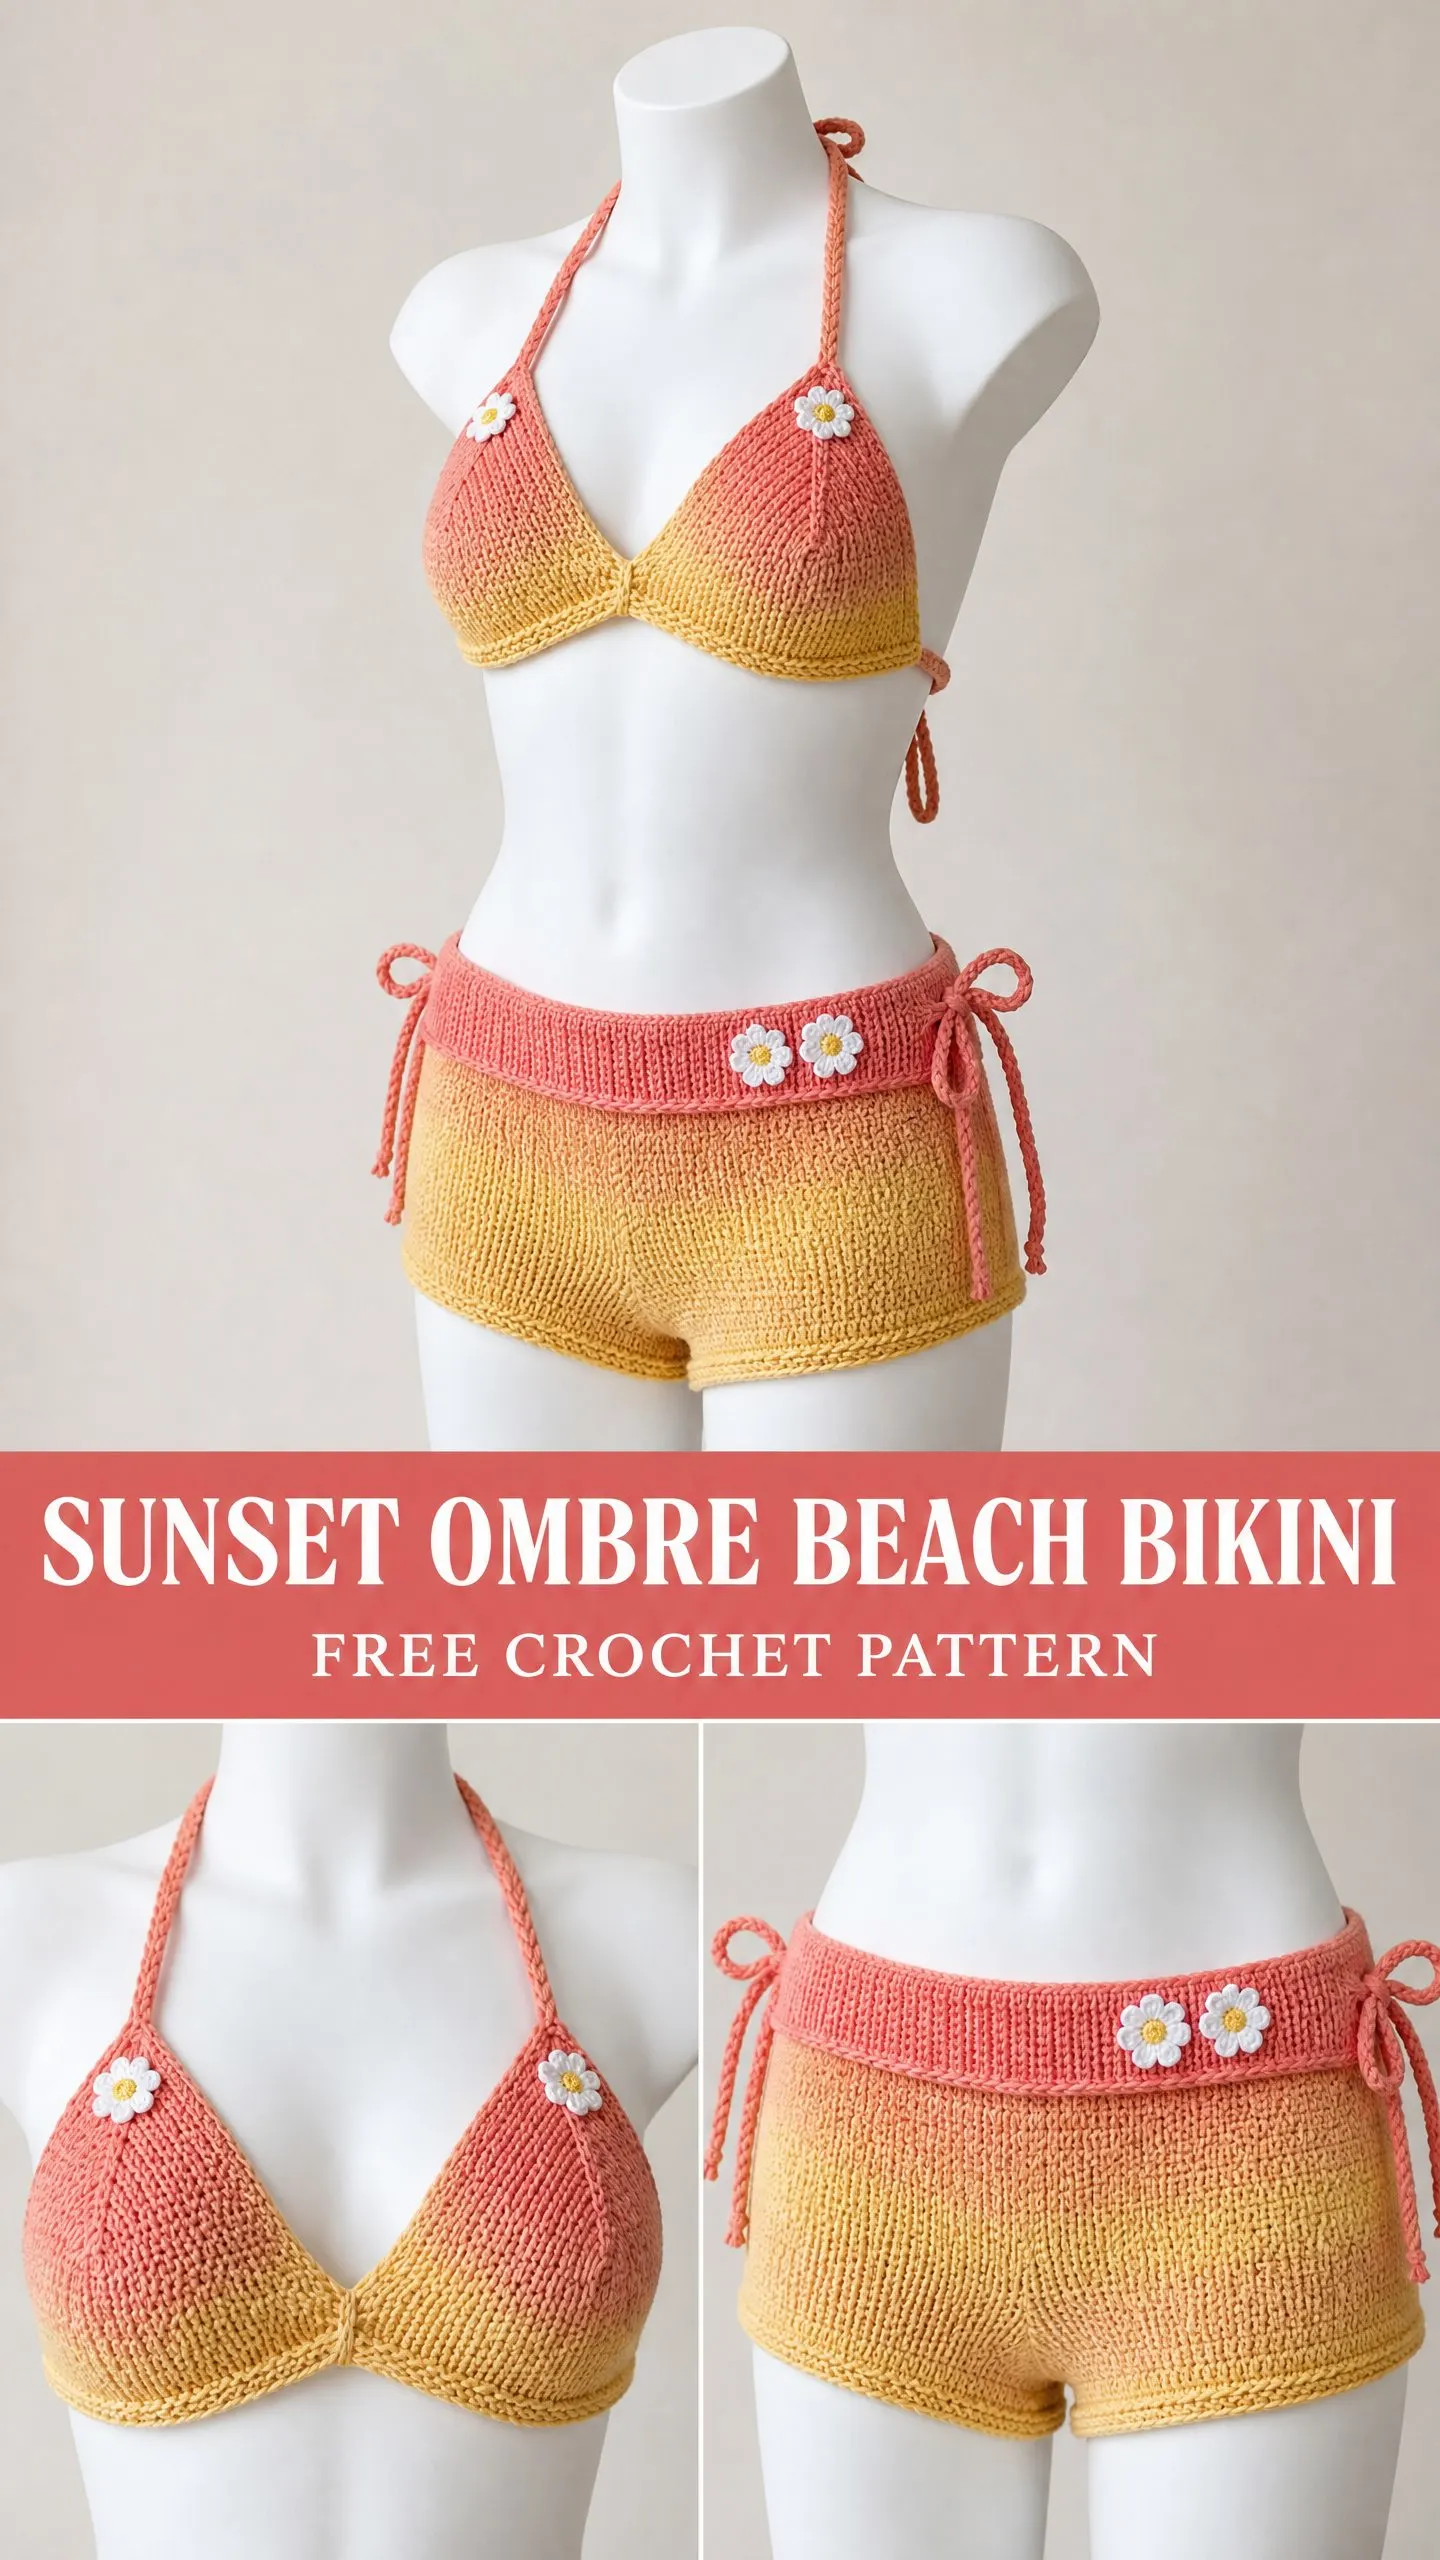
The gradient flows from coral at the top to golden yellow at the bottom. Small daisy appliques add a sweet finishing touch. Braided ties make the fit adjustable.
This pattern is written for intermediate crocheters who want a structured, dense fabric with that handmade beachy vibe. Let me walk you through everything you need to know.
About This Crochet Bikini Pattern
This Sunset Ombre Beach Bikini consists of a halter-style triangle top and matching boy-short bottoms. Both pieces are worked flat in rows using tight single crochet stitches. The result is a dense, structured fabric with minimal stretch, which is exactly what you want for swimwear.
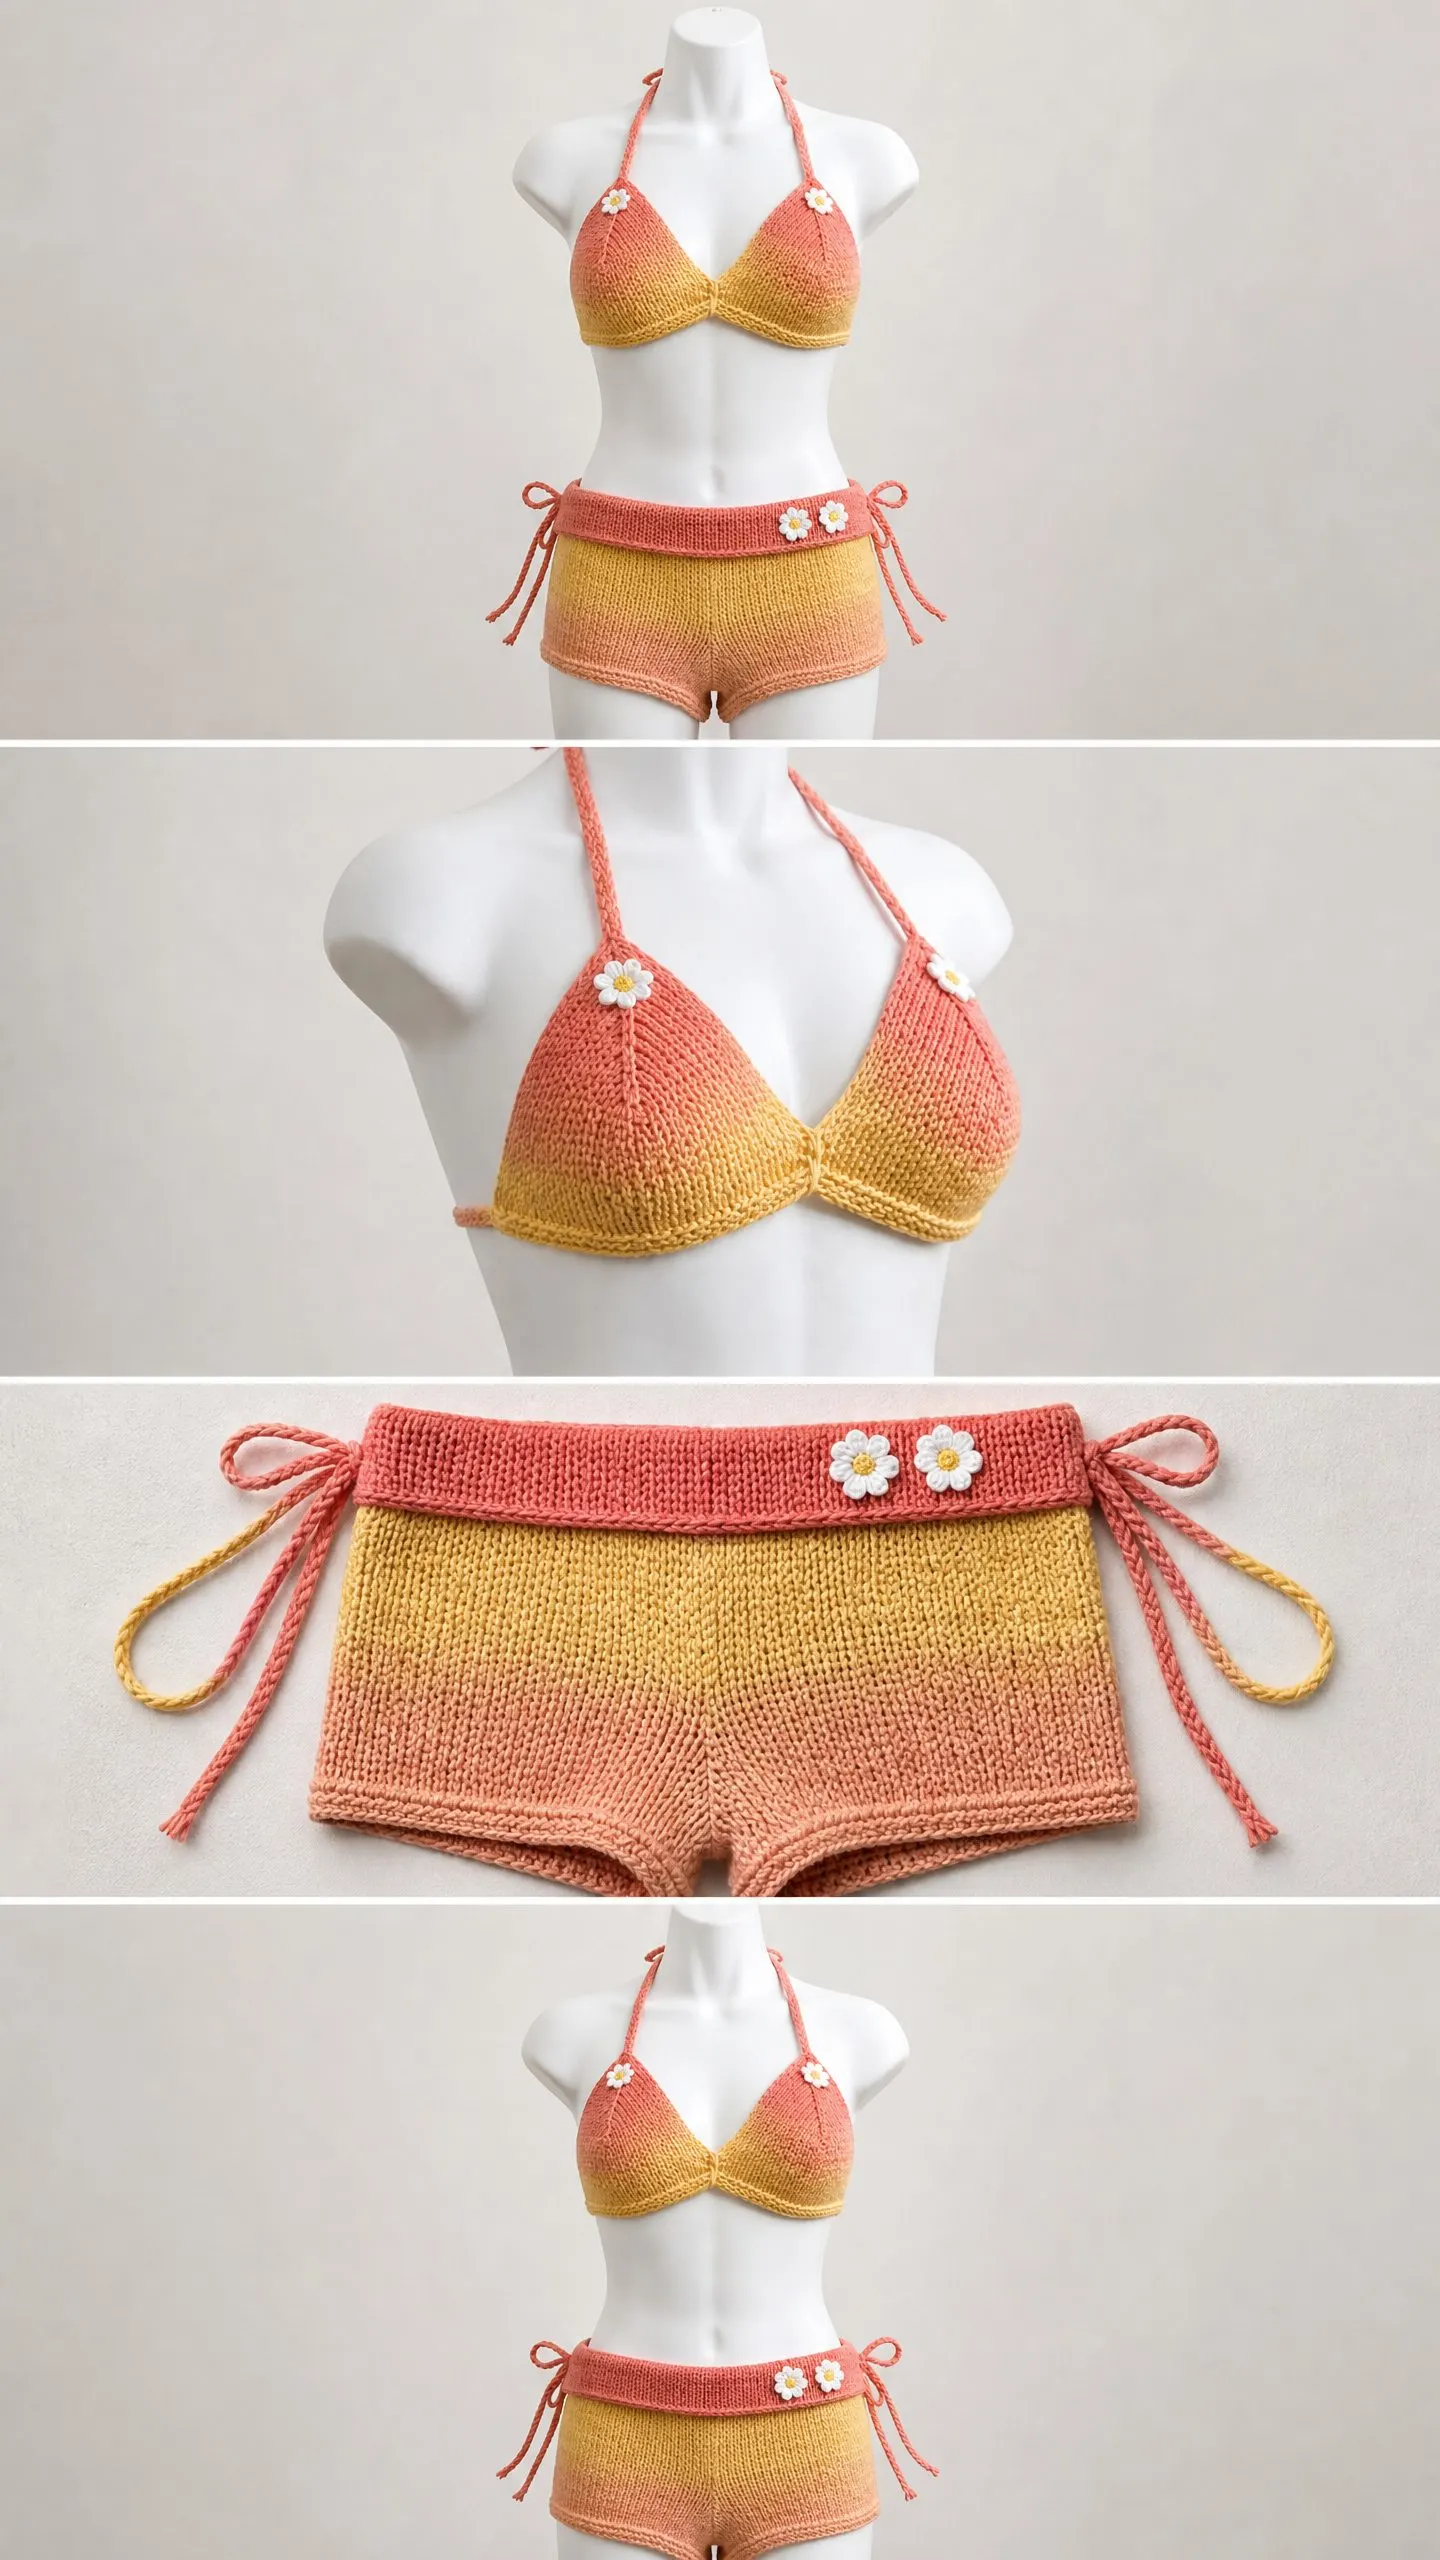
The bikini top features two identical triangle cups joined at the center front. Braided cords form the halter ties around the neck and the band that wraps around your ribcage. The shorts are constructed from two flat panels, a front and a back, which get seamed at the sides and crotch. A separate waistband strip folds over and attaches to the top edge.
The star of this design is the ombre colorway. You achieve it by holding two strands of fingering weight yarn together and gradually swapping one strand at a time. No complicated color work. No carrying yarn. Just a smooth, beautiful gradient that transitions from coral to yellow.
Skill Level
This pattern is rated intermediate. You should be comfortable with working increases and decreases to shape the triangle cups, maintaining a tight gauge on fine yarn, managing two strands held together, and basic seaming. If you have made a few garments before, you are ready for this one.
Time Estimate
Plan for approximately 20 to 30 hours to complete the entire set. The shorts take the longest because of their size. The bikini top works up faster since the cups are small triangles.
Finished Measurements
The pattern is written for a size Small (US 4 to 6). Customization notes are included at the end for other sizes.
Bikini Top:
Shorts:
Materials Needed
Yarn
This pattern uses a gradient technique requiring two colors of fine weight yarn worked held together throughout. You will never work with a single strand.
Both colors must be the same fiber content and weight.
Yarn Suggestions:
Choose a yarn with low halo and good stitch definition. Avoid overly stretchy yarns. Cotton or cotton-blend yarns produce a stiffer, truer swimwear look.
Hook
Additional Materials
Gauge
Gauge is mandatory for this garment. A difference of even half a stitch per inch will alter the fit significantly.
Working with two strands of fingering weight yarn held together:
18 sc x 22 rows = 4 inches x 4 inches (10 cm x 10 cm) in single crochet, after wet blocking
To check gauge: Chain 24. Work single crochet (sc) in 2nd chain from hook and across. (23 sc) Work in sc for 26 rows. Fasten off. Wet block the swatch, pin flat, allow to dry completely. Measure the center 4 inches x 4 inches.
If your swatch is too large, go down a hook size. If your swatch is too small, go up a hook size.
Abbreviations
Before we dive in, here are all the abbreviations used in this pattern with their full names and definitions:
Special Techniques
Single Crochet Two Together (sc2tog)
This is your decrease stitch. Here is how to work it step by step:
1. Insert hook into the next stitch.
2. Yarn over and pull up a loop. (2 loops on hook)
3. Without completing the stitch, insert hook into the following stitch.
4. Yarn over and pull up a loop. (3 loops on hook)
5. Yarn over and draw through all 3 loops on hook.
6. One stitch decreased.
Ombre Color Transition (Two-Strand Method)
At the start, both strands are Color A (coral). As you work through the rows, you gradually swap strands:
Change one strand at a time by dropping one Color A and picking up one Color B. Complete the color transition over 6 to 8 rows for a smooth gradient. The exact placement is specified in the instructions.
Braided Cord
Cut 6 strands of yarn (3 Color A and 3 Color B, or all one color as directed), each 3 times the desired finished cord length plus 4 inches extra. Hold all 6 strands together and fold in half to find the center. Attach at the center point to the garment. Divide the 12 working strands into 3 groups of 4 strands each. Braid the groups together for the desired length. Knot the end. Trim evenly.
Crocheted Daisy Applique (Make 5)
Using 2 strands of white fingering weight yarn held together and a US B-1 / 2.25 mm hook:
Magic ring (or ch 2, work stitches into 2nd ch from hook).
Round 1: Ch 1, work 6 sc into ring. Pull ring tight. (6 sc)
Round 2: (Ch 3, sl st in next sc) 6 times. (6 petals)
Fasten off, leaving a 12-inch tail for sewing.
Using yellow yarn, thread tapestry needle and make 3 to 4 straight stitches through the center of the ring to form the flower center.
Pattern Notes
1. The entire set is worked holding 2 strands of fingering weight yarn together throughout.
2. All turning chains count as nothing. The ch 1 at the beginning of each row does NOT count as a stitch. Always work the first sc into the first stitch directly below.
3. Stitch counts in parentheses at the end of each row reflect the total number of sc stitches in that row.
4. The bikini top is constructed as two identical triangle cups, each worked separately from the base upward. The cups are then joined at center front.
5. The shorts are constructed in two flat panels (front and back), seamed at the sides and crotch. The waistband is worked last as a separate strip.
6. Work all stitches firmly and consistently. This fabric should feel dense and structured.
Bikini Top Instructions
Each Cup (Make 2 Identical Pieces)
The cup is worked flat from the base (widest point at bottom) upward to the apex (tip at top center).
Color Setup for Cups:
Foundation:
Using 2 strands Color B held together, ch 26.
Row 1 (RS): Sc in 2nd ch from hook and in each ch across. Ch 1, turn. (25 sc)
Row 2 (WS): Sc2tog over first 2 sts, sc in each st across to last 2 sts, sc2tog. Ch 1, turn. (23 sc)
Row 3: Sc2tog over first 2 sts, sc in each st across to last 2 sts, sc2tog. Ch 1, turn. (21 sc)
Row 4: Sc2tog over first 2 sts, sc in each st across to last 2 sts, sc2tog. Ch 1, turn. (19 sc)
Row 5: Sc2tog over first 2 sts, sc in each st across to last 2 sts, sc2tog. Ch 1, turn. (17 sc)
Row 6: Sc2tog over first 2 sts, sc in each st across to last 2 sts, sc2tog. Ch 1, turn. (15 sc)
Begin color transition: drop one strand Color B, pick up one strand Color A.
Row 7: Sc2tog over first 2 sts, sc in each st across to last 2 sts, sc2tog. Ch 1, turn. (13 sc)
Row 8: Sc2tog over first 2 sts, sc in each st across to last 2 sts, sc2tog. Ch 1, turn. (11 sc)
Row 9: Sc2tog over first 2 sts, sc in each st across to last 2 sts, sc2tog. Ch 1, turn. (9 sc)
Row 10: Sc2tog over first 2 sts, sc in each st across to last 2 sts, sc2tog. Ch 1, turn. (7 sc)
Row 11: Sc2tog over first 2 sts, sc in each st across to last 2 sts, sc2tog. Ch 1, turn. (5 sc)
Row 12: Sc2tog over first 2 sts, sc in each st across to last 2 sts, sc2tog. Ch 1, turn. (3 sc)
Complete color transition: drop second strand Color B, pick up second strand Color A. (2 strands Color A)
Row 13: Sc2tog over first 2 sts, sc in last st. Ch 1, turn. (2 sc)
Row 14: Sc2tog. (1 sc)
Fasten off, leaving a 12-inch tail.
Checkpoint: Each completed cup should measure approximately 5.5 inches wide at the foundation edge and 4.5 inches tall from foundation to apex.
Cup Edging
With RS facing, using 2 strands Color A, join yarn at the bottom left corner of one cup.
Work 1 sc evenly in each row end along the left diagonal edge, then sl st into the apex, then work 1 sc evenly in each row end along the right diagonal edge.
Do not sc along the foundation chain edge.
Fasten off and weave in ends. Repeat edging on second cup.
Joining the Cups
Hold both cups with RS facing up and apex pointing upward. Place the cups side by side so that the right edge of the left cup meets the left edge of the right cup at center front.
Using 2 strands Color A and tapestry needle, whipstitch the two center edges together for approximately 1 inch (2.5 cm) from the base upward.
Band and Halter Ties
For each side band tie:
Cut 18 strands of yarn (9 strands Color A and 9 strands Color B), each 60 inches long. Hold all 18 strands together, fold in half. Thread the fold through the lower corner of the cup using a crochet hook, pull the ends through the fold and cinch snugly (lark’s head mount). Divide the 36 working strands into 3 groups of 12 strands each. Braid for approximately 20 inches. Knot the end. Trim.
Halter ties attach at the apex of each cup using the same method, braided for approximately 18 inches.
Attaching Daisy Appliques to Top
Sew one daisy to the upper outer corner of each cup, approximately 0.5 inch from the top edge and 0.75 inch from the outer edge.
Bikini Shorts Instructions
Color Setup for Shorts Body
Front Panel
Foundation:
Using 2 strands Color B, ch 68.
Row 1 (RS): Sc in 2nd ch from hook and in each ch across. Ch 1, turn. (67 sc)
Rows 2 through 8: Sc in each st across. Ch 1, turn. (67 sc)
Begin color transition after Row 8: drop one strand Color B, pick up one strand Color A.
Row 9: Sc in each st across. Ch 1, turn. (67 sc)
Rows 10 through 14: Sc in each st across. Ch 1, turn. (67 sc)
Complete color transition after Row 14: drop second strand Color B, pick up second strand Color A.
Rows 15 through 20: Sc in each st across. Ch 1, turn. (67 sc)
Checkpoint: After Row 20, the front panel should measure approximately 3.6 inches tall and 14.9 inches wide.
Crotch Shaping for Front Panel
Row 21: Sl st in first 17 sts, ch 1, sc in same st as last sl st, sc in each st across until 17 sts remain. Ch 1, turn. (33 sc)
Row 22: Sc2tog, sc across to last 2 sts, sc2tog. Ch 1, turn. (31 sc)
Row 23: Sc2tog, sc across to last 2 sts, sc2tog. Ch 1, turn. (29 sc)
Row 24: Sc2tog, sc across to last 2 sts, sc2tog. Ch 1, turn. (27 sc)
Row 25: Sc across. Ch 1, turn. (27 sc)
Row 26: Sc across. Ch 1, turn. (27 sc)
Fasten off and leave a 24-inch tail for seaming.
Back Panel
The back panel is identical to the front panel through Row 20 but continues 4 additional rows before crotch shaping.
Foundation:
Using 2 strands Color B, ch 68.
Row 1 (RS): Sc in 2nd ch from hook and in each ch across. Ch 1, turn. (67 sc)
Rows 2 through 8: Sc in each st across. Ch 1, turn. (67 sc)
Begin color transition: drop one strand Color B, pick up one strand Color A.
Row 9: Sc in each st across. Ch 1, turn. (67 sc)
Rows 10 through 14: Sc in each st across. Ch 1, turn. (67 sc)
Complete color transition: drop second strand Color B, pick up second strand Color A.
Rows 15 through 24: Sc in each st across. Ch 1, turn. (67 sc)
Crotch Shaping for Back Panel
Row 25: Sl st in first 17 sts, ch 1, sc in same st as last sl st, sc in each st across until 17 sts remain. Ch 1, turn. (33 sc)
Row 26: Sc2tog, sc across to last 2 sts, sc2tog. Ch 1, turn. (31 sc)
Row 27: Sc2tog, sc across to last 2 sts, sc2tog. Ch 1, turn. (29 sc)
Row 28: Sc2tog, sc across to last 2 sts, sc2tog. Ch 1, turn. (27 sc)
Row 29: Sc across. Ch 1, turn. (27 sc)
Row 30: Sc across. Ch 1, turn. (27 sc)
Fasten off, leaving a 24-inch tail for seaming.
Assembling the Shorts
Step 1, Side seams: Hold the front and back panels with RS facing outward. Using 2 strands Color A and tapestry needle, whipstitch the left side edge of the front panel to the left side edge of the back panel along the full length of the side (Rows 1 through 20). Repeat for the right side.
Step 2, Crotch seam: With RS together, hold the two crotch panels matched. Whipstitch along the lower edge and up both short side edges to close the crotch. Turn RS out.
Checkpoint: The assembled shorts body should measure approximately 7.5 inches tall at the front and 9 inches tall at the back, with an approximate hip circumference of 30 inches.
Waistband
Foundation:
Using 2 strands Color A, ch 138.
Row 1: Sc in 2nd ch from hook and in each ch across. Ch 1, turn. (137 sc)
Rows 2 through 7: Sc in each st across. Ch 1, turn. (137 sc)
Fasten off, leaving a long tail for attachment.
Fold the waistband strip in half lengthwise. Sew or slip stitch the bottom long edge of the waistband (both layers together) around the top of the assembled shorts, matching center front, center back, and side seams.
Side Ties for Waistband
At each side seam, attach braided cords using the lark’s head method.
For each side tie: Cut 12 strands of Color A, each 50 inches long. Attach at the side seam point using lark’s head mount. Divide the 24 strands into 3 groups of 8 strands each. Braid for approximately 8 inches. Knot and trim.
Attaching Daisies to Waistband
Sew 3 daisy appliques evenly spaced across the center front of the waistband, approximately 0.5 inch down from the top fold. Space them approximately 1.5 inches apart.
Size Customization Tips
To adjust the bikini cup size: For smaller cups, begin the foundation with fewer chains. Each 2 stitches removed reduces the cup width by approximately 0.5 inch. For larger cups, add 2 to 4 stitches to the foundation chain.
To adjust the shorts waist circumference: Each 2 stitches added or removed from each panel adds or removes approximately 0.5 inch of circumference. Both panels must have the same foundation chain count.
To adjust the shorts rise: Add or remove 2-row increments from the main body section before crotch shaping begins. Maintain the 4-row difference between front and back.
Finishing and Blocking
Weave in all ends on the WS using a tapestry needle. Wet block both pieces by submerging in cool water for 10 to 15 minutes. Gently press out water. Lay flat on a blocking mat and pin to finished dimensions. Allow to dry completely before unpinning.
Care Instructions
Hand wash in cool water with gentle detergent. Do not machine wash or wring. Press gently in a clean towel to remove excess water. Lay flat to dry away from direct sunlight. Do not tumble dry or iron directly.
If wearing in water, note that natural fiber yarns will absorb water and become heavy. Consider superwash wool blend or nylon-based yarn for true swimwear. Lining the cups with swimwear lining fabric is recommended for beach or pool use.
I hope you love making this Sunset Ombre Beach Bikini crochet pattern as much as I loved designing it. The ombre technique is so satisfying to watch develop row by row, and those little daisy accents just make me smile every time.
If this pattern caught your eye, go ahead and save it to your Pinterest boards so you can find it when you are ready to start. And if you make this set, I would absolutely love to see it. Drop a comment below or tag me on Instagram or Facebook with your finished photos. Happy crocheting!
You Might Also Like
- Lavender Jellyfish Baby Blanket Free Crochet Pattern
- Berry Blossom Lace Cardigan Free Crochet Pattern
- Coral Sunset Pineapple Lace Maxi Free Crochet Pattern
- Boho Monstera Crochet Plant for Bedroom Shelf Decor