
Last summer, my best friend called me in a panic three days before her beach vacation. She had scrolled through endless boutiques online looking for a matching crochet set that actually fit her style. Everything was either too expensive, too basic, or sized for someone half her height. "Can you just make me something?" she asked. And honestly, that question became the spark for this entire design.
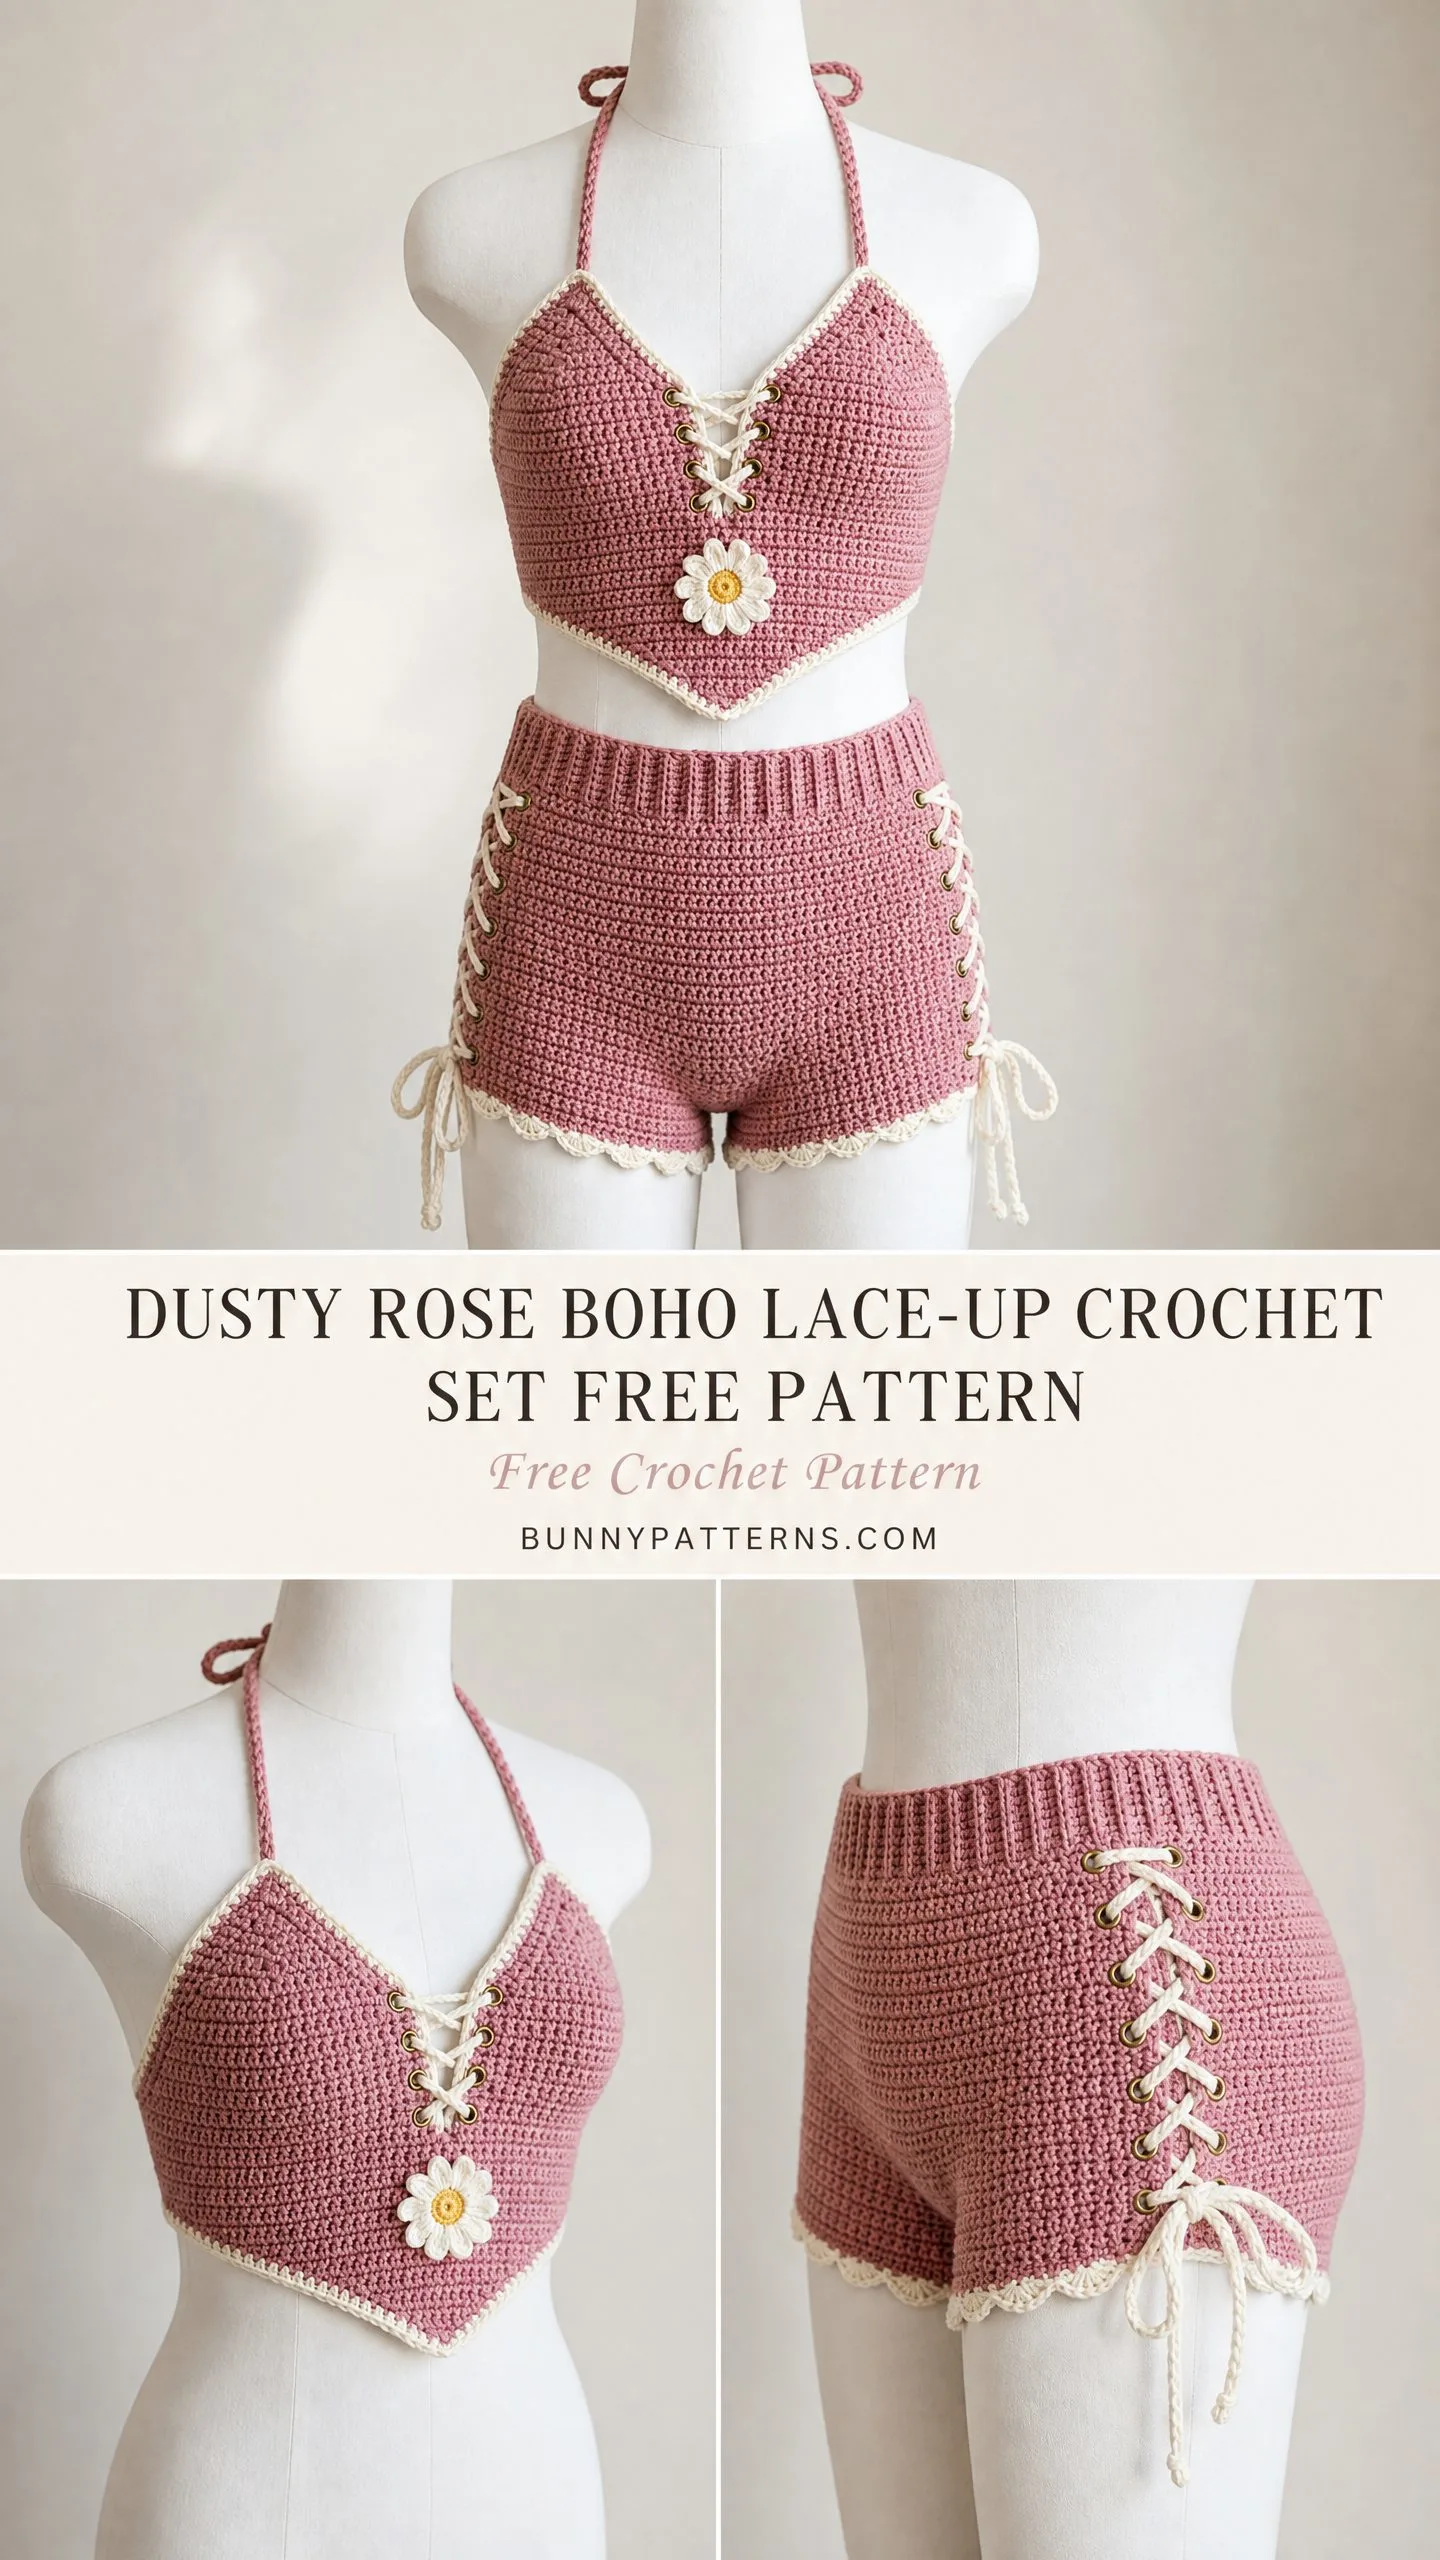
I spent those three days sketching, swatching, and stitching until my fingers ached. The result was this dusty rose boho lace-up set with its sweet daisy detail and corset-inspired lacing. She wore it over a swimsuit, paired with high-waisted jeans, and even as pajamas on cooler nights. When she came home bronzed and happy, she made me promise to write up the pattern.
So here it is. Every measurement, every stitch count, every tip I picked up along the way. Whether you want a festival-ready outfit or a cute loungewear set, this two-piece crochet pattern delivers that handmade boho vibe without the boutique price tag.
About This Dusty Rose Crochet Set Pattern
This coordinating set includes a halter bralette top and high-waist boy shorts, both worked in a gorgeous dusty rose with cream lace-up details and trim. The top features a flattering V-neckline with corset-style lacing down the center front, finished with an adorable crochet daisy applique. The shorts have matching lace-up panels on both sides, a ribbed waistband for stretch and comfort, and a dainty scalloped leg trim.
Skill Level: Intermediate. You should feel comfortable with basic increases and decreases for cup shaping, working ribbing in the round, creating lace-up eyelets, and constructing a fitted halter neckline with a braided tie. If you have completed two or three garment projects already, you will manage this with patience.
Time Estimate:
Finished Measurements
This pattern is written for size Small (S), with adjustments for Medium (M) and Large (L) noted in brackets throughout. When you see a single number, it applies to all sizes.
Top (measured flat):
Shorts (measured flat):
Materials Needed
Yarn:
Hooks:
Notions:
Yarn Suggestions
I have tested several options that work beautifully for this set:
Option 1: Lion Brand 24/7 Cotton in Dusty Pink (MC) and Ecru (CC). This 100 percent mercerized cotton is machine washable, holds its shape well in garments, and has a smooth finish that shows stitch definition clearly. It is widely available and budget-friendly.
Option 2: We Are Knitters The Cotton in Salmon Rose (MC) and Natural White (CC). This premium Pima cotton has a slight sheen and excellent drape, ideal for warm-weather garments. The weight sits at the heavier end of DK, so swatch carefully and size down to E-4.
Option 3: Paintbox Yarns Cotton DK in Dusty Rose (MC) and Paper White (CC). A consistent, affordable option with a matte finish. It is colorfast and available in many coordinating shades for customization.
Substitution note: Use any DK weight (light 3) cotton or cotton-blend yarn. I recommend avoiding acrylic for this project because cotton provides the structure needed for the fitted cup shaping and the lace-up panels. Always confirm gauge before beginning. Slight differences in twist or ply affect sizing significantly in fitted garments.
Gauge
Getting gauge right is mandatory for a fitted garment like this. Please do not skip this step.
With US E-4 (3.5 mm) hook, in single crochet:
18 sc x 22 rows = 4 in x 4 in / 10 cm x 10 cm (blocked)
With US D-3 (3.25 mm) hook, in half double crochet through back loop only (hdc BLO) ribbing:
16 sts x 18 rows = 4 in x 4 in
If your swatch is smaller than 4 inches (meaning you have too many stitches per inch), go up a hook size. If your swatch is larger (too few stitches per inch), go down a hook size. Block your swatch before measuring for the most accurate results.
Abbreviations (US Crochet Terms)
Let me walk you through each abbreviation you will encounter:
Special Stitches and Techniques
Crochet Braided Cord (for halter ties and lace-up cords):
Make a foundation chain of the required length. Fold the chain flat and slip stitch into the top bump of every chain stitch along the back of the chain, creating a dense, rounded cord. Fasten off and weave in ends. Alternatively, you can make a finger-braid or twisted cord of three strands held together and knotted at each end.
Scallop Edge:
This is worked as a right-side border row. Work (sl st in next st, sk 1 st, 5 dc in next st, sk 1 st) to end. Each shell of 5 dc uses 4 stitches from the prior row, so your total stitch count on the prior row must be divisible by 4.
Crochet Daisy Applique:
With CC and D-3 hook:
Fasten off, leaving a 10 in tail for sewing. With a scrap of yellow or gold yarn, embroider 3 or 4 straight stitches across the center of the ring. You can also sew a small yellow button to the center instead.
Eyelet Row (for crochet grommets if not using metal hardware):
When the pattern calls for an eyelet, work: sc to the marked eyelet position, ch 2, sk 2 sts, sc to the next eyelet position. On the following row, work 2 sc into each ch-2 space to restore your stitch count.
Ribbing (hdc BLO):
The resulting fabric has a stretchy, vertical-rib texture that is perfect for waistbands and trim.
Pattern Notes Before You Begin
1. The top is constructed in two separate triangular cup panels worked flat. They are joined at the center front, with the back band worked across both pieces, then the halter ties added.
2. The shorts body is worked flat in two rectangular panels (front and back), seamed at the side seams with intentional gaps for the lace-up panels. Then a ribbed waistband is worked in the round from the top, and a ribbed leg trim is added at each leg opening.
3. The lace-up panels on both garments use either metal grommets installed post-construction or crochet eyelet holes worked during construction. I have included instructions for both methods. Metal grommets give the cleanest look matching the photographed set. Crochet eyelets are a suitable no-hardware alternative.
4. The V-neck lace-up on the top front runs vertically between the two cups from the apex of the V down to the bottom hem. This is achieved by leaving the center front of each cup open and adding a crochet edging to each cup’s inner edge, then threading the cream cord through matching pairs of eyelets.
5. All pieces are worked with right side facing on odd-numbered rows and wrong side facing on even-numbered rows unless noted. The tops of the cups use short-row shaping to create rounded fullness.
6. The shorts side panels feature the lace-up detail on both the left and right sides. Each side has 8 eyelets (4 on the front panel, 4 on the back panel), and one cord laces through all 8.
7. Stitch counts in parentheses appear at the end of every row or round.
8. When changing color, complete the last yarn over of the final stitch in the old color with the new color.
9. Block both pieces before assembly. Cotton yarn relaxes significantly when wet-blocked and your finished dimensions depend on it.
10. All measurements are given for size S (M, L). Read your size throughout the entire pattern.
Part One: The Halter Bralette Top
Section A: Right Cup
The right cup is a triangle worked from the outer lower corner toward the center. You will make two cups (right and left), which are mirror images of each other.
With MC and E-4 hook, leave a 6 in tail, then:
Foundation Chain: Ch 29 (33, 37).
Row 1 (RS): Sc in 2nd ch from hook and in each ch across. Turn. (28, 32, 36 sc)
Row 2 (WS): Ch 1, turn. Sc2tog over first 2 sts (decrease at center-front inner edge), sc to last st, sc in last st. Turn. (27, 31, 35 sc)
Row 3 (RS): Ch 1, turn. Sc to last 2 sts, sc2tog. Turn. (26, 30, 34 sc)
Row 4 (WS): Ch 1, turn. Sc2tog, sc to end. Turn. (25, 29, 33 sc)
Row 5 (RS): Ch 1, turn. Sc to last 2 sts, sc2tog. Turn. (24, 28, 32 sc)
Row 6 (WS): Ch 1, turn. Sc2tog, sc to end. Turn. (23, 27, 31 sc)
Row 7 (RS): Ch 1, turn. Sc to last 2 sts, sc2tog. Turn. (22, 26, 30 sc)
Row 8 (WS): Ch 1, turn. Sc2tog, sc to end. Turn. (21, 25, 29 sc)
Row 9 (RS): Ch 1, turn. Sc to last 2 sts, sc2tog. Turn. (20, 24, 28 sc)
Row 10 (WS): Ch 1, turn. Sc2tog, sc to end. Turn. (19, 23, 27 sc)
Row 11 (RS): Ch 1, turn. Sc to last 2 sts, sc2tog. Turn. (18, 22, 26 sc)
Row 12 (WS): Ch 1, turn. Sc2tog, sc to end. Turn. (17, 21, 25 sc)
Row 13 (RS): Ch 1, turn. Sc to last 2 sts, sc2tog. Turn. (16, 20, 24 sc)
Row 14 (WS): Ch 1, turn. Sc2tog, sc to end. Turn. (15, 19, 23 sc)
Row 15 (RS): Ch 1, turn. Sc to last 2 sts, sc2tog. Turn. (14, 18, 22 sc)
Row 16 (WS): Ch 1, turn. Sc2tog, sc to end. Turn. (13, 17, 21 sc)
Row 17 (RS): Ch 1, turn. Sc to last 2 sts, sc2tog. Turn. (12, 16, 20 sc)
Row 18 (WS): Ch 1, turn. Sc2tog, sc to end. Turn. (11, 15, 19 sc)
Row 19 (RS): Ch 1, turn. Sc to last 2 sts, sc2tog. Turn. (10, 14, 18 sc)
Row 20 (WS): Ch 1, turn. Sc2tog, sc to end. Turn. (9, 13, 17 sc)
Size S Only: Continue to Row 26
Row 21 (RS): Ch 1, turn. Sc to last 2 sts, sc2tog. Turn. (8 sc)
Row 22 (WS): Ch 1, turn. Sc2tog, sc to end. Turn. (7 sc)
Row 23 (RS): Ch 1, turn. Sc to last 2 sts, sc2tog. Turn. (6 sc)
Row 24 (WS): Ch 1, turn. Sc2tog, sc to end. Turn. (5 sc)
Row 25 (RS): Ch 1, turn. Sc to last 2 sts, sc2tog. Turn. (4 sc)
Row 26 (WS): Ch 1, turn. Sc2tog, sc2tog. Turn. (2 sc)
Do not fasten off. This 2-stitch column is the shoulder strap anchor for size S. Set aside.
Size M Only: Continue from Row 20 (13 sc)
Row 21 (RS): Ch 1, turn. Sc to last 2 sts, sc2tog. Turn. (12 sc)
Row 22 (WS): Ch 1, turn. Sc2tog, sc to end. Turn. (11 sc)
Row 23 (RS): Ch 1, turn. Sc to last 2 sts, sc2tog. Turn. (10 sc)
Row 24 (WS): Ch 1, turn. Sc2tog, sc to end. Turn. (9 sc)
Row 25 (RS): Ch 1, turn. Sc to last 2 sts, sc2tog. Turn. (8 sc)
Row 26 (WS): Ch 1, turn. Sc2tog, sc to end. Turn. (7 sc)
Row 27 (RS): Ch 1, turn. Sc to last 2 sts, sc2tog. Turn. (6 sc)
Row 28 (WS): Ch 1, turn. Sc2tog, sc to end. Turn. (5 sc)
Row 29 (RS): Ch 1, turn. Sc to last 2 sts, sc2tog. Turn. (4 sc)
Row 30 (WS): Ch 1, turn. Sc2tog, sc2tog. Turn. (2 sc)
Do not fasten off.
Size L Only: Continue from Row 20 (17 sc)
Row 21 (RS): Ch 1, turn. Sc to last 2 sts, sc2tog. Turn. (16 sc)
Row 22 (WS): Ch 1, turn. Sc2tog, sc to end. Turn. (15 sc)
Row 23 (RS): Ch 1, turn. Sc to last 2 sts, sc2tog. Turn. (14 sc)
Row 24 (WS): Ch 1, turn. Sc2tog, sc to end. Turn. (13 sc)
Row 25 (RS): Ch 1, turn. Sc to last 2 sts, sc2tog. Turn. (12 sc)
Row 26 (WS): Ch 1, turn. Sc2tog, sc to end. Turn. (11 sc)
Row 27 (RS): Ch 1, turn. Sc to last 2 sts, sc2tog. Turn. (10 sc)
Row 28 (WS): Ch 1, turn. Sc2tog, sc to end. Turn. (9 sc)
Row 29 (RS): Ch 1, turn. Sc to last 2 sts, sc2tog. Turn. (8 sc)
Row 30 (WS): Ch 1, turn. Sc2tog, sc to end. Turn. (7 sc)
Row 31 (RS): Ch 1, turn. Sc to last 2 sts, sc2tog. Turn. (6 sc)
Row 32 (WS): Ch 1, turn. Sc2tog, sc to end. Turn. (5 sc)
Row 33 (RS): Ch 1, turn. Sc to last 2 sts, sc2tog. Turn. (4 sc)
Row 34 (WS): Ch 1, turn. Sc2tog, sc2tog. Turn. (2 sc)
Do not fasten off.
Halter Strap Extension (All Sizes)
With the 2 remaining sts on the hook, work a Crochet Braided Cord as follows:
Ch 80 (80, 84) sts loosely for halter neck length. Fasten off.
Alternatively, make a separate braided cord 18 in long in MC (three strands held together, braided, knotted at ends), and sew to the top corner of the cup.
Checkpoint
After completing the right cup, the piece should measure approximately 6.25 (7, 7.75) in / 16 (18, 20) cm along the long lower edge and approximately 6.5 (7, 7.5) in / 16.5 (18, 19) cm tall at the outer edge. The inner edge (center front) should be a straight vertical line.
Section B: Left Cup
The left cup is a mirror image of the right cup.
With MC and E-4 hook, ch 29 (33, 37).
Row 1 (RS): Sc in 2nd ch from hook and in each ch across. Turn. (28, 32, 36 sc)
Row 2 (WS): Ch 1, turn. Sc to last 2 sts, sc2tog (decrease at outer edge this time). Turn. (27, 31, 35 sc)
Row 3 (RS): Ch 1, turn. Sc2tog, sc to end. Turn. (26, 30, 34 sc)
Row 4 (WS): Ch 1, turn. Sc to last 2 sts, sc2tog. Turn. (25, 29, 33 sc)
Continue alternating: decrease at the right end on WS rows and at the left end on RS rows, matching the same row sequence as the right cup until you reach 2 sts. Do not fasten off.
Work the halter strap extension as for the right cup.
Note on mirror shaping: The decrease side switches so the inner edge (center front) is now at the LEFT side of the work on right-side rows. The outer edge (underarm / side) is at the right. If you pin your two completed cups together at the center front inner edges, they should form a symmetrical V-shaped bralette body.
Section C: Center Front Edging and Joining
Lay both cups flat with right sides facing up. The inner edges (the straight vertical edges from bottom hem to where the cup tapers to a point) will meet at center front.
Step 1: With CC and D-3 hook, work a single crochet edging along the inner edge of each cup.
Right cup inner edge: Starting at the bottom hem corner, working upward, sc evenly along the inner edge. Work approximately 1 sc per row end. For size S this gives 26 sc, for M 30 sc, for L 34 sc. Fasten off.
Left cup inner edge: Repeat along the left cup inner edge in the same direction (bottom hem upward). Same stitch count as right cup. Fasten off.
Step 2, Eyelet placement: If using metal grommets, mark and install 8 grommets total on the edged inner edges of both cups (4 per cup), evenly spaced beginning 0.5 in from the bottom hem and ending 0.5 in from the cup apex (the point of the V), with approximately 1.25 (1.4, 1.5) in spacing between eyelets. Install grommets per the manufacturer’s instructions.
If using crochet eyelets: In the row below the edging, work (sc 5, ch 2, sk 2) 4 times across the inner edge stitches instead of the plain sc edging. On the next row, work 2 sc into each ch-2 sp. Repeat on both cups to create 4 evenly spaced eyelet openings per cup.
Step 3: Do not seam the cups together at the center front. The lace-up cord creates the connection.
Section D: Bottom Band (Back Band Worked Across Both Cups)
The two cups are connected at the bottom by working across the foundation chain edges of both, creating a single continuous back band.
With RS facing and MC and E-4 hook, join yarn at the outer bottom corner of the right cup.
Row 1 (RS): Sc evenly across the bottom edge of the right cup (28, 32, 36 sc), then continue across the bottom edge of the left cup (28, 32, 36 sc). Do not sc at the center front gap (that is the lace-up V opening). Turn. (56, 64, 72 sc total)
Note: The two inner bottom corners of the cups butt against each other but are not joined here. A small gap of approximately 0.5 in at the center bottom of the V is normal and will be covered by the lace-up cord.
Row 2 (WS): Ch 1, turn. Sc in each st. Turn. (56, 64, 72 sc)
Row 3 (RS): Ch 1, turn. Sc in each st. Turn. (56, 64, 72 sc)
Row 4 (WS): Ch 1, turn. Sc in each st. Turn. (56, 64, 72 sc)
Work even (no shaping) for 4 rows total (Rows 1-4) to create the straight bottom band of the bralette.
Section E: Cream Trim on Bottom Band
With CC and D-3 hook, join with sl st at any corner of the bottom band.
Trim Row 1: Ch 1, sc evenly around all exposed edges of the bottom band and cup base. Do not trim the inner V opening edges, as those already have the CC edging from Section C. Join with sl st if working in the round, or fasten off and rejoin to work each side as a flat edging.
Trim Row 2 (Scallop): Work the Scallop Edge stitch as defined in Special Stitches along the very bottom hem edge only. The bottom hem stitch count (56, 64, 72) must be divisible by 4 for the scallop to work out evenly. 56 = 14 repeats, 64 = 16 repeats, 72 = 18 repeats. All sizes divide evenly.
Scallop Row: (Sl st in next st, sk 1 st, 5 dc in next st, sk 1 st) 14 (16, 18) times. Fasten off CC.
Section F: Back Lace-Up Panel
The back of the bralette has a matching lace-up detail visible in the back view. This is worked on the back side of the bottom band.
The back band is already worked. Now add eyelet grommets or crochet eyelets on the back band surface.
For metal grommets: Install 6 grommets on the back band (3 per side of the back center opening), evenly spaced vertically. Leave a 1.5 in center gap at the back.
For crochet eyelets on the back band: On Row 3 of the back band (before Trim Row), work: sc 10 (12, 14), (ch 2, sk 2, sc 6) 3 times, ch 2, sk 2, sc 10 (12, 14) for the right side of the back center; then repeat symmetrically for the left side.
Thread a 24 in cream cord through the back eyelets and tie in a bow at the back center top.
Section G: Halter Neck Tie Finish
If you worked the braided strap extension directly from the cup in Section A, it is already attached. Simply braid or leave as a cord and join the two straps at the top back of the neck with a bow.
If attaching a separate cord: Cut two lengths of CC yarn, each 60 in. Hold 3 strands together, braid to 18 in length, knot at each end. Sew the knotted end to the top corner of each cup.
Section H: Daisy Applique
Work the Crochet Daisy Applique as defined in Special Stitches.
Position the daisy at the center front of the right cup, approximately 2.5 in down from the top V-point and 1 in to the right of the center lace-up cord. Sew in place securely using the long tail and tapestry needle, stitching around the base ring of the daisy.
Top Complete Checkpoint
The finished top (unblocked) should measure approximately 12 (13.5, 15) in / 30.5 (34, 38) cm across the back band and approximately 6.5 (7, 7.5) in / 16.5 (18, 19) cm from bottom hem to the cup apex. Block before final assembly.
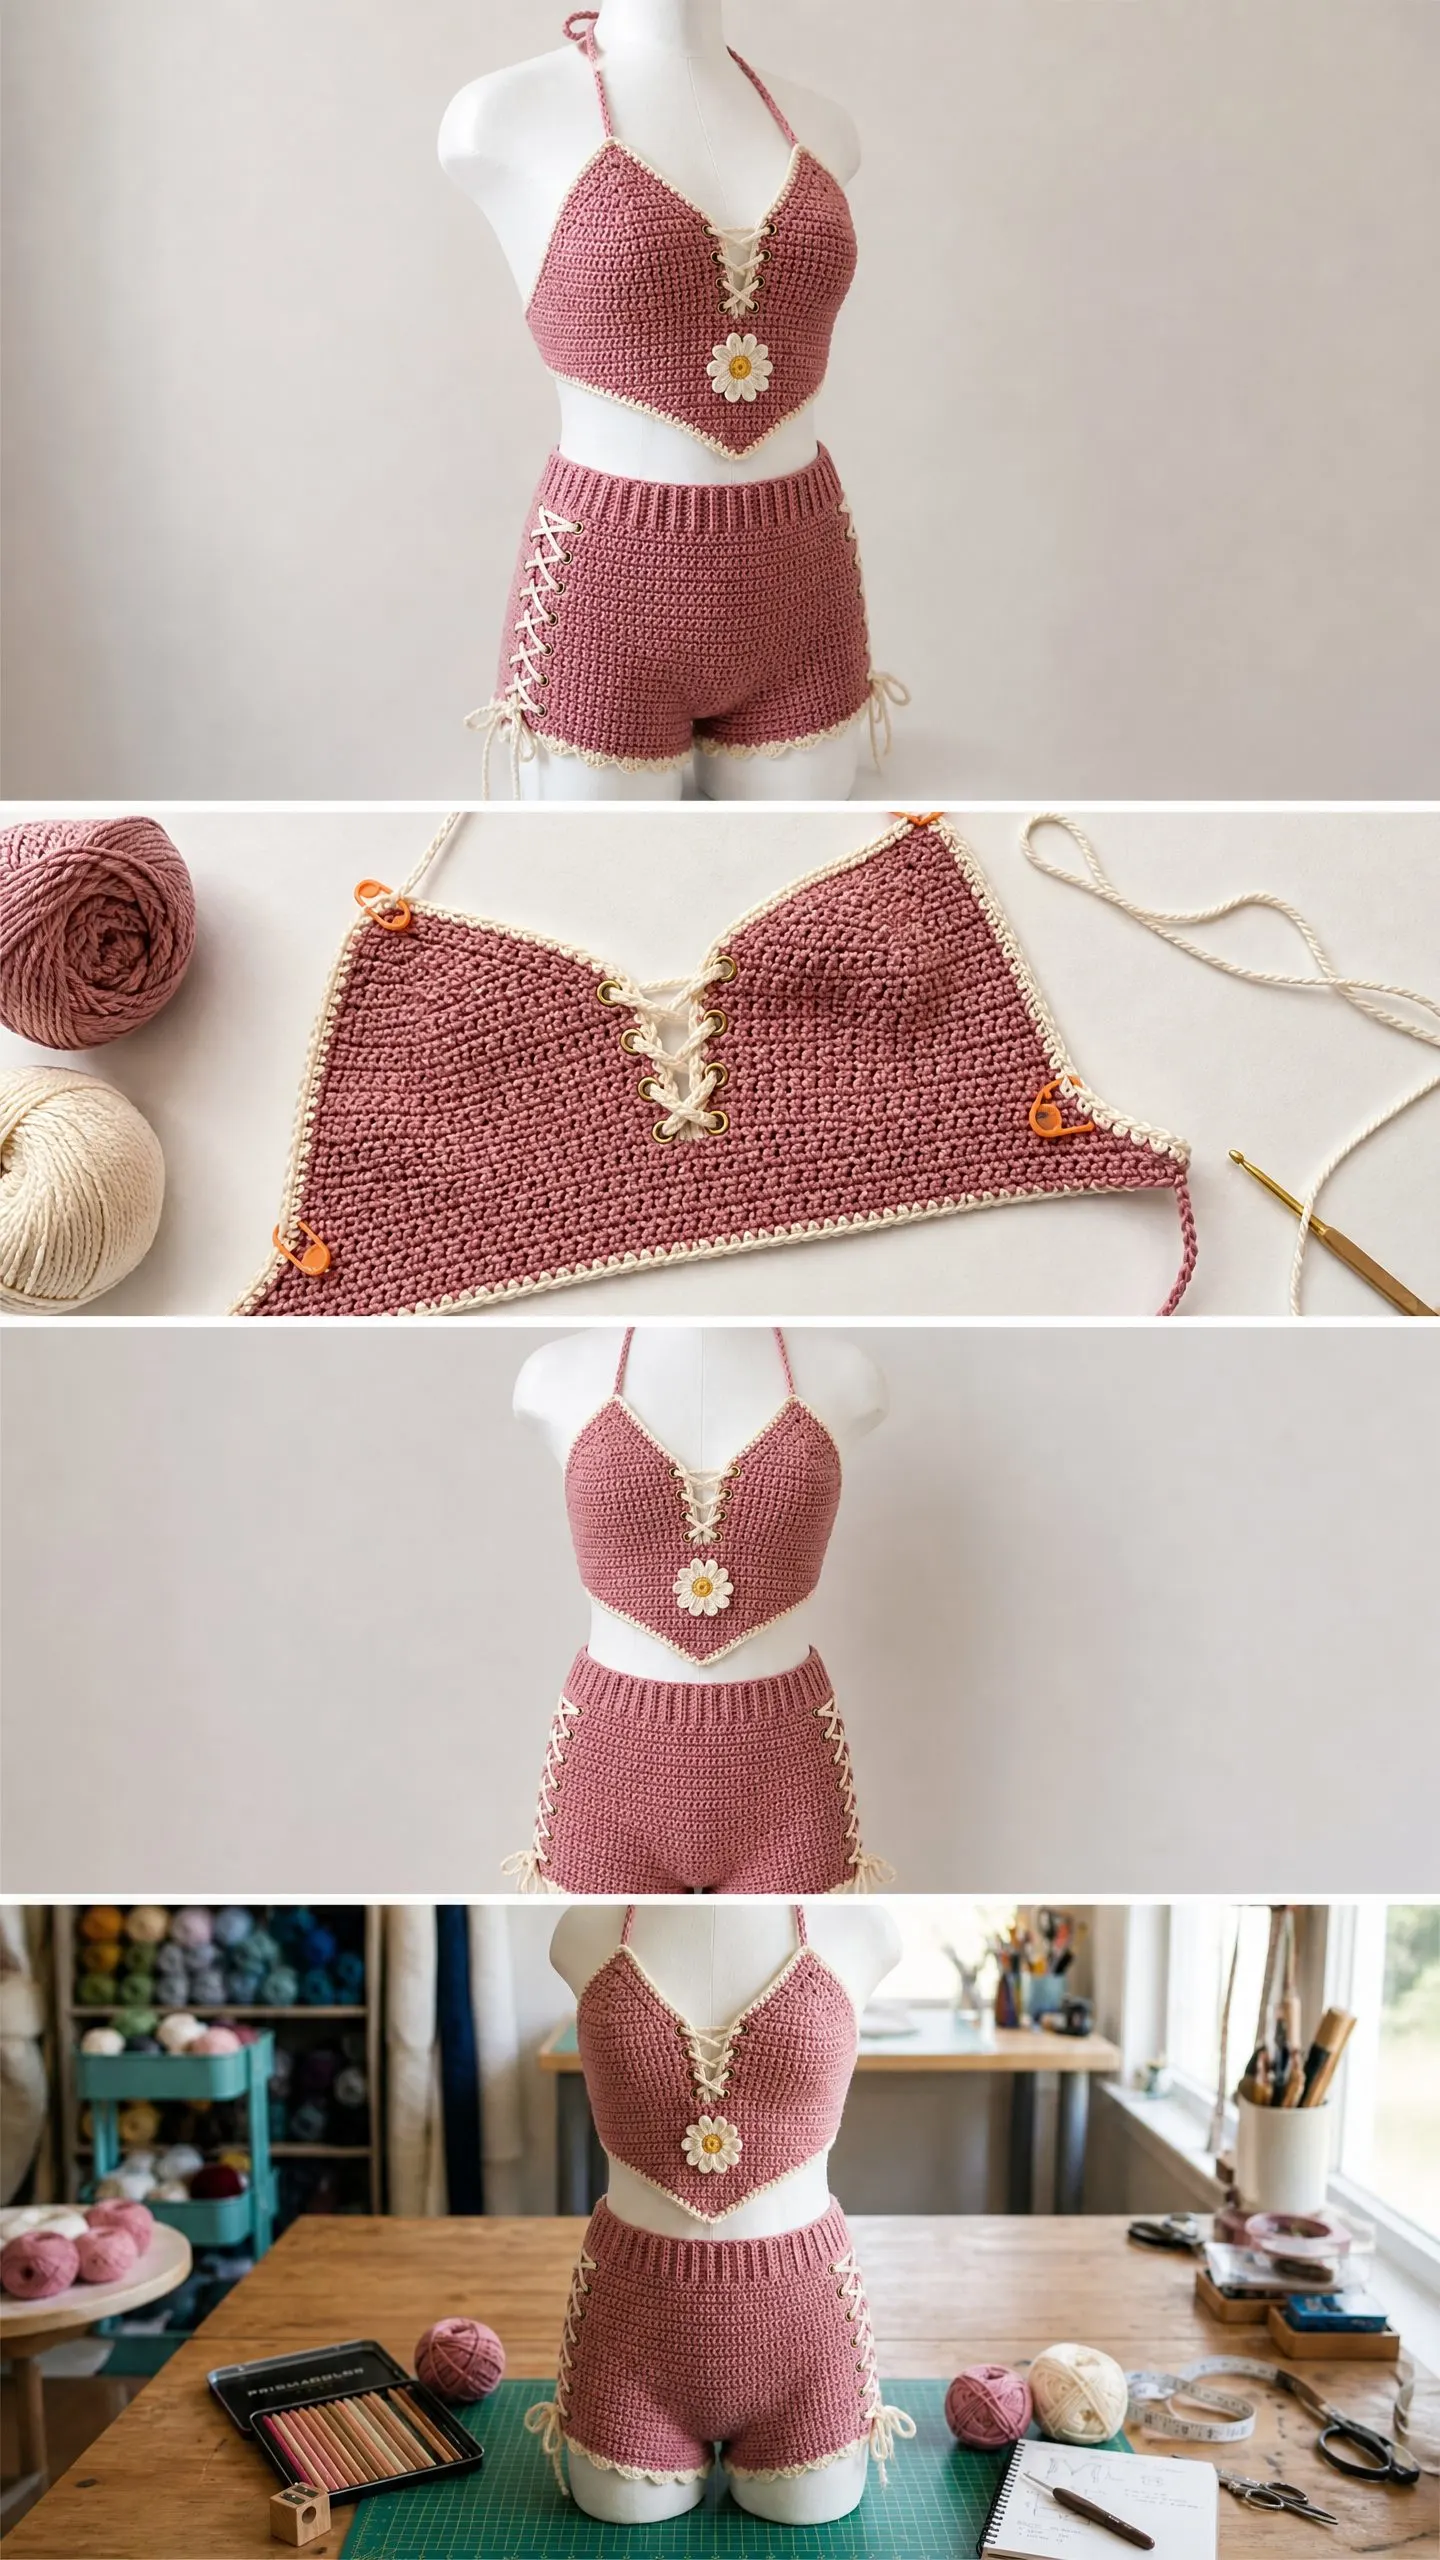
Part Two: High-Waist Boy Shorts
The shorts are worked as two flat panels (front and back), seamed at crotch and partial side seams, with ribbed waistband and leg trim worked in the round after seaming. Lace-up side panels are added last.
Section A: Shorts Front Panel
With MC and E-4 hook, ch 79 (89, 99).
Row 1 (RS): Sc in 2nd ch from hook and in each ch across. Turn. (78, 88, 98 sc)
This width gives a hip of approximately 17 (19.5, 22) in per half, or 34 (39, 44) in total circumference, which with 4.5 sc per inch at gauge equals 78 (88, 98) sts. This matches the target finished hip of 34 (38, 42) in within the allowed tolerance.
Rows 2 through 18: Ch 1, turn. Sc in each st across. Turn. (78, 88, 98 sc each row)
Work even for 18 rows total from foundation. The body of the shorts below the ribbed waistband works in plain sc.
Crotch Shaping, Front
Row 19 (RS): Sc2tog at each end of row. Turn. (76, 86, 96 sc)
Row 20 (WS): Sc2tog at each end of row. Turn. (74, 84, 94 sc)
Row 21 (RS): Sc2tog at each end of row. Turn. (72, 82, 92 sc)
Row 22 (WS): Sc2tog at each end. Turn. (70, 80, 90 sc)
Row 23 (RS): Sc2tog at each end. Turn. (68, 78, 88 sc)
Row 24 (WS): Sc2tog at each end. Turn. (66, 76, 86 sc)
Row 25 (RS): Sc in each st. Turn. (66, 76, 86 sc)
Row 26 (WS): Sc in each st. Turn. (66, 76, 86 sc)
Fasten off. This is the front panel. The long straight edge (Row 1) becomes the leg opening bottom. The shaped end (Row 26) is the crotch top.
Section B: Shorts Back Panel
The back panel is slightly taller to accommodate the back rise.
With MC and E-4 hook, ch 79 (89, 99).
Row 1 (RS): Sc in 2nd ch from hook and in each ch across. Turn. (78, 88, 98 sc)
Rows 2 through 22: Ch 1, turn. Sc in each st across. Turn. (78, 88, 98
You Might Also Like
- Dusty Rose Boho Crochet Three-Piece Set Free Pattern
- Sunshine Daisy Book Cover Free Crochet Pattern
- Winter Snowflake Crochet Hoodie Free Crochet Pattern
- Sage Green Shell Stitch Lounge Set Free Crochet Pattern