
THIS IS THE CUTEST TODDLER PROJECT I have ever had the pleasure of creating, and I am SO excited to share it with you today! If you have been looking for a show-stopping handmade gift that looks way harder than it actually is, this bunny pinafore dress is about to become your new favorite pattern. We are talking 18 to 25 hours of work that results in the most adorable little outfit you have ever seen.
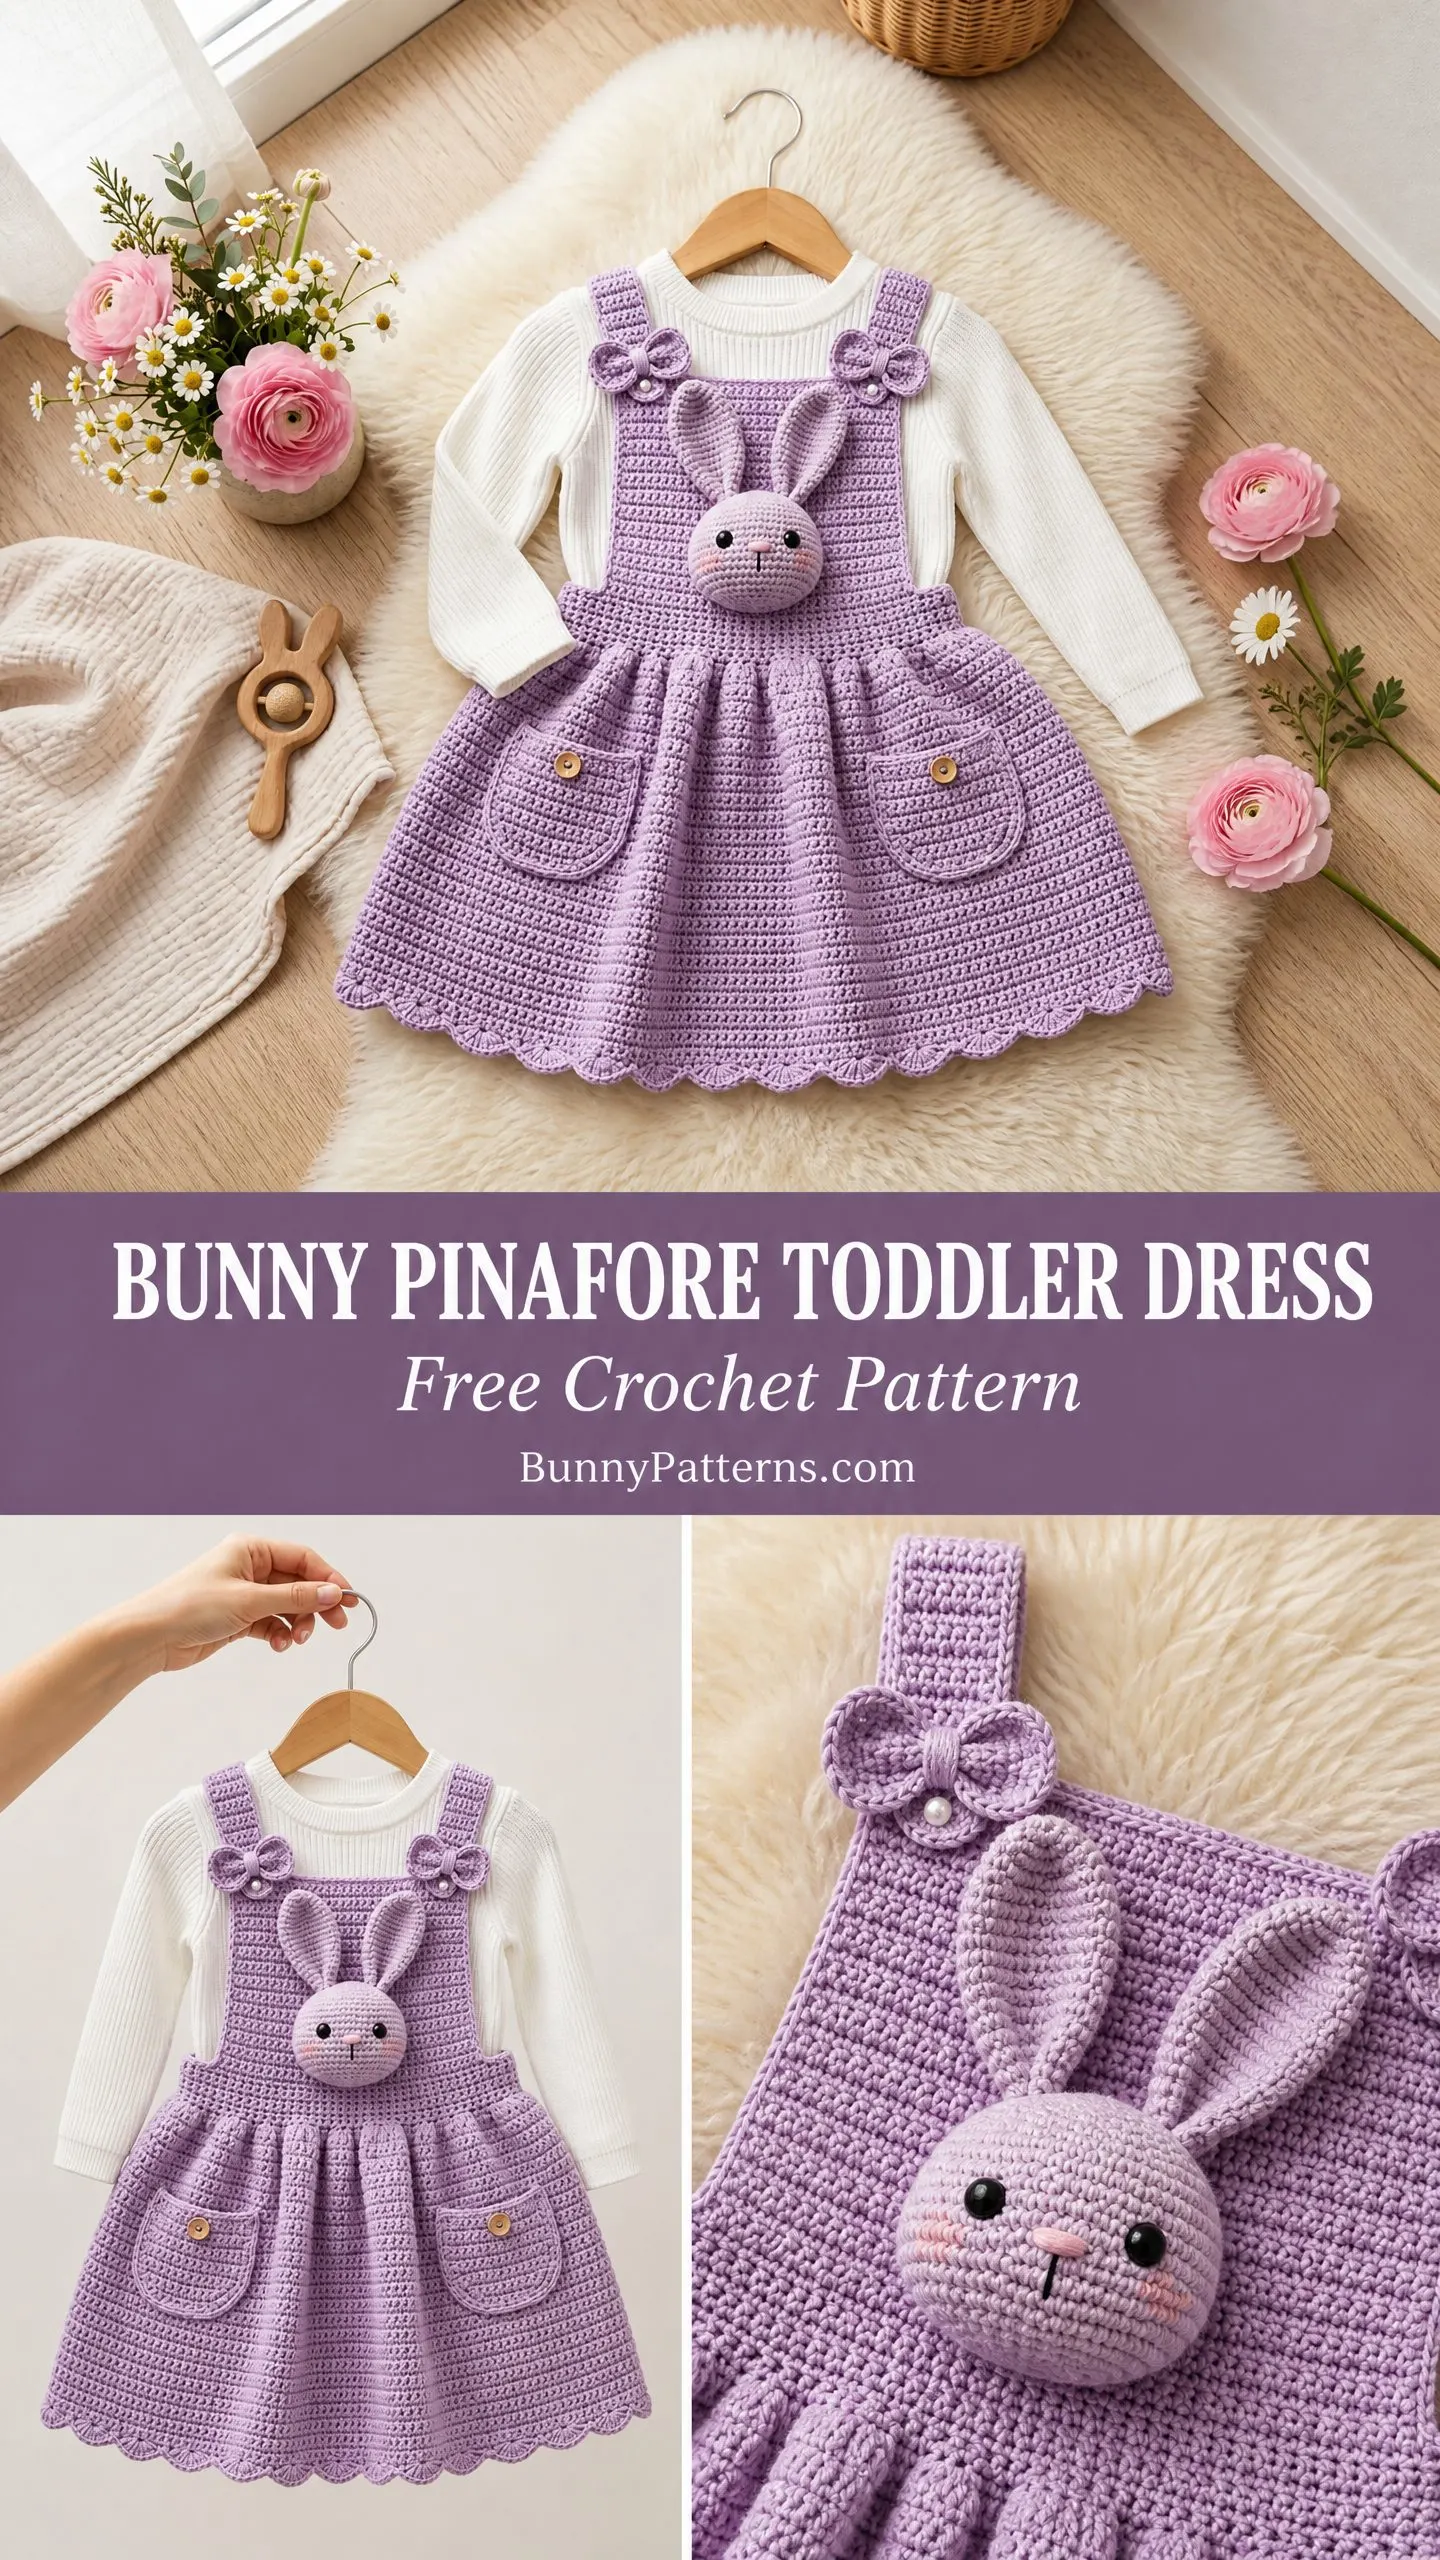
This crochet pattern combines everything I love about making children’s clothing. You get a gorgeous lavender pinafore with a structured bodice, a flowy gathered skirt with scalloped edges, sweet patch pockets with button accents, and the most precious three-dimensional bunny face right on the front. The whole thing layers over a simple white long-sleeve shirt for the perfect seasonal look.
Whether you are making this for your own little one, a baby shower gift, or a grandchild who deserves to be spoiled, this pattern delivers serious wow factor. The intermediate skill level means you will learn some new techniques along the way, but nothing here is impossible if you are comfortable with basic crochet stitches and willing to follow along step by step.
About This Bunny Pinafore Crochet Pattern
This toddler dress crochet tutorial walks you through creating a complete pinafore set that fits sizes 12 months through 3T. The design features several components worked separately and then assembled together. You will make a front bodice panel, a back bodice panel, two shoulder straps, a gathered skirt worked in the round, two patch pockets, a stuffed amigurumi bunny head, bunny ears, and decorative bow embellishments.
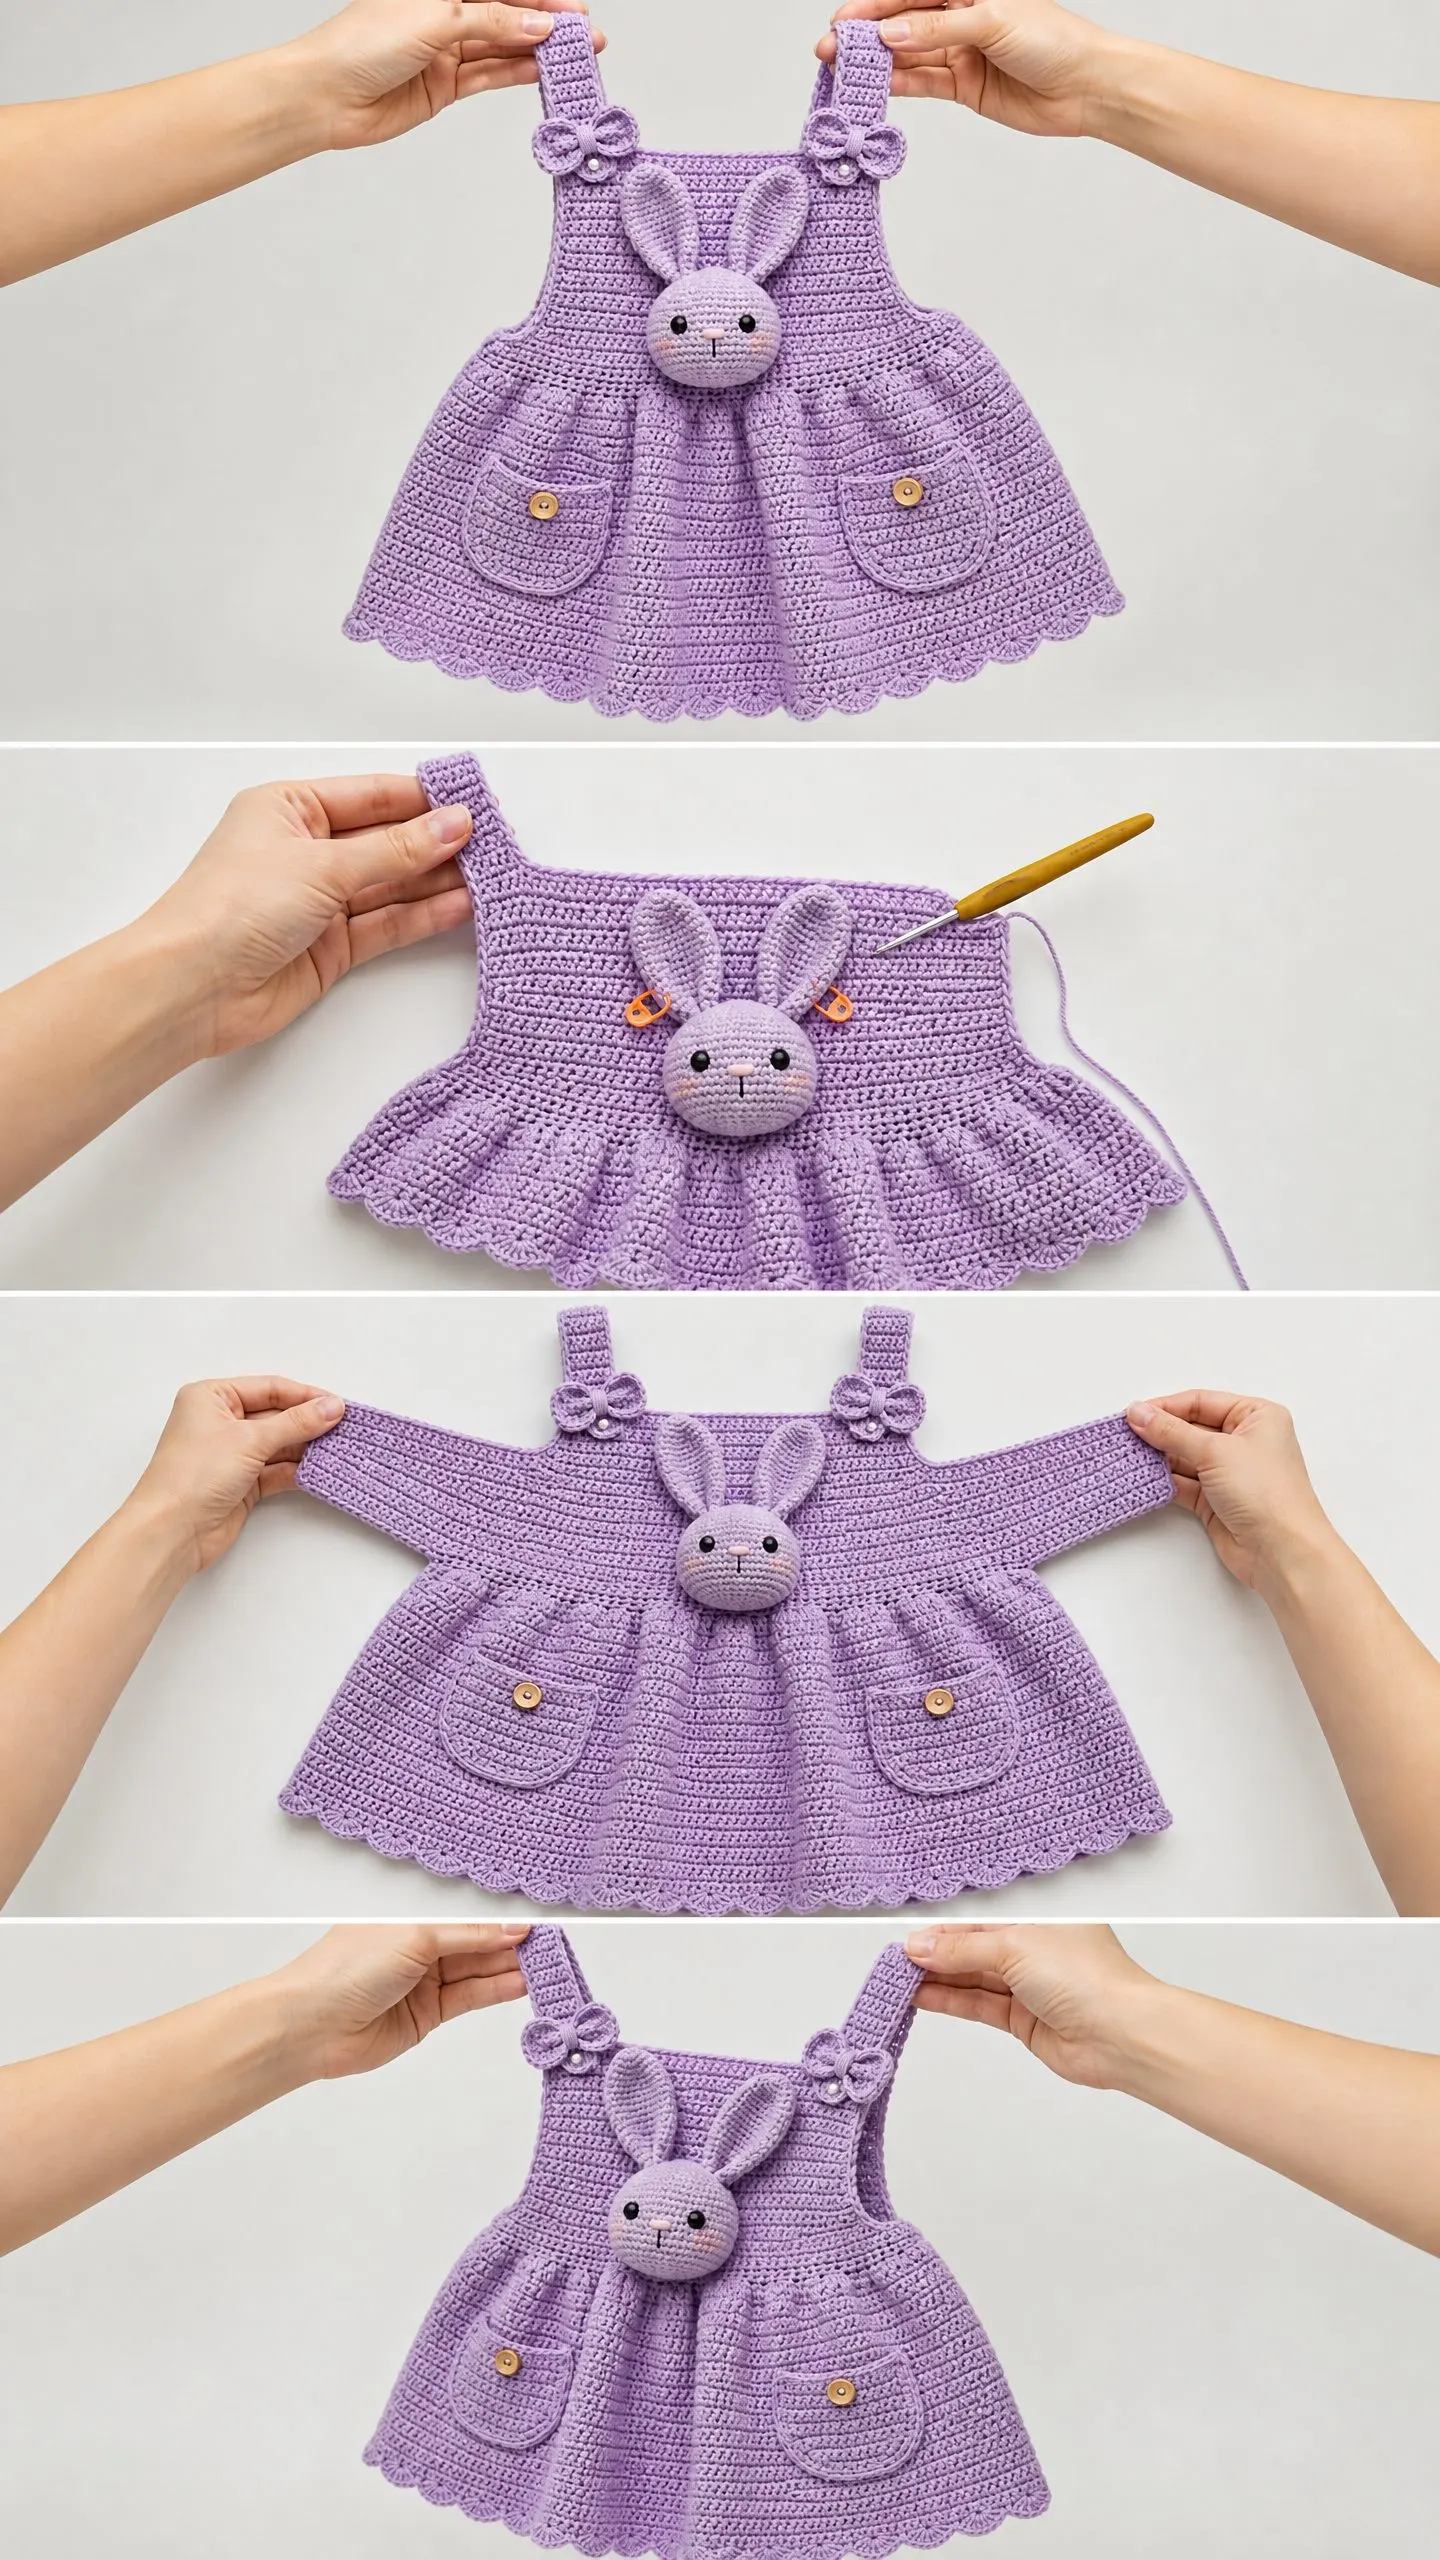
The construction order is straightforward once you understand the pieces. You start with flat panels for the bodice, seam them at the sides, then pick up stitches along the waist edge to work the skirt downward in joined rounds. The embellishments get made separately and attached during final assembly.
What makes this pattern special is the textured fabric created by working in the back loop only (BLO) throughout most of the project. This technique creates subtle horizontal ridges that give the finished dress a professional, structured appearance distinct from basic single crochet fabric.
Finished Measurements
All instructions are written for the smallest size first. Larger sizes appear in parentheses in the format: 12-18 months (2T, 3T).
Size 12 to 18 months:
Size 2T:
Size 3T:
Materials Needed
Yarn
Color A (Lavender): Worsted weight yarn, approximately 400 (440, 480) yards / 366 (402, 439) meters
Color B (Off-white or Cream): Approximately 20 yards / 18 meters for the bunny face embellishment only
Small amounts of black and pink yarn or embroidery floss for the bunny’s facial features
Recommended Yarn Brands
1. Lion Brand Pound of Love in Lavender, which is 100 percent acrylic, machine washable, and wonderfully soft against baby skin
2. Paintbox Yarns Simply DK used at a tighter gauge on a G hook to achieve worsted density, also 100 percent acrylic with excellent stitch definition
3. Caron Simply Soft in Soft Mauve or Lilac, known for beautiful drape and very affordable pricing
Substitution tip: Choose any smooth worsted weight yarn that achieves gauge. Avoid heavily textured or fuzzy yarns because they will obscure the stitch definition. Cotton blends work but produce a stiffer fabric. Acrylic or acrylic-blend yarns are best for drape and washability in children’s garments.
Hooks
Notions
Gauge
With G-6 / 4.0 mm hook and worsted weight yarn:
16 single crochet stitches x 18 rows = 4 inches x 4 inches / 10 cm x 10 cm in single crochet, blocked
To make a gauge swatch: Chain 20. Work single crochet in each chain across. Turn. Continue working single crochet rows until your swatch measures approximately 5 inches. Fasten off, block the swatch, then measure the center 4 inch by 4 inch area.
Gauge is critical for fit in garments. Adjust your hook size up or down as needed to achieve correct gauge before beginning the dress.
Abbreviations and Stitch Definitions
Let me walk you through every abbreviation used in this pattern. If you are newer to reading crochet patterns, take a moment to review these before diving into the instructions.
beg = beginning
BLO = back loop only (when you look at a stitch from above, you see two loops; the back loop is the one farther from you)
ch = chain (wrap yarn over hook and pull through the loop on your hook)
ch-sp = chain space (the gap created by a chain in the previous row)
dc = double crochet (yarn over, insert hook, pull up loop, yarn over and pull through 2 loops, yarn over and pull through remaining 2 loops)
dec = single crochet decrease, also written as sc2tog
hdc = half double crochet
inc = single crochet increase (work 2 sc in the same stitch, which adds 1 stitch to your count)
rep = repeat
rnd = round
RS = right side (the side that faces outward when worn)
sc = single crochet (insert hook, pull up loop, yarn over and pull through both loops)
sc2tog = single crochet two together, a decrease stitch (insert hook into next stitch and pull up a loop so you have 2 loops on hook, insert hook into following stitch and pull up a loop so you have 3 loops on hook, yarn over and draw through all 3 loops; this consumes 2 stitches and produces 1 stitch)
sk = skip
sl st = slip stitch (insert hook, pull up loop and draw directly through loop on hook)
sp = space
st(s) = stitch(es)
t-ch = turning chain
WS = wrong side
yo = yarn over
Special Techniques
Magic Ring
Make a loop with your yarn, insert hook through the loop, draw up a working loop, then chain 1. This creates an adjustable ring that you can tighten closed after working the first round. It eliminates the small hole that appears when starting amigurumi with a traditional chain.
Scallop Stitch (for hem border)
Work as follows in one continuous pass: Slip stitch into first stitch, chain 1. In the next stitch work 5 double crochet. Skip 1 stitch. Slip stitch into next stitch. Repeat this sequence around. Each scallop shell consumes 3 stitches total.
Button Opening
Chain 2, skip 2 stitches. On the following row, work 2 single crochet into the chain-2 space to close the opening while leaving a buttonhole.
Pattern Notes Before You Begin
1. The pinafore bodice is worked flat in two panels (front and back) and seamed at the sides. The skirt is picked up along the waist edge and worked in joined rounds downward.
2. Straps are worked separately and attached at the front of the bodice, then secured with buttons at the back.
3. All turning chains are chain 1 and do NOT count as a stitch throughout this pattern.
4. Stitch counts appear in parentheses at the end of every row and round.
5. Row 1 establishes the right side. After the first chain 1 and turn, you are on the wrong side for Row 2, alternating from there.
6. The bunny head is worked in continuous rounds with no joining and no turning. Use a stitch marker to track the beginning of each round.
7. When working in BLO for the bodice panels, you create a subtle horizontal ridge every right-side row. This gives the bodice its textured, structured appearance.
8. Weave in all ends before assembly.
Step by Step Instructions
Front Bodice Panel
Foundation: Chain 39 (43, 47).
Row 1 (RS): Sc in 2nd ch from hook and in each ch across. Turn. (38, 42, 46 sc)
Row 2 (WS): Ch 1. Sc in BLO of each st across. Turn. (38, 42, 46 sc)
Row 3 (RS): Ch 1. Sc in BLO of each st across. Turn. (38, 42, 46 sc)
Rows 4 through 20 (21, 22): Repeat Rows 2 and 3 alternately, maintaining sc in BLO throughout. Turn at end of each row. After Row 20 (21, 22), the bodice panel should measure approximately 4.5 inches / 11.5 cm (4.75 inches / 12 cm, 5 inches / 12.5 cm) from foundation chain. (38, 42, 46 sc)
Armhole Shaping
Row 21 (22, 23) (RS): Ch 1. Sl st across first 4 sts. Ch 1. Sc in BLO across until 4 sts remain. Leave last 4 sts unworked. Turn. (30, 34, 38 sc)
Row 22 (23, 24) (WS): Ch 1. Sc2tog over first 2 sts. Sc in BLO across until 2 sts remain. Sc2tog over last 2 sts. Turn. (28, 32, 36 sc)
Row 23 (24, 25) (RS): Ch 1. Sc2tog over first 2 sts. Sc in BLO across until 2 sts remain. Sc2tog over last 2 sts. Turn. (26, 30, 34 sc)
Row 24 (25, 26) (WS): Ch 1. Sc in BLO across. Turn. (26, 30, 34 sc)
Row 25 (26, 27) (RS): Ch 1. Sc in BLO across. Turn. (26, 30, 34 sc)
Rows 26 through 31 (27 through 32, 28 through 34): Repeat last 2 rows. After final row, bodice measures approximately 7 inches / 18 cm (7.5 inches / 19 cm, 8 inches / 20 cm) from foundation. (26, 30, 34 sc)
Neckline and Strap Division
Row 32 (33, 35) (RS): Ch 1. Sc in BLO across first 8 (9, 10) sts. Turn. This creates the left strap base. Leave remaining sts unworked for right side and center neck.
Left Strap Base:
Row 33 (34, 36): Ch 1. Sc in BLO across 8 (9, 10) sts. Turn. (8, 9, 10 sc)
Row 34 (35, 37): Ch 1. Sc in BLO across. Turn. (8, 9, 10 sc)
Rows 35 through 40 (36 through 41, 38 through 44): Repeat last 2 rows. Fasten off. Mark this edge with stitch marker.
Center Neck: With RS facing, skip center 10 (12, 14) sts on Row 32 (33, 35).
Right Strap Base: Join yarn in next st.
Row 33 (34, 36): Ch 1. Sc in BLO across remaining 8 (9, 10) sts. Turn. (8, 9, 10 sc)
Rows 34 through 40 (35 through 41, 37 through 44): Ch 1. Sc in BLO across. Turn. (8, 9, 10 sc)
Fasten off.
Checkpoint: After completing the front bodice panel, the piece should measure approximately 7 inches / 18 cm tall (7.5 inches / 19 cm for 2T, 8 inches / 20 cm for 3T) and approximately 9.5 inches / 24 cm wide at the widest point. The two strap bases should each be approximately 2 inches / 5 cm wide and 1.5 inches / 3.8 cm tall above the armhole shaping.
Back Bodice Panel
Foundation: Chain 39 (43, 47).
Row 1 (RS): Sc in 2nd ch from hook and in each ch across. Turn. (38, 42, 46 sc)
Row 2 (WS): Ch 1. Sc in BLO across. Turn. (38, 42, 46 sc)
Row 3 (RS): Ch 1. Sc in BLO across. Turn. (38, 42, 46 sc)
Rows 4 through 20 (21, 22): Repeat Rows 2 and 3. (38, 42, 46 sc)
Armhole Shaping
Row 21 (22, 23): Ch 1. Sl st across first 4 sts. Ch 1. Sc in BLO across until 4 sts remain. Leave last 4 sts unworked. Turn. (30, 34, 38 sc)
Row 22 (23, 24): Ch 1. Sc2tog. Sc in BLO across until 2 sts remain. Sc2tog. Turn. (28, 32, 36 sc)
Row 23 (24, 25): Ch 1. Sc2tog. Sc in BLO across until 2 sts remain. Sc2tog. Turn. (26, 30, 34 sc)
Rows 24 through 31 (25 through 32, 26 through 34): Ch 1. Sc in BLO across. Turn. (26, 30, 34 sc)
Row 32 (33, 35): Ch 1. Sc in BLO across. Turn. (26, 30, 34 sc)
Row 33 (34, 36): Ch 1. Sc in BLO across. Fasten off. (26, 30, 34 sc)
Note: The back panel does not have a center neckline cut-out. The full top edge becomes the back neck and strap attachment zone.
Button Placement: With RS of back panel facing, measure and mark two positions 2.5 inches / 6.5 cm from each outer edge along the top. These will be the button attachment points for the straps.
Checkpoint: Back bodice panel should match the front bodice panel in height. Width at top edge should be 6.5 inches / 16.5 cm (7.5 inches / 19 cm, 8.5 inches / 21.5 cm).
Full-Length Straps (Make 2)
Foundation: Chain 55 (59, 63).
Row 1: Sc in 2nd ch from hook and in each ch across. Turn. (54, 58, 62 sc)
Row 2: Ch 1. Sc in BLO across. Turn. (54, 58, 62 sc)
Row 3: Ch 1. Sc in BLO across. Turn. (54, 58, 62 sc)
Row 4: Ch 1. Sc in BLO across first 3 sts. Ch 2. Skip 2 sts. Sc in BLO across remaining sts. Turn. (54, 58, 62 sc total, with 2-st button opening)
Row 5: Ch 1. Sc in BLO across until ch-2 sp. Work 2 sc into ch-2 sp. Sc in BLO to end. Turn. (54, 58, 62 sc)
Row 6: Ch 1. Sc in BLO across. Fasten off, leaving a long tail for seaming. (54, 58, 62 sc)
Each strap is 6 rows tall and approximately 13.5 inches / 34 cm (14.5 inches / 37 cm, 15.5 inches / 39 cm) long.
Bow Attachment Point: On Row 2 of each strap, mark the position 1 inch / 2.5 cm from one short end (this is the front end where you will attach the bow later).
Skirt
The skirt is worked in joined rounds from the waist edge, going downward toward the hem. After seaming the bodice side seams, you will pick up stitches along the bottom edge of both bodice panels combined.
Important Size Adjustments for Clean Math:
To ensure the increase rounds and scallop border work out evenly, adjust your pickup counts as follows:
Waist Pickup Round: With RS of joined bodice facing, join Color A at right side seam. Work sc evenly along entire bottom edge of bodice. Join with sl st to first sc. Do not turn. (76, 80, 88 sc)
Round 1: Ch 1. Sc in BLO of each st around. Join with sl st to first sc. (76, 80, 88 sc)
Round 2 (Increase Round): Ch 1. (Sc in next 3 sts, inc in next st) around. Join. (95, 100, 110 sc)
Round 3: Ch 1. Sc in BLO of each st around. Join. (95, 100, 110 sc)
Round 4: Ch 1. Sc in BLO of each st around. Join. (95, 100, 110 sc)
Round 5 (Increase Round): Ch 1. (Sc in next 4 sts, inc in next st) around. Join. (114, 120, 132 sc)
Round 6: Ch 1. Sc in BLO of each st around. Join. (114, 120, 132 sc)
Round 7: Ch 1. Sc in BLO of each st around. Join. (114, 120, 132 sc)
Round 8 (Increase Round): Ch 1. (Sc in next 5 sts, inc in next st) around. Join. (133, 140, 154 sc)
Rounds 9 through 18: Ch 1. Sc in BLO of each st around. Join. (133, 140, 154 sc)
For 2T and 3T, add 2 and 4 additional plain rounds respectively before the hem border to achieve target skirt length.
Checkpoint: At this point the skirt circumference at the hem should be approximately 33 inches / 84 cm (35 inches / 89 cm, 38.5 inches / 98 cm).
Hem Scallop Border
The scallop stitch requires a stitch count divisible by 3. Work an adjustment round as follows:
Adjustment Round for 12-18M: Ch 1. Sc in BLO across first 65 sts, inc, sc in next 2 sts, inc, sc in BLO across remaining 66 sts. Join. (135 sc)
Adjustment Round for 2T: Ch 1. Sc in first 70 sts, inc, sc in remaining 70 sts. Join. (141 sc)
Adjustment Round for 3T: Ch 1. Sc in first 51 sts, inc, sc in next 51 sts, inc, sc in remaining 52 sts. Join. (156 sc)
Hem Scallop Border Round: Ch 1. Work as follows: (Sl st into next st, ch 1, work 5 dc into next st, skip 1 st) around. After final shell, sl st into first sl st to join. Fasten off. (45, 47, 52 scallop shells)
Patch Pockets (Make 2)
Foundation: Chain 16 (17, 18).
Row 1: Sc in 2nd ch from hook and in each ch across. Turn. (15, 16, 17 sc)
Rows 2 through 11: Ch 1. Sc in BLO across. Turn. (15, 16, 17 sc)
Row 12 (all sizes): Ch 1. Sc2tog as needed to reach 15 sts total. Sc across remaining sts. Turn. (15 sc)
Pocket Top Border (Row 13): Ch 1. Work (sl st, ch 1, 5 dc into next st, skip 1 st) across. End with sl st. Fasten off. (5 scallop shells)
Pocket Button: Sew one wooden button to center of each pocket, approximately 1 row from top. The button is decorative only.
Pocket Placement: Position pockets on front skirt, centering each one on the left and right front quarter, approximately 1 inch / 2.5 cm above the hem scallop. Whipstitch along the three non-scalloped sides.
Bunny Head Applique
Worked in continuous rounds with E-4 / 3.5 mm hook and Color A. Use a stitch marker to track round beginnings.
Round 1: Magic ring. Work 6 sc into ring. Pull ring closed. (6 sc)
Round 2: Inc in each st around. (12 sc)
Round 3: (Sc in next st, inc in next st) around. (18 sc)
Round 4: (Sc in next 2 sts, inc in next st) around. (24 sc)
Round 5: (Sc in next 3 sts, inc in next st) around. (30 sc)
Round 6: (Sc in next 4 sts, inc in next st) around. (36 sc)
Round 7: (Sc in next 5 sts, inc in next st) around. (42 sc)
Rounds 8 through 12: Sc in each st around. (42 sc)
Round 13: (Sc in next 5 sts, sc2tog) around. (36 sc)
Round 14: (Sc in next 4 sts, sc2tog) around. (30 sc)
Insert safety eyes between Rounds 9 and 10, spaced about 6 stitches apart. If using embroidery floss instead, wait until after stuffing to embroider the eyes.
Round 15: (Sc in next 3 sts, sc2tog) around. (24 sc)
Begin stuffing the bunny head firmly with fiberfill.
Round 16: (Sc in next 2 sts, sc2tog) around. (18 sc)
Round 17: (Sc in next st, sc2tog) around. (12 sc)
Add more stuffing as needed.
Round 18: Sc2tog around. (6 sc)
Fasten off, leaving a long tail. Thread through remaining stitches and pull tight to close. Weave in end.
Use pink embroidery floss to stitch a small triangle nose and optional rosy cheeks onto the bunny face.
Bunny Ears (Make 2)
Worked in continuous rounds with E-4 / 3.5 mm hook and Color A.
Round 1: Magic ring. Work 6 sc into ring. Pull ring closed. (6 sc)
Round 2: (Sc in next st, inc in next st) around. (9 sc)
Round 3: Sc in each st around. (9 sc)
Round 4: (Sc in next 2 sts, inc in next st) around. (12 sc)
Rounds 5 through 10: Sc in each st around. (12 sc)
Round 11: (Sc in next 2 sts, sc2tog) around. (9 sc)
Fasten off, leaving a long tail for attaching. Do not stuff the ears. Pinch the base flat and sew onto the top of the bunny head, spacing them about 1 inch apart.
Bow Embellishments (Make 2)
With G-6 / 4.0 mm hook and Color A:
Foundation: Chain 9.
Rows 1 through 6: Sc in 2nd ch from hook and in each ch across. Turn. (8 sc)
Fasten off, leaving a long tail. This creates a small rectangle. Pinch the center together and wrap the tail around the middle several times to create a bow shape. Secure with a few stitches. Attach one bow to each strap at the marked position near the front.
Assembly Instructions
1. Seam bodice sides: Place front and back bodice panels with right sides together. Whipstitch or mattress stitch the side seams from the underarm down to the waist edge.
2. Attach skirt: Work the waist pickup round directly onto the bottom edge of the joined bodice as described in the Skirt section.
3. Attach straps: Sew the front end of each strap (the end without the buttonhole) to the corresponding strap base on the front bodice panel. Try the dress on the child or a similar-sized doll to determine whether straps should cross at the back or run straight. Mark button placement on the back bodice panel and sew buttons securely.
4. Attach pockets: Position and whipstitch pockets to front skirt as described.
5. Attach bunny head: Center the stuffed bunny head on the front bodice, just below the neckline. Whipstitch in place around the base, securing firmly.
6. Attach bows: Sew one bow to each strap near the front attachment point.
7. Weave in all remaining ends and block the finished dress lightly if desired.
Helpful Tips for Success
Tension matters: Because this is a garment, consistent tension throughout is essential for proper fit. If your gauge changes as you work, the bodice and skirt may not align properly.
Try it on as you go: If possible, have the child try on the bodice after seaming the sides but before attaching the skirt. This allows you to adjust strap length and check fit.
Safety eyes versus embroidery: For babies and young toddlers who may put things in their mouths, embroidered eyes are the safer choice. Safety eyes are secure when properly installed, but embroidered features eliminate any choking hazard completely.
Blocking: A light steam block or wet block will even out your stitches and help the scallop border lay flat and pretty.
Washing: If made with acrylic yarn as recommended, this dress is machine washable on a gentle cycle. Lay flat to dry to maintain shape.
Closing Thoughts
Thank you so much for choosing this bunny pinafore toddler dress pattern for your next crochet project. I truly hope you enjoy making it as much as I enjoyed designing it. The combination of techniques, from the textured BLO fabric to the sweet amigurumi bunny face, creates something really special that any little one would be lucky to wear.
If you make this dress, I would absolutely love to see it! Tag me on Instagram or share your finished project on Facebook. Seeing your creations brings me so much joy and inspires other makers in our community.
Go ahead and save this pattern to your Pinterest boards so you can find it easily when you are ready to start. And please drop a comment below if you have any questions or just want to share how your dress turned out. Happy crocheting, friend!
You Might Also Like
- Coral Reef Summer Tote Free Crochet Pattern
- Dusty Rose Boho Crochet Three-Piece Set Free Pattern
- Strawberry Bat Amigurumi Free Crochet Pattern
- Pastel Rainbow Granny Square Bucket Bag Free Crochet Pattern