
This is THE project that will make everyone think you spent months learning advanced techniques. I’m talking a full coordinating outfit, head to toe gorgeous, and you can absolutely make this! The halter crop top takes about 8 to 12 hours, the skirt around 14 to 18 hours, and the kimono cardigan between 20 to 28 hours. That’s roughly 42 to 58 hours of total crafting time for three stunning pieces you’ll wear constantly.
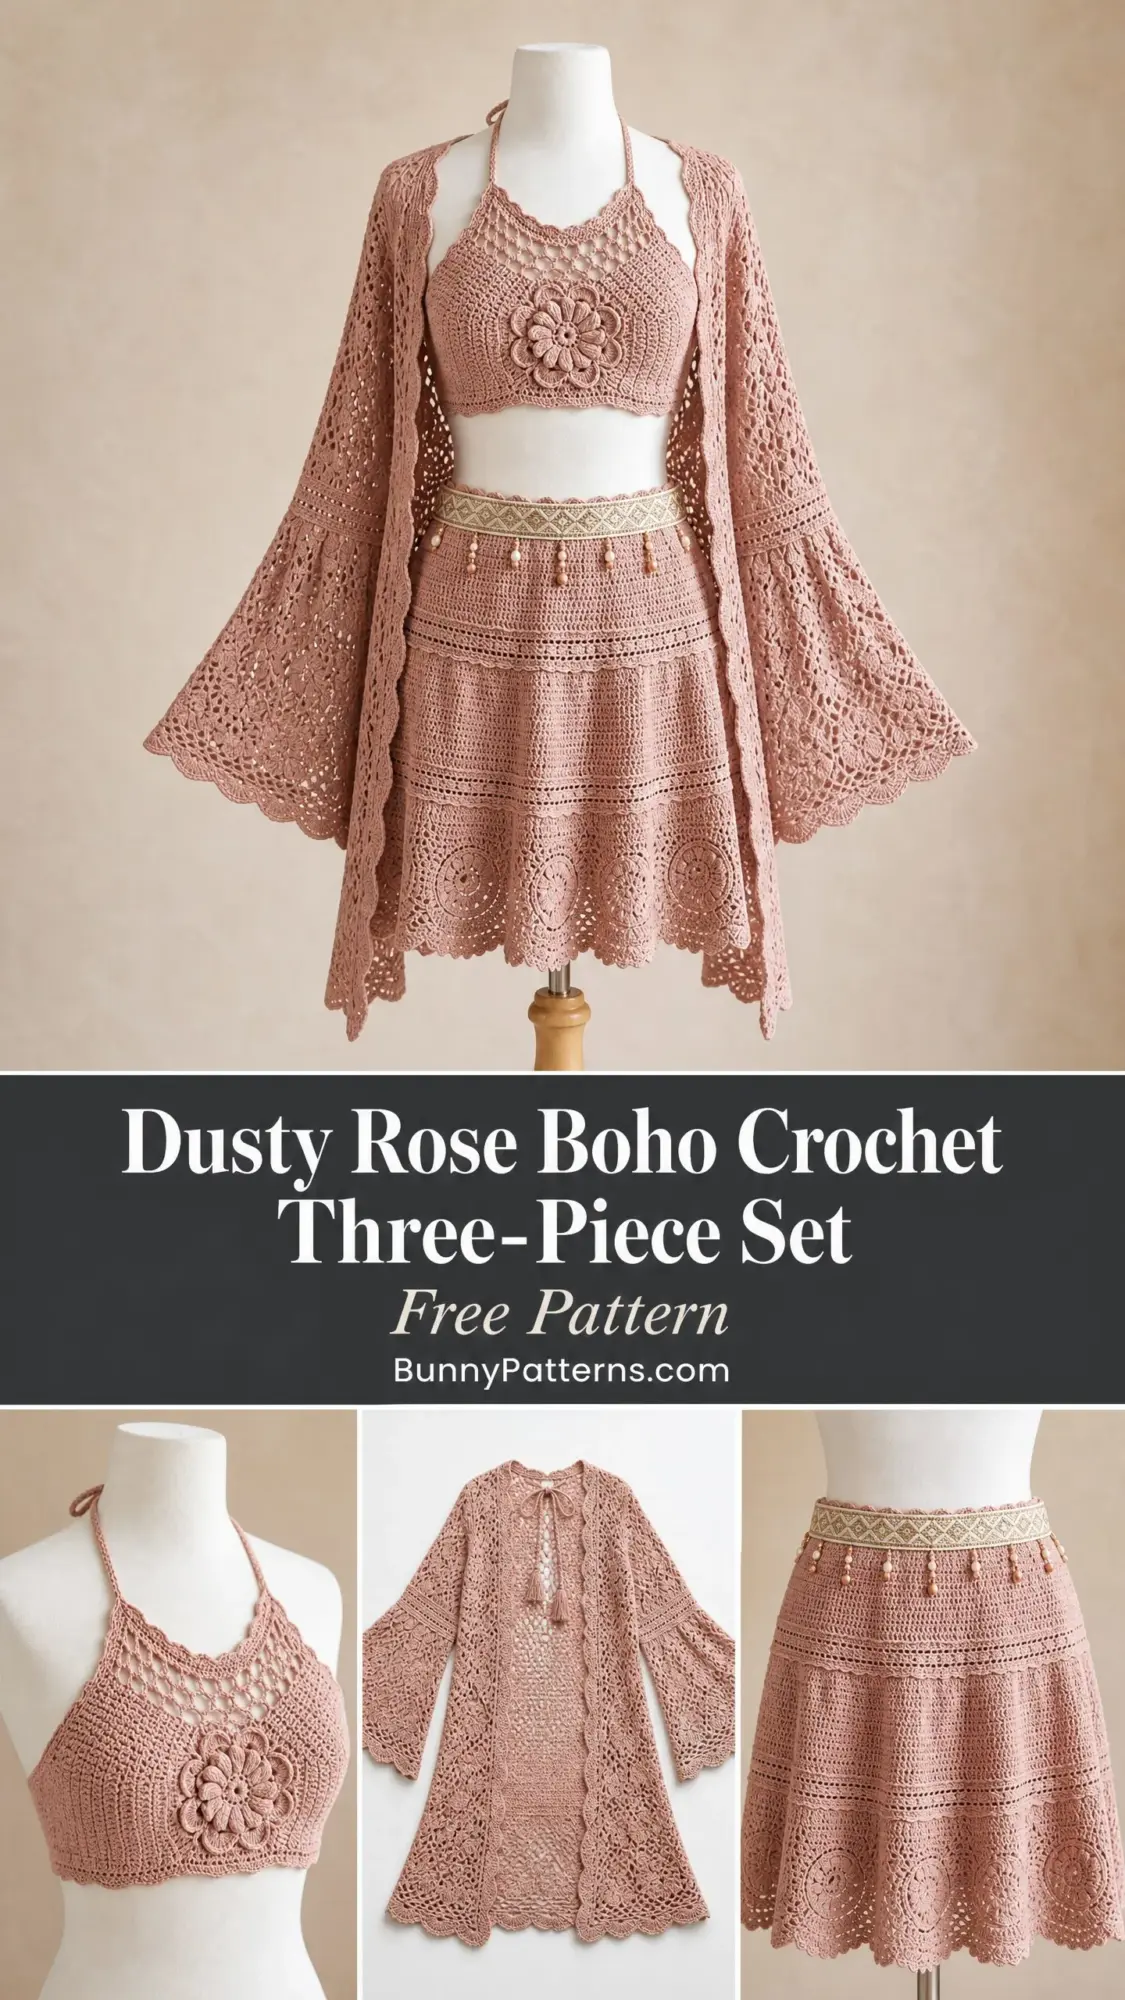
Trust me when I say this bohemian set looks way more complicated than it actually is. If you’ve completed a couple of garments before, you have the skills to pull this off. The lace patterns are repetitive once you get going, and I’ll walk you through every single stitch.
This makes an incredible gift for a festival lover, beach vacation enthusiast, or anyone who appreciates that effortless boho aesthetic. Or keep it for yourself. I won’t judge!
Why This Dusty Rose Boho Set Works So Well
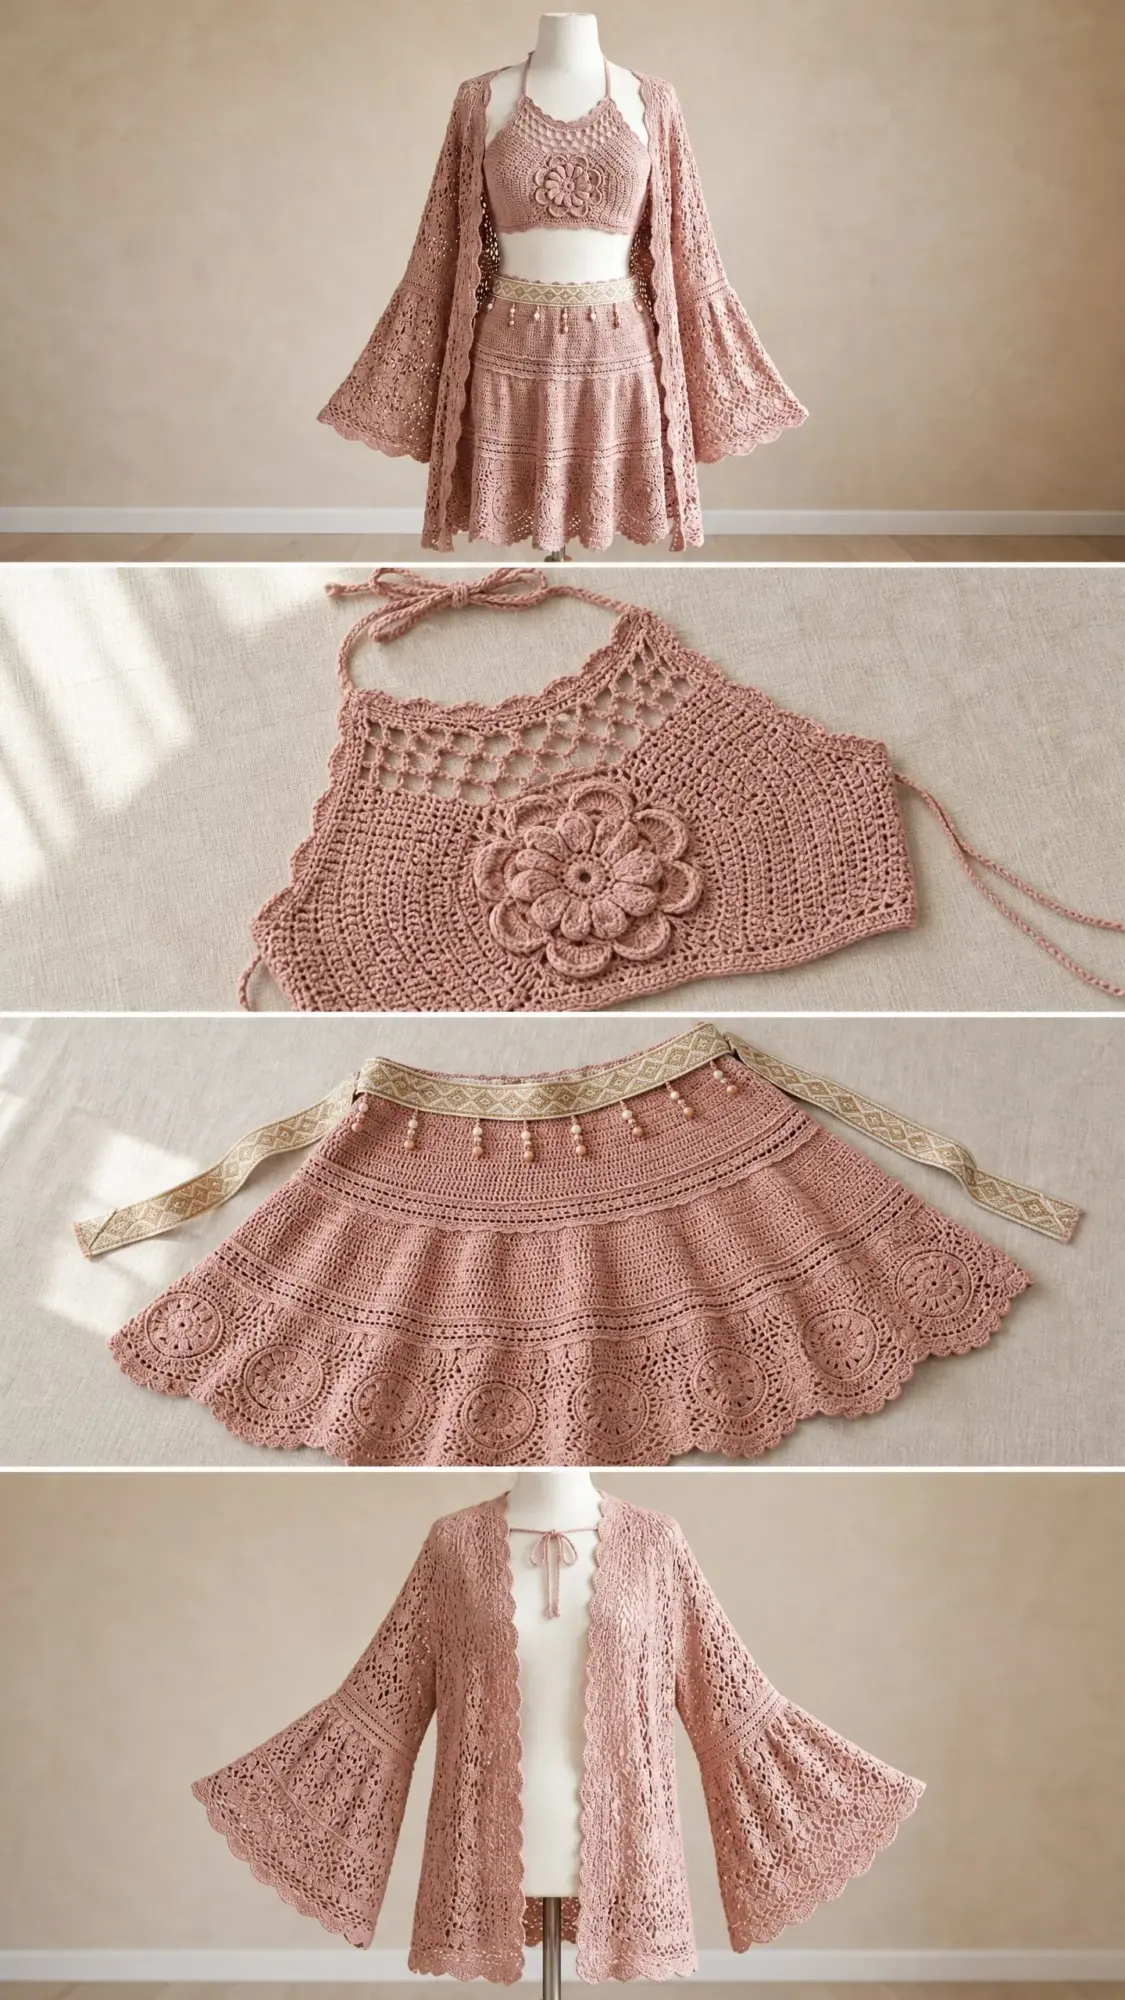
The beauty of this three-piece crochet pattern lies in its versatility. Each piece, the halter top, tiered skirt, and bell-sleeve kimono, works beautifully on its own or together as a complete look. The dusty rose color feels romantic and modern without being too sweet.
The construction uses a combination of techniques that create visual interest. You’ll work with lace stitch patterns, granny square flower motifs, and scalloped edging throughout. These elements repeat across all three pieces, which ties the whole set together cohesively.
I designed this for size Small/Medium (US size 4/6), but I’ve included detailed customization tips for each piece so you can adjust the fit to your measurements.
Materials You’ll Need
Gathering your supplies before you start makes the whole process smoother. Here’s everything you’ll need for this crochet tutorial:
Yarn:
Approximately 1,800 yards (1,645 meters) of DK weight (light weight, #3) 100 percent cotton yarn in dusty rose
Yarn Suggestions:
Choose a smooth, mercerized cotton for the best drape. Avoid linen blends for your first attempt since they have less stretch.
Hooks:
Notions:
Gauge (Don’t Skip This!)
I know checking gauge isn’t the exciting part, but for fitted garments like these, it really matters. Using your primary E-4 / 3.5 mm hook and DK cotton:
If your swatch is too big, try a smaller hook. Too small? Go up a hook size. Taking ten minutes now saves hours of frustration later.
Abbreviations and Stitch Definitions
Let me break down every abbreviation you’ll encounter. I’ll explain each one in plain English so you know exactly what to do.
ch = chain: Wrap yarn over hook and pull through the loop on your hook
sl st = slip stitch: Insert hook, yarn over, pull through both the stitch and the loop on your hook in one motion
sc = single crochet: Insert hook, yarn over, pull up a loop (2 loops on hook), yarn over, pull through both loops
hdc = half double crochet: Yarn over, insert hook, pull up a loop (3 loops on hook), yarn over, pull through all 3 loops
dc = double crochet: Yarn over, insert hook, pull up a loop (3 loops on hook), yarn over, pull through 2 loops, yarn over, pull through remaining 2 loops
tr = treble crochet: Yarn over twice, insert hook, pull up a loop, (yarn over, pull through 2 loops) three times
sk = skip: Pass over the indicated stitch without working into it
sp = space: The gap created by chain stitches
st/sts = stitch/stitches
rep = repeat
pm = place marker
yo = yarn over: Wrap yarn over your hook from back to front
MR = magic ring: An adjustable starting loop for working in the round
sc2tog = single crochet two together (a decrease): Insert hook in next stitch, pull up loop, insert hook in next stitch, pull up loop, yarn over and draw through all 3 loops
FO = fasten off
Special Stitches Explained Step by Step
These special stitches appear throughout all three pieces. Practice them on a swatch first if they’re new to you.
Shell Stitch
Work 5 double crochet stitches all in the same stitch or space. This creates one decorative fan-shaped unit that’s central to the lace pattern.
V-Stitch
Work (double crochet, chain 2, double crochet) all in the same stitch or space. The chain 2 in the middle creates a small gap that adds to the lacy look.
Picot
Chain 3, then slip stitch into the first chain of that chain-3 you just made. This creates a tiny decorative loop that looks like a small bump along edges.
Scallop Edge
This decorative edge must be worked on a stitch count that’s a multiple of 6 plus 1. Here’s how:
1. Slip stitch into first stitch
2. Chain 3 (counts as double crochet)
3. Work 2 double crochet into same stitch
4. Skip 2 stitches
5. Slip stitch into next stitch
6. Skip 2 stitches
7. Work 3 double crochet into next stitch
8. Repeat steps 4 through 7 across
Cluster Stitch
1. Yarn over, insert hook in stitch, pull up loop, yarn over, draw through 2 loops (leaving one incomplete double crochet)
2. Repeat step 1 two more times in the same stitch (4 loops on hook)
3. Yarn over and draw through all 4 loops to close
Puff Stitch
1. Yarn over, insert hook in stitch, pull up a tall loop (about half an inch)
2. Repeat step 1 three more times in same stitch (9 loops on hook)
3. Yarn over and draw through all 9 loops
4. Chain 1 to lock it in place
Flower Motif
This gorgeous centerpiece adorns the halter top. It’s worked in rounds.
Round 1: Magic ring, chain 3 (counts as double crochet), work 11 double crochet into ring, join with slip stitch to top of beginning chain-3. (12 dc)
Round 2: Chain 1, single crochet in same stitch, (chain 3, skip 1 stitch, single crochet in next stitch) 5 times, chain 3, join with slip stitch to first single crochet. (6 chain-3 loops)
Round 3: Slip stitch into first chain-3 space, chain 1, work (single crochet, half double crochet, 3 double crochet, half double crochet, single crochet) in each chain-3 space around, join with slip stitch. (6 petals)
Round 4: Working behind the petals you just made, slip stitch to the base single crochet of Round 2, (chain 5, single crochet into next base single crochet of Round 2) around. (6 chain-5 loops)
Round 5: Work (single crochet, half double crochet, 5 double crochet, half double crochet, single crochet) in each chain-5 space around, join with slip stitch. (6 larger petals)
Fasten off leaving a 12-inch tail for sewing.
Lace Panel Repeat
This pattern requires a stitch count that’s a multiple of 10.
Row 1 (Right Side): Double crochet in first stitch, (skip 2, shell in next stitch, skip 2, V-stitch in next stitch, skip 2, shell in next stitch, skip 1, double crochet in next stitch) across.
Row 2 (Wrong Side): Chain 3, turn, double crochet in first double crochet, (shell in chain-2 space of V-stitch, V-stitch in center double crochet of shell) across, ending double crochet in top of turning chain.
Repeat Row 2 for the lace panel pattern.
Granny Square Base
Used for the skirt hem panel.
Round 1: Magic ring, chain 3 (counts as double crochet), 2 double crochet, (chain 2, 3 double crochet) 3 times, chain 2, join with slip stitch to top of beginning chain-3. (4 clusters of 3 dc, 4 chain-2 corner spaces)
Round 2: Slip stitch to corner space, chain 3, (2 double crochet, chain 2, 3 double crochet) in same corner space, chain 1, (3 double crochet, chain 2, 3 double crochet) in each remaining corner space, chain 1, join. (8 clusters of 3 dc, 4 chain-2 corner spaces, 4 chain-1 spaces)
Round 3: Slip stitch to corner space, chain 3, (2 double crochet, chain 2, 3 double crochet) in same space, chain 1, 3 double crochet in chain-1 space, chain 1, (3 double crochet, chain 2, 3 double crochet) in corner space, chain 1, 3 double crochet in chain-1 space, chain 1, repeat around, join. (12 clusters of 3 dc)
Fasten off. Each completed square measures approximately 3 inches / 7.5 cm.
Finished Measurements
Halter Top:
Skirt:
Kimono:
Pattern Notes Before You Begin
All three pieces are worked separately and can be worn independently. This is perfect because you can complete one piece at a time and wear it while working on the next!
The halter top is worked from the bottom band upward in joined rounds, then the cups are shaped individually in flat rows.
The skirt is worked in joined rounds from the waist down, with the lace hem panel added separately.
The kimono is worked flat in panels: two front panels, one back panel, and two sleeves. These are then seamed at shoulders and sides.
When joining rounds, always join with a slip stitch to the top of the beginning chain unless I tell you otherwise.
Turning chain rules:
Block all pieces before seaming! This step makes a huge difference in fit and drape.
Use stitch markers at the beginning of each round and at increase/decrease points. Your future self will thank you.
Piece 1: Halter Crop Top
Section A: Bottom Band
Using D-3 / 3.25 mm hook, chain 133. Join with slip stitch to form a ring, being careful not to twist.
Round 1: Chain 1, single crochet in each chain around, join. (132 sc)
Round 2: Chain 1, single crochet in each stitch around, join. (132 sc)
Round 3: Chain 1, single crochet in each stitch around, join. (132 sc)
Switch to E-4 / 3.5 mm hook.
Section B: Lace Body (Bodice)
Your 132-stitch count supports 13 full lace repeats (13 x 10 = 130 stitches) plus 2 border double crochet stitches.
Round 4: Chain 3 (counts as double crochet), double crochet in next stitch, (skip 2, shell in next stitch, skip 2, V-stitch in next stitch, skip 2, shell in next stitch, skip 1, double crochet in next stitch) 13 times, skip last stitch, join with slip stitch to top of beginning chain-3. (13 shells on each shell row, 13 V-stitches, plus 2 border dc)
Check that you have 13 V-stitches evenly placed before continuing.
Round 5: Chain 3, double crochet in same join space, (shell in chain-2 space of each V-stitch, V-stitch in center double crochet of each shell) 13 times, join. (pattern continues)
Rounds 6, 7, and 8: Repeat Round 5.
After Round 8, the bodice should measure approximately 4 inches / 10 cm tall from the bottom of the lace section.
Section C: Divide for Cups
The bodice is now divided in half: 66 stitches per half (front and back). You’ll work the front cup section in flat rows.
Setup: Slip stitch across first 33 stitches to reach center front. Place marker. The next 66 stitches will form the front panel.
Front Panel (worked flat):
Row 1 (RS): Chain 3, double crochet in same stitch, work lace pattern (shell, V-stitch sequence) across 66 stitches, end with double crochet in last stitch, turn.
Row 2 (WS): Chain 3, work lace pattern across, turn.
Row 3: Chain 3, work lace pattern across, turn.
Decrease rows for cup shaping:
Row 4: Chain 3, skip first 2 stitches, work lace pattern to last 3 stitches, skip 2, double crochet in last stitch, turn. (62 sts)
Row 5: Work even in lace pattern, turn. (62 sts)
Row 6: Repeat Row 4 decrease. (58 sts)
Row 7: Work even, turn. (58 sts)
Row 8: Repeat Row 4 decrease. (54 sts)
Divide for two individual cups:
Row 9: Work lace pattern across first 27 stitches only, turn. (27 sts, right cup)
Rows 10 to 14: Work even in lace pattern on these 27 stitches, turn after each row. (27 sts)
Row 15: Chain 1, sc2tog, work to last 2 stitches, sc2tog. (25 sts)
Row 16: Work even. (25 sts)
Row 17: Chain 1, sc2tog, work to last 2 stitches, sc2tog. (23 sts)
Row 18: Work even. (23 sts)
Row 19: Chain 1, sc2tog, sc2tog, work to last 4 stitches, sc2tog, sc2tog. (19 sts)
Row 20: Work even. (19 sts)
Row 21: Chain 3, sc2tog, sc2tog, work to last 4 stitches, sc2tog, sc2tog, double crochet in last stitch. (15 sts)
Row 22: Work even. (15 sts)
Row 23: Chain 1, sc2tog, work to last 2 stitches, sc2tog. (13 sts)
Fasten off.
Rejoin yarn at center of Row 8 for left cup. Repeat Rows 9 through 23 in mirror image.
Checkpoint: Each cup should measure approximately 4.5 inches / 11.5 cm tall and approximately 5.5 inches / 14 cm wide at the base. Total halter front height from band to cup top should be approximately 9 inches / 23 cm.
Flower Motif Attachment
Work the Flower Motif special stitch through Round 5. Block the flower flat. Sew securely to the center of the front panel between the two cups, centered at approximately Row 4 of the front panel.
Section D: Halter Neck Ties
Join yarn at top corner of right cup. Chain 90. Fasten off.
Join yarn at top corner of left cup. Chain 90. Fasten off.
These chains form the halter ties that cross at the back of the neck. At the end of each chain, work a puff stitch and fasten off securely to prevent unraveling.
Section E: Top Edging
Using D-3 / 3.25 mm hook, join yarn at upper edge of right cup. Work single crochet evenly along top edge of each cup, then work Scallop Edge along entire upper cup edge. Fasten off.
Work Scallop Edge along the bottom band edge of the halter using D-3 hook.
Back Panel
Rejoin yarn at right side of back panel (the 66 back stitches that were set aside).
Row 1: Chain 1, single crochet across 66 stitches, turn. (66 sc)
Rows 2 to 5: Chain 1, single crochet across, turn. (66 sc)
Fasten off. This creates the back band that anchors the halter.
Work Scallop Edge along top edge of back band using D-3 hook.
Back neck ties: Join yarn at upper right corner of back band. Chain 90. Fasten off. Join yarn at upper left corner of back band. Chain 90. Fasten off.
These ties cross and tie at the neck with the front ties. String 1 pearl bead onto each tie at approximately 2 inches / 5 cm from end and knot to secure.
Halter Top Size Customization
To adjust bust size: Each 10-stitch increase or decrease in the foundation round adds or removes approximately 2 inches / 5 cm from the circumference. Add or remove full 10-stitch lace repeats. The foundation chain must remain a multiple of 10 plus 3 (for the join).
To adjust cup depth: Add or remove even-numbered rows before the decrease shaping rows.
Piece 2: Tiered Mini Skirt
Section A: Waistband
Using D-3 / 3.25 mm hook, chain 141. Join with slip stitch to form a ring without twisting.
Round 1: Chain 1, single crochet in each chain around, join. (140 sc)
Rounds 2, 3, and 4: Chain 1, single crochet in each stitch around, join. (140 sc)
Fold waistband in half toward inside (wrong side) creating a casing. Working through both layers, slip stitch around to close waistband, leaving a 2-inch / 5 cm opening at back.
Thread woven ribbon through casing. Pull ribbon to desired waist circumference and knot. Sew opening closed after ribbon is inserted.
The ribbon extends approximately 4 inches / 10 cm beyond each casing end to tie at center back. Attach pearl beads in groups of two every 4 inches / 10 cm along the front of the ribbon using sewing needle and thread, with each bead pair hanging on a short loop of thread approximately 0.75 inch / 2 cm.
Switch to E-4 / 3.5 mm hook.
Section B: Tier 1 (Upper Hip Section)
Round 5: Chain 3, double crochet in same stitch, 2 double crochet in next stitch, (double crochet in each of next 3 stitches, 2 double crochet in next stitch, 2 double crochet in next stitch) around, adjusting last repeat to end evenly. (175 sts)
Increase math: Begin with 140 stitches. Increase 35 stitches evenly by placing a 2 dc increase every 4th stitch.
Round 6: Chain 1, single crochet in each stitch around, join. (175 sts)
Round 7: Chain 3 (counts as dc), double crochet in each stitch around, join. (175 sts)
Round 8: Chain 1, single crochet in each stitch around, join. (175 sts)
Round 9: Chain 3, double crochet in each stitch around, join. (175 sts)
Round 10: Chain 1, single crochet in each stitch around, join. (175 sts)
Checkpoint: After Round 10, the skirt should measure approximately 4 inches / 10 cm from top of waistband. Hip circumference should measure approximately 35 inches / 89 cm.
Section C: Tier 2 (Mid Skirt) with Second Expansion
Round 11: Chain 3, (2 double crochet in next stitch, double crochet in each of next 4 stitches) 35 times, join. (210 sts)
Rounds 12 through 18: Alternate between chain 1 single crochet rounds and chain 3 double crochet rounds as follows:
Round 12: Chain 1, single crochet in each stitch around, join. (210 sts)
Round 13: Chain 3, double crochet in each stitch around, join. (210 sts)
Round 14: Chain 1, single crochet in each stitch around, join. (210 sts)
Round 15: Chain 3, double crochet in each stitch around, join. (210 sts)
Round 16: Chain 1, single crochet in each stitch around, join. (210 sts)
Round 17: Chain 3, double crochet in each stitch around, join. (210 sts)
Round 18: Chain 1, single crochet in each stitch around, join. (210 sts)
Checkpoint: After Round 18, skirt measures approximately 9 inches / 23 cm from top of waistband. The fabric should have gentle A-line flare.
Section D: Tier 3 (Hem Panel) Lace Section
Round 19: Chain 3, (skip 1, V-stitch in next stitch, skip 1, shell in next stitch) 42 times, join. (210 working stitches represented by 42 V-stitches and 42 shells in alternating sequence)
Rounds 20 through 23: Chain 3, (shell in chain-2 space of V-stitch, V-stitch in center double crochet of shell) 42 times, join. (42 shells, 42 V-stitches)
At this point the lace section measures approximately 4 inches / 10 cm. Total skirt length approximately 13 inches / 33 cm.
Section E: Granny Circle Hem Border
Work 7 Granny Square Base motifs as described in Special Stitches.
Join motifs in a strip by working the final round of each new motif, and on the side facing the previous motif, replace the chain-2 corner space joins with: chain 1, slip stitch into corresponding corner space of adjacent motif, chain 1.
Join all 7 squares into a ring by connecting the final square to the first in the same manner.
Attach the granny ring at the top edge to the bottom round of the lace tier using single crochet seaming on the wrong side.
Total skirt length with granny hem: approximately 15 inches / 38 cm.
Section F: Scallop Hem Edge
After attaching the granny ring, work one round of single crochet around the entire lower edge, adjusting to a multiple of 6 plus 1 stitches if needed. Work Scallop Edge around the hem.
Skirt Size Customization
To adjust waist: The foundation chain must be a multiple of 4. Add or subtract multiples of 4 from the foundation chain. Every 4 stitches added is approximately 0.8 inch / 2 cm of circumference.
To lengthen: Add rounds to any tier before beginning the next expansion round.
Piece 3: Bell-Sleeve Kimono Cardigan
The kimono is worked in flat panels and seamed. There are five panels: left front, right front, back, left sleeve, right sleeve.
Section A: Back Panel
Foundation: Chain 104.
Row 1 (RS): Double crochet in 4th chain from hook, double crochet in each chain across, turn. (102 dc)
Note: 102 minus 2 border stitches = 100 interior stitches. 100 divided by 10 = 10 full lace repeats.
Row 2: Chain 3 (counts as dc), double crochet in next stitch (border), (skip 2, shell in next stitch, skip 2, V-stitch in next stitch, skip 2, shell in next stitch, skip 1, double crochet in next stitch) 10 times, double crochet in top of turning chain, turn. (10 shells, 10 V-stitches)
Row 3: Chain 3, double crochet in next stitch, (shell in chain-2 space of V-stitch, V-stitch in center double crochet of shell) 10 times, double crochet in top of turning chain, turn.
Repeat Row 3 until back panel measures 28 inches / 71 cm from foundation. Fasten off.
Checkpoint: Back panel should be approximately 20 inches / 51 cm wide.
Section B: Front Panels (make 2, mirror image)
Foundation: Chain 54.
Row 1: Double crochet in 4th chain from hook, double crochet in each chain across, turn. (52 dc)
Note: 52 minus 2 border stitches = 50 interior stitches. 50 divided by 10 = 5 full lace repeats.
Row 2: Chain 3, double crochet in next stitch (border), (skip 2, shell in next stitch, skip 2, V-stitch in next stitch, skip 2, shell in next stitch, skip 1, double crochet in next stitch) 5 times, double crochet in top of turning chain, turn.
Row 3: Chain 3, double crochet in next stitch, (shell in chain-2 space of V-stitch, V-stitch in center double crochet of shell) 5 times, double crochet in top of turning chain, turn.
Repeat Row 3 until front panel measures 28 inches / 71 cm.
Front edge: Do not fasten off after the final row. Rotate and work Scallop Edge along the entire front-opening edge length. Fasten off.
Make second front panel to match.
Section C: Shoulder Seaming and Neck Shaping
Lay back panel flat. Mark center 8 inches / 20 cm of top edge for neck opening. The remaining top edges on each side are the shoulder seams: approximately 6 inches / 15 cm per shoulder.
Align front panels at shoulders. Join shoulders using single crochet seam on wrong side (hold pieces together, right sides facing each other, single crochet through both layers). Work 6 inches / 15 cm on each side. Fasten off.
Neck edge: Work one round of single crochet around entire neckline (back neck plus front neckline drops), then work Scallop Edge. Fasten off.
Section D: Sleeves (make 2)
The sleeves are worked flat as tapered rectangles with a dramatic bell flare at the cuff.
Sleeve cap foundation: Chain 62.
Row 1: Double crochet in 4th chain from hook, double crochet in each chain across, turn. (60 dc)
Upper sleeve (single crochet fabric):
Rows 1 to 6: Chain 1, single crochet across, turn. (60 sc)
Begin sleeve taper by decreasing 1 stitch each end every 4 rows:
Row 7: Chain 1, sc2tog, single crochet to last 2 stitches, sc2tog, turn. (58 sc)
Rows 8, 9, 10: Chain 1, single crochet across, turn. (58 sc)
Row 11: Chain 1, sc2tog, single crochet to last 2 stitches, sc2tog, turn. (56 sc)
Rows 12, 13, 14: Chain 1, single crochet across, turn. (56 sc)
Row 15: Chain 1, sc2tog, single crochet to last 2 stitches, sc2tog, turn. (54 sc)
Rows 16, 17, 18: Chain 1, single crochet across, turn. (54 sc)
Row 19: Chain 1, sc2tog, single crochet to last 2 stitches, sc2tog, turn. (52 sc)
Rows 20, 21, 22: Chain 1, single crochet across, turn. (52 sc)
Row 23: Chain 1, sc2tog, single crochet to last 2 stitches, sc2tog, turn. (50 sc)
Checkpoint: At Row 23, sleeve should measure approximately 9 inches / 23 cm from top. The sleeve is now 50 stitches wide.
Rows 24 to 30: Chain 1, single crochet across, turn. (50 sc)
This brings sleeve to approximately 12 inches / 30 cm.
Bell Expansion: Beginning at Row 31, increase for the bell flare by working 2 single crochet in every 5th stitch across each row until sleeve measures 22 inches / 56 cm total length. Work Scallop Edge along cuff. Fasten off.
Section E: Assembly
1. Attach sleeves to armhole openings using single crochet seam on wrong side
2. Sew side seams from underarm to hem
3. Add optional button closure at neckline if desired
4. Block entire finished garment
Blocking and Finishing Tips
Blocking transforms these pieces from "nice" to "stunning." Here’s my process:
Soak all pieces in lukewarm water with a drop of wool wash for about 15 minutes. Gently squeeze out excess water (never wring!). Lay flat on blocking mats and pin to measurements. Let dry completely before removing pins.
For the lace sections, really open up those shells and V-
You Might Also Like
- Mustard Yellow Sunshine Slipper Boots Free Crochet Pattern
- Dusty Rose Floral Granny Square Tote Free Crochet Pattern
- Sage Green Romantic Peplum Crochet Top Free Pattern
- Dusty Rose Floral Crochet Summer Boots Free Pattern