
I don’t know about you, but I have always been drawn to projects that make people stop and stare. This butterfly cape is exactly that kind of showstopper.
Get the Ad-Free PDF Pattern
You can find the free pattern below, or you can purchase the ad-free printable PDF from my shop.
Get the Printable PDF →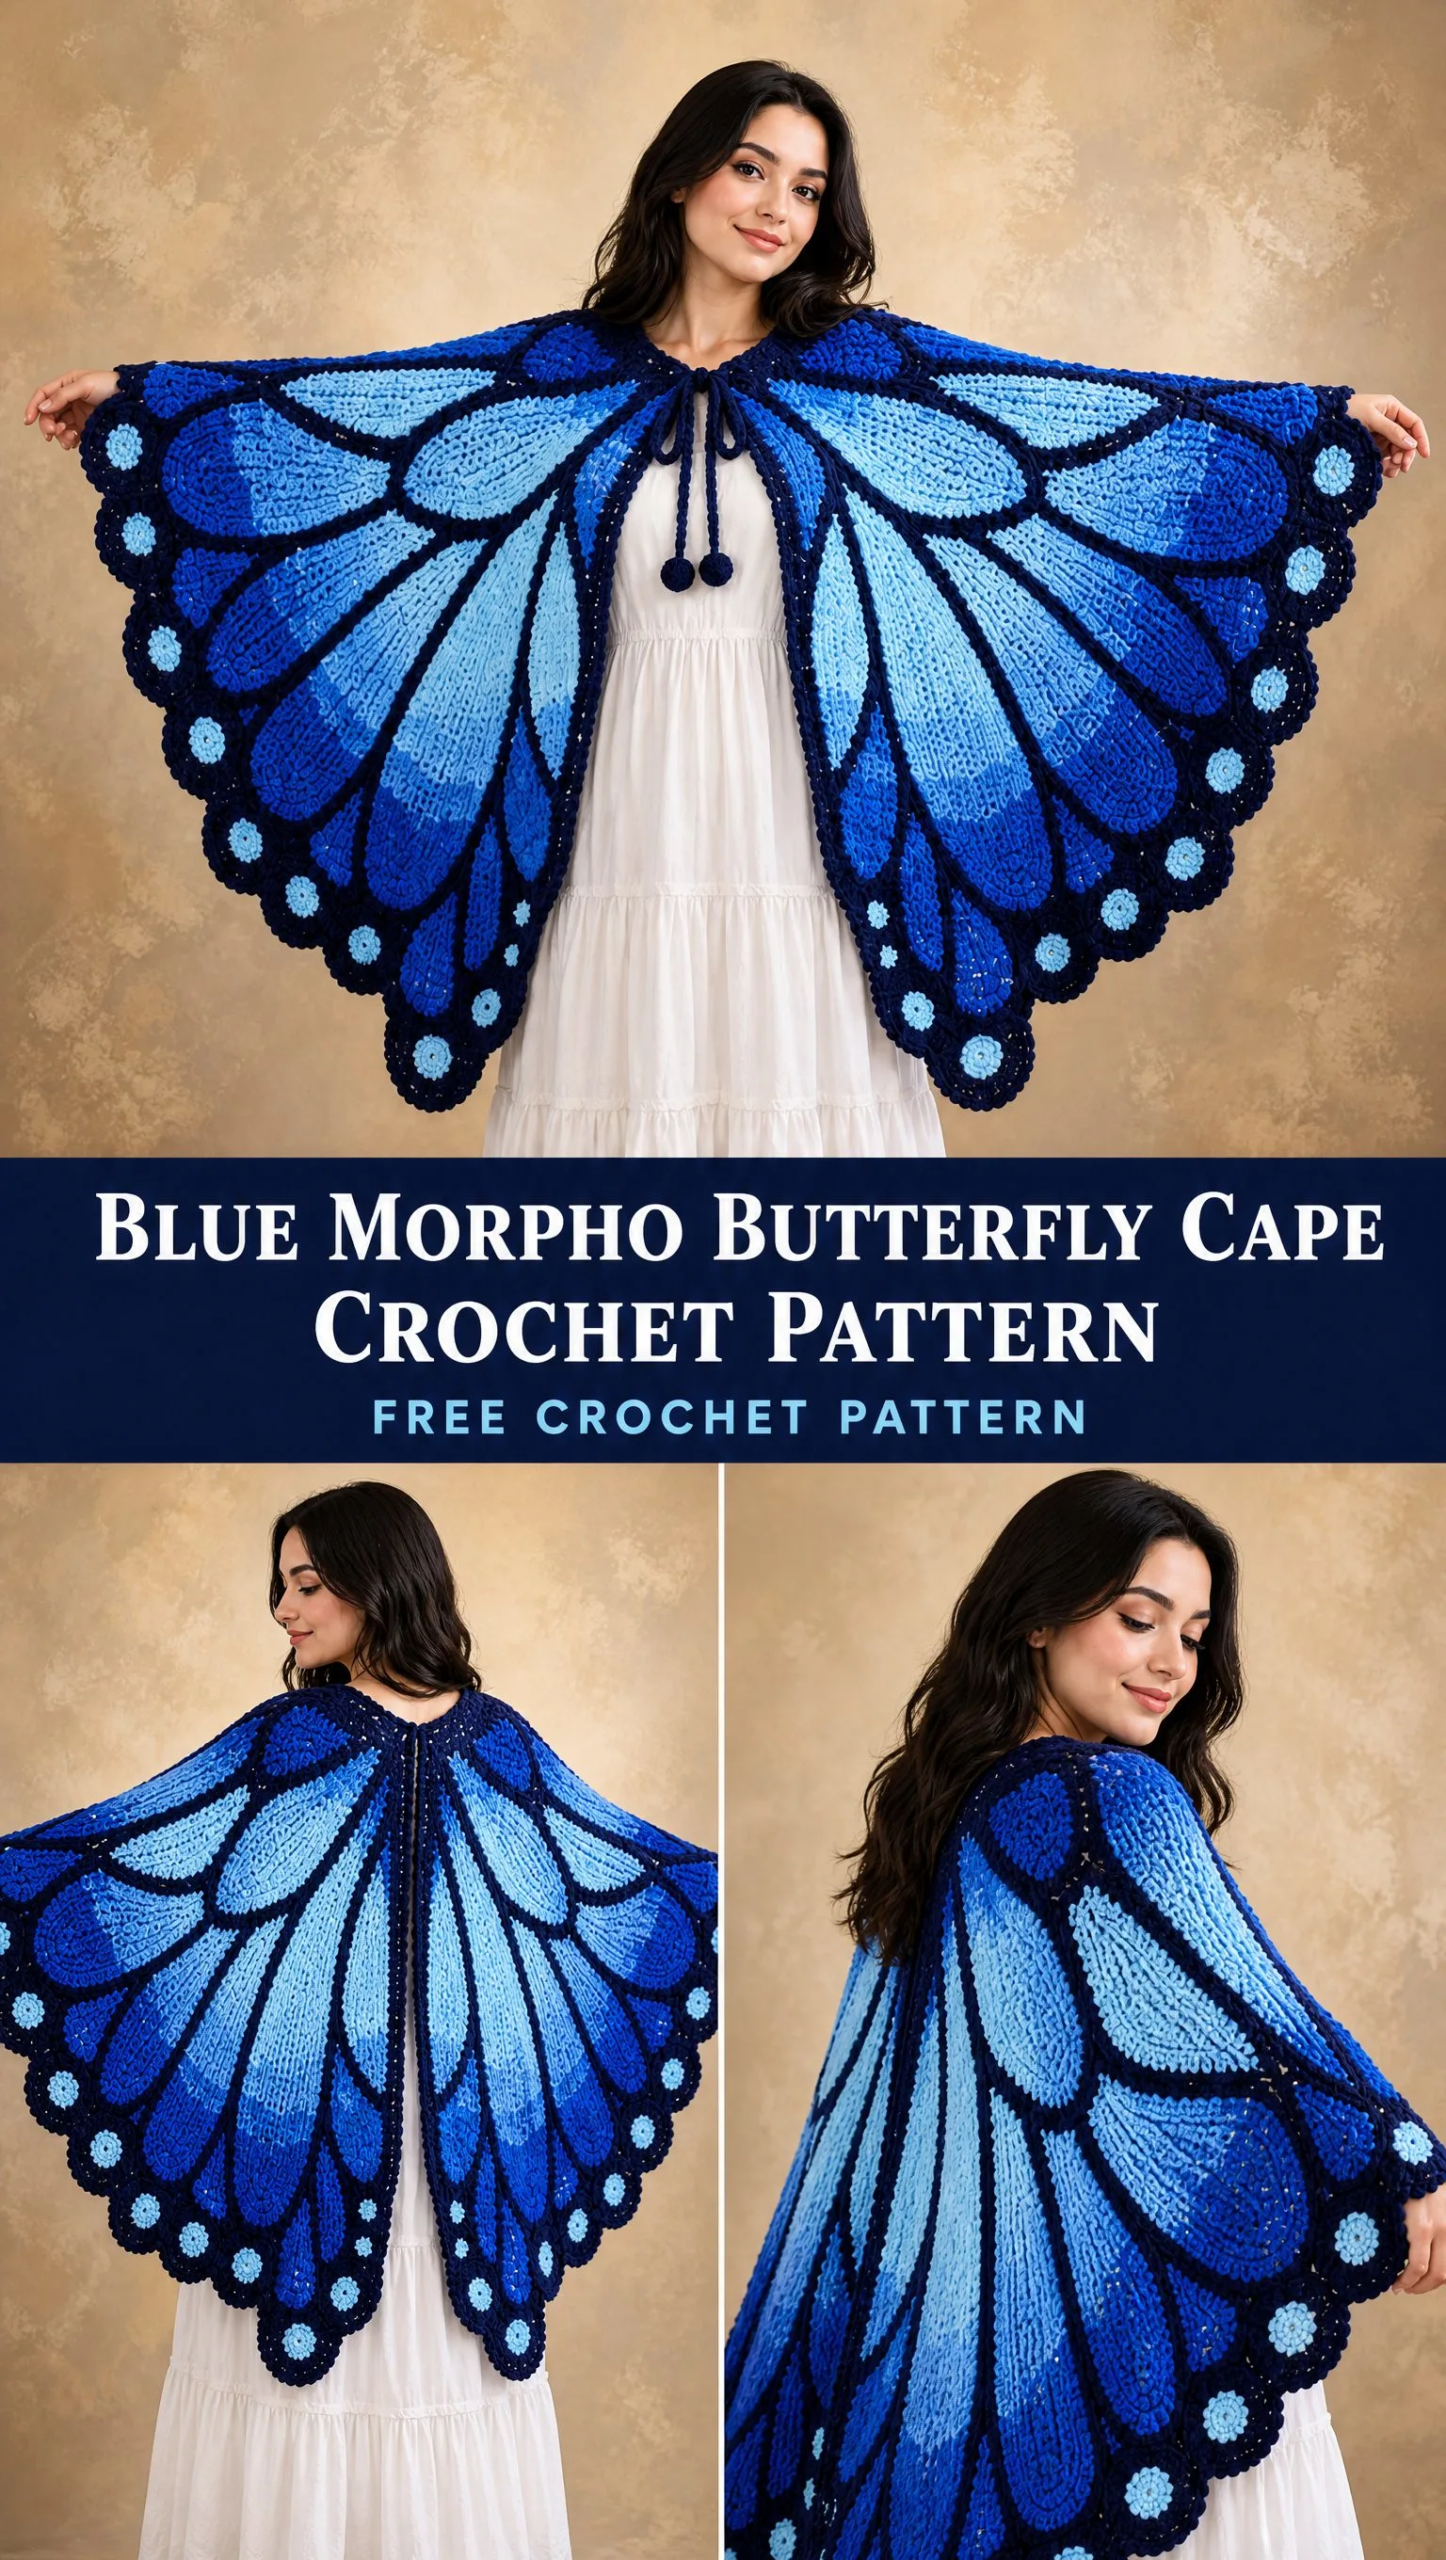
When I first saw this design, I knew I had to figure out how to make it work in crochet. The combination of bold navy veins, gradient blue cells, and that gorgeous scalloped border creates something truly wearable and artistic. All the drama of a statement piece with a construction method that is actually approachable once you break it down.
If you have been wanting to try colorwork, surface crochet, or shaping but felt intimidated, this is your sign. The techniques here are intermediate level, but I will walk you through every single step so you can create your own stunning butterfly wings.
About This Blue Morpho Butterfly Cape Pattern
This cape is inspired by the iconic Blue Morpho butterfly, famous for its brilliant iridescent blue wings edged in black. The finished piece drapes over your shoulders and opens at the front, creating the illusion of butterfly wings when you spread your arms.
The construction is clever but straightforward. You will make two mirrored wing panels, join them at the center back, add surface crochet veins for that authentic butterfly anatomy, then finish with a navy scalloped border and pale blue spots. The result is an opaque, hip length cape that spans approximately 145 to 160 cm (57 to 63 inches) from fingertip to fingertip when spread.
This is a visual reference pattern, meaning you will want to make a gauge swatch and use the measurement checkpoints throughout. Every crocheter’s tension is slightly different, and body proportions vary. Taking time to check your work against the target measurements will ensure your finished cape fits beautifully.
Skill Level
This pattern is rated intermediate to advanced beginner. You should be comfortable with basic shaping (increases and decreases), color changes, surface crochet, and seaming pieces together.
If any of those techniques sound unfamiliar, do not worry. I will explain each one as we go. The stitches themselves are simple, primarily single crochet (sc). The complexity comes from managing the shaping and color placement, not from difficult stitch patterns.
Finished Measurements
| Measurement | Target |
|---|---|
| Neck opening | 48 to 54 cm / 19 to 21 inches |
| Center back length | 63 to 68 cm / 25 to 27 inches |
| Half wingspan | 72 to 80 cm / 28 to 31.5 inches |
| Upper wing depth | 38 to 42 cm / 15 to 16.5 inches |
These measurements give you one flexible adult size. I have included adjustment notes throughout if you need to go larger or smaller.
Materials You Will Need
Yarn: Fine to medium weight matte cotton or cotton blend, approximately 1,250 to 1,500 meters (1,365 to 1,640 yards) total. A smooth, plied yarn gives the cleanest vein definition.
| Color | Amount | Use |
|---|---|---|
| Sky blue (A) | 450 to 500 m | Inner wing cells |
| Cobalt (B) | 400 to 450 m | Mid/outer wing sections and upper shoulders |
| Midnight navy (C) | 350 to 400 m | Veins, neckline, border, ties |
| Pale blue (D) | 50 to 70 m | Small border spots |
Hook: 4.0 mm (US G/6) or size needed to achieve gauge. Optional 3.5 mm hook for firmer surface crochet.
Notions: Locking stitch markers, yarn needle, scissors, flexible tape measure, rustproof pins or blocking wires, blocking mats.
Gauge
18 sc x 20 rows = 10 cm / 4 inches after wet blocking
A 10% difference in gauge can noticeably change the wingspan, so please do not skip this step. Work at least 24 sc by 24 rows, wash and block exactly as planned for the finished cape, then remeasure.
Abbreviations and Stitch Definitions
Before we dive in, let me define every abbreviation you will encounter:
Special Technique: Surface Slip Stitch
This technique creates the butterfly veins on top of your finished fabric. Hold the working yarn on the wrong side. Insert your hook from the right side to the wrong side and pull up a loop. Insert the hook at the next marked point, draw yarn through the fabric and through the loop on hook. Keep your loops relaxed so the fabric does not pucker.
Think of it like drawing on your crochet with yarn. You are creating a raised line that sits on top of the existing stitches.
Understanding the Color Map
The cape is built as two mirrored wedges. Each wing contains four long tapered visual cells separated by navy surface crochet veins. The crochet fabric itself is solid, and the cell effect comes entirely from color blocking and the overlaid veins.
| Zone | Placement | Color Plan |
|---|---|---|
| Shoulder cap | Top 8 to 10 cm nearest neck | Cobalt B, edged later with Navy C |
| Inner upper cell | Long wedge from neck toward outer upper wing | Sky A |
| Middle upper cell | Center of upper wing | Sky A grading to Cobalt B |
| Outer upper cell | Near widest outer curve | Cobalt B |
| Lower cells | Three smaller tapered lobes | Sky A at inner portions, Cobalt B toward perimeter |
| Veins/edge | All cell boundaries and perimeter | Midnight Navy C |
Gradient shortcut: If you do not want to carry multiple yarns, make clear color blocks. Use color A for the inner 55 to 60 percent of each wing, color B for the outer 40 to 45 percent, then let the navy vein lines visually blend the transition.
Step by Step Instructions
Make the Right Wing Panel
The instructions below produce one complete wing. The left wing is made as a mirror image. Place a marker in the first stitch of every right side row to help track the neckline edge.
1. Foundation and Neckline Edge
With color B, chain 63.
Row 1 (RS): Single crochet in 2nd chain from hook and across. (62 sc)
Rows 2 through 6: Chain 1, turn, sc across. (62 sc)
This firm strip sits over the shoulder and forms the top edge of the wing.
2. Upper Wing Expansion
Row 7: Chain 1, turn, inc, sc to last st, inc. (64 sts)
Row 8: Sc across. (64 sts)
Repeat Rows 7 and 8 five more times. (74 sts)
The outer edge begins rounding while the neckline edge remains stable.
3. Begin Sky Blue Inner Cell
Row 19: With color B, work 18 sc, change to color A and work to end.
Row 20: With color A, work 54 sc, change to color B for final 20 sc.
Carry unused yarn only for 2 to 3 stitches at a transition. Otherwise cut and weave ends.
4. Build the Broad Upper Wing
Rows 21 through 34: Continue in established colors. On every right side row, increase at both ends. On every wrong side row, sc even. At the same time, shift each A/B color boundary outward by 1 stitch every second row to create tapered cells. End with approximately 88 stitches.
5. Round the Outer Upper Wing
Rows 35 through 44: Work even at neckline edge. At outer edge, increase every right side row for 4 right side rows, then work 2 rows even, then decrease at outer edge every right side row for 2 right side rows. Keep the first 22 to 26 stitches near shoulder mostly in color B. Inner cells remain mostly color A.
6. Start Lower Wing Taper
Rows 45 through 50: Decrease 1 stitch at outer edge on every row. Work neckline edge even.
Rows 51 through 56: Decrease at both ends on every right side row. Work wrong side rows even. This narrows the fabric beneath the broad upper wing.
7. Form First Lower Lobe
Rows 57 through 64: Increase at outer edge on Rows 57, 59, 61, and 63. Work inner edge even.
Rows 65 through 70: Decrease at outer edge each right side row. Use color A in inner half and color B in outer half.
8. Form Second Lower Lobe
Rows 71 through 80: Repeat the previous lobe but make it 2 rows shorter. Increase outer edge on alternate right side rows for 4 increases, then decrease on alternate right side rows until the lobe curves inward.
9. Form Third Small Lower Lobe
Rows 81 through 88: Work 2 outer edge increases over first 4 rows, then 2 outer edge decreases over last 4 rows. Maintain a gentle inward slope at the neckline/center back edge by making 1 decrease on Rows 84 and 88.
10. Bottom Tip
Continue 4 to 8 rows in single crochet, decreasing 1 stitch at each edge every right side row until 18 to 22 stitches remain. Fasten off.
The finished wing should have a rounded upper half and three progressively smaller lower curves rather than a sharp triangle.
Measurement Checkpoint
Before adding any edging, block your panel lightly. It should measure about 72 to 80 cm (28 to 31.5 inches) from neckline edge to widest outer point, and 63 to 68 cm (25 to 27 inches) from shoulder top to lowest point. If it is too small, add rows in the broad upper wing section before shaping the lower lobes.
Make the Left Wing Panel
Work a second panel exactly as for the right wing, but mirror all color changes and outer edge shaping. The neckline edge must face inward when the two panels are laid side by side with right sides up.
Mirror rule: Whenever the right wing says outer edge, use the opposite edge on the left wing. Keep the same row counts and stitch counts. Lay the panels together every 10 to 12 rows to confirm symmetry.
Join the Back and Shape the Neckline
1. Block both panels lightly to the same dimensions before joining. Do not stretch the scalloped curves yet.
2. With right sides facing, align the upper inner edges. Starting about 6 to 8 cm (2.5 to 3 inches) below the neckline, seam the two panels together for 18 to 22 cm (7 to 8.5 inches) using mattress stitch in color B or C. This creates the center back seam while keeping the front open.
3. At the neckline, join color C at one front neck corner. Work 1 round of sc evenly around the entire neck opening, placing approximately 2 sc for every 3 row ends. Aim for a finished neck circumference of 48 to 54 cm (19 to 21 inches).
4. Work a second neckline row in BLO sc for subtle structure. Fasten off.
Add the Midnight Navy Butterfly Veins
The vein layout is the defining feature of this cape. Use removable markers or contrasting waste yarn to sketch every line before surface crocheting.
Main radial vein: From the neckline/center back area, mark a sweeping line toward the widest outer upper wing point.
Upper branches: Mark 3 branches from the main radial vein toward the top edge. The first branch should be short and nearly horizontal. The next two should angle outward to divide the long sky blue cells.
Lower branches: Mark 3 descending branches that terminate between the lower lobes, not at their centers.
Outer cell loops: Add shallow curved lines that follow each lobe and reconnect to a radial vein, producing elongated butterfly cell shapes.
Work the lines: With color C and a 3.5 to 4.0 mm hook, surface slip stitch over all marked lines from base outward. Keep every stitch loose enough that the cape remains flat. On thick junctions, work one short reinforcing pass only. Do not stack many layers.
For a slightly raised vein, work a second surface slip stitch line immediately beside the first on the most important branches only. This keeps the line bold without making the entire cape stiff.
Navy Scalloped Perimeter
1. Foundation edge: Join color C at one front neck corner. Work sc evenly around the entire outer perimeter to the opposite front neck corner. Along row ends, use approximately 2 sc per 3 rows. Add or skip a stitch where needed so the fabric lies flat.
2. Round 2: Chain 1, turn if needed. Sc in each stitch around, placing an increase at the deepest part of every lower lobe and 1 decrease between lobes if the edge begins to flare.
3. Scallop round: Skip 2 sts, 6 dc in next st, skip 2 sts, sl st in next st around. Where the curve is tight, use a smaller 5 dc shell. Where broad, use a 7 dc shell. Keep shell count mirrored on both wings.
4. Finish: Slip stitch neatly into first border stitch and fasten off. Steam or wet block the scallops into smooth rounded arcs.
Pale Blue Border Spots
Make 18 to 26 small spots in color D, depending on your shell count. Place one spot in approximately every second or third navy scallop, evenly mirrored across both wings.
Round 1: Magic ring, chain 1, work 8 sc in ring. Join with slip stitch.
Round 2: Chain 1, 2 sc in each stitch around. (16 sc) Join and fasten off, leaving a sewing tail.
Attach: Sew each circle centered on a navy scallop with tiny invisible stitches through the back loops. Keep spots flat. Do not stuff.
Front Neck Ties
1. With color C, join at one front neckline corner and chain 46 to 55 (about 30 to 35 cm / 12 to 14 inches). Slip stitch back along the chain for a firm cord. Fasten off.
2. Repeat at the opposite front neckline corner.
3. Optional ends: Make a tiny 8 sc ball or a 2 round flat circle in color C and sew to each tie end. Keep the tie ends light so they do not pull the neckline downward.
Final Blocking and Finishing
1. Weave in all ends on the wrong side, splitting yarn plies slightly to prevent migration.
2. Soak the cape in cool water with a small amount of wool/cotton safe wash if appropriate for your yarn. Gently press out water. Do not wring.
3. Pin the neckline to measurement first, then spread the upper wings symmetrically. Pin each lower lobe and each scallop separately.
4. Confirm the center back seam is vertical and the two wing tips sit at equal height.
5. Allow to dry completely. Remove pins and lightly finger shape the surface crochet veins so they sit raised but not puckered.
Assembly Checklist
Before you call this cape finished, run through this list:
Fit Adjustments
| If you want… | Do this |
|---|---|
| More arm coverage | Add 6 to 10 sts to the foundation strip and add 4 to 6 rows before beginning lower wing shaping |
| Shorter cape | Remove one lower lobe or remove 2 rows from each lower lobe section |
| Wider neckline | Seam fewer center back rows and work fewer neckline decreases while edging |
| Narrower neckline | Seam 2 to 4 additional center back cm, then work the neckline border more tightly |
| Stronger color gradient | Use an intermediate royal blue shade between A and B for 6 to 10 rows in the outer half of each cell |
| Lighter fabric | Use a cotton blend with more drape, but keep the same blocked gauge so shaping remains accurate |
Compact Row Map
For quick reference, here is the overall structure of each wing panel:
| Rows | Purpose | Shaping Summary |
|---|---|---|
| 1 to 6 | Shoulder foundation | 62 sc, even |
| 7 to 18 | Initial expansion | Inc both ends every RS row to approx. 74 sts |
| 19 to 34 | Broad upper wing build | Color blocking plus inc both ends every RS row to approx. 88 sts |
| 35 to 44 | Round upper outer curve | Outer edge inc then even then dec |
| 45 to 56 | Transition to lower wing | Steady outer edge taper, then both edge RS decreases |
| 57 to 70 | Lower lobe 1 | Outer inc sequence, then dec sequence |
| 71 to 80 | Lower lobe 2 | Shorter repeat of lobe 1 |
| 81 to 88 | Lower lobe 3 | Two incs, two decs, slight inner taper |
| 89+ | Bottom tip | Dec both edges every RS row to 18 to 22 sts |
Final Thoughts on This Butterfly Cape Crochet Pattern
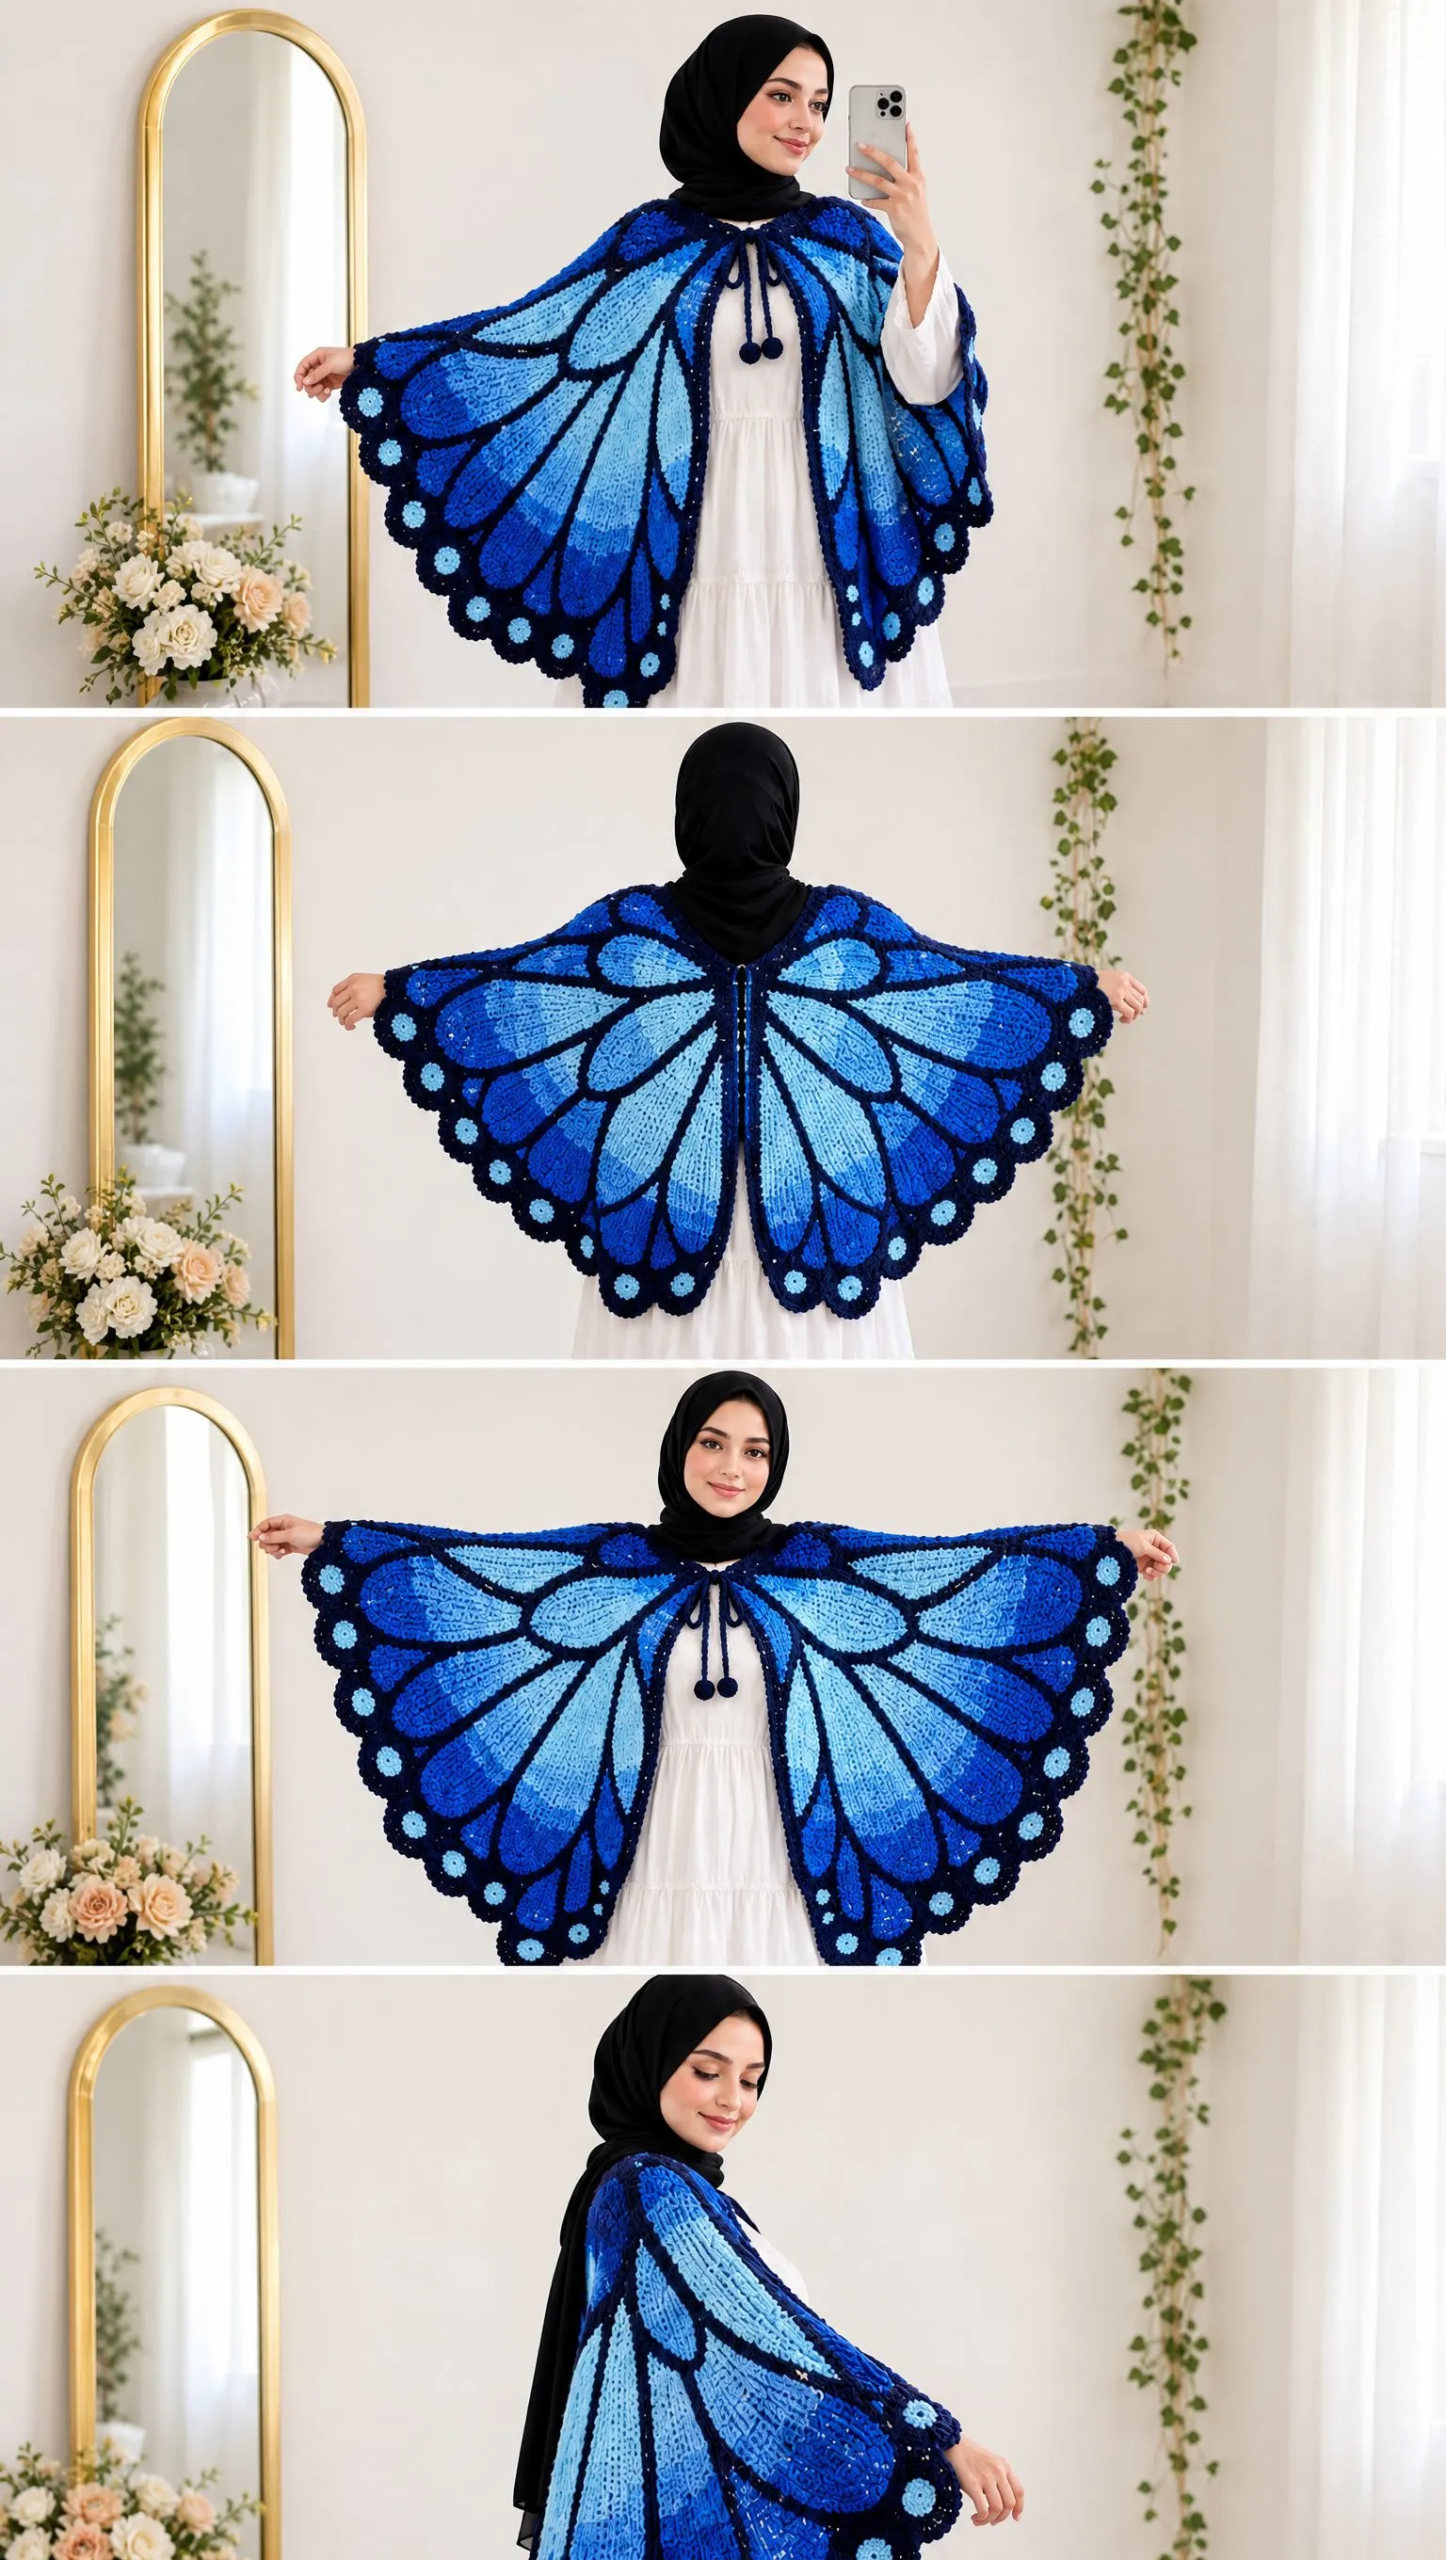
For the closest visual result to the reference images, prioritize symmetry over exact row counts. This garment is effectively a shaped textile illustration. The smooth solid crochet establishes the drape, while the surface crochet network creates the recognizable butterfly anatomy.
Here is a helpful tip: photograph the finished cape spread flat before adding the border. This lets you compare both wings and correct any asymmetry early, before you commit to the final edging.
Thank you so much for choosing this pattern. I hope you love making your Blue Morpho butterfly cape as much as I loved designing it. If you create one, I would absolutely love to see it. Tag me on Instagram or share a photo in our Facebook group.
If this pattern caught your eye, go ahead and save it to your Pinterest boards so you can find it when you are ready to start. And please drop a comment below if you make one. I love hearing about your projects and seeing your color choices.
Want a Quick & Easy Printable Version?
Get a clean, beautifully formatted PDF of this pattern — easy to follow step by step, ready to print or save on any device. No scrolling, no distractions, just the pattern.
Get the Printable PDF →You Might Also Like
- Pastel Sunset Granny Tote Bag Free Crochet Pattern
- Blush Pink Bunny Ear Hooded Coat Free Crochet Pattern
- Lavender Crochet Sandals in Modern Bedroom Free Pattern
- Lavender Daisy Granny Square Backpack Free Crochet Pattern