
When I sat down to design this backpack, I had a very specific vision in mind. I wanted something that combined the timeless charm of granny squares with a modern, functional shape that could actually hold your everyday essentials. The puffed daisy appliques, the structured box construction, the sweet tassels on the drawcords. Every detail came together exactly the way I hoped.
Get the Ad-Free PDF Pattern
You can find the free pattern below, or you can purchase the ad-free printable PDF from my shop.
Get the Printable PDF →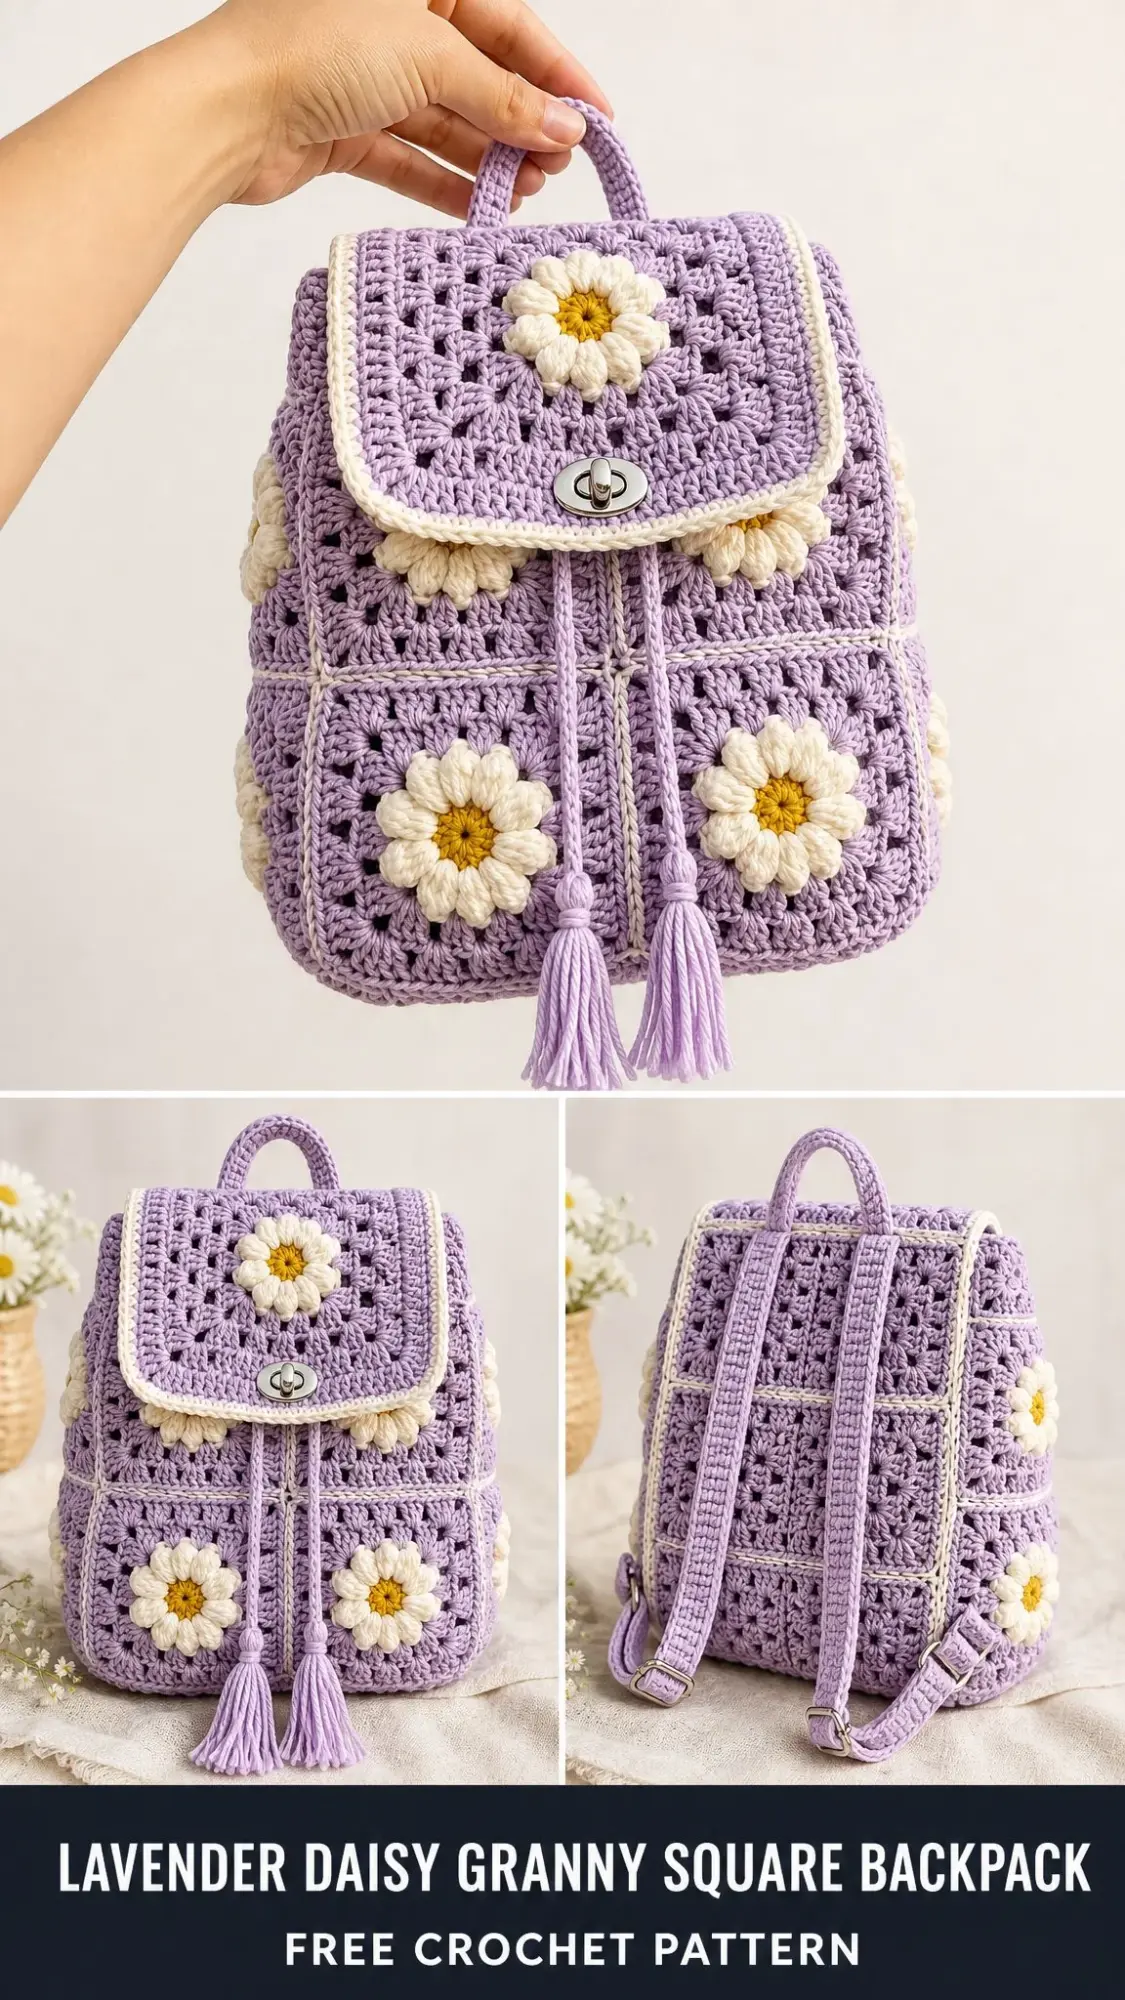
I am genuinely thrilled with how this one turned out. The lavender and cream color combination feels fresh and springy, and those raised daisies add just the right amount of whimsy without being over the top.
If you have been looking for a crochet bag pattern that is both beautiful and practical, this is the one. Let me walk you through everything you need to know to make your own Lavender Daisy Granny Square Backpack.
About This Crochet Backpack Pattern
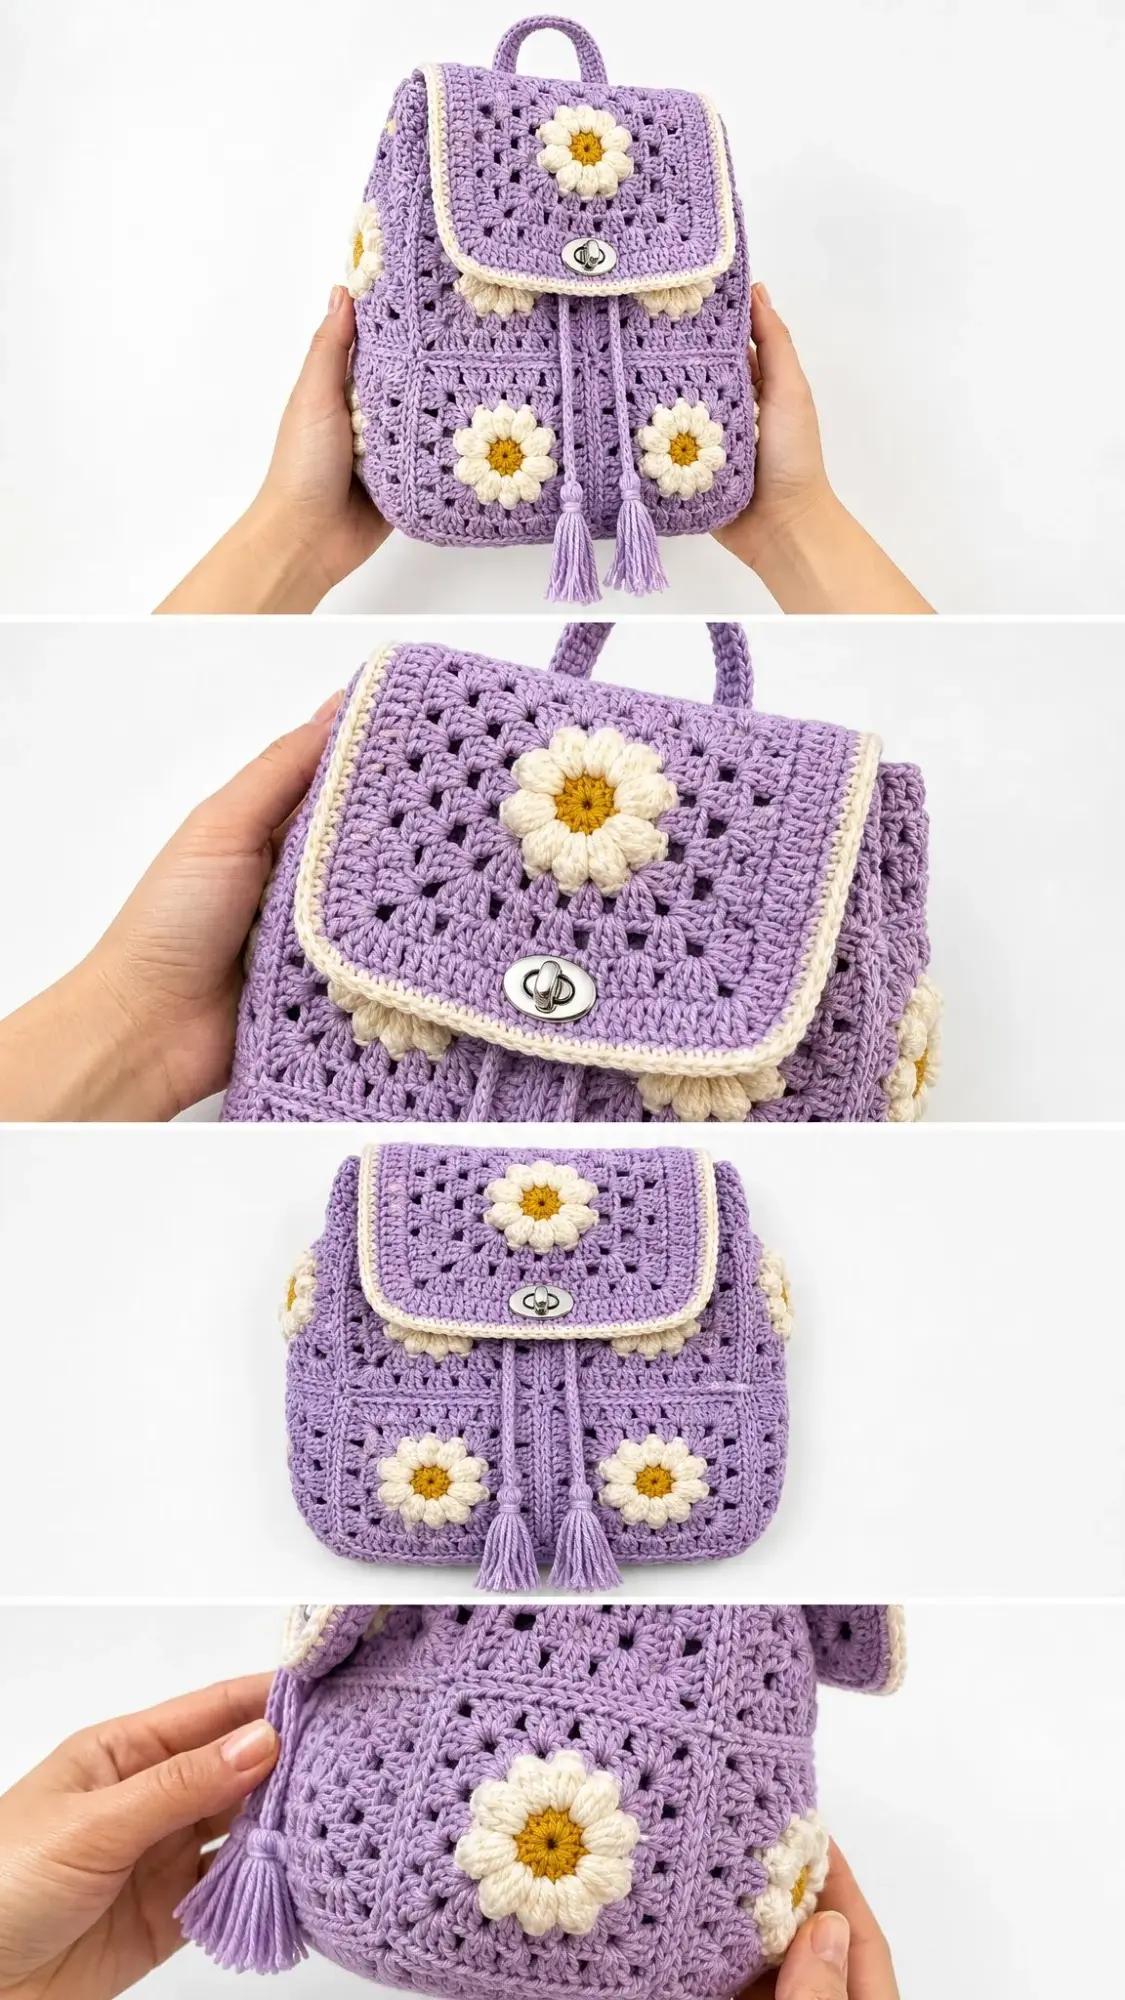
This backpack is constructed from sturdy granny square panels that get joined into a structured box shape. Raised daisy appliques are sewn onto the front and side panels, giving the bag its signature look. A two square flap folds over the top and closes with a turn lock style bag clasp, while a drawcord cinches the opening and finishes with soft tassels.
The design uses modular construction, which means you will crochet individual squares first, block them, and then seam them together. This approach makes the project portable and gives you built in checkpoints along the way.
Skill level: Confident beginner to intermediate. You should be comfortable with basic granny squares, simple applique, seaming, strap construction, and hardware placement.
Estimated making time: 10 to 14 hours, plus blocking and finishing time.
Finished Dimensions
Your completed backpack will measure approximately:
Each bordered granny square measures approximately 5.25 inches / 13.5 cm after blocking.
Materials You Will Need
Yarn
You will need worsted weight or aran weight cotton or cotton blend yarn in three colors:
The lavender forms the body, straps, handle, cords, and tassels. Cream is used for the square borders and daisy petals. Golden yellow is used only for the daisy centers.
Recommended Yarn Brands
Choose a yarn that gives you firm squares at gauge. If your fabric feels floppy, go down a hook size or plan to add lining or interfacing.
Tools
Hardware
Gauge
Getting your gauge right is essential for this project since all the squares need to match for proper assembly.
One 6 round granny square with cream border should measure approximately 5.25 inches / 13.5 cm square.
In blocked granny stitch, 4 clusters and 5 rounds should measure approximately 4 inches / 10 cm.
Make a test square and match the measurement before making all your motifs. After blocking, every square should be the same size. If one square is more than 1/4 inch / 6 mm larger or smaller, re-block it or remake it before assembly.
Abbreviations and Stitch Guide
Here are all the abbreviations used in this pattern:
Special Stitches
3-dc cluster: Work 3 double crochet stitches into the same indicated space. This forms one granny cluster.
Petal cluster: In the indicated stitch, chain 2, then work the following sequence: yarn over, insert hook in same stitch, yarn over and pull up loop, yarn over and pull through 2 loops. Repeat this 4 times total so you have 5 loops on your hook. Yarn over and pull through all 5 loops on hook, chain 2, slip stitch in same stitch.
Firm strap sc: Work single crochet rows tightly. For extra strength, you can crochet over a strand of cotton cord or add a fabric backing to each strap.
Pattern Notes
This pattern uses US crochet terms throughout. If you are a UK maker, remember that US sc equals UK dc, and US dc equals UK tr.
The chain 3 at the start of granny rounds counts as 1 double crochet. Slip stitch to the top of the beginning chain 3 to close each round unless instructed otherwise.
Make your joins neat and firm. The backpack shape depends on even squares and tidy seams.
Left handed makers can follow the same instructions. Your rounds will travel in the opposite direction, but the counts and assembly map stay the same.
Motif Count Summary
Before you begin, here is what you will make:
Daisy Applique Pattern (Make 9)
With golden yellow, make a magic ring (MR).
Round 1: Chain 1, work 12 single crochet stitches in ring, tighten ring, slip stitch to first single crochet. (12 sc)
Round 2: Join cream in any single crochet. Work 1 petal cluster in each single crochet around, slip stitch to base of first petal. Fasten off, leaving a long tail for sewing. (12 petals)
Set your daisies aside for now. You will sew them on after assembling the panels.
Granny Square Pattern (Make 16 Total)
You will make 8 lavender squares for the front and side daisy panels, and 8 lavender squares for the back, bottom, and flap panels.
With lavender yarn:
Round 1: Chain 4, slip stitch to form ring. Chain 3, 2 double crochet in ring, chain 2, [3 double crochet in ring, chain 2] 3 times. Slip stitch to beginning chain 3. (12 dc; 4 corner spaces)
Round 2: Slip stitch into first corner space. Chain 3, 2 double crochet, chain 2, 3 double crochet in same corner space, chain 1; [(3 double crochet, chain 2, 3 double crochet) in next corner space, chain 1] 3 times. Slip stitch to beginning chain 3. (24 dc; 8 clusters)
Round 3: Slip stitch into first corner space. Work (chain 3, 2 double crochet, chain 2, 3 double crochet) in corner, chain 1, 3 double crochet in next chain 1 space, chain 1; corner group in next corner, chain 1, 3 double crochet in next chain 1 space, chain 1; repeat from 2 more times. (36 dc; 12 clusters)
Round 4: Work as Round 3, placing 3 double crochet in each side chain 1 space and corner group in each corner. (48 dc; 16 clusters)
Round 5: Repeat the established granny pattern. (60 dc; 20 clusters)
Round 6: Repeat the established granny pattern. (72 dc; 24 clusters)
Border: Join cream in any corner. Chain 1, 3 single crochet in corner, single crochet in each double crochet and each chain 1 space to next corner, 3 single crochet in corner; repeat from 3 times, omitting the final corner that was already worked. Slip stitch to first single crochet. Fasten off. (156 sc)
Square Checkpoint
Each bordered square should measure approximately 5.25 inches / 13.5 cm on all sides. Steam block or wet block lightly so the edges are straight and the corners are square.
Panel Assembly and Daisy Placement
Placement Map
Front Panel: Join 4 daisy squares in a 2 x 2 grid. Sew 1 daisy centered on each square. Finished front panel measures approximately 10.5 x 10.5 inches / 27 x 27 cm.
Back Panel: Join 4 plain squares in a 2 x 2 grid. Finished back panel measures approximately 10.5 x 10.5 inches / 27 x 27 cm.
Side Panels (make 2): Join 2 daisy squares vertically for each side panel. Finished side panel measures approximately 5.25 x 10.5 inches / 13.5 x 27 cm.
Bottom Panel: Join 2 plain squares side by side. Finished bottom panel measures approximately 10.5 x 5.25 inches / 27 x 13.5 cm.
Flap: Join 2 plain squares side by side. Sew 1 daisy centered across the join near the outer half of the flap. Finished flap measures approximately 10.5 x 5.25 inches / 27 x 13.5 cm.
How to Seam
Hold pieces with wrong sides together. Using lavender yarn and a tapestry needle, whip stitch through outer loops only, matching every border stitch along the seam. Each square edge has 26 single crochet stitches, so every square to square seam uses 26 matched stitches.
Body Construction
Step 1: Join the Panels
Join the front panel to one long edge of the bottom panel, matching 52 front edge single crochet stitches to 52 bottom edge single crochet stitches.
Join the back panel to the opposite long edge of the bottom panel in the same way.
Join one side panel between the front and back along the short side of the bottom. Match 26 bottom edge single crochet stitches to the lower edge of the side panel, then match 52 side edge single crochet stitches to the front and back side edges.
Repeat for the second side panel.
Step 2: Top Edging
With lavender, join yarn at center back top edge. Chain 1, single crochet evenly around the top opening, working 1 single crochet in each border stitch and seam join. Slip stitch to first single crochet. (approximately 156 sc)
Round 2: Chain 1, single crochet in each single crochet around, slip stitch to first single crochet. Fasten off. (156 sc)
Step 3: Attach the Flap
Place the flap along the top back edge, with the wrong side of the flap against the right side of the back panel. Sew one long edge of the flap to the back top edge across approximately 52 matched single crochet stitches. Let the cream border face outward.
Add a second line of stitching 1/4 inch / 6 mm below the first seam for strength.
Step 4: Install the Closure
Install your turn lock or magnetic snap centered on the flap and front. Place the front piece approximately 1.5 inches / 4 cm below the top edge. Place the flap piece where it meets naturally when the flap is closed.
Reinforce the wrong side with a small felt or fabric square before tightening the hardware.
Assembly Checkpoint
Before adding straps and hardware, the body should stand as a soft box with the front and back approximately 10.5 inches wide, side depth approximately 5.25 inches, and height approximately 10.5 inches.
Drawcords (Make 2)
With lavender, chain 70. Slip stitch in 2nd chain from hook and each chain across. Fasten off. (69 slip stitches; approximately 18 to 20 inches / 46 to 51 cm)
Weave one cord from center front to center back through the top edging. Weave the second cord from center back to center front through the same spaces in the opposite direction. Pull both ends to cinch the opening closed.
Tassels (Make 4)
Wrap lavender yarn around a 4 inch / 10 cm card 24 times. Tie firmly at the top, cut the bottom loops, wrap the neck 1/2 inch / 1.3 cm below the top, and trim evenly.
Attach one tassel to each drawcord end.
Top Handle
Chain 24.
Row 1: Single crochet in 2nd chain from hook and each chain across. (23 sc)
Rows 2 through 5: Chain 1, turn, single crochet in each stitch across. (23 sc)
Fasten off, leaving long tails.
Sew handle ends to the top back and flap seam area, spacing the ends approximately 3 inches / 7.5 cm apart.
Back Straps (Make 2)
Chain 74.
Row 1: Single crochet in 2nd chain from hook and each chain across. (73 sc)
Rows 2 through 5: Chain 1, turn, single crochet in each stitch across. (73 sc)
Fasten off.
Attach each strap top approximately 2 inches / 5 cm from center back. Attach each strap bottom to a D-ring at the lower back corner.
Use sliders if you want adjustable straps. The strap length before hardware is approximately 22 to 24 inches / 56 to 61 cm.
Finishing Your Backpack
Weave in every end on the wrong side, splitting yarn plies for a secure finish.
Sew your daisies firmly around the center and between petals so they do not catch during use.
Optional lining: Sew a simple fabric pouch slightly smaller than the bag, turn the top edge under, and hand stitch it inside below the top edging.
Optional structure: Place a plastic canvas rectangle inside the bottom before adding the lining.
Blocking Tips
Pin your panels to the finished measurements and steam lightly without flattening the daisy petals. Allow the project to dry fully before installing closure hardware.
Care Instructions
Spot clean is recommended. If the yarn label allows washing, hand wash cold, support the bag while wet, reshape, and dry flat. Remove or protect hardware before washing whenever possible.
Troubleshooting Common Issues
Bag twists after assembly: Check that front, back, and side panel seams each match the same number of border stitches.
Squares cup or ripple: Adjust hook size and block each square before seaming.
Top opening is loose: Add one extra single crochet round at the top or weave the drawcord through every other stitch.
Straps stretch: Line straps with fabric or crochet over cotton cord.
Size Customization Options
For a smaller mini bag: Stop your granny squares after Round 5 and use the same assembly method.
For a larger bag: Add Round 7 to every square, then add 1 extra single crochet border round before joining.
Keep every square identical so the seams match properly.
Maker Checkpoints
Use these checkpoints as you work so adjustments can be made early:
| Step | Target |
|---|---|
| Each square | 5.25 in / 13.5 cm; 104 sc around border |
| Front panel | 4 daisy squares; 10.5 x 10.5 in / 27 x 27 cm |
| Back panel | 4 plain squares; strap anchors centered and even |
| Side panels | 2 daisy squares stacked per side; 5.25 x 10.5 in / 13.5 x 27 cm |
| Top opening | Approximately 156 sc around after first edging round |
| Flap | Covers top front smoothly; closure centered |
Final Thoughts on This Granny Square Backpack Pattern
This Lavender Daisy Granny Square Backpack is such a satisfying project to make. The modular construction means you can work on squares during your commute or while watching TV, and then enjoy the assembly process when you are ready to see it all come together.
The combination of classic granny squares with those puffy dimensional daisies creates something that feels both nostalgic and fresh. Whether you make it in the lavender and cream shown here or choose your own color palette, you are going to end up with a bag that gets compliments everywhere you go.
Thank you so much for choosing this pattern for your next crochet project. I hope you love making it as much as I loved designing it.
If you want to save this pattern for later, go ahead and pin it to your Pinterest boards so you can find it when you are ready to start. And if you make this backpack, I would absolutely love to see it. Leave a comment below or tag me on social media with your finished project. Happy crocheting!
Want a Quick & Easy Printable Version?
Get a clean, beautifully formatted PDF of this pattern — easy to follow step by step, ready to print or save on any device. No scrolling, no distractions, just the pattern.
Get the Printable PDF →You Might Also Like
- Lavender Dream Ankle Socks Free Crochet Pattern
- Periwinkle Hydrangea Sweater in Closet Free Crochet Pattern
- Sage Green Botanical Lace Maxi Skirt Free Crochet Pattern
- Lavender Ombre Crochet Backpack Free Crochet Pattern