
I pulled this design out of my notebook last spring, and it finally feels ready to share. I originally sketched it after a trip to a botanical garden where the peonies were in full, ridiculous bloom. I kept thinking about how to capture that layered petal effect in yarn, and the Peony Pink Lace Placemat was born.
Get the Ad-Free PDF Pattern
You can find the free pattern below, or you can purchase the ad-free printable PDF from my shop.
Get the Printable PDF →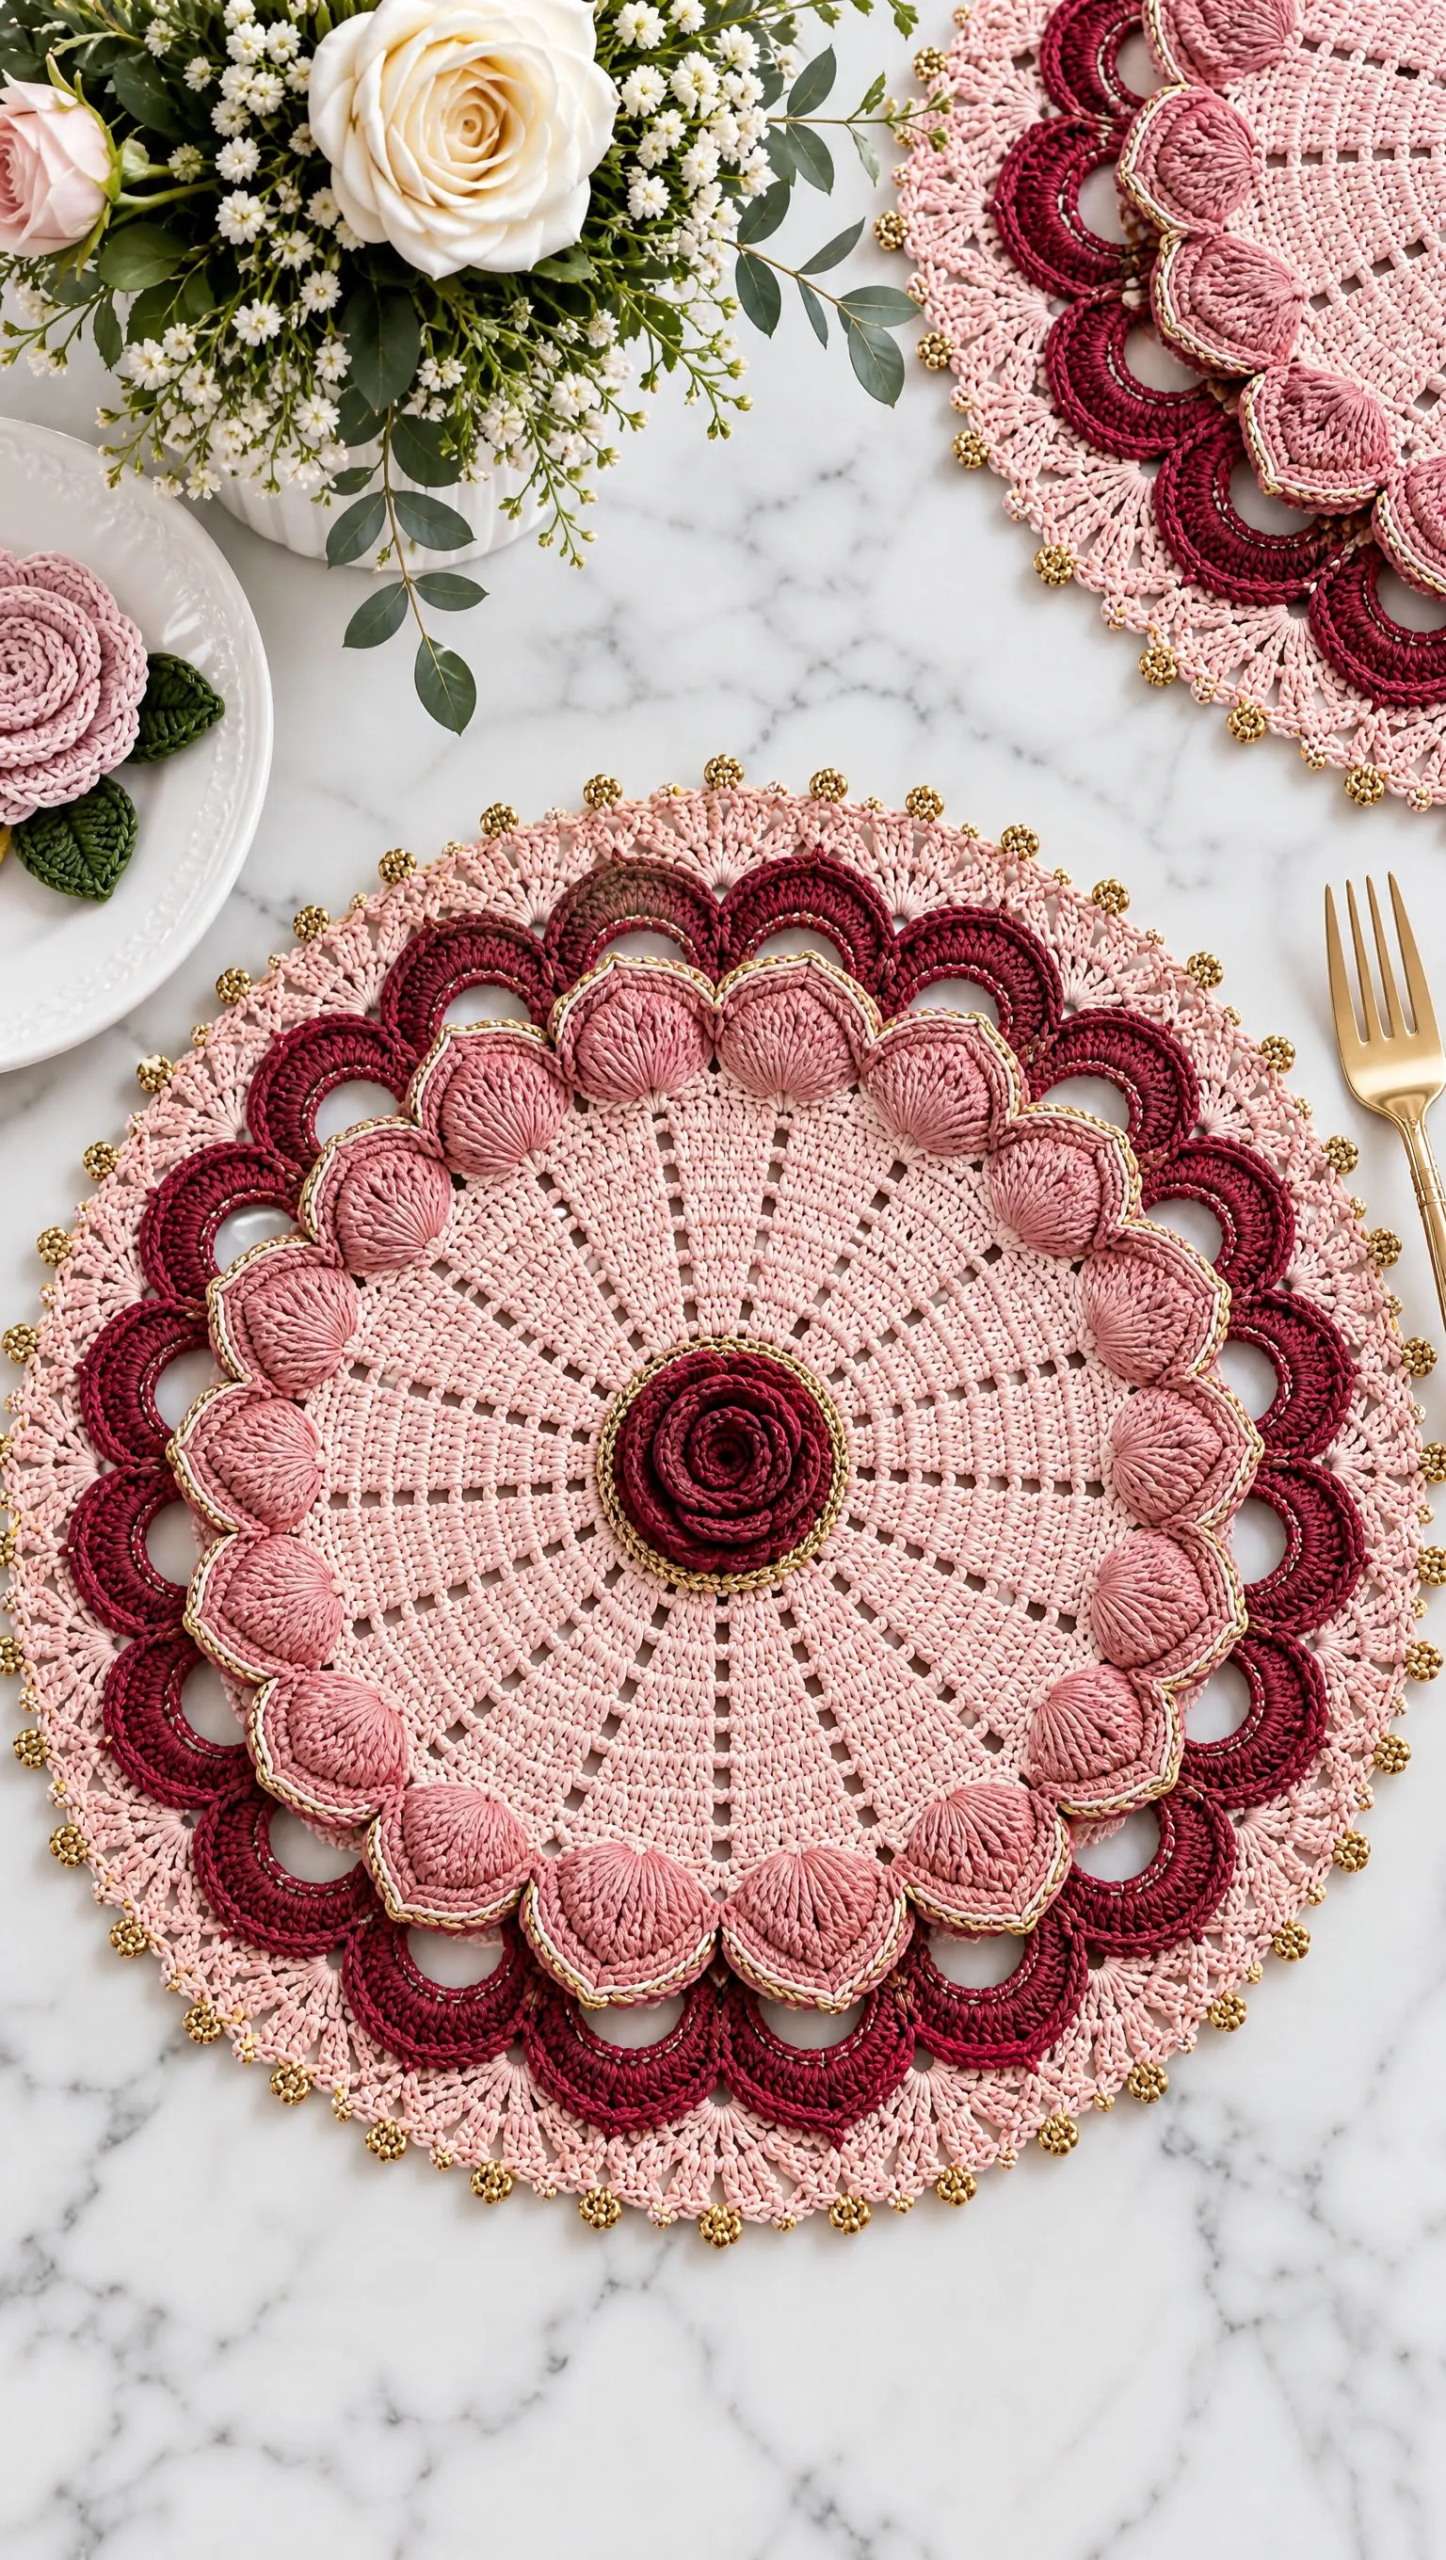
This placemat sat in draft form for almost two years while I tested different puff stitch heights and worked out how to keep the center flat enough for actual dining. The dusty rose petals needed to pop without making your water glass wobble. I think I finally cracked it.
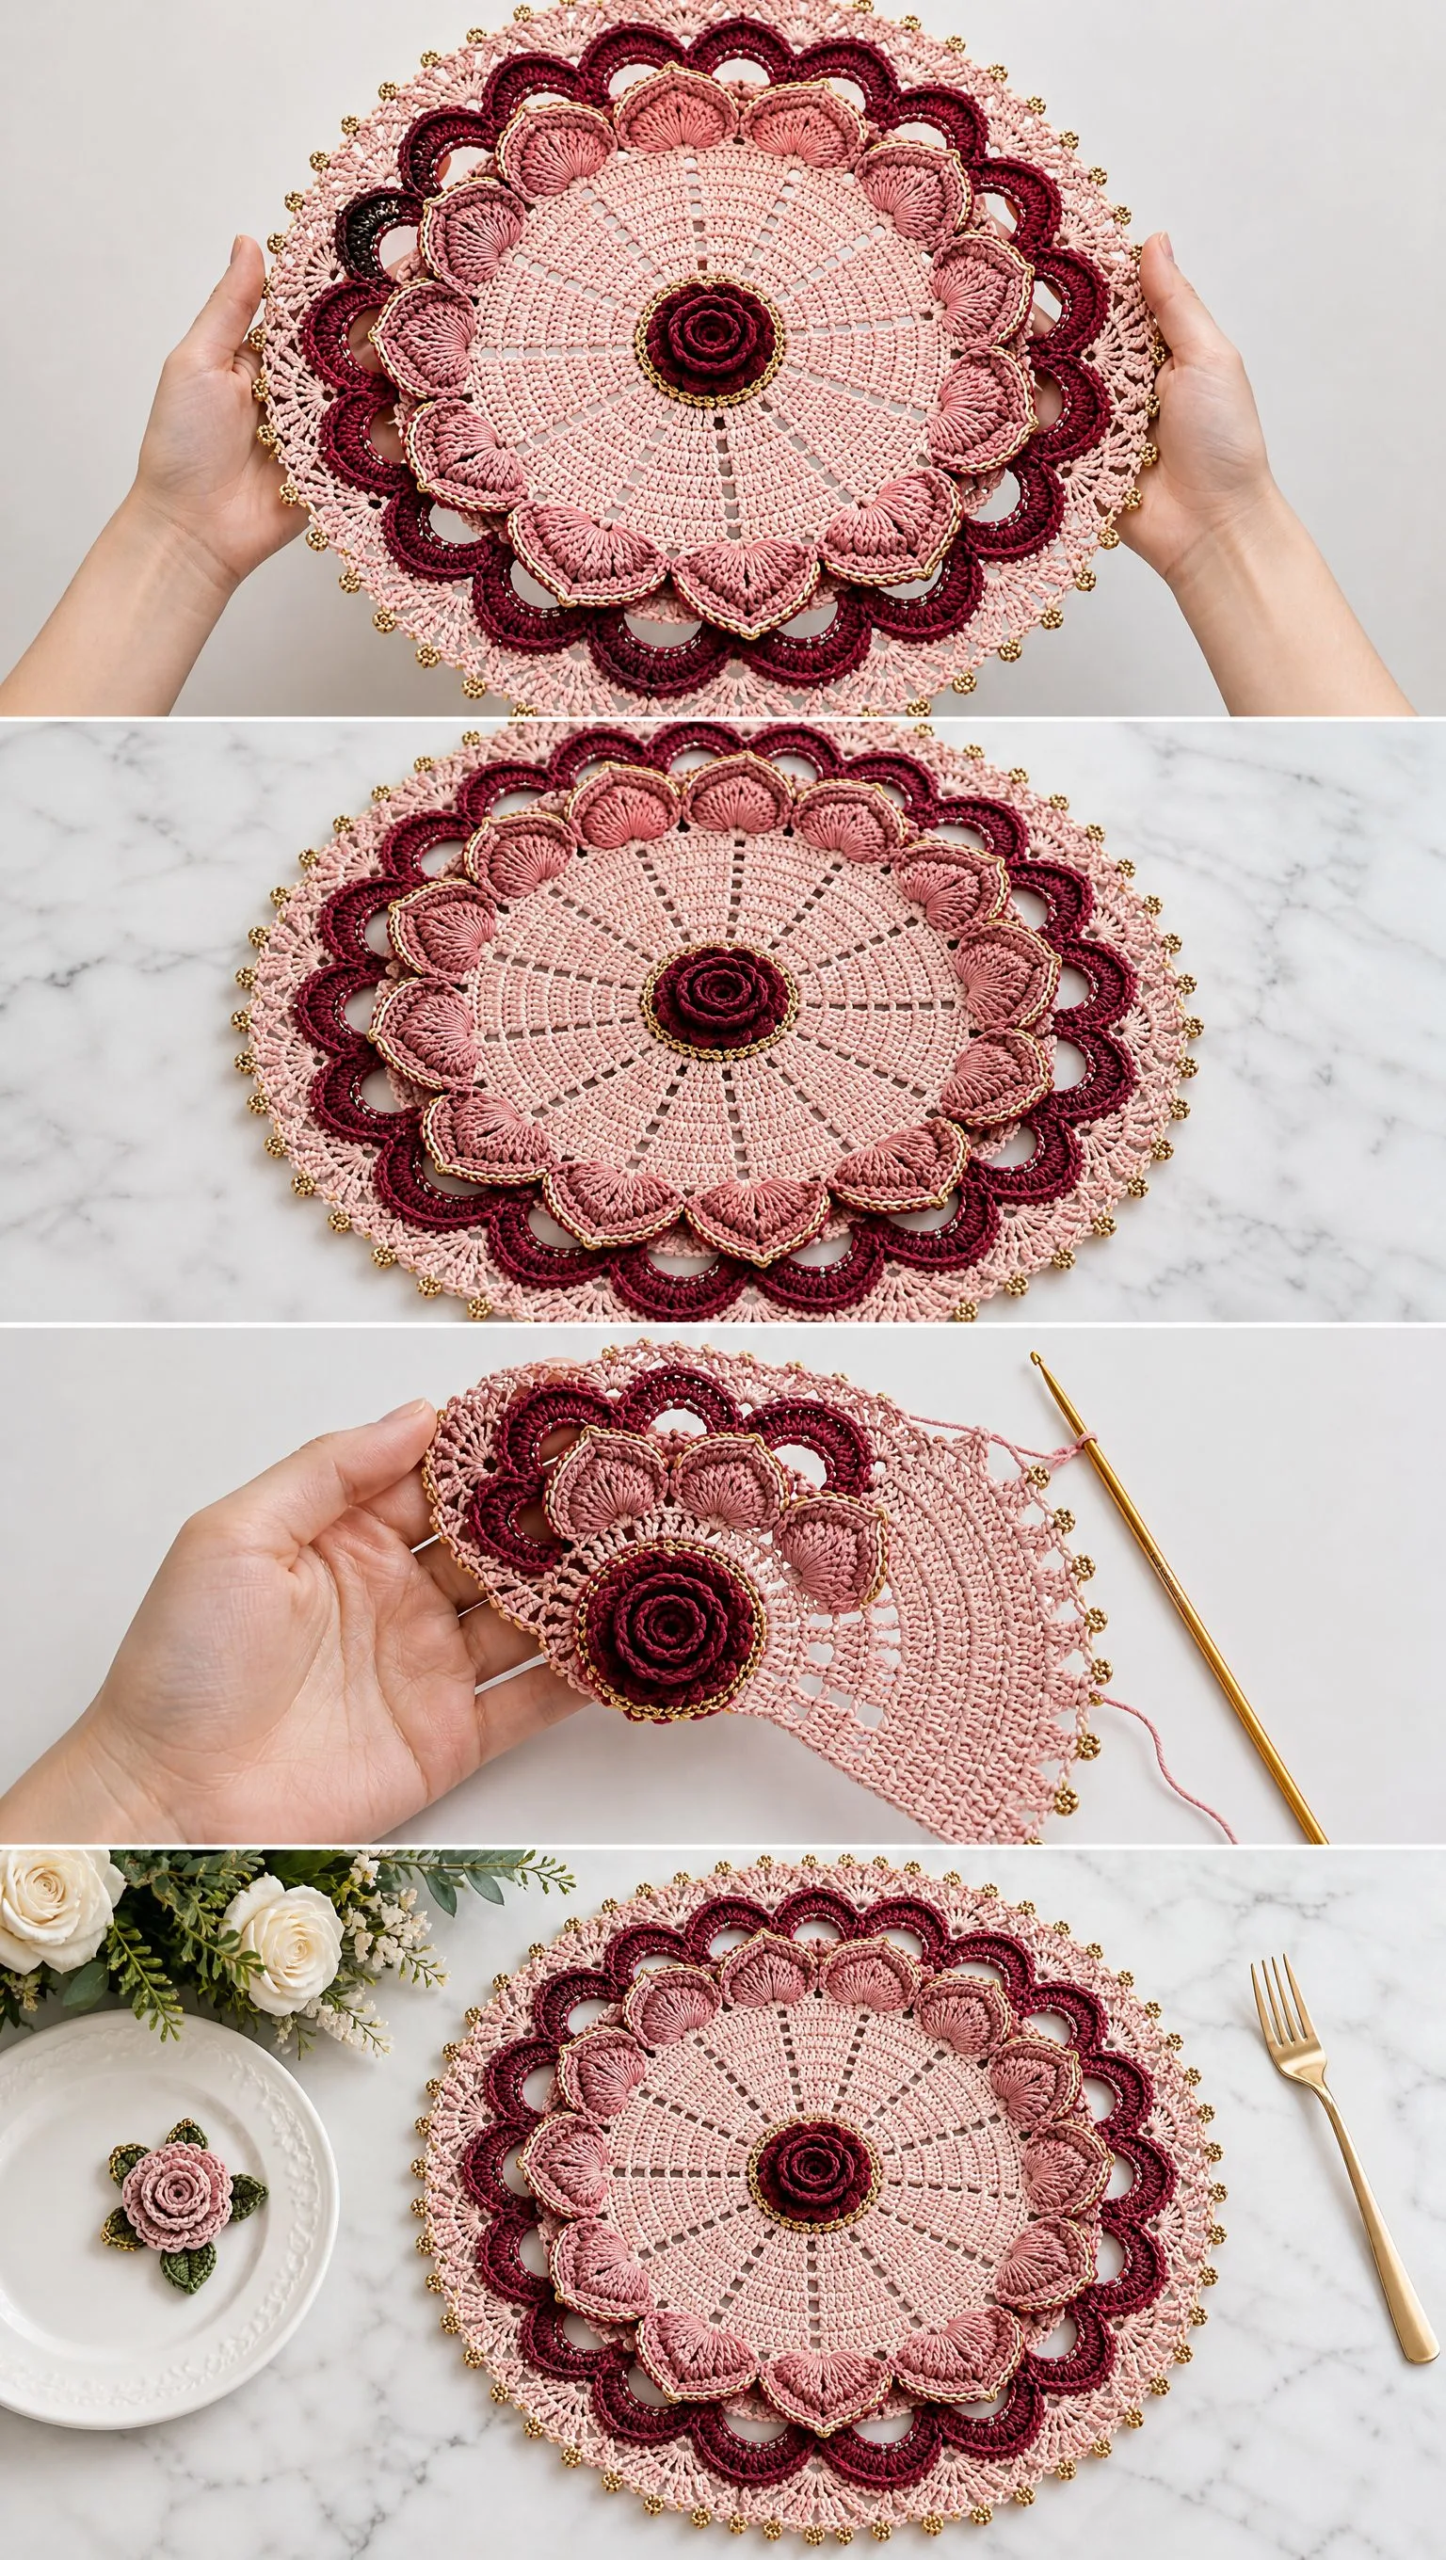
What you get is a romantic table mat with a practical flat center, raised peony petals that sit on top of a stable foundation, raspberry lace arches, and delicate champagne gold picots around the edge. It measures approximately 16 to 17 inches across after blocking, perfect for dinner plates or as a stunning centerpiece doily.
Pattern Overview and Finished Measurements
This placemat is constructed from the center outward in joined rounds. The first half of the diameter remains mostly flat and dense for practical table use. Decorative relief begins beyond the main dining area. Raised peony petals sit over a stable foundation, followed by two raspberry lace rounds and a blush fan edging tipped with champagne gold picots.
Finished size: Approximately 16 to 17 inches (41 to 43 cm) diameter after blocking
Flat dining center: Approximately 8 to 8.5 inches (20 to 22 cm) diameter
Construction: Worked in joined rounds from center outward. Rosette made separately and sewn on.
Skill level: Intermediate. You should be comfortable with double crochet (dc), puff stitches, shells, working in chain spaces, front and back loops, and basic blocking.
Materials Needed
Yarn weight: DK or light worsted mercerized or softly lustrous cotton
Hook: 3.25 mm (US D) or size needed for gauge
Color A (pale shell pink): 90 to 110 g, about 200 to 240 m (220 to 260 yd)
Color B (dusty rose): 30 to 40 g, about 65 to 90 m (70 to 100 yd)
Color C (raspberry): 25 to 35 g, about 55 to 75 m (60 to 82 yd)
Color D (wine red): 8 to 12 g, about 18 to 26 m (20 to 28 yd)
Color E (champagne gold): 8 to 12 g, about 18 to 26 m (20 to 28 yd)
Additional supplies: Removable stitch markers, tapestry needle, scissors, rustproof blocking pins, and blocking surface
Gauge and Fabric Notes
Gauge is measured after light blocking: about 20 dc and 10 dc rows equal 4 inches (10 cm).
Exact gauge is less important than obtaining a firm, flat center. If the center cups, use a larger hook or block more gently. If it ruffles, use a smaller hook or omit an increase where noted.
Practical flatness rule: Keep Rounds 1 through 10 flat and smooth. The raised texture is intentionally delayed until the decorative outer half. Place a dinner plate on the center during blocking to confirm that no petal relief intrudes into the main dining area.
Abbreviations and Special Stitches
Before diving in, let me walk you through every abbreviation and special technique you will need. If any of these are new to you, practice them on a swatch first.
ch = chain (yarn over, pull through loop on hook)
sl st = slip stitch (insert hook, yarn over, pull through stitch and loop on hook in one motion)
sc = single crochet (insert hook, yarn over and pull up a loop, yarn over and pull through both loops)
hdc = half double crochet (yarn over, insert hook, pull up a loop, yarn over and pull through all three loops)
dc = double crochet (yarn over, insert hook, pull up a loop, yarn over and pull through two loops twice)
tr = treble crochet (yarn over twice, insert hook, pull up a loop, yarn over and pull through two loops three times)
sp = space
st(s) = stitch(es)
BLO = back loop only
FLO = front loop only
RS = right side
Special Stitches Defined
5-loop puff: Yarn over, insert hook in indicated stitch or space, yarn over and pull up a loop to dc height. Repeat 4 more times in the same place (11 loops on hook). Yarn over and pull through all loops, ch 1 to lock. The locking ch does not count as a separate stitch. This creates a plump, rounded bobble effect.
Raspberry shell: Work 5 dc in the indicated chain space. Simple and pretty.
Blush fan: Work (dc, ch 1) five times in the same chain space, then 1 dc in the same space. You end up with 6 dc separated by 5 ch-1 spaces.
Gold picot: Ch 3, sl st in the first ch made. Work snugly so the picot sits like a tiny bead at the border.
Invisible join (recommended): Cut yarn after the final stitch, pull tail through, thread tail onto needle, pass under both loops of the first stitch, then back down through the last stitch to imitate a normal top loop. Weave securely. This gives you a seamless finish.
Pattern Notes Before You Start
Rounds are joined unless a round explicitly says otherwise. Join with a sl st to the first stitch, then begin the next round as directed.
The center uses 12 radial wedges. Each wedge gains one dc on every increase round while the ch-1 eyelets stay aligned, creating the flower ray effect.
Use stitch markers in every ch-1 eyelet through Round 9. This makes the 12 wedge boundaries easy to see. Trust me, your future self will thank you.
For the raised peony ring, work the petals into front loops or marked spaces while leaving the underlying round intact. This keeps the mat structurally flat.
When changing color, complete the last yarn over of the final stitch with the new color for the cleanest transition.
If your yarn is very soft, steam or wet block the lace firmly so the oval openings and fan border read clearly.
Main Placemat Instructions: Shell Pink Radial Center
With Color A, make a magic ring. Keep all increases relaxed. Do not pull the chain eyelets tight.
Round 1: Ch 3 (counts as dc). In ring work [dc, ch 1] 11 times. Join to top of beginning ch-3. Pull ring closed. 12 dc, 12 ch-1 sps
Round 2: Sl st into first ch-1 sp. Ch 3, dc in same sp, ch 1. In each remaining ch-1 sp work 2 dc, ch 1. Join. 24 dc, 12 ch-1 sps
Round 3: Ch 3. Dc in next dc, 2 dc in next dc, ch 1. Dc in each dc of next wedge to last dc, 2 dc in last dc, ch 1. Repeat from around. Join. 36 dc, 12 ch-1 sps
Round 4: Work each wedge as 2 dc evenly, 2 dc in the final dc, ch 1. Repeat around. Join. 48 dc, 12 ch-1 sps
Round 5: Work each wedge as 3 dc evenly, 2 dc in the final dc, ch 1. Repeat around. Join. 60 dc, 12 ch-1 sps
Round 6: Work each wedge as 4 dc evenly, 2 dc in the final dc, ch 1. Repeat around. Join. 72 dc, 12 ch-1 sps
Round 7: Work each wedge as 5 dc evenly, 2 dc in the final dc, ch 1. Repeat around. Join. 84 dc, 12 ch-1 sps
Round 8: Work each wedge as 6 dc evenly, 2 dc in the final dc, ch 1. Repeat around. Join. 96 dc, 12 ch-1 sps
Round 9: Work each wedge as 7 dc evenly, 2 dc in the final dc, ch 1. Repeat around. Join. 108 dc, 12 ch-1 sps
Round 10 (stabilizing scallop base): Ch 1, sc in same st and in each dc around. In each ch-1 eyelet work (sc, ch 2, sc). Join to first sc. Fasten off Color A. 108 sc plus 24 eyelet sc, 12 ch-2 sps
Fit check after Round 10: The piece should lie flat and measure roughly 8 to 8.5 inches (20 to 22 cm) across. If yours is larger, the finished placemat will also be larger. That is fine as long as the fabric stays smooth.
Raised Peony Petal Ring: Dusty Rose
Join Color B in any ch-2 eyelet of Round 10. The petal ring sits on top of the foundation, not through the entire mat, so the underside stays relatively smooth.
Round 11 (petal anchors): Ch 1, sc in same ch-2 sp, ch 4, skip the next 4 sc, sc in next sc. Ch 4, skip next 4 sc, sc in next sc. Repeat from around, adjusting the final skips by 1 stitch if necessary so you finish with 24 evenly spaced ch-4 arches. Join. 24 ch-4 arches*
Round 12 (first puff petals): Sl st into first ch-4 arch. In each arch work [ch 2, 5-loop puff, ch 2, 5-loop puff, ch 2, sl st in same arch]. Keep both puffs leaning slightly toward one another to form a rounded petal. Repeat in all arches. Join and fasten off. 24 paired-puff petals
Round 13 (overlapping upper petals): Rejoin Color B behind the petal row, working into the unused sc anchors from Round 11. Sl st in anchor, ch 5, skip one anchor, sl st in next anchor. Repeat from around to make 12 larger arches. In each ch-5 arch work [sl st, ch 2, 5-loop puff, ch 1, 5-loop puff, ch 2, sl st]. Position these 12 petals so they overlap the joins between the 24 lower petals. Fasten off. 12 larger overlapping petals*
Shape the petals: With your fingers, lift only the puff sections and gently cup their tips outward. Keep the base stitches pressed flat. This produces flower relief without making the placemat unstable under dishes.
Raspberry Lace Arches
For the lace foundation, turn the work to locate the firm edge of Round 10 behind the petals. Work through available back loops and spaces so the new rounds extend outward from the base rather than from the puff petals themselves.
Round 14 (lace foundation): With Color C, join in a back loop near any ch-2 eyelet. Ch 1, sc in same place. Ch 5, skip approximately 4 base stitches, sc in next available back loop. Repeat from around, spacing 24 arches evenly. Join. 24 ch-5 arches*
Round 15 (first shell row): Sl st into first ch-5 arch. Work 5 dc in each ch-5 arch around. Between shells, ch 2. Join to first dc. 24 raspberry shells, 24 ch-2 sps
Round 16 (oval opening row): Sl st to center dc of first shell. Sc in center dc, ch 7, sc in center dc of next shell. Repeat from around. Keep ch-7 loops loose and even. Join. 24 ch-7 oval arches*
Round 17 (offset shell row): Sl st into first ch-7 arch. In each arch work [3 dc, ch 2, 3 dc]. Between arches ch 1. Join. 24 split shells
Round 18 (second oval row): Sl st into first ch-2 center space. Sc in ch-2 sp, ch 8, sc in next ch-2 sp. Repeat from around. Join. The ch-8 arches should sit directly outside the gaps between the inner shells, giving the lace a staggered look. 24 ch-8 arches*
Blush Fan Border and Gold Picots
Round 19 (blush fans): Change to Color A. Sl st into first ch-8 arch. In each arch work one blush fan: (dc, ch 1) 5 times, dc. Between fans work sc in the joining sc of Round 18. Continue around. Join. 24 fans
Round 20 (fine blush outline): Ch 1, sc in each dc and each ch-1 sp across every fan. At each valley sc between fans, work one tight sl st instead of sc to sharpen the scallop. Join and fasten off Color A. Even scalloped edge
Round 21 (champagne gold picots): Join Color E at the center stitch of any fan. Ch 1, sc in same stitch. Sc evenly across the fan edge. At the highest point of the fan work one gold picot. Continue sc to the valley. Sl st in valley. Repeat from around. Add only one picot per fan for a refined, beaded look. Join invisibly and fasten off. 24 gold picots*
Wine Red Center Rosette
Make the rosette separately with Color D. For a subtle gold outline, use Color E only on the final edge.
Rosette strip: Ch 31. Row 1: 2 dc in 4th ch from hook, then 3 dc in each ch across. The strip will curl naturally. Fasten off, leaving a 16 inch (40 cm) sewing tail.
Roll and sew: Starting at the first worked end, roll the curled strip into a compact rose about 1.25 to 1.5 inches (3 to 4 cm) wide. With the long tail, stitch through all layers across the underside several times. Knot securely.
Gold outline: With Color E, surface sl st around the lowest visible outer curve of the rosette, or embroider a small running chain around the base. Keep the gold narrow rather than covering the wine red petals.
Attach: Center the rosette over the magic ring area. Sew only around the underside base of the rosette using Color D. Do not stitch through the top petals.
Finishing and Blocking
1. Weave in all ends on the wrong side, changing direction at least once. Avoid carrying dark raspberry or wine tails beneath the pale shell pink center where they could show through.
2. Wet block for the crispest lace. Soak in cool water for 10 to 15 minutes, gently squeeze in a towel, then pin to exact shape without stretching the dense center.
3. Pin the 24 outer fans first at equal distances, then pin the ch-8 and ch-7 arches so the oval openings are symmetrical.
4. Use a ruler to confirm the diameter in several directions. Adjust pins until the circle is balanced.
5. Lift and shape the dusty rose puff petals after the base has been pinned. Let dry completely before removing pins.
6. Optional: very lightly steam the gold picots from above without touching the iron to the yarn.
Care: Hand wash or use a delicate cycle in cool water if your yarn label permits. Reshape flat to dry. Avoid high heat, which can flatten puff stitches and distort mercerized shine.
Troubleshooting and Size Adjustments
Center cups upward: Your stitch tension is tight or the hook is too small. Move up 0.25 to 0.5 mm, or add one extra dc increase in every third wedge on the next center round.
Center ruffles: Too much circumference. Move down 0.25 mm, or skip one planned increase in every third wedge on the next center round.
Petals flop outward: Use firmer cotton, reduce puff height slightly, or tack the base of each large upper petal to the foundation with one hidden stitch.
Lace arches look uneven: Block using 24 equally spaced pins. Count chain stitches consistently and avoid tightening the first chain after each anchor sc.
Need a smaller mat: Stop the radial center after Round 8, then work Round 10 style stabilization and continue the decorative rounds with fewer evenly spaced arches.
Need a larger charger mat: Add 1 to 2 more radial increase rounds before Round 10, increasing each wedge by one dc per round. Then distribute the 24 decorative arches evenly over the larger edge.
Round-by-Round Color Checklist
| Section | Color | Purpose |
|---|---|---|
| R1 to R10 | A (shell pink) | Flat radial center and stabilizing edge |
| R11 to R13 | B (dusty rose) | Raised overlapping puff stitch peony petals |
| R14 to R18 | C (raspberry) | Two offset lace and shell sections with oval openings |
| R19 to R20 | A (shell pink) | Fine fan border and scallop outline |
| R21 | E (champagne gold) | One picot at each fan peak |
| Rosette | D and E | Wine red center rose with narrow gold outline |
Final Thoughts on This Peony Pink Lace Placemat Crochet Pattern
This pattern takes some patience, but every round builds on the last in a satisfying way. The flat center makes it genuinely usable for dining, while the raised petals and lacy border give it that show stopping look. It makes a beautiful gift for weddings, housewarmings, or anyone who appreciates handmade table linens.
Thank you so much for choosing this pattern. I hope you love making it as much as I loved designing it. If you give it a try, I would absolutely love to see your finished placemat. Tag me on Instagram or share a photo in our Facebook group.
If you want to find this pattern again later, go ahead and save it to your Pinterest boards. And please leave a comment below if you make one. I read every single comment and it truly makes my day to see your creations come to life.
Want a Quick & Easy Printable Version?
Get a clean, beautifully formatted PDF of this pattern — easy to follow step by step, ready to print or save on any device. No scrolling, no distractions, just the pattern.
Get the Printable PDF →You Might Also Like
- Coral Sunset Granny Square Maxi Dress Free Crochet Pattern
- Pink Ombre Granny Square Purse Free Crochet Pattern
- Sage Green Boho Crochet Sundress Free Pattern
- Blush Pink Butterfly Lace Earrings Free Crochet Pattern