
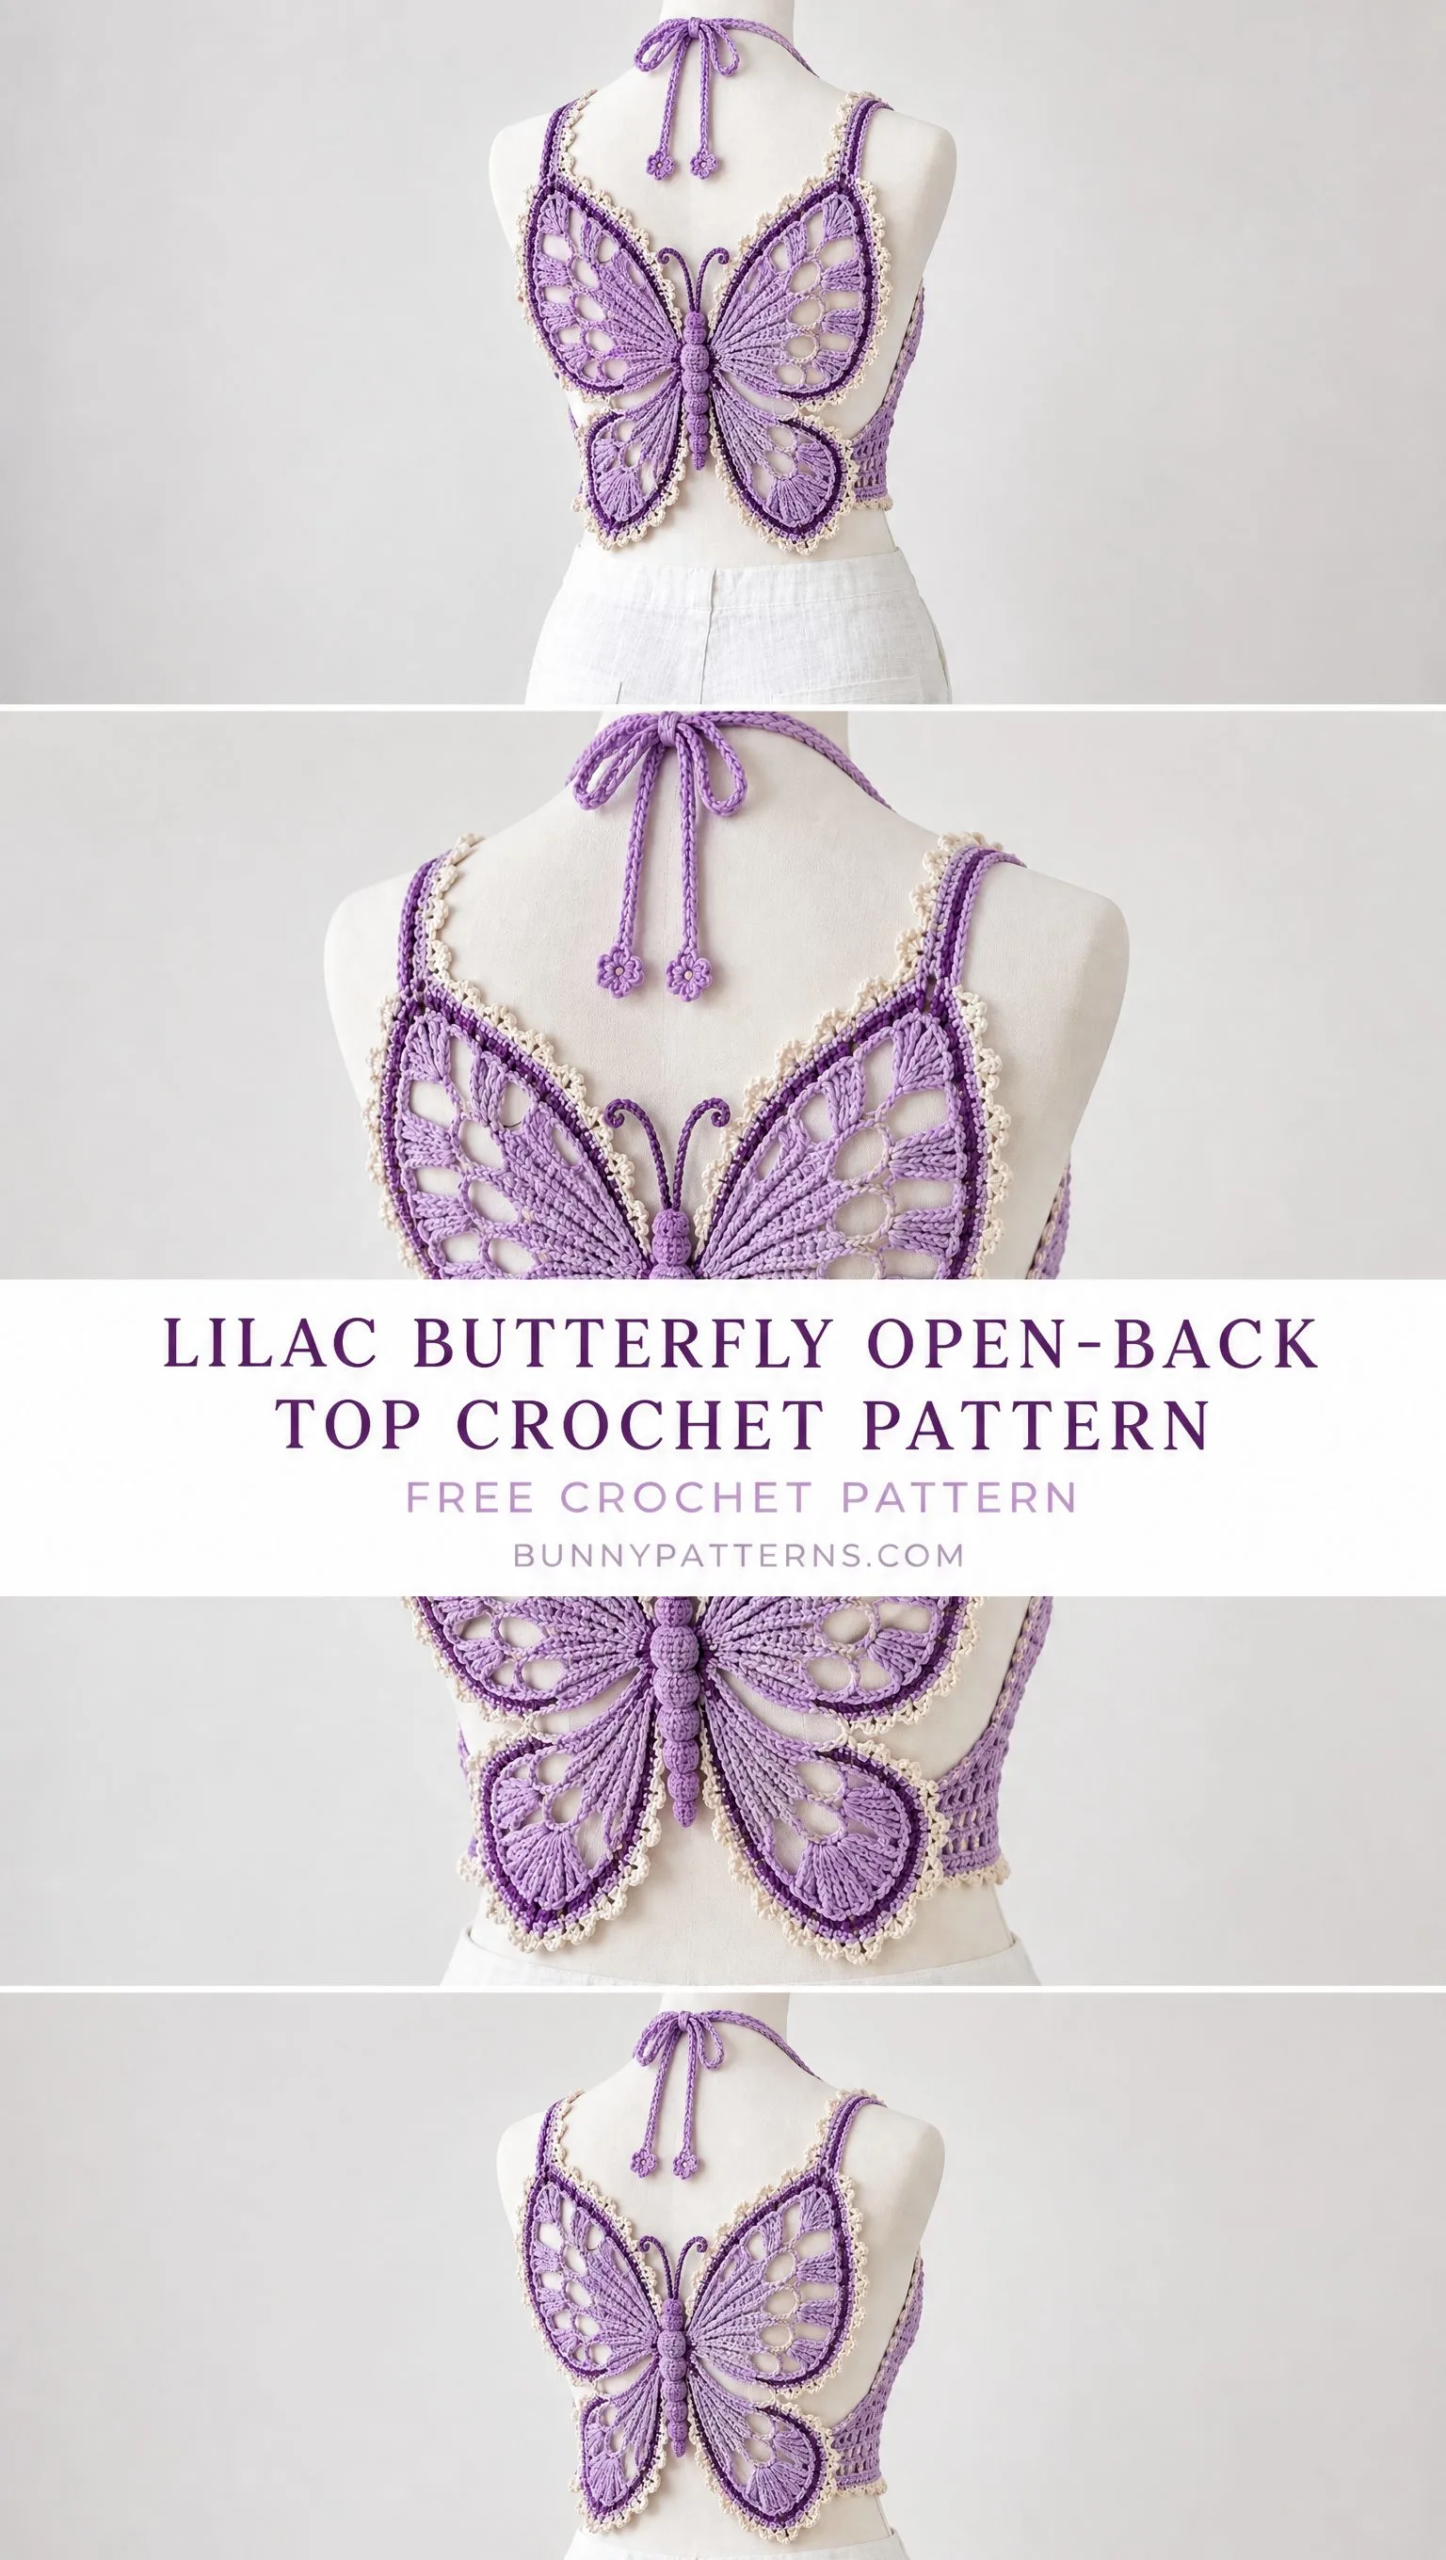
When I first sketched out this butterfly top, I had one goal: create something that looks like wearable art but actually makes sense to construct. I wanted four distinct wings with real dimension, a body that pops off the fabric, and edges that frame everything beautifully without overwhelming the design.
Get the Ad-Free PDF Pattern
You can find the free pattern below, or you can purchase the ad-free printable PDF from my shop.
Get the Printable PDF →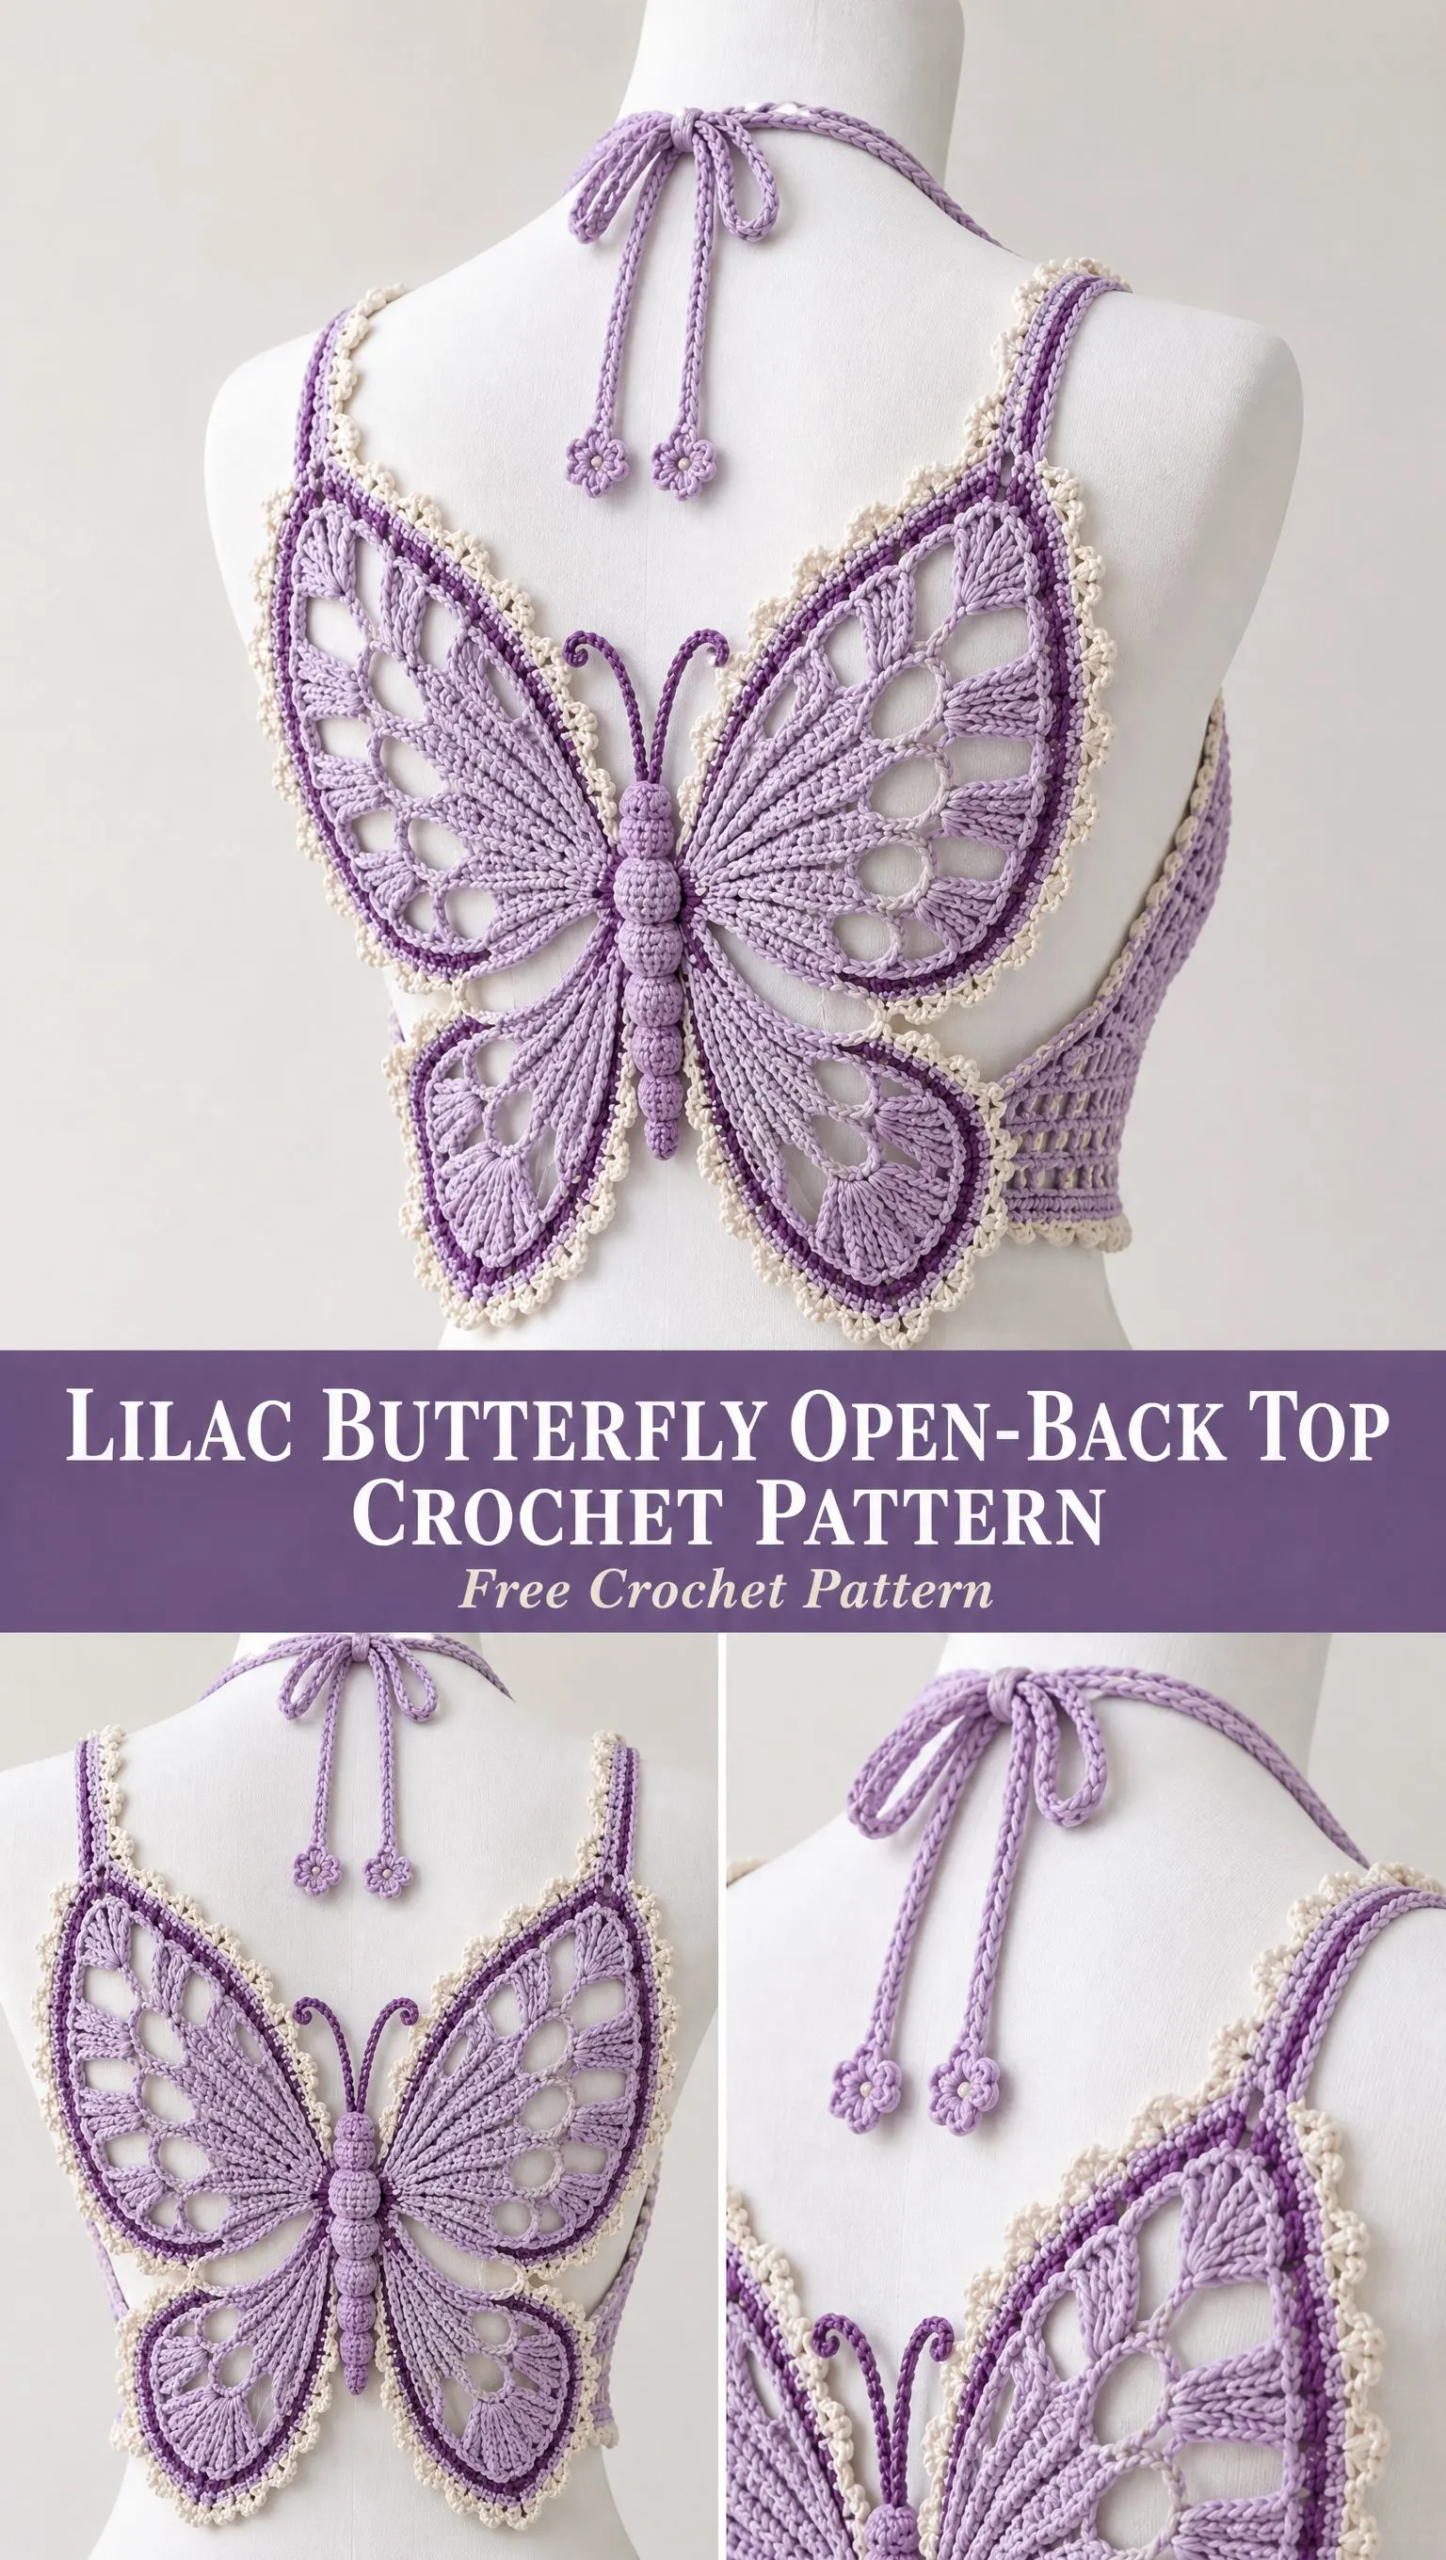
The result? I am genuinely thrilled with how this turned out. The radiating stitches catch the light, the plum accent border gives it definition, and those little curled antennae add personality that makes me smile every time I see it.
This is not a quick weekend project, and I will be honest about that upfront. But if you have been craving something showstopping for your handmade wardrobe, something that will make people stop and ask "wait, you MADE that?" then grab your hook and let us dive in.
About This Pattern
The Lilac Butterfly Open-Back Top features one large butterfly motif that forms the entire back of the garment. Two rounded upper wings spread toward the shoulder blades while two smaller lower wings taper toward the waist. A raised segmented body joins all four wings at the center back, complete with curled antennae for that realistic butterfly silhouette.
Skill Level: Intermediate to advanced
This pattern uses tall stitches like trebles and double trebles, lace construction with chain spaces, and three-dimensional elements. If you are comfortable reading written patterns and have made a few lace projects before, you will do great here.
Finished Measurements
The pattern includes four sizes. Here is what you need to know:
| Size | Bust | Butterfly Width | Butterfly Height | Side Band (each side) |
|---|---|---|---|---|
| XS/S | 30-34 in | 12.5-13.5 in | 12-13 in | 2.5-3 in |
| M | 35-38 in | 14-15 in | 13-14 in | 3-3.5 in |
| L | 39-42 in | 15.5-16.5 in | 14-15 in | 3.5-4 in |
| XL/2X | 43-48 in | 17-18.5 in | 15-16.5 in | 4-5 in |
The instructions describe a Medium sample. To resize, you will add or subtract one repeat in the radiating sections of each wing and adjust the side band rows to your body measurement.
Pro tip: Measure your back width from the outer edge of one shoulder blade to the other. Your finished butterfly width should be about 85-95% of this measurement since the side bands and ties provide the remaining fit.
Materials You Will Need
| Item | Recommendation | Amount |
|---|---|---|
| Main yarn | Sport/5-ply mercerized or matte cotton, lilac | 260-420 yd / 240-385 m |
| Contrast 1 | Same weight cotton, pale ivory | 70-110 yd / 65-100 m |
| Contrast 2 | Same weight cotton, plum | 25-45 yd / 23-41 m |
| Hook | 3.0-3.5 mm, chosen to meet gauge | 1 |
| Notions | Tapestry needle, stitch markers, scissors, blocking pins/mat | as needed |
| Optional | 1-2 mm elastic thread for side bands if extra recovery is desired | small amount |
Gauge
After wet blocking: 20 double crochet stitches x 10 rows = 4 in / 10 cm in solid fabric.
For this lace project, the more important measurement is the motif itself. One completed upper wing before edging should measure about 7.5 in / 19 cm from body join to outer tip in the sample size.
Abbreviations and Special Stitches
Let me walk you through every stitch you will use in this pattern.
Standard Abbreviations:
Special Stitches:
3-dc shell: Work 3 double crochet stitches into the indicated stitch or space. This creates a small fan shape.
5-dc fan: Work 5 double crochet stitches into the indicated chain space. This creates a larger, more dramatic fan.
Picot: Chain 3, then slip stitch into the first chain you made. This creates a small decorative loop that sticks up from your work.
Front-post rib (FPtr): Yarn over twice, insert your hook from front to back to front around the post of the indicated stitch (not through the top of the stitch, but around its vertical "body"), then complete the treble as usual.
Bobble segment: This creates the raised bumps on the butterfly body. Here is how: [yarn over, insert hook in stitch, yarn over and pull up loop, yarn over and pull through 2 loops] 5 times in the same stitch, then yarn over and pull through all remaining loops on your hook, chain 1 to close.
Cord: Chain to your desired length, then slip stitch into the back bump of each chain. This creates a firm, rounded tie that will not stretch out.
Construction Overview
Before we dive into the rows, here is how this top comes together:
1. Crochet the two upper wings separately, mirroring the second wing
2. Crochet the two lower wings separately, mirroring the second wing
3. Join all four wings around a narrow center spine
4. Work the raised segmented butterfly body over the spine
5. Add the plum accent round around each wing
6. Add the ivory scallop-and-picot edging
7. Work fitted side bands from the inner edges of the lower wings
8. Add lilac neck ties from the upper wing tips
9. Create curled antennae and finish all ends
10. Wet block to final measurements
Upper Wing Pattern (Make 2)
Make the first wing as written. For the second wing, work the same pattern and reverse the joining orientation during assembly so the pair mirrors cleanly.
Foundation and Inner Rib
Row 1 (RS): With lilac, ch 9. Dc in 4th ch from hook and in next 5 ch. (7 dc including turning ch) Turn.
Row 2: Ch 3, dc in same st, 2 dc in each of next 5 sts, 2 dc in top of turning ch. (14 dc) Turn.
Row 3: Ch 4, tr in next st, ch 2, sk 1, tr in next 2 sts across, ending tr in last st. This creates the first open rib row. Turn.
Row 4: Ch 3, dc in first tr, 3 dc in ch-2 sp, dc in next 2 tr across. Turn.
Row 5: Ch 5, dtr in same st, ch 2, dtr in next dc, ch 2, sk 1 dc across. Finish with 2 dtr in last st. Turn.
Shape the Rounded Upper Lobe
Row 6: Ch 3. Work 2 dc in first ch-2 sp, then 3 dc in each ch-2 sp across. Work 3 dc in final edge space. Turn.
Row 7: Ch 4, tr in same st, ch 1, tr in next 2 sts, ch 2, sk 1, tr in next 3 sts, ch 2, sk 1 across. Finish 2 tr in final st. Turn.
Row 8: Ch 3, dc in each tr and 3 dc in each ch-2 sp. Turn.
Row 9: Ch 5, dtr in same st, ch 2, dtr in next 2 sts, ch 3, sk 2 sts across, placing 2 dtr in last st. Turn.
Row 10: Ch 3, 2 dc in each ch-2 sp, 5-dc fan in each ch-3 sp, and dc in each dtr between spaces. Turn.
Row 11: Ch 4, tr in first st, ch 2, sk 2 sts, tr in next st across, working 2 tr in the final st. Turn.
Row 12: Ch 3. Work 3-dc shell in each ch-2 sp, sc in each tr between shells. Do not fasten off.
Outer Wing Shaping
Rotate the work 90 degrees. Crochet evenly around the curved outside edge only: sc in next row-end, ch 2, sc in next row-end around. At the top shoulder point, work (sc, ch 3, sc) to create a defined tip. Stop at the lower inner corner and FO, leaving a 12 in / 30 cm tail for assembly.
Size Adjustment Note: To enlarge, repeat Rows 9-10 one additional time before Rows 11-12. To reduce, omit Row 9 and work Row 10 using 3-dc shells instead of 5-dc fans. Make both upper wings identical.
Lower Wing Pattern (Make 2)
The lower wings are smaller and more tapered. They should visually echo the upper wings without matching them exactly.
Row 1: With lilac, ch 7. Dc in 4th ch from hook and in next 3 ch. (5 dc including turning ch) Turn.
Row 2: Ch 3, dc in same st, 2 dc in next 3 sts, 2 dc in top of turning ch. (10 dc) Turn.
Row 3: Ch 4, tr in next st, ch 2, sk 1, tr in next st across. Turn.
Row 4: Ch 3, 2 dc in each ch-2 sp and dc in each tr. Turn.
Row 5: Ch 5, dtr in same st, ch 2, sk 1, dtr in next st across, 2 dtr in last st. Turn.
Row 6: Ch 3, dc in each dtr, 3 dc in each ch-2 sp. Turn.
Row 7: Ch 4, tr in same st, ch 3, sk 2 sts, tr in next 2 sts across, ending 2 tr in final st. Turn.
Row 8: Ch 3, 5-dc fan in each ch-3 sp, sc between fans. Turn.
Row 9: Ch 3, dc in next 3 sts, ch 2, sk 1 across. Turn.
Row 10: Ch 3, dc in each dc and 3 dc in each ch-2 sp. FO, leaving a 12 in / 30 cm tail.
Lower Edge Shaping
Join lilac at the widest outer corner. Work sc evenly around the curved outer edge, placing a ch-2 between every second or third sc to keep the lace open. At the lowest point, work (sc, ch 3, sc), then continue to the inner corner. FO.
Assembling the Butterfly
Center Spine
With lilac, ch 33. Beginning in 2nd ch from hook, sl st in each ch across. This firm cord is the center spine.
Lay the cord vertically on a blocking mat. Mark four attachment zones: upper-left wing, upper-right wing, lower-left wing, and lower-right wing.
Pin the upper wings so their inner lower corners meet near the upper third of the spine. Pin lower wings beneath them with a 1/2-1 in / 1.5-2.5 cm visual gap between upper and lower lobes.
Join Wings to Spine
Using the long lilac tails and a tapestry needle, whipstitch each wing to the spine through sturdy stitch posts rather than through chain spaces. Make 5-8 secure attachment points per wing. Keep the wings flat and symmetrical. Do not pull so tightly that the center gathers.
Join Upper to Lower Wings
At each side, tack the lower inner edge of the upper wing to the upper inner edge of the lower wing in 2-3 places. Leave the majority of the gap open so the butterfly remains visibly divided into four wings.
Symmetry Check: Before adding the body or borders, pin the butterfly flat and compare left and right. The upper tips, lower tips, and outermost points should align horizontally. Correct asymmetry now by easing stitches at the join.
Raised Segmented Butterfly Body
Work the body directly over the center spine so it stands slightly above the wing surface.
Join lavender/lilac at the top of the spine. Work 5 sc around the cord. Turn.
Row 2: Ch 1, bobble segment in center sc, sc in remaining sts. Turn.
Row 3: Ch 1, sc across. Turn.
Repeat Rows 2-3 three more times to create four rounded body segments.
Tapered Tail: Work 4 sc, then 3 sc, then 2 sc over the next three short rows. FO and weave in securely.
Antennae
Join lilac at top-left of first body segment. Ch 13, then work 2 sc in each of the final 5 chains to force a curl. Sl st back along remaining chains. FO.
Repeat on top-right, mirroring the first antenna. Block curls with your fingers rather than pinning them straight.
Plum Accent Border
The plum line sits just inside the ivory edging and gives the wing outline definition.
With RS facing, join plum anywhere on an outer wing edge. Work sc evenly around the entire perimeter of that wing, placing 2 sc in each outer tip and 2 sc in every ch-3 point. Across deep inward curves, use sl st or skip one underlying stitch as needed so the border lies flat. FO and repeat for the remaining three wings.
Ivory Scallop and Picot Edge
Join pale ivory into any plum sc. Skip 1 plum sc, 5 dc in next plum sc, picot, skip 1 plum sc, sl st in next plum sc. Repeat around the wing.
At narrow tips, work 7 dc instead of 5 dc so the scallop wraps smoothly around the point. At deep concave joins near the body, substitute (sc, picot, sc) for a full shell to avoid crowding. FO. Repeat around all four wings.
Edge Troubleshooting: If the edge ruffles, use fewer shells or skip an extra plum stitch between shells. If it cups inward, add an extra shell at each broad curve. The border should lie flat after blocking.
Side Bands (Make 2)
The side bands stabilize the lower wings and wrap toward the front torso.
Join lilac at the inner outer edge of one lower wing, beginning about 1.5 in / 4 cm above its lowest point.
Row 1: Work 18 sc evenly along the attachment edge. Turn.
Row 2: Ch 2, hdc across. Turn.
Rows 3-8: Repeat Row 2, or continue until the band reaches from the butterfly edge to your side seam without stretching more than 10%.
Optional Shaping: Decrease 1 hdc at each end on the final two rows for a tapered side seam.
FO, leaving a long sewing tail. Repeat for second side.
For a tie-back version instead of sewn side seams, continue each band as a cord: ch 70-90, then sl st back along the chain. Tie at the front or side.
Neck Ties
Join lilac at the top point of one upper wing. Ch 95-115, depending on desired tie length. Sl st in the back bump of each chain to form a firm cord. FO. Repeat at the opposite upper wing.
Optional Decorative End: Add a tiny 5-petal flower by working [ch 3, 2 dc, ch 3, sl st] five times into a magic ring. Sew one flower to each tie end.
Finishing and Blocking
Weave all yarn ends through solid stitch posts for at least 1.5 in / 4 cm. Reverse direction once before trimming.
Soak in cool water with a small amount of wool/cotton wash for 10-15 minutes. Do not wring. Roll in a towel to remove excess water.
Pin the butterfly flat, matching left and right wing dimensions. Pin every scallop point and picot lightly. Shape the center body straight and leave the antennae softly curled. Allow to dry completely before unpinning.
Care Instructions: Hand wash cool, reshape while damp and dry flat. Do not hang the top while wet because the open lace can lengthen. Store folded.
Troubleshooting Guide
| Problem | Solution |
|---|---|
| Wings curl upward | Add one extra stitch at the widest curves during the plum round, then block firmly |
| Wings ruffle | Reduce stitches in the plum border or skip one more base stitch between ivory shells |
| Butterfly sags at center | Add two more whipstitch attachment points per wing and reinforce the spine |
| Side bands stretch too much | Use a smaller hook for bands or carry fine elastic thread through the final two rows |
| Upper wings pull toward neck | Lengthen the side bands slightly or move neck-tie attachment 1-2 stitches outward |
| Lower wings flip outward | Steam lightly, then pin flat. If needed, tack the inner lower edge to the side band with 2 hidden stitches |
Final Checklist
Before you call this project complete, run through this list:
Thank you so much for choosing this pattern! I know it is a bigger project, but I promise the finished result is absolutely worth every stitch. If you make this butterfly top, I would love to see it. Tag me on Instagram or share a photo in my Facebook group.
If this pattern caught your eye, go ahead and pin it to your crochet board so you can find it when you are ready to start. And please drop a comment below if you make one. I love seeing your finished butterflies take flight!
Want a Quick & Easy Printable Version?
Get a clean, beautifully formatted PDF of this pattern — easy to follow step by step, ready to print or save on any device. No scrolling, no distractions, just the pattern.
Get the Printable PDF →You Might Also Like
- Blush Pink Tiered Ruffle One-Shoulder Dress Crochet Pattern
- Pink Strawberry Couple Amigurumi Free Crochet Pattern
- Warm Autumn Terracotta Shoulder Bag Free Crochet Pattern
- Daisy Granny Square Toddler Jumpsuit Free Crochet Pattern