
A crochet net tote bag turns open mesh and tiny cross stitches into a roomy shoulder bag that looks airy, yet holds its shape on a table or on your arm.
The Crochet Net Tote Bag
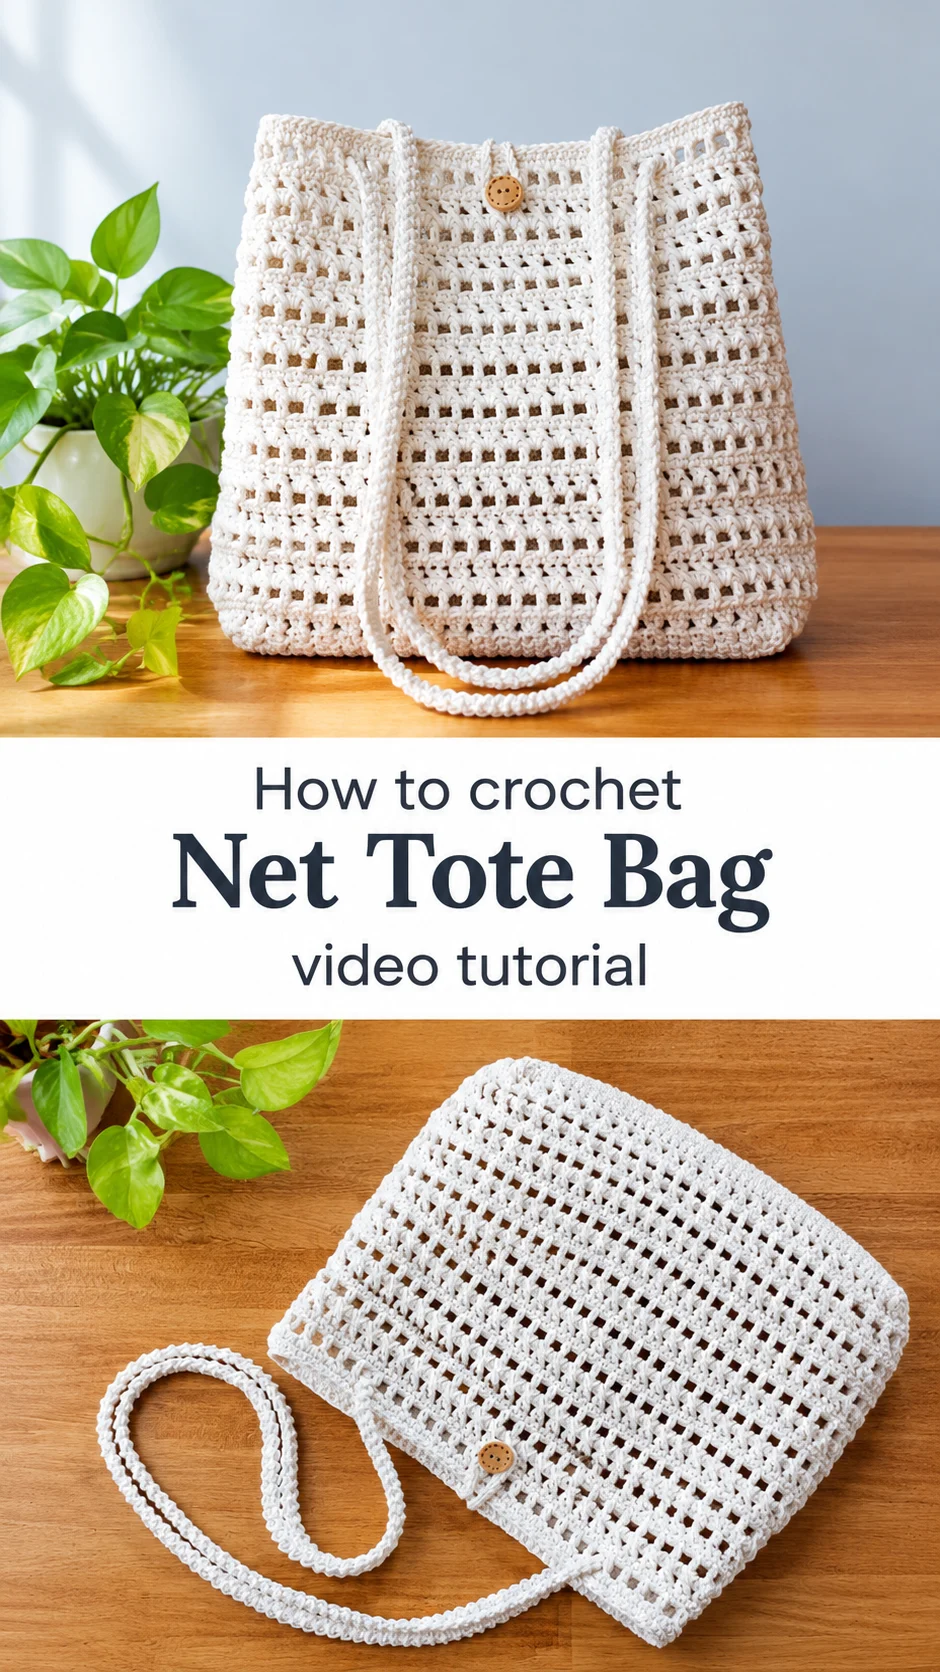
This crochet net tote bag is a soft cream shoulder bag built from bands of openwork. Rows of small square gaps alternate with denser rows of crossed stitches, so the fabric reads as a gentle stripe. The shape is a simple trapezoid, slightly wider at the top than at the base, with a solid, tightly worked bottom edge. Two slim, rope-like handles are long enough to sit comfortably over the shoulder. A single wooden button and a loop at the center of the top edge close the bag without a zip or heavy hardware. The cotton-style cord has a matte, slightly twisted look that suits the neutral colour. It works at the market, on a beach walk, at the café or as an everyday carry-all for a book and a water bottle.
The design also has a quieter side. Because the mesh is open in places, a lining or a contrasting pouch inside can show through like a shadow, and that detail changes the whole mood of the bag. Make it once in cream and it feels summery. Make it in black or sage and it turns evening-ready. It also makes a thoughtful gift, since the pattern repeats are rhythmic and forgiving.
Tote Bag Related Posts:
- Crochet Braided Leaf Headband: A Charming Floral Accent
- Crochet Rose Bouquet: A Beautiful Floral Arrangement
- Crochet Mile-A-Minute Blanket: A Bold Timeless Treasure
- Crochet Wrap Shawl: A Timeless and Graceful Layer
Materials
For a crochet net tote bag like this one, choose a mercerized or tightly twisted cotton cord in a worsted to light-bulky weight. Cotton holds its shape when stretched by a full load, and the slight sheen of mercerized cotton makes the small crossed stitches stand out crisply. A hook about half a size smaller than the ball band suggests gives the firm tension the bag needs to stand upright, so it is worth testing a swatch before you commit. You will also need a single wooden button of roughly two centimetres for the closure, a tapestry needle for weaving ends, and stitch markers to keep track of the corners. Fabric for an optional lining is a good idea, because the open gaps will otherwise let small items such as keys or lipsticks peek out. Pick a lining colour that contrasts gently with the cream cord, such as warm tan or soft grey, if you want the mesh pattern to show.
Understanding the Structure
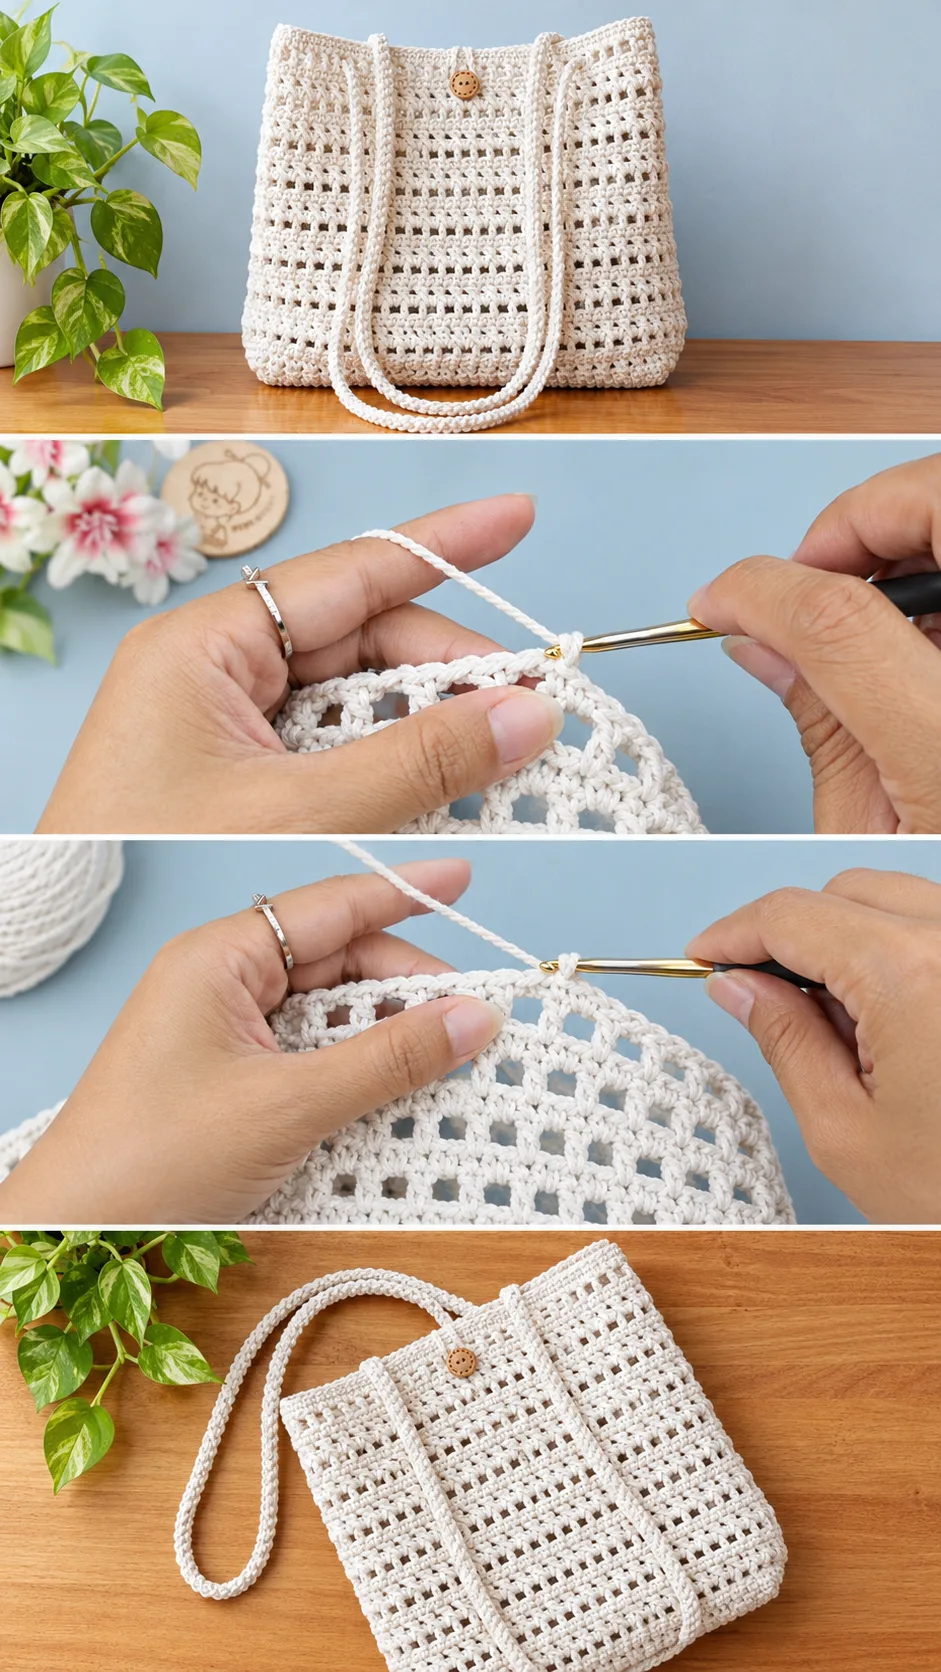
The bag is a single, boxy body with two handles and a button loop, so there is far less assembly than you might expect. The body appears to be worked in rows that build the height, and the base sits flat and dense, which lets the bag stand without slumping. The sides taper outward slightly toward the top, a sign that the width is controlled by gentle shaping at the corners rather than by seams.
The handles are separate narrow cords with a textured, braided look. They attach at the inside of the top edge and fall in two long loops, which spreads the weight across the shoulder. Each handle is anchored near the corners, so the bag hangs level when carried.
The closure is a modest chain loop at the center top that slips over the button. It does not hold the bag tightly shut, but it keeps the opening from gaping when you walk. Think of it as a gentle fastener rather than a security feature.
Watch the video tutorial to see how the base transitions into the sides, because that corner is where the shape is decided. Pause there and replay it until the movement of the hook feels natural.
Best Stitches for Strength
Open mesh sounds fragile, yet this fabric has a clever balance. The square gaps are bordered by sturdy double-crochet style posts, and every few rows a band of crossed stitches ties the structure together. Those crossed rows act like horizontal ribs, stopping the mesh from stretching vertically under a heavy load.
The densest work sits at the bottom, where the bag takes the most strain. Keep that area tight and even, because a loose base will sag after a few outings. If your stitches feel too airy, drop down a hook size for the first few rows and see whether the fabric stands on its own.
Between the bands, the open rows give the bag its lightness. If the mesh squares start to look uneven, check that you are working the chain spaces the same length each time. A slightly longer chain turns a neat square into a droopy oval and the whole stripe loses its crispness.
If the bag feels too floppy once finished, a simple fix is to wet it lightly, shape it over a box or a stack of books, and let it dry completely. Cotton remembers the shape it dries in.
Handles and Closure: The Details That Carry the Weight
The handles look slim, but a narrow tube of stitches worked in a tight, twisted pattern is surprisingly strong. Their rounded cord-like texture also keeps them from digging into the shoulder the way a flat strap sometimes does. Make them a little longer than you think you need, because cotton relaxes with use and the drop will shorten after the first wash.
Attach each handle with several passes through the same stitches, and reinforce with a few extra stitches of yarn on the inside. This is the spot where bags most often fail. If you plan to carry books or a laptop sleeve, double the anchoring and weave the tails back through the handle itself.
The button and loop are a fine place to personalize. A wooden button with sewn-look holes matches the earthy cream well, while a dark horn button feels more grown-up. If the loop is too tight, the bag will pucker at the top, so stitch the button on last, after you have tested the fit of the loop.
Adding a Lining
A lining is optional, but it changes the bag from a pretty accessory into a practical one. Cut a rectangle of cotton or linen, sew it into a bag slightly smaller than the crochet body, and stitch it to the inside top edge by hand. A lining also takes pressure off the crochet fabric, so the mesh will not stretch with heavy items. For a lighter, more playful look, skip the lining and use a removable inner pouch instead.
How to Style a Crochet Net Tote Bag
In the photos, the cream bag sits against a pale wall and warm wood, a pairing that suggests relaxed, natural outfits. It looks right with a linen shirt, wide-leg trousers and flat sandals, where the texture of the bag echoes the weave of the clothes.
For a beach day, pair it with a swimsuit cover-up and a straw hat. The open mesh lets sand shake out easily, and a bright towel tucked inside will glow through the gaps. For evening, a dark lining under the cream cord feels a little dramatic and works nicely with a slip dress.
As a gift, it suits anyone who carries a lot and dislikes bulky bags. Teachers, students and market regulars will appreciate the light weight and the generous interior.
Tips for a Neat Finish
Weave in every end along the direction of the stitches, not straight across them, so the tails do not poke through the open mesh. With a net-style fabric, a loose end is far more visible than it would be on a dense bag.
If the top edge ripples, the last round is probably worked too loosely. Rework it with a smaller hook or skip one stitch at each corner to pull it flat. If the sides lean outward, the shaping has been uneven, so compare each side with a ruler and adjust before you add the handles.
Block the finished bag gently. Mist it with water, shape the base into a clean rectangle, and let it dry away from direct heat. When washing, use a mesh laundry bag, cool water and a mild soap, then reshape while damp.
Following the Tutorial
The video shows each row as it is worked, which helps with the alternation between open and crossed bands. Pause whenever a new band begins, and mark the row with a stitch marker so you can count the repeats without rewatching.
Work in the order shown: body first, then handles, then the closure loop and button. Resist the urge to attach the handles early, because trying the bag on your shoulder before the top edge is finished tells you very little.
A Light, Lasting Handmade Bag
This crochet net tote bag combines open mesh, crossed stitch bands and slim braided handles into a bag that is both airy and dependable.
Three things decide how it turns out: a firm cotton cord, a tight base, and well-anchored handles. Get those right and the rest is a gentle, repeating rhythm.
Make it once and it will probably become the bag you reach for first.
Video tutorial credit: thank you to the creator of the original crochet net tote bag tutorial for sharing this lovely design.
Follow us on Pinterest and subscribe to the Newsletter so you don’t miss a thing!
Tutorial and photos of this net tote bag by: ViVi Berry Crochet.