
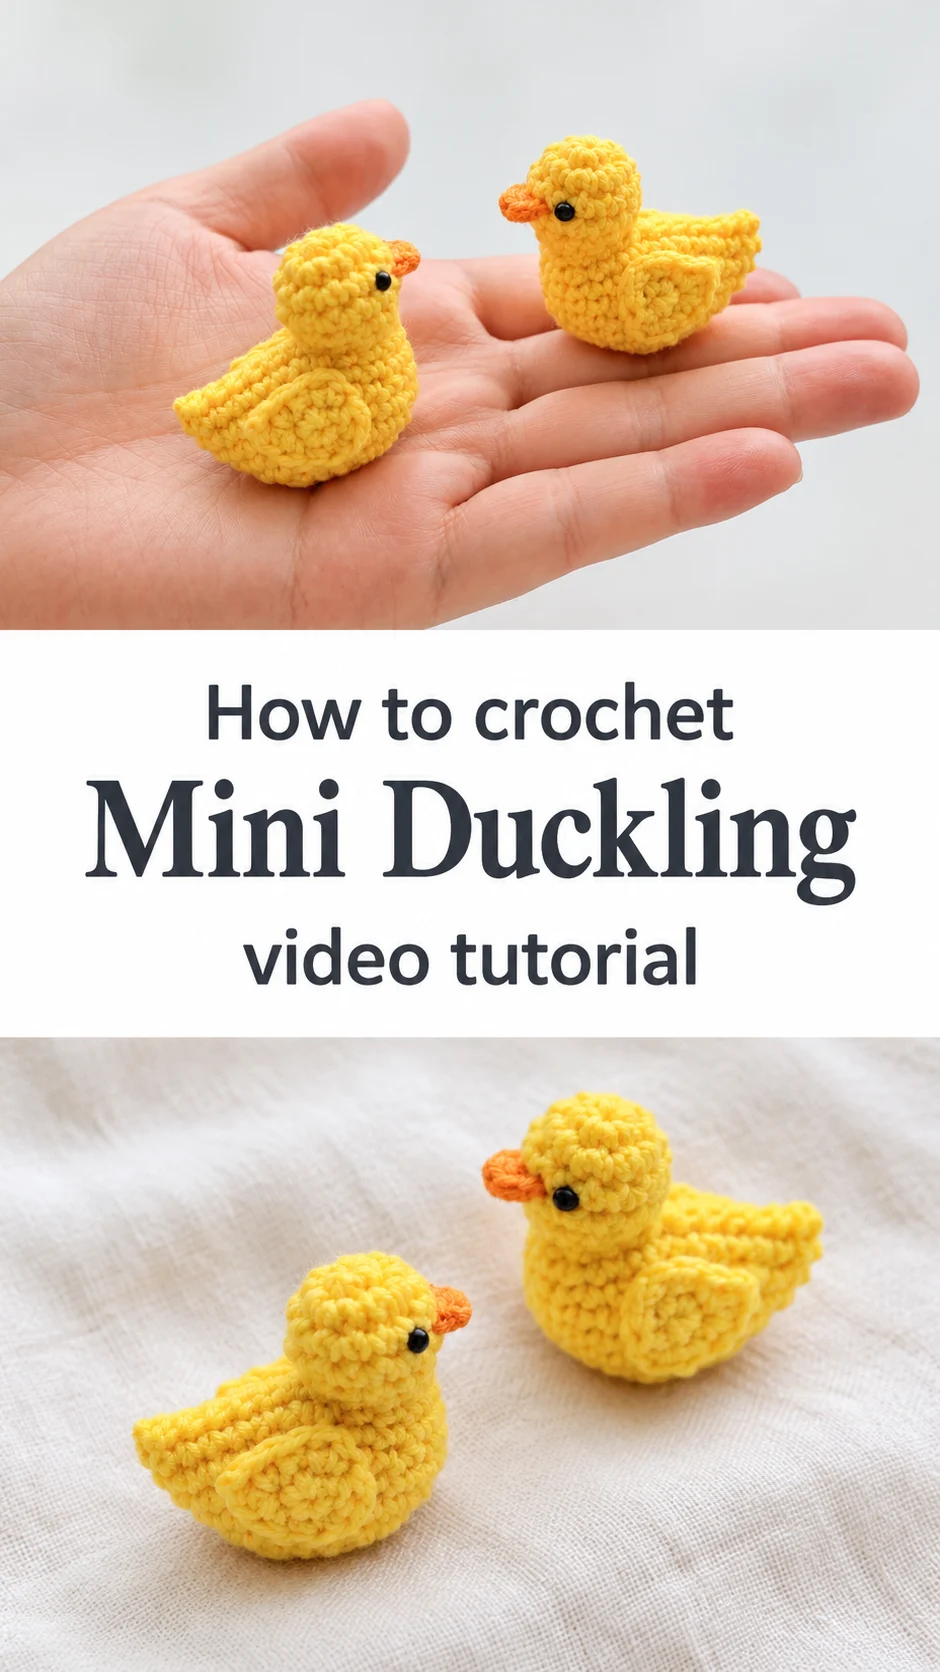
A crochet mini duckling is a thumb-sized bird in sunny yellow, small enough to sit in the curve of your palm and charming enough to make you smile each time you spot it.
[IMAGE 1]
The Crochet Mini Duckling
The crochet mini duckling is a tiny amigurumi bird with a round head, a plump body and a pair of little wings folded against its sides. It is worked in a warm, buttery yellow, with a small orange beak and two black bead eyes that give it a bright, curious look. The fabric is dense and tightly stitched, which keeps the shape firm and gives the surface a neat, bumpy texture. What sets this design apart is its scale and its wings. Each wing is a separate rounded piece sewn onto the side of the body, with a smaller layered shape on top that suggests feathers. Two ducklings sitting face to face in a hand look like a pair of friends in conversation. They suit a windowsill, a desk, a gift box or an Easter basket. They are small enough to finish in an afternoon, yet detailed enough to feel like real keepsakes.
Because they weigh almost nothing, these ducklings travel well. Tuck one into a card, clip it to a bag charm, or line up a little flock along a shelf. They also make a gentle way to practise small-scale shaping. Quick to make, easy to give away.
[IMAGE 2]
Mini Duckling Related Posts:
- Crochet Ribbed Beanie: A Warm and Timeless Classic
- Crochet Hexagon Shoulder Bag: A Chic Seasonal Staple
- Crochet Hook Case: A Charming and Practical Pouch
- Crochet Floral Lace Top: A Delicate Summer Essential
Materials
For a crochet mini duckling you need a smooth, soft yarn in sunny yellow, a small scrap of orange for the beak, and a little black for the eyes if you prefer to embroider them instead of using beads. The ducklings in the photos have a slightly plush, matte finish with clear stitch definition, which suggests a fine milk cotton or a soft blend of similar weight. Smooth yarn matters here, because fuzzy or brushed fibres hide the tiny stitches and blur the shape of the wings. Choose a hook a size or so smaller than the yarn label recommends. A tighter fabric stops the stuffing from showing through and helps the little body hold its plump outline. You will also need small black safety beads or black thread, a tapestry needle for sewing the parts together, a pair of scissors, a stitch marker for working in the round, and a pinch of polyester fiberfill. A thin stick or the blunt end of a pencil helps push the filling into the head.
[IMAGE 3]
Understanding the Duckling’s Construction
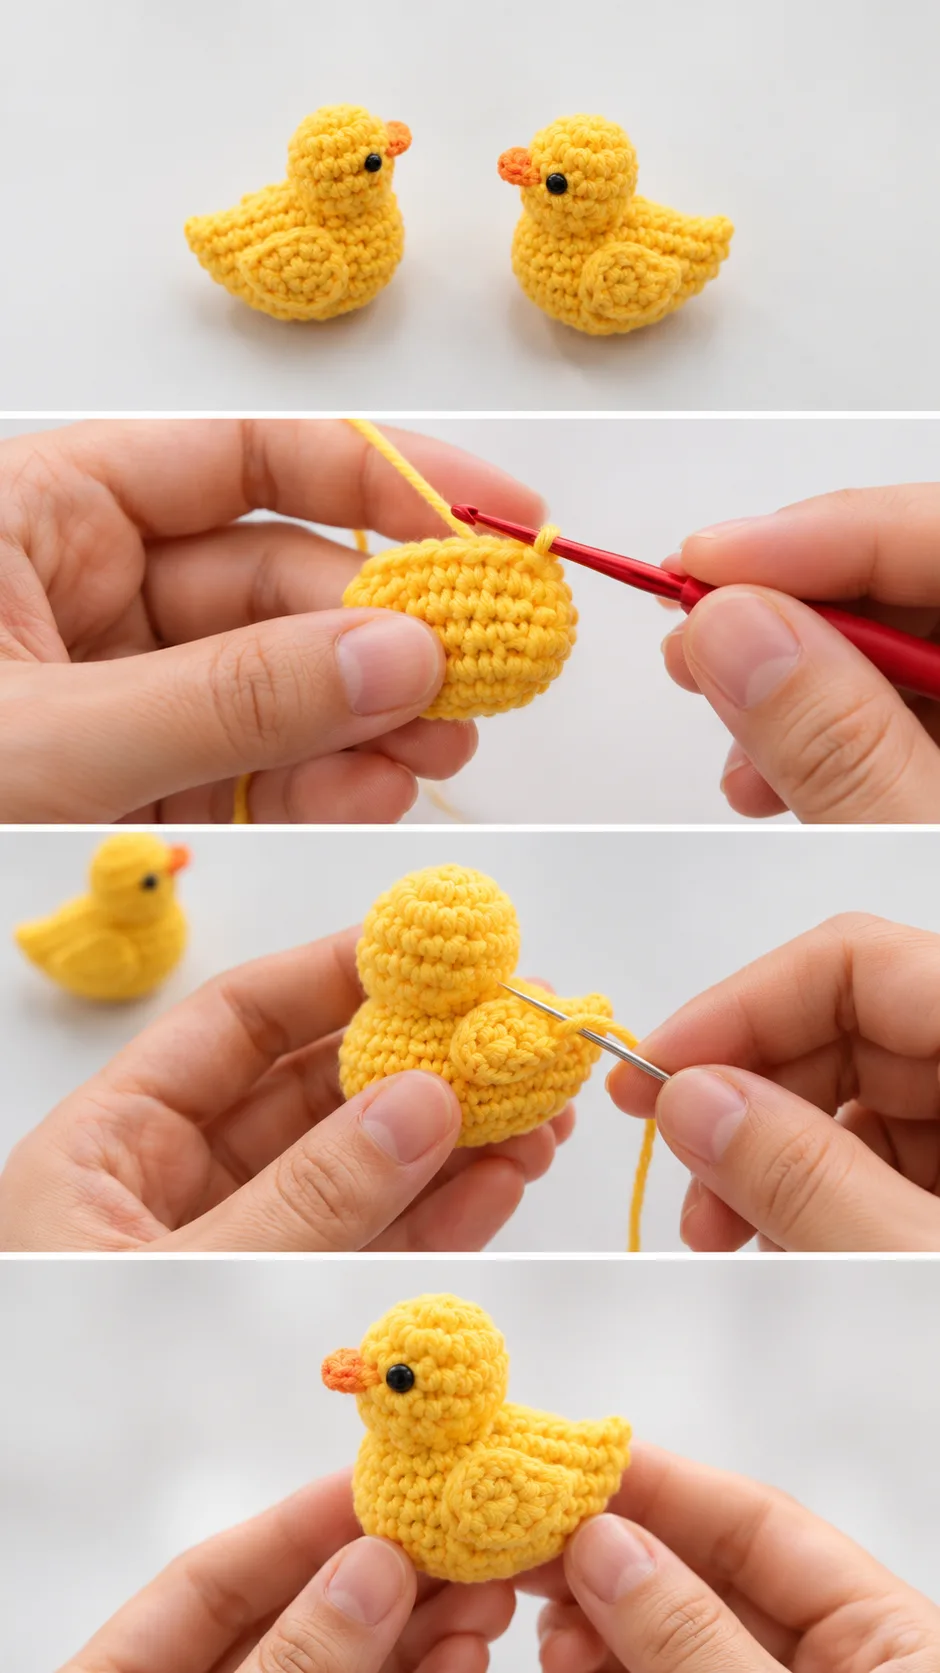
The duckling is built from a handful of small parts: a body that flows up into the head, two wings, and a beak. The head and body appear to be worked in the round as one piece, with the neck narrowing slightly before the head swells out again. That narrowing gives the bird its upright, alert posture.
Stuffing happens before the piece is closed. Fill the head first and firmly, then the body, so the neck does not collapse and the head does not tilt forward. A duckling stuffed too lightly will lean and slump on the shelf, while an overstuffed one stretches the stitches and shows the filling between them.
The wings are made separately and sewn on afterwards. Each has a rounded, flat shape, with a smaller layered piece or stitched curve lying on top of it. Because they are flat, they need to be attached at the right angle so they hug the body rather than stick out.
The watch-point in the order of work is the base. A flat, slightly broad bottom lets the duckling sit upright without a prop. If the base curves too much, it will roll forward onto its beak.
Wings: The Detail That Gives It Character
Wings are what turn a yellow blob into a duckling. On these birds, each wing is a rounded oval with a layered feather shape laid across it, and the tips point slightly back toward the tail. The effect is a soft, sculpted look from the side.
Placement is the choice that matters most. Pin both wings in place before you sew anything, then compare them from the front and the back. They should sit at the same height and the same angle, or the duckling will look lopsided. Position them low on the body, just behind the neck, as in the photos.
Sew with a matching yellow yarn tail and small stitches along the wing’s top edge, leaving the lower edge free so it lifts slightly. This is the mistake to avoid: stitching all the way around flattens the wing and loses the feathered shadow beneath it. Watch the part of the video where the wings are joined, and pause to see exactly where the needle goes in and comes out.
Beak and Eyes
The beak is a tiny orange piece that sits just below the eyes, pointing slightly upward. Sew it on with a few snug stitches so it stays put, and keep the colour a warm orange rather than red, which would turn the duckling grumpy.
Eyes belong low and wide-set on the sides of the head. Closer-set eyes give a worried look, while eyes placed too high make the face seem startled. Fix them with the head fully stuffed, so you can judge their position against the real shape.
Choosing the Best Yarn and Colours
Yarn decides how this duckling feels in the hand. A fine mercerised cotton gives crisp stitch definition and a slight sheen, which is lovely if you want the wings to stand out clearly. Milk cotton or a cotton blend feels softer and rounder, and it matches the plush, matte look of the ducklings in the photos. Acrylic works too, though it can look a little shiny and tends to puff out when it is stuffed.
Avoid mohair, chenille and other fuzzy yarns for a piece this small. They hide the wing detail and make the beak look blurred. Thick yarn is also a poor fit, because it makes the head clumsy and leaves too few stitches to shape the neck.
Yellow is the natural colour, and a warm buttery shade gives the cheerful look seen here. If you want variety, try pale cream for a duckling that looks freshly hatched, soft pink for a spring gift, or pale blue for a nursery shelf. Keep the beak in a contrasting orange or coral so the face reads clearly.
How to Style and Display a Crochet Mini Duckling
The most natural display is exactly what the photos show: two ducklings sitting together, turned slightly toward each other. A pair feels like a little scene, and it takes up almost no room. Set them on a bookshelf, a desk or a bedside table.
For seasonal use, place a small flock in an Easter basket on a bed of shredded paper, or tuck one into a jar of spring flowers. As gifts, they sit well on top of a wrapped present in place of a bow, or inside a card envelope with a short note. Tie a loop of ribbon through the top and a duckling becomes an ornament or a bag charm.
For a nursery, keep them as shelf decoration. The beads are firmly attached but still small, so these are better as display pieces than as toys for children under three.
Tips for a Neat, Plump Finish
Tension is everything on a piece this small. If the fabric looks loose and the stuffing shows through, switch to a smaller hook and try again. If the body feels stiff and the stitches are hard to work, go up a half size, since a fabric that is too tight makes the sewing-up painful.
Weave in the ends carefully. Pull each tail inside the body through a few stitches, then trim. Loose ends on a yellow duckling are easy to see, and they catch on fingers.
If the head tilts forward, add a little more stuffing to the neck and base of the head. If the duckling rolls onto its face, flatten the bottom slightly with your thumb while the filling is still soft, then close the opening. If the wings stick out, unpick the stitches and re-sew them closer to the body.
Finally, keep the beads secure. Knot the thread several times inside the head, and give each eye a gentle tug before you call it finished. Handle the small parts under good light, and take your time with the sewing; it is the stage that most changes how the finished bird looks.
A Tiny Handmade Companion
The crochet mini duckling is a small, plump, bright yellow bird with layered wings, a tiny orange beak and a calm, curious face. Four things decide whether it turns out well: a smooth yarn with clear stitch definition, a tight fabric that hides the stuffing, a firmly filled neck and head, and wings sewn on level and low.
Make one, and a second is almost certain to follow. They look best in pairs.
Video tutorial for this crochet mini duckling by 小师妹手作 (Xiao Shimei Handmade). Watch the full video below.
[VIDEO]
Follow us on Pinterest and subscribe to the Newsletter so you don’t miss a thing!
Tutorial and photos of this mini duckling by: 小师妹手作.