
This crochet peplum cardigan has a deep V-neckline, a ribbed waist and a ruffled hem, and it makes a handmade layer feel like a tailored piece from a wardrobe.
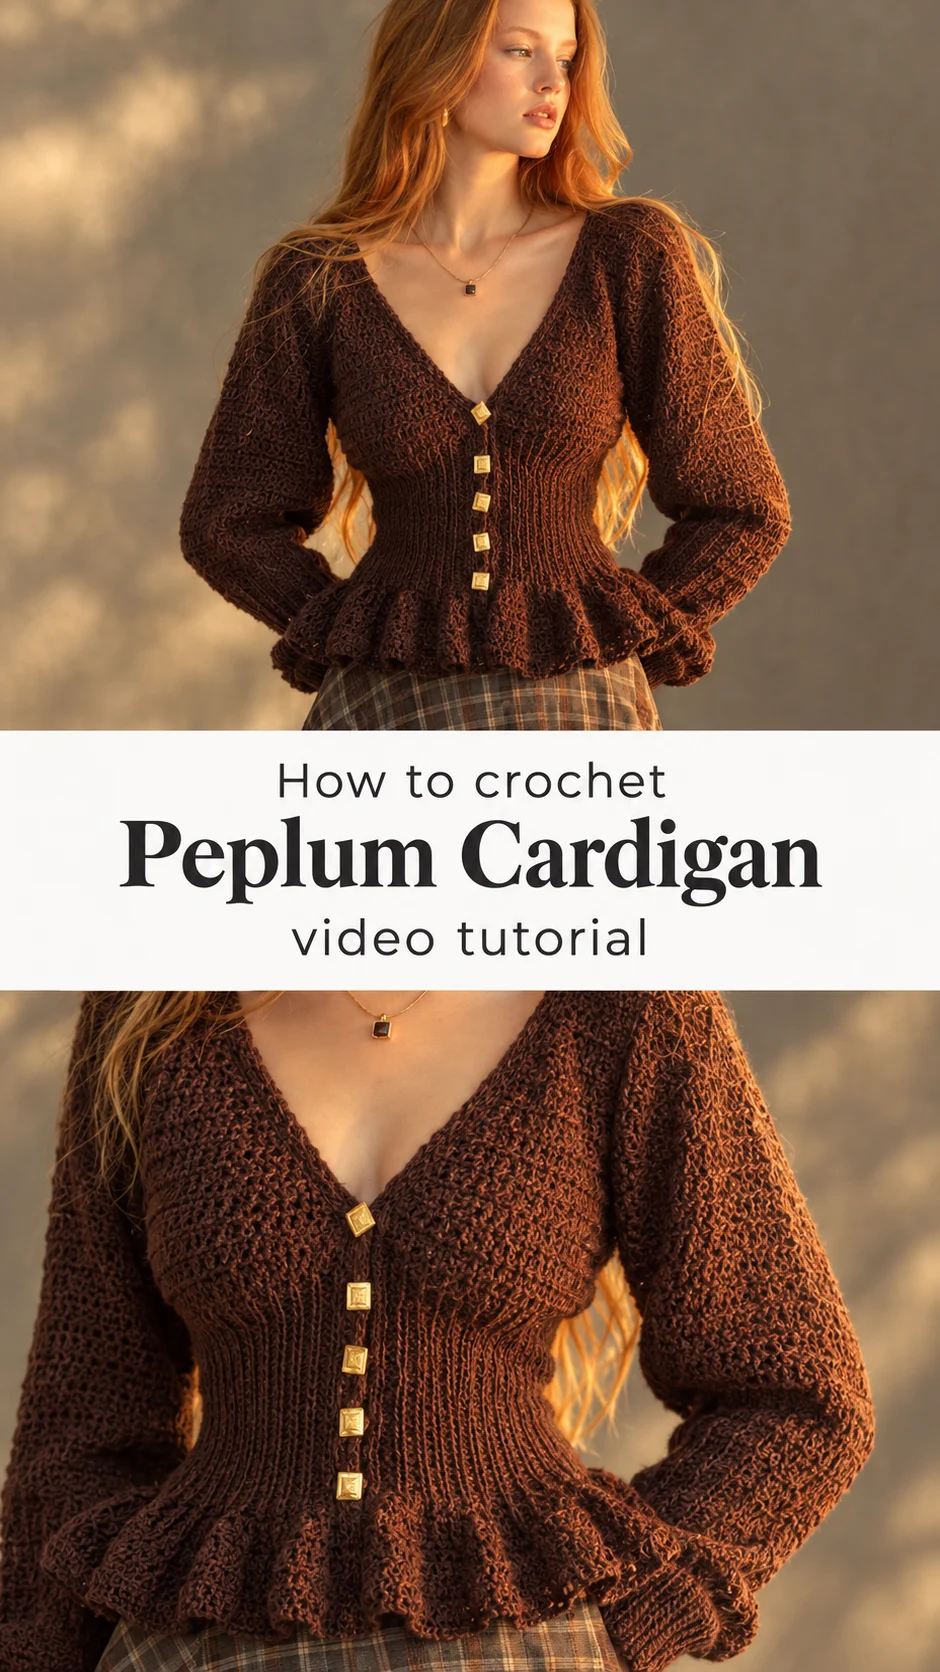
The Crochet Peplum Cardigan
This crochet peplum cardigan is built around its waist. A deep V-neckline opens over the chest, a ribbed middle section pulls the fabric in close, and a full ruffle flares out over the hips. The colour is a deep chocolate brown, and a row of square gold buttons runs down the front. The sleeves are gently gathered at the shoulder and finish in long ribbed cuffs that flip back at the wrist. Together these details give the cardigan an old-fashioned, almost Victorian outline. Worn over a plaid midi skirt, it looks like autumn in a single garment. It suits cool mornings, library afternoons and any outfit that needs a little structure.
Cardigans are usually boxy and forgiving. This one is fitted and shaped, and that is what makes it special. It asks a bit more of you as a maker, and it gives back a piece you will not find in a shop. Think of it as a first step into crocheted tailoring.
Peplum Cardigan Related Posts:
- Crochet Granny Square Bag: A Chic Two-Tone Accessory
- Crochet Square Motif: A Bold and Timeless Classic
- Crochet Autumn Beret: A Chic and Timeless Classic
- Crochet Strawberry Bottle Holder: A Sweet Functional Charm
Materials
For a crochet peplum cardigan you need a smooth, matte, medium-weight yarn in a deep colour such as chocolate brown, plus a hook that suits the yarn. The fabric in the photos looks dense and slightly textured, so a wool or wool-blend yarn with some bounce is a good guess. It will hold the fitted waist without stretching out of shape. A hook around 4 to 5 mm is a sensible general range for this weight, but always check the label and work a swatch first. You will also need a stitch marker or two, a yarn needle, and five or six square buttons with a shank, ideally in antique gold. Choose wool-blend over pure acrylic if you can, because wool springs back after wearing and blocks into shape. Choose buttons with a flat back and a sturdy shank, since they sit on a ribbed band that has some give.
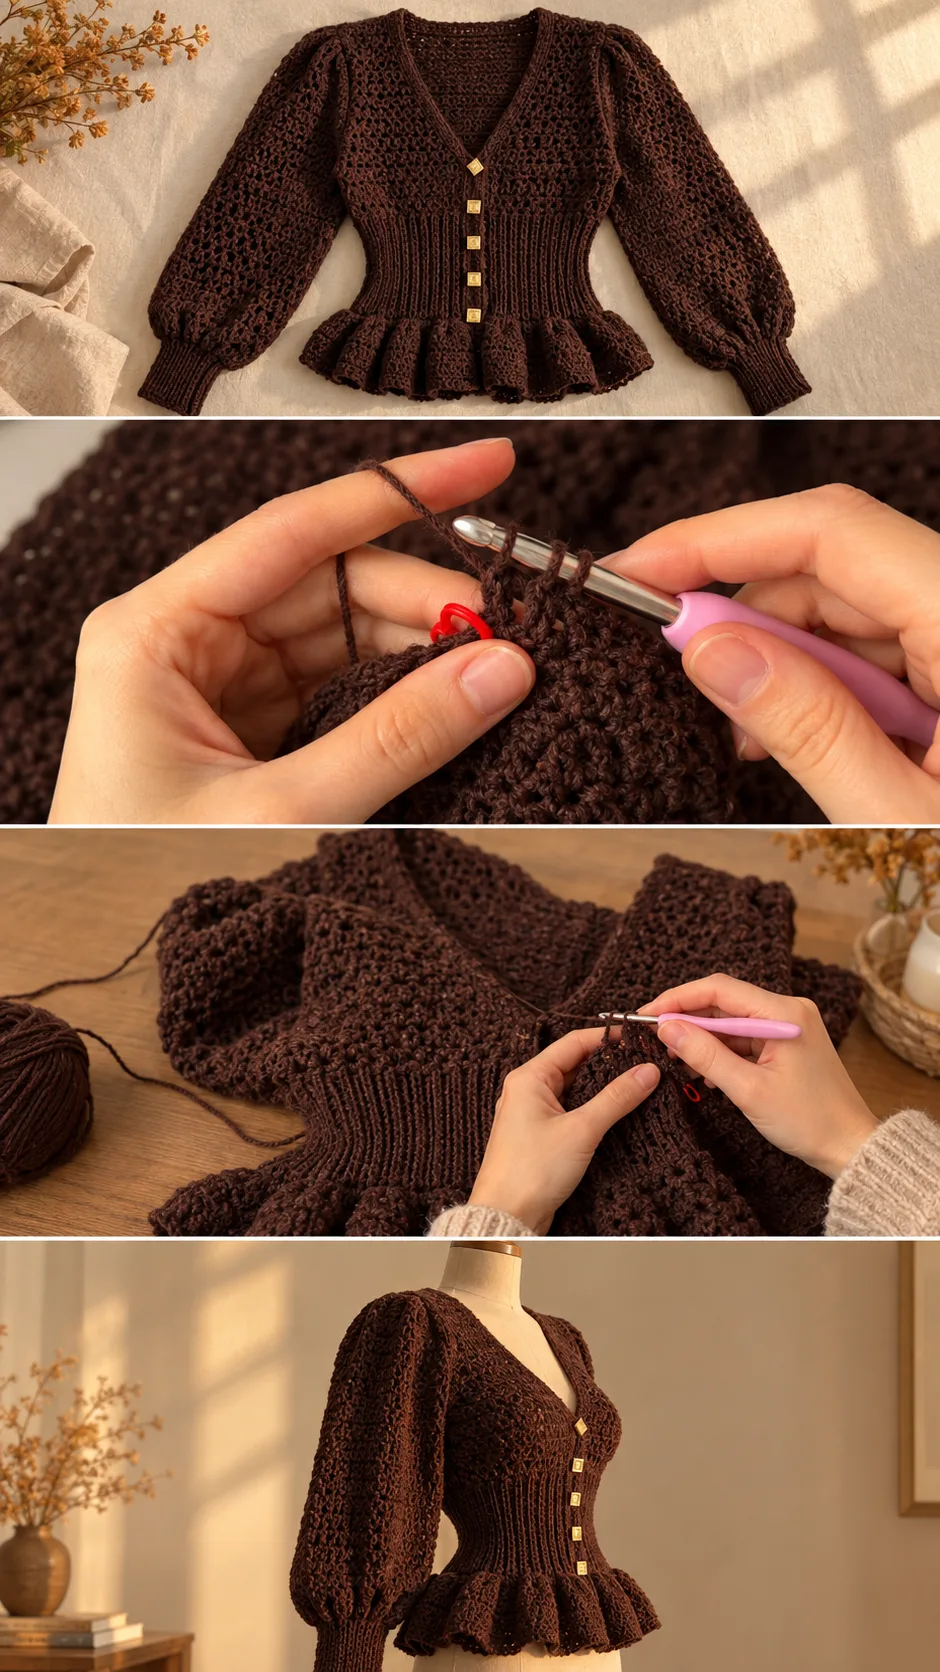
Shape and Construction
The cardigan is made up of a few distinct zones, and it helps to see them before you start. There is a shaped bodice with a plunging neckline, a ribbed waist section, a peplum ruffle at the hem, and two full sleeves with ribbed cuffs. The front edges carry the button band.
The shaping happens in the bodice. In the tutorial, rows are worked with decreases on both sides, which narrows the fabric gradually to shape the armholes and neckline. A red stitch marker sits in the work to show where the shaping lines fall. Keep your own markers in place until the decreases are finished.
The waist is where the garment changes character. The fabric shifts from a flat, dense crochet texture to tall vertical ribbing that clings to the body. Ribbing pulls inward, so it acts like a built-in corset. The ruffle then grows from the bottom edge and flares outward.
Work in the order the tutorial shows, and pause the video whenever the shaping begins. Rewatching the decrease rows once or twice will save you from ripping back later.
Fit and Measuring
Because the waist is fitted, this is not a garment to guess at. Measure your bust, waist and the length from shoulder to waist before choosing a size. The ribbed section should sit snug without squeezing.
Test the fit as you go. If the bodice is running short, add a few rows before the waist begins. If it looks loose, go down a hook size for the ribbing.
Ribbing and Texture: The Detail That Shapes the Waist
The ribbing is the signature of this cardigan. The vertical ridges in the waist and cuffs look like knitted ribbing, and they give the piece its elastic, sculpted fit. They contrast with the denser, slightly nubby fabric of the bodice and sleeves, and that contrast is much of the charm.
Crocheted ribbing is usually worked in the back loop only, or in a similar method that creates a stretchy column. Watch the tutorial closely here and note where the hook enters the stitch. Entering the wrong loop will flatten the ridges and lose the stretch.
Keep your tension steady through this section. If the ribbing looks tight and puckered, switch to a hook half a size larger. If it looks floppy and does not spring back, go half a size smaller. Ribbing rewards even stitches more than any other part of the garment.
Choosing the Best Yarn for a Fitted Cardigan
Yarn decides whether a fitted cardigan looks polished or sloppy. A wool or wool-blend yarn with a smooth twist is the safest choice. It holds the ribbed waist, gives the ruffle a little body, and blocks well. Cotton is a possible alternative, but it has no stretch and tends to sag at the waist after a few wears.
Avoid very fuzzy yarns such as mohair blends. They hide stitch definition, and the ribbing is the star of this design. A smooth yarn lets every ridge show.
Colour matters too. Chocolate brown is rich and flattering, and it makes gold buttons stand out. Deep forest green, burgundy or charcoal would give the same moody tone. Pale colours are lovely but will show the ribbing less clearly, so choose a solid and avoid heavily speckled yarns.
Buttons and the Front Band
The square gold buttons are a strong feature, and they are spaced evenly down the front from the neckline to the waist. They turn a plain cardigan into something that looks designed.
Plan the button positions before you sew anything. Lay the cardigan flat, place pins where each button will go, and check the spacing with a ruler. Sewing on buttons that are slightly off will make the whole front look crooked.
Use a sturdy thread and sew through the shank several times. Because the front band is crocheted, it has gaps, so the buttons can pull on the fabric. Stitching a small piece of ribbon or tape behind the band gives the buttons something solid to hold on to.
How to Style a Crochet Peplum Cardigan
In the photos, the cardigan is worn with a brown and cream plaid skirt, and the hem of the ruffle sits just above the waistband. The tones match, and the result looks like a school-library autumn. Keep that proportion and the fitted top balances the fuller skirt.
For a different feel, pair it with high-waisted dark denim and boots. The ruffle sits neatly over the waistband, and the deep V shows off a delicate necklace. A slim gold pendant, like the one in the photos, echoes the buttons.
It also works over a slip dress or a fitted camisole for an evening look. Because the neckline is low, a thin layer underneath keeps it comfortable on cool days. Avoid thick, high-necked tops beneath it, which crowd the V.
Tips for a Polished Finish
Blocking is not optional here. Pin the pieces to the measurements you want, steam or dampen them gently, and let them dry flat. Blocking evens out the stitches and sets the shape of the sleeves and ruffle.
If the peplum ruffle curls or flips up, it may be too tight. Work the ruffle rows with a slightly larger hook, or add a few extra stitches in each increase round. Steam and gentle pinning will also help it fall in soft waves.
If the sleeve cuffs look too loose, the ribbing may be too wide for your wrist. Go down a hook size, or work a few fewer stitches in the cuff. If the cuffs roll, give them a light steam and fold them back, since this design is meant to have a turned-back cuff.
Weave in ends along the ribbing columns where they will disappear. Sew the seams with a matching yarn and a mattress stitch for an invisible join. Take your time here, because seams that run along a fitted waist show easily.
Caring for Your Cardigan
Wool blends do best with gentle care. Hand wash in cool water with a mild detergent, press out the water in a towel, and dry flat. Hanging a wet cardigan will drag the ribbing and the ruffle downward.
Store the cardigan folded rather than on a hanger. The weight of the sleeves can stretch the shoulders. Check the buttons now and then, and tighten any that have worked loose.
A Structured Handmade Treasure
This crochet peplum cardigan is a fitted, feminine layer with a ribbed waist, a ruffled hem and gold buttons that catch the light. It takes patience, but the result looks far from a beginner project.
Four things decide how it turns out: a smooth, springy yarn, steady tension in the ribbing, careful measuring at the waist, and a good block at the end. Get those right and the fit will follow.
Wear it with plaid and boots, and let it become your favourite autumn piece.
Video tutorial by the original creator of the Crochet Peplum Cardigan. Watch the full tutorial on YouTube and support their work.
VIDEO
Follow us on Pinterest and subscribe to the Newsletter so you don’t miss a thing!
Tutorial and photos of this peplum cardigan by: WONDER NETTING.