
A crochet frog tissue pouch turns a plain packet of tissues into a small green character with raised eyes and a wide, flat mouth. It is quick to make, soft to hold, and sits happily in a bag or on a desk.
The Crochet Frog Tissue Pouch
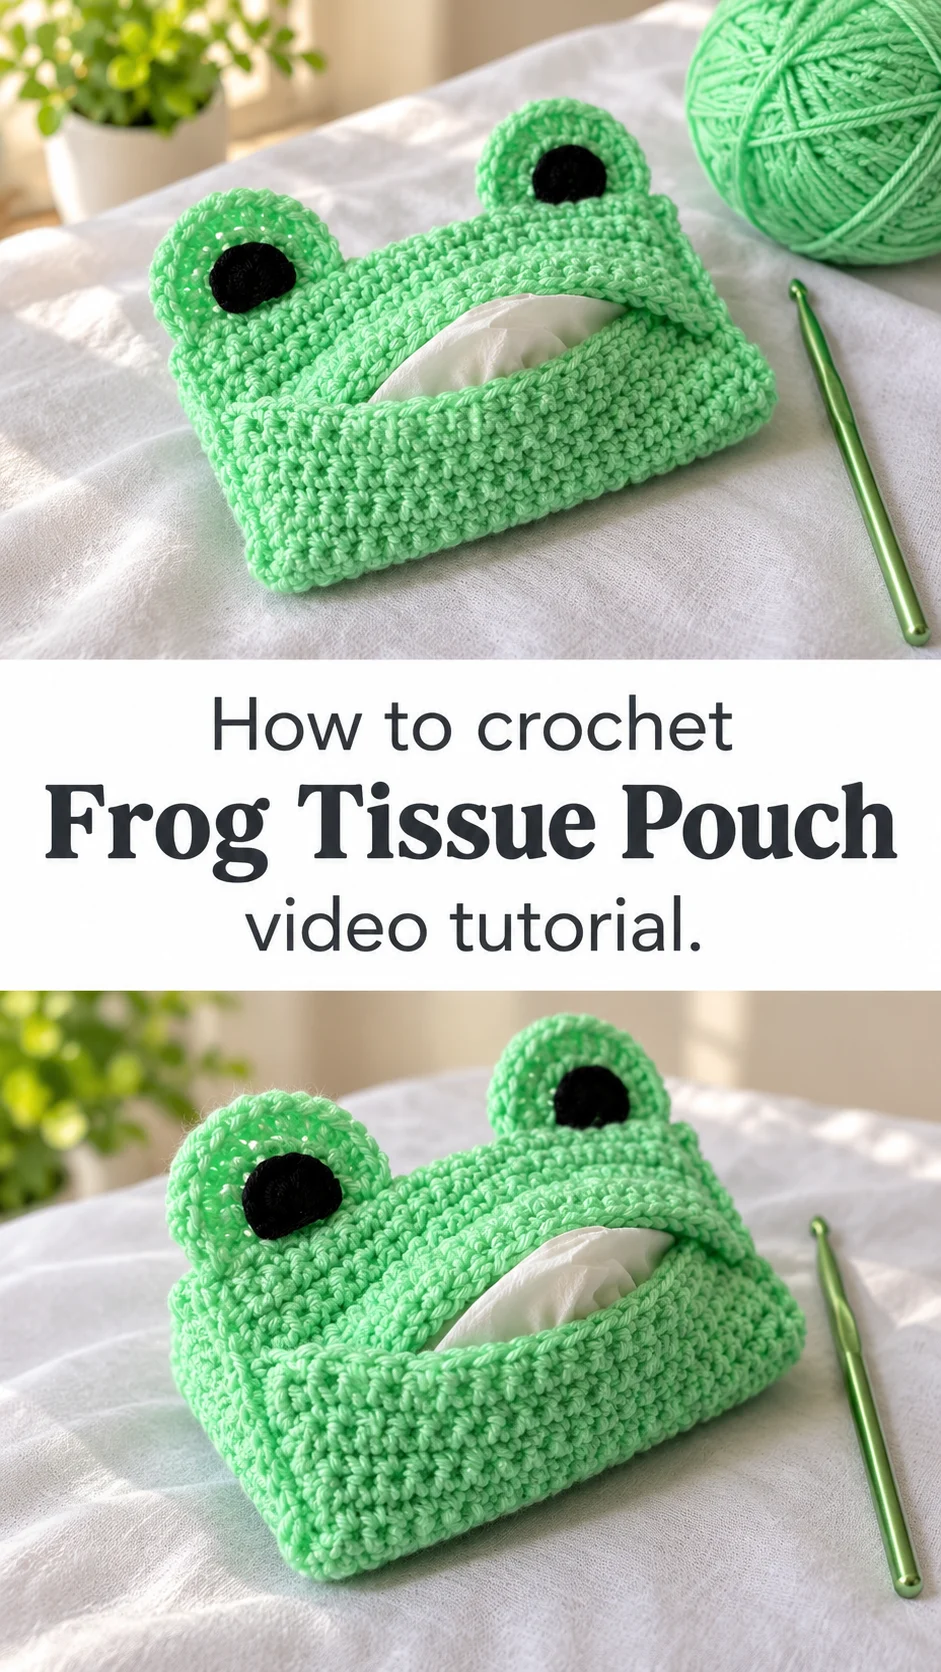
The crochet frog tissue pouch is a flat, rectangular holder worked in a fresh mint green. Two round ears sit on the top edge, each filled with a black pupil, and they give the whole piece its frog face. The body is made of dense, firm stitches, so it keeps a neat shape even when the tissues run low. A slit across the front works as the mouth, and a tissue peeks out of it like a tongue. The pouch is small enough to slip into a handbag, a backpack pocket or a car door. It also looks sweet on a bedside table. Nothing about it needs special shaping skills. The charm comes from the eyes and the simple folded structure.
Pocket packs of tissues are easy to lose and easy to crush. This pouch protects them and makes the daily act of reaching for one a little more fun. It is also a very giftable project, since it uses so little yarn and finishes in an evening or two. Beginners can use it to practise working neat rows and sewing on small details.
Tissue Pouch Related Posts:
- Crochet Baby Blanket: A Beautiful Heirloom Piece
- Crochet Tassels: A Charming Decorative Touch
- Crochet Lace Flower Band: A Delicate Timeless Accent
- Crochet Lace Table Cover: A Timeless and Elegant Classic
Materials
The crochet frog tissue pouch needs a smooth worsted weight acrylic in a light mint or pastel green, plus a small amount of black for the pupils. The yarn in the pictured piece has a soft sheen and a slightly springy feel, and acrylic is a good match because it holds its shape and washes easily. Pair it with a hook one size smaller than the yarn label suggests, around 3.5 to 4 mm for a worsted yarn. A tighter fabric stops the tissues from showing through the stitches and keeps the pouch from stretching. You will also need a yarn needle for sewing the pieces together and weaving in ends, and scissors. A pack of pocket tissues is handy for testing the size as you work. Stitch markers are optional, but they help when you are joining the ears.
Understanding the Pouch Structure
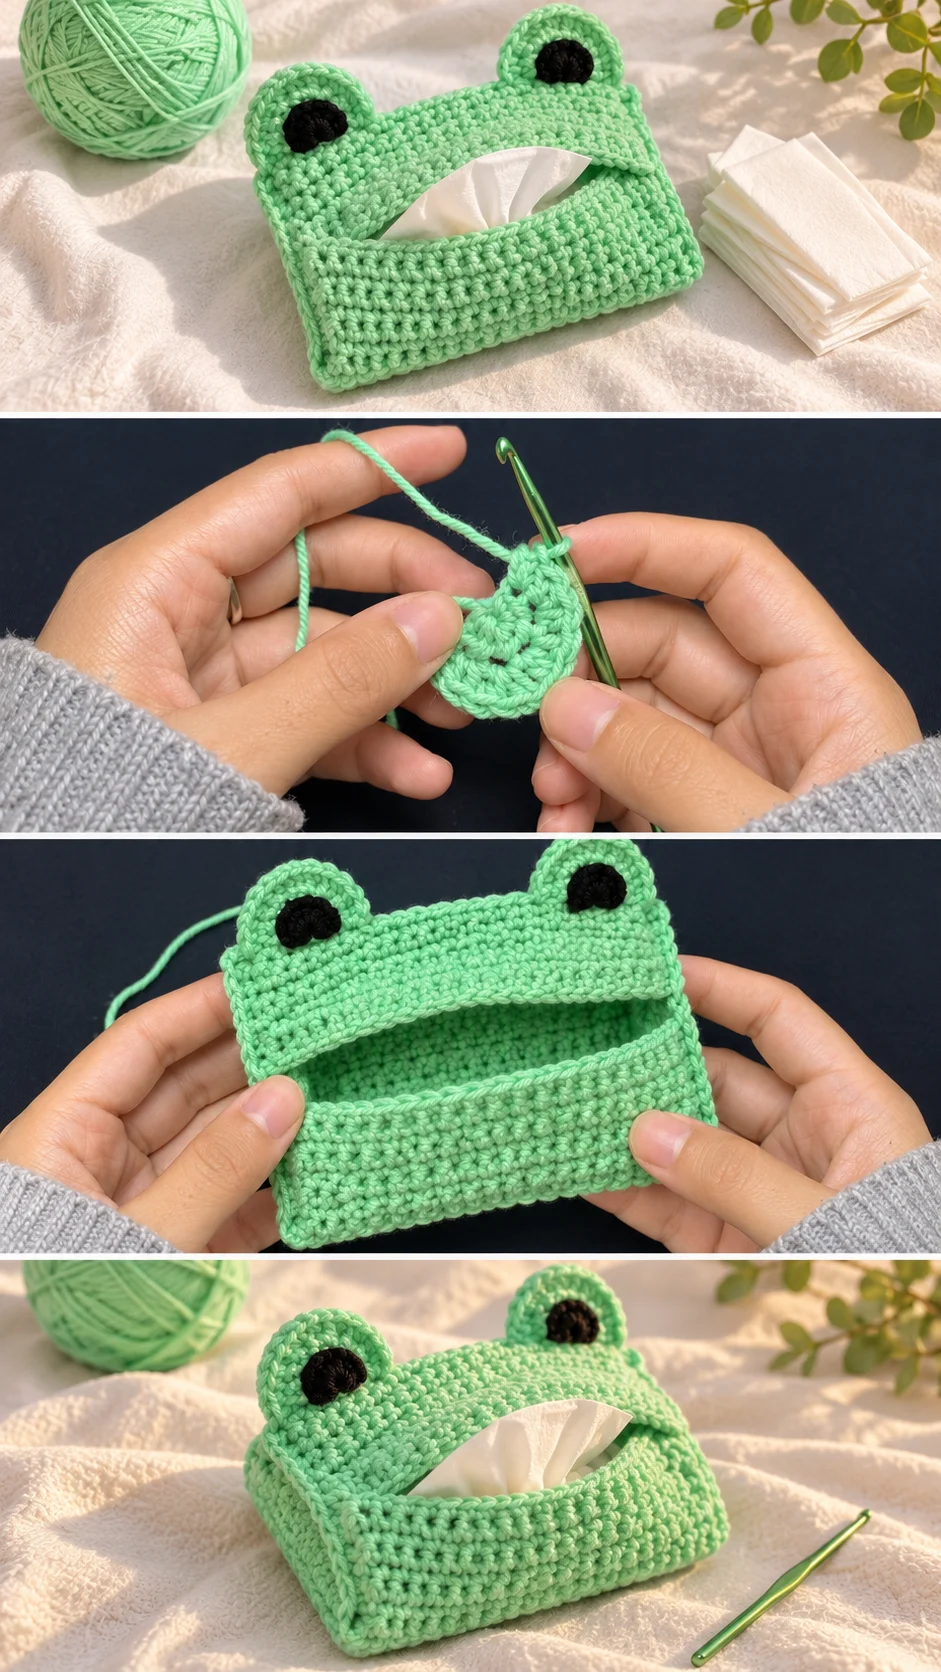
The pouch looks like a single flat panel that is folded so that one edge overlaps the other. That overlap creates the mouth opening. The fabric is worked in rows of tight, even stitches, and you can see the horizontal ridges running across the body.
The overlapping flap is the clever part. It lies across the middle of the front and leaves a narrow gap through which a tissue can be pulled. Because the flap is simply folded and stitched at the sides, there is no zipper, button or lining to deal with.
The ears are separate small circles worked flat and sewn to the top corners. They are slightly larger than a coin and have a visible raised rim around the outside. Watch the video closely when the ears are shaped, and pause to check how the rounds grow so the circle stays flat instead of cupping.
Eyes: The Detail That Gives It Life
The black pupils are what make the frog read as a frog. They are not perfectly round. Each one is a small, slightly irregular patch of black yarn stitched onto the green circle, and that hand-made quality adds to the personality.
There are two ways to make them. You can crochet a tiny black disc and sew it on, or you can embroider the pupil directly with layered stitches, which is what the stitched texture in the photos suggests. Embroidery is easier to shape, but a crocheted disc is firmer and more even.
Place both pupils in the same position on each ear, usually toward the inner or lower side, so the frog seems to look in one direction. If they end up uneven, unpick one and move it. A small shift changes the expression more than you would expect.
Keeping the Ears Even
Pin both ears in place before sewing and hold the pouch up to check that they mirror each other. If one ear sits higher, the frog looks lopsided. Sew with the same green yarn and use small stitches along the straight edge only, so the curved top stays free and slightly raised.
Choosing the Best Yarn and Colours
Acrylic gives the crispest result, because it keeps its structure and does not fluff up with handling. A mercerised cotton is another option and has a cooler, smoother look, but it is less forgiving and can make the fabric stiff. Avoid a very fuzzy or brushed yarn, since it hides the stitch texture and blurs the eyes.
The mint green in the photos reads as a classic storybook frog. For a different mood, try a deeper moss green with cream pupils, or a soft pastel yellow for a duckling-like version. Keep the pupils in a strong contrast colour so they stay readable from a distance.
If the fabric feels loose after a few rows, go down a hook size and restart. A pouch that sags will not hold its shape, and the gap in the mouth will gape open.
How to Style a Crochet Frog Tissue Pouch
In the photos the pouch rests on a soft white cloth beside a ball of yarn and a few loose tissues. That calm, simple setting suits it. A neutral surface lets the green stand out.
Tuck it into a tote bag as a travel companion, or leave it on a desk as a small piece of cheerful decor. It also works well in a nursery or a child’s bedroom, where a frog face is welcome. As a gift, pair it with a pack of tissues and a hand cream for a tiny self-care set.
Because it is so small, you could make several in different greens for a classroom, a craft fair stall or a set of teacher gifts. Each one takes only a short amount of yarn.
Tips for a Neat Finish
Weave in every end on the wrong side and trim close. Loose tails near the mouth will catch on tissues and look messy. If the edges ripple, your tension is too loose at the turns, so chain more firmly at the start of each row.
If the flap curls upward, press it flat with a damp cloth and let it dry under a light weight. If the pouch feels too tight for the tissue pack, add a row or two to the main panel, but test the fit before sewing the sides closed. If the pouch is too loose, the tissues will slide out, so tighten the side seams slightly.
Sew the side seams with a whip stitch or mattress stitch, whichever you find easier to keep invisible. Check that the mouth opening still lines up after the sides are closed. This is the part that takes the most patience, and it is worth slowing down for.
Following the Tutorial
Watch the video once before you pick up the hook, then follow it again while you work. Pay attention to how the creator folds the panel to form the overlap, because that fold decides the size of the mouth. Pause when the ears are shaped and when the pieces are joined, and replay those moments until your hands feel sure of them.
Work in a sensible order: the main panel first, the ears next, the pupils after that, and the final assembly last. That way you can adjust the fit before committing to any sewing.
A Small Handmade Frog
The crochet frog tissue pouch is a tiny project with real character. It is built from one folded panel, two round ears and a pair of dark eyes.
Four things decide how it turns out: a firm tension, a clean fold for the mouth, matching ears and carefully placed pupils. Get those right and the frog looks happy.
Small, green and useful.
Follow us on Pinterest and subscribe to the Newsletter so you don’t miss a thing!
Tutorial and photos of this frog tissue pouch by: The Yarnling.