
A crochet flower motif worked in fine white thread turns one small round of petals into something that feels like old lace, light enough to rest on a fingertip and detailed enough to study for a long while.
The Crochet Flower Motif
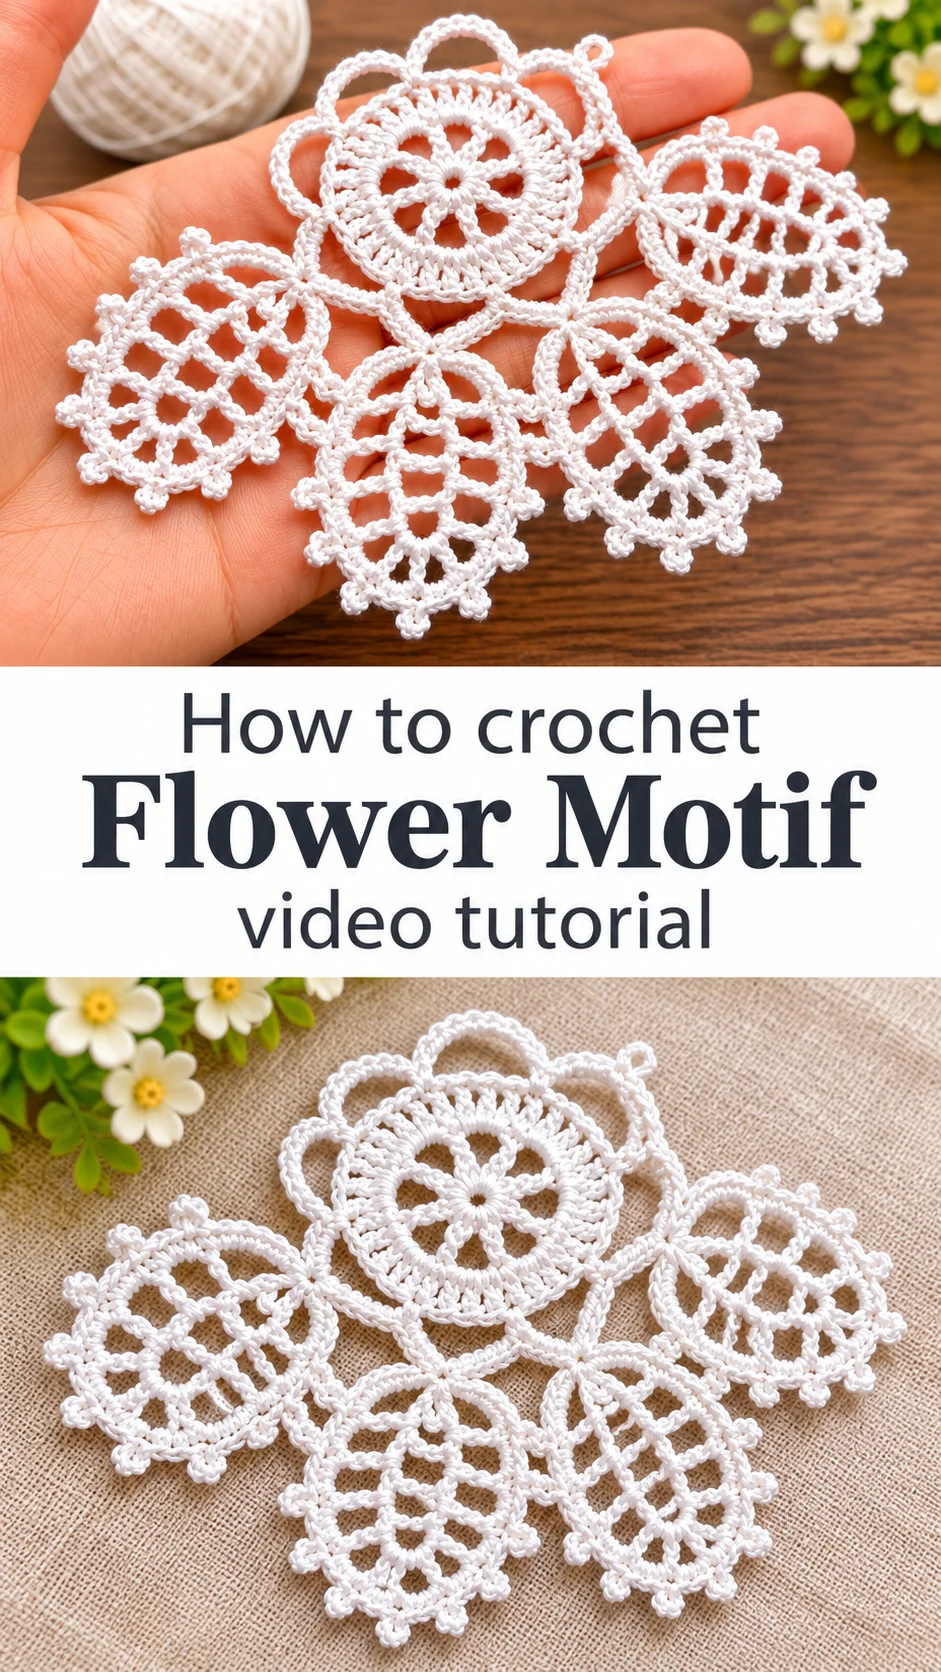
The crochet flower motif in the photos is a doily-sized piece built around a small round centre with eight leaf-shaped petals radiating outward. The centre is a dense little disc with a spoked, wheel-like middle, and it sits inside a ring of chain loops that connect it to the petals. Each petal is an open oval of mesh, framed by a firm outline and finished with tiny picot knobs along the outer edge. That contrast between the solid centre and the airy petals is what gives the design its character. The white thread has a soft sheen that suits the lacework. A motif like this works as a coaster, a small table mat, a jar topper or a repeating unit for a larger runner. It is also small enough to finish in a few evenings.
Think of it as a lesson in lace-making. The petals are all worked alike, so once the first one makes sense, the rest follow with a steady, almost meditative rhythm. It makes a thoughtful gift too, especially when mounted on a card or tucked into a book. Delicate, quick, satisfying.
Flower Motif Related Posts:
- Crochet Modern Granny Blanket: A Timeless Elegant Classic
- Crochet Jasmine Stitch Blanket: A Stunning Textured Treasure
- Crochet Chunky Bean Stitch Hat: A Warm Winter Essential
- Crochet Granny Square Handbag: A Charming Vintage Accent
Materials
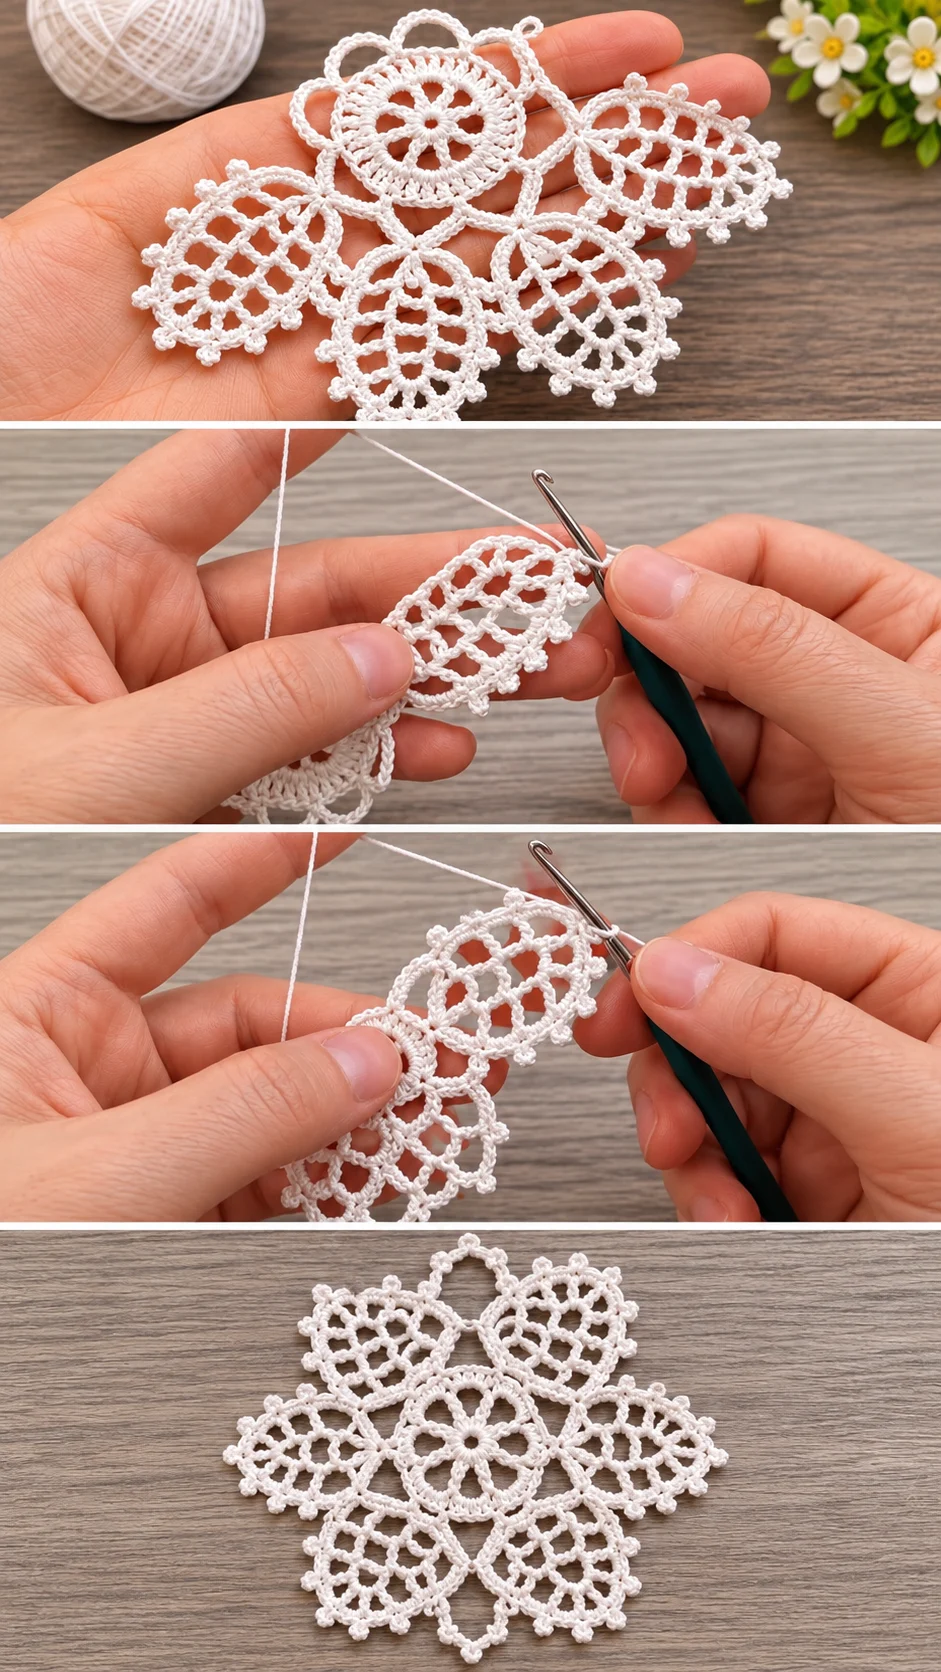
For a crochet flower motif like this, choose a fine mercerized cotton thread in white or ivory, since its smooth twist and light sheen show off the open mesh and the picot edge. Pair it with a steel crochet hook in a small size, usually somewhere between 1.0 and 1.75 mm depending on the thread weight, and keep the stitches snug so the petals hold their oval shape. A hook with a soft grip, like the teal handle seen in the photos, saves your hand during long sessions of fine work. You will also need a small tapestry needle for weaving in ends, a few pins, and a clean towel for blocking. Starch or a fabric stiffener is optional, but it helps the finished motif stay crisp if you plan to use it as a coaster or display piece.
Choosing the Best Thread for a Lace Motif
The motif in the photos looks like it is worked in a smooth, tightly twisted cotton, and that is the right instinct for this style. Mercerized cotton glides on the hook, keeps the stitch definition sharp and gives the picots a clean, rounded shape.
A thicker cotton, such as a size 5 pearl-type cord, produces a larger and bolder flower with more visible chain spaces. A finer size 20 or 30 thread makes a truly delicate piece, though it demands patience and good light.
Avoid fuzzy or loosely plied yarns. The mesh petals depend on clear, open spaces, and a halo of fibre blurs them. Acrylic can also look limp once the motif is washed, because it does not respond to starch or blocking the way cotton does.
If the finished motif feels floppy, the cause is usually a hook that is too large for the thread. Drop down a size and the fabric tightens at once.
The Centre and Its Chain Ring
The signature detail here is the round centre. It looks like a small wheel with a pinhole middle, surrounded by dense rounds that give it more body than the petals. This is almost certainly worked from a magic ring or a small chain circle, which keeps the middle tight.
Around the centre, a ring of chain loops forms a kind of scalloped frame. These loops do the practical job of linking the centre to the petals, and they also give the motif its flower-like silhouette from a distance.
The choice you face is how firm to make the centre. Work it snugly and it stays flat. Work it loosely and it will cup or ruffle, which spoils the lace effect. If the disc starts to dome, that is a sign your tension is too tight on the outer rounds, so relax slightly or use a hook half a size larger for that part only.
The most common mistake is miscounting the spokes at the start. Watch how the creator sets up the first round in the video, pause at the closing join, and confirm your spokes are evenly spaced before moving on.
How the Petals Are Built
Each petal is an elongated oval of mesh. Chain spaces form a diamond-like net inside a firm outline, and radiating bars give the interior a leaf-vein look. Along the outer rim, small picot knobs repeat like beads on a necklace.
The petals appear to be worked one at a time and attached to the centre ring as you go, which means the motif grows petal by petal rather than round by round. That makes it easy to put down and pick up, but it also means every petal must match. Keep a similar number of chains in each space and the ovals will come out the same size.
Keeping the Picot Edge Neat
The picots are the finishing flourish, and they are easy to rush. Work each one with the same count of chains and anchor it firmly into the base stitch. A loose anchor leaves a limp loop instead of a rounded knob.
If some picots look pointed and others round, tension is the culprit. Hold the thread at a steady distance from the hook and keep the little chains of each picot uniform.
Watch the creator’s hand during this step in the video. The way the hook rotates to close each picot is hard to describe but easy to copy, so replay it as often as you need.
Joining and Assembling the Pieces
Because the petals connect to the centre ring, the order of work matters. Complete the centre first, then add each petal around it in sequence, joining at the chain loops. Working in order keeps the spacing balanced and prevents a lopsided flower.
Check the join points as you travel around. A petal attached a stitch too far to the left will pull the whole circle off centre. Lay the piece flat after every two petals and look for gaps or overlaps.
If the last petal will not fit its space, the earlier ones have drifted. Unpick back to the petal where the spacing first slipped, rather than forcing the final join. A little frogging now saves a puckered motif later.
Blocking and Finishing Tips
Lace motifs like this one transform when blocked. Pin the flower out on a towel, shaping each petal into a clean oval, and let it dry fully. Pinning through each picot gives the edge its crisp, beaded look.
Weave in ends along the solid outlines of the petals, where the stitches are dense enough to hide them. Avoid weaving through the open mesh, because tails show clearly against the empty spaces.
For a stiffer finish, dip the motif in diluted fabric stiffener or starch before pinning. The petals will hold their shape for years, which is useful for coasters and display pieces. Skip the stiffener if you plan to join several motifs into a soft runner.
If the finished flower curls at the edges, it needs more blocking, not more stiffener. Re-wet it, pin it flat and give it a full day to dry.
How to Style a Crochet Flower Motif
In the photos, the flower is shown flat on a wooden surface, where the white thread stands out against the warm grain. That contrast is the simplest way to display it: a single motif under a glass, or on a dark tabletop.
Beyond that, a few ideas work well. Use it as a coaster under a tea glass, where the open petals let the table show through. Stitch several together for a table runner, or sew one onto a linen napkin corner or cushion cover for a vintage touch.
For gifts, mount a stiffened motif inside a small frame, or use it as an ornament by hanging it from a ribbon in a window. Dyed thread in soft blue or dusty pink changes the mood entirely while keeping the same pattern.
A Delicate Handmade Treasure
This crochet flower motif is a small piece with a big payoff: a dense little centre, eight lacy petals and a picot edge that catches the light. It rewards patience more than skill.
Four things decide how it turns out: a smooth cotton thread, a hook small enough to keep the stitches firm, even spacing as the petals join, and a proper blocking at the end. Get those right and the motif looks heirloom-ready.
Small stitches, lasting beauty.
Video tutorial by Knitting Love, who walks through every stitch of this crochet flower motif. Watch it on YouTube and pause at the petal joins.
Follow us on Pinterest and subscribe to the Newsletter so you don’t miss a thing!
Tutorial and photos of this flower motif by: Knitting Love 💗.