
I’ve been searching for the perfect floral tote pattern for months, and this one stopped me in my tracks. The Lavender Rose Granny Square Tote is exactly what I’d been hoping to find. Those layered 3D roses sitting inside classic granny squares? Absolutely stunning. This is my new favourite bag pattern, and I’m thrilled to share every detail with you today.
Get the Ad-Free PDF Pattern
You can find the free pattern below, or you can purchase the ad-free printable PDF from my shop.
Get the Printable PDF →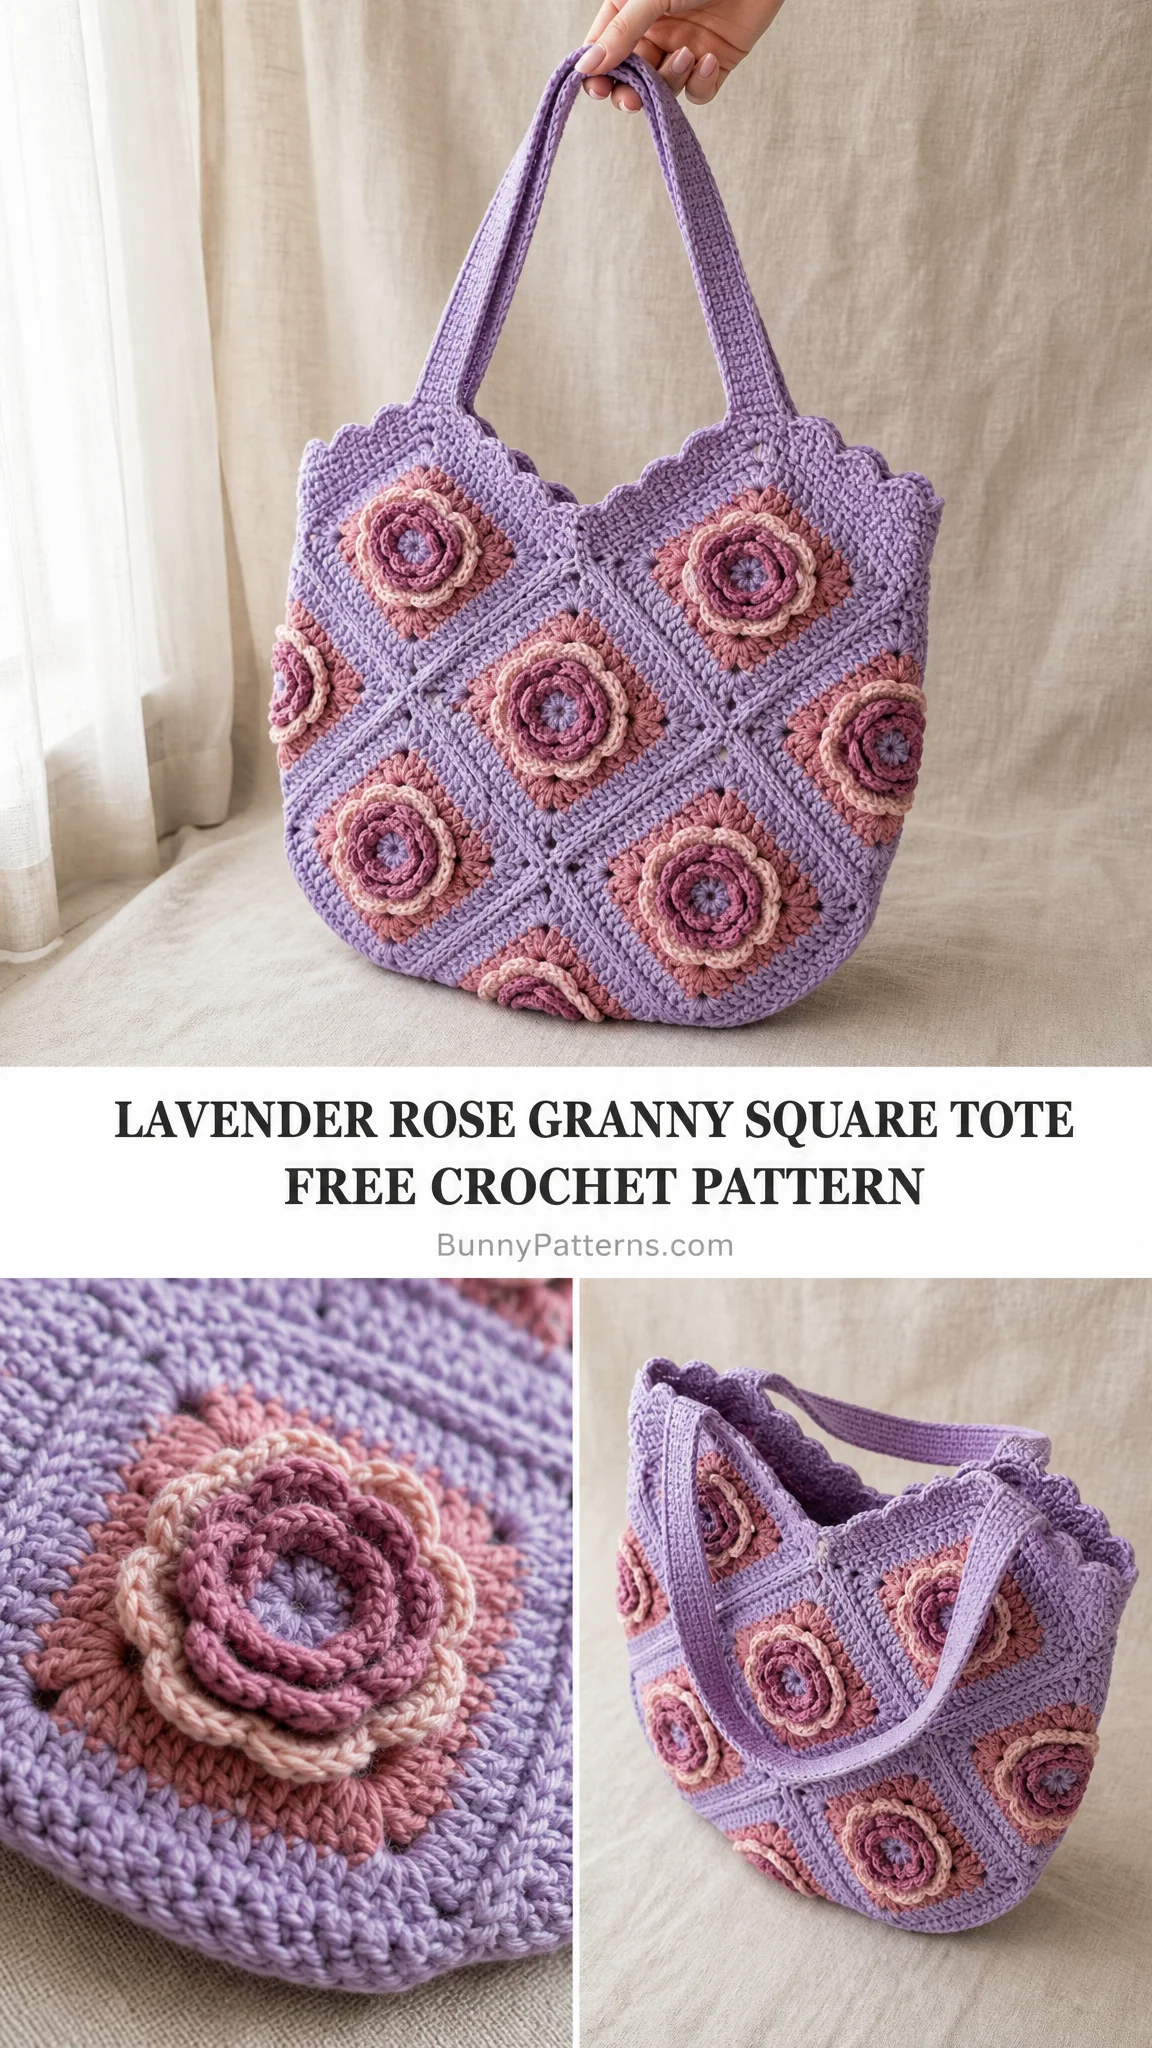
This intermediate crochet pattern creates a structured cotton tote covered in soft, dimensional roses. Each flower has three graduated petal layers that genuinely pop off the fabric. The whole bag works up as flat motifs you assemble at the end, which makes it perfect for picking up and putting down between life’s interruptions. Whether you choose the romantic Antique Rose colorway or the garden-fresh Blush & Sage version with leaves, you’ll end up with a bag that turns heads everywhere you go.
What Makes This Tote Special
The magic of this design lives in the construction. You’re not crocheting a complicated bag shape. Instead, you’re making 18 individual granny squares, each featuring a gorgeous 3D rose in the centre. Then you join them into two panels and stitch everything together. It’s modular, manageable, and surprisingly relaxing once you get the rhythm down.
The finished tote measures 34 × 38 cm (13.4 × 15 inches) with a comfortable 24 cm strap drop. It’s roomy enough for everyday essentials without being bulky. The solid granny square construction creates a sturdy fabric that holds its shape beautifully, especially in 100% cotton yarn.
Two Colorways, One Pattern
This pattern gives you options. Pick the style that speaks to you:
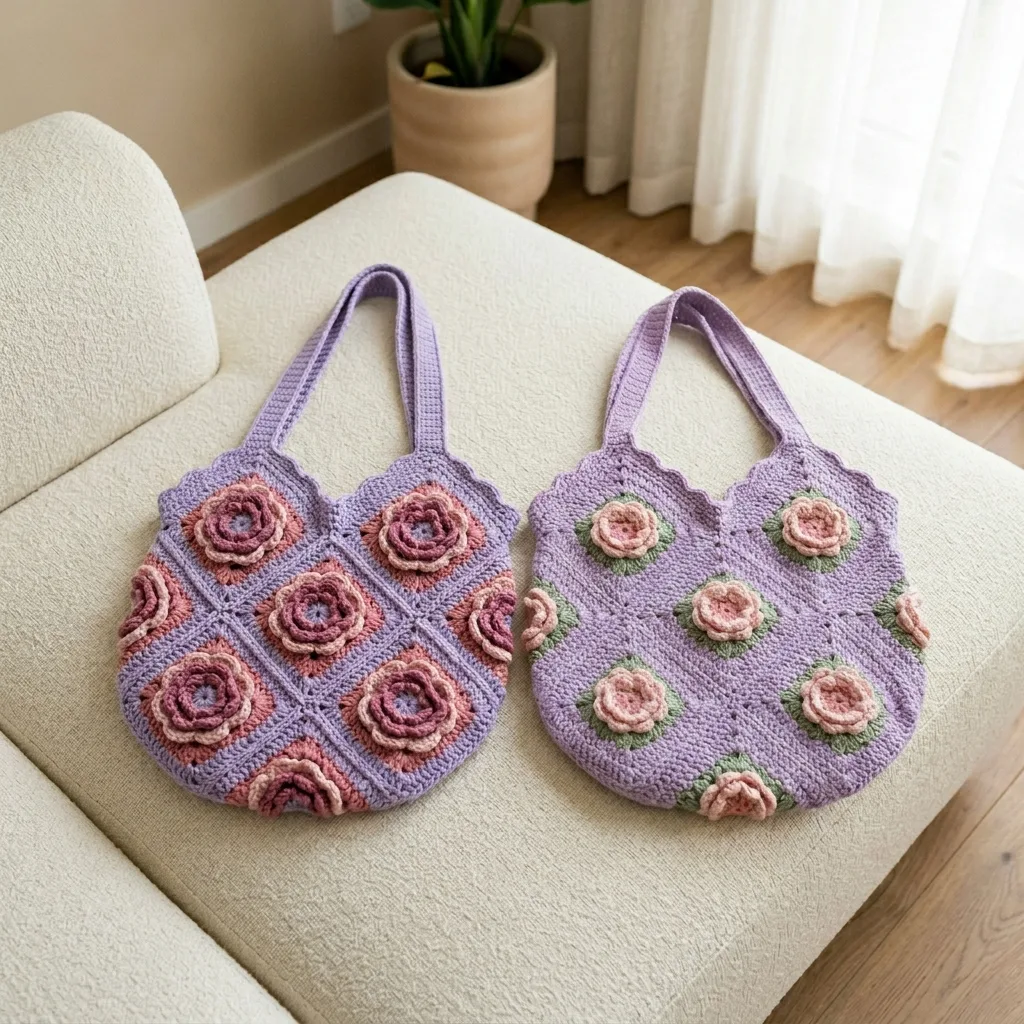
Colorway A: Antique Rose features roses only, no leaves. The rose centres are worked in a deeper rose shade, with outer petals in soft blush. This creates a romantic, vintage feel with gorgeous colour depth in each flower.
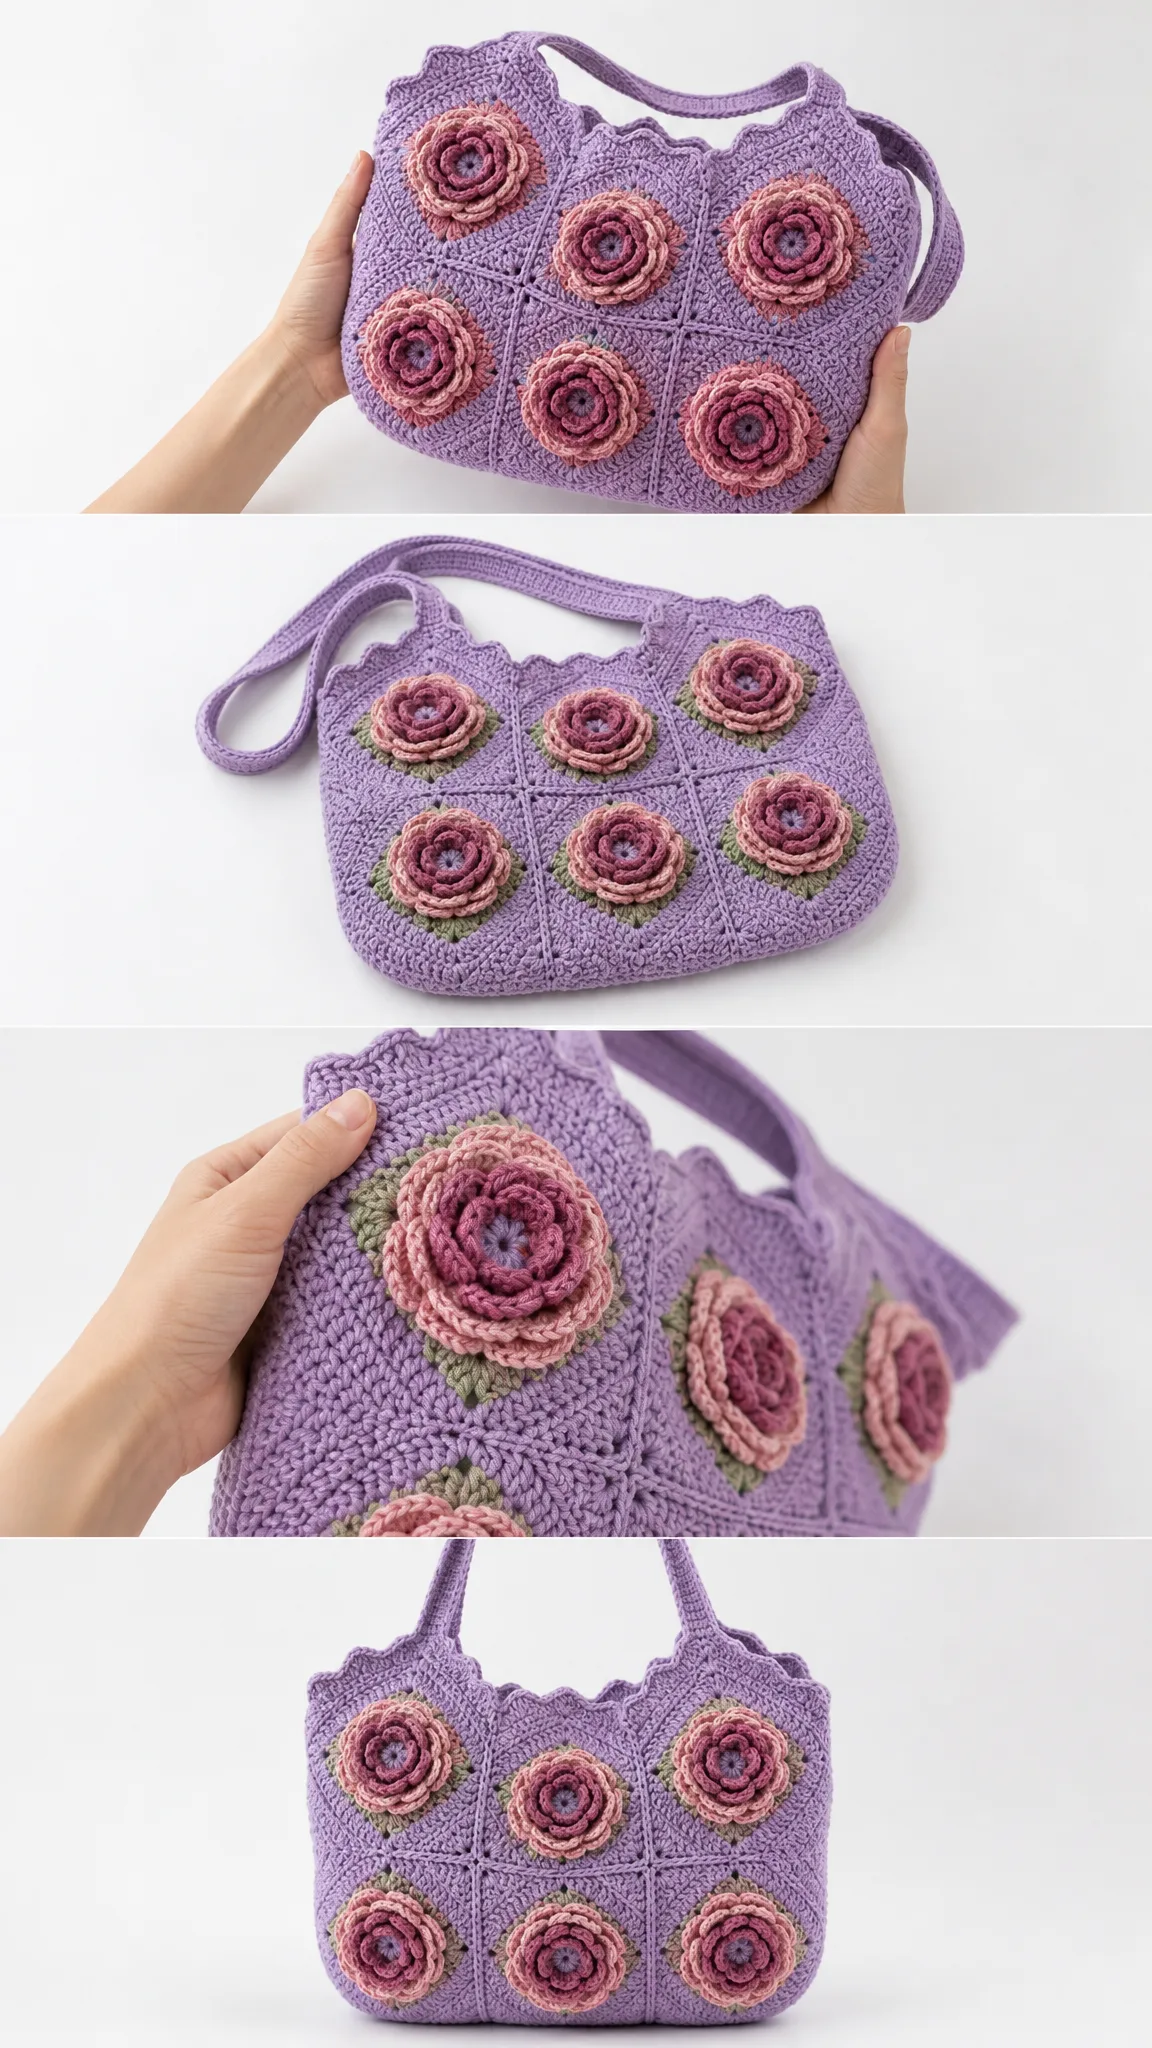
Colorway B: Blush & Sage includes two sage green leaves tucked under each rose. The entire rose is worked in blush for a softer, more garden-inspired look. The green leaves add a fresh pop of colour against the lilac background.
The squares themselves are identical in both versions. Only the rose colours and optional leaves change. You could even mix both styles for a his-and-hers set like the sample photos show.
Materials You’ll Need
Yarn Requirements
You’ll need 100% cotton yarn in worsted/aran weight (#4). Here’s the breakdown by colour:
| Colour | Use | Yards | Metres |
|---|---|---|---|
| A: Lilac | Squares, edge, straps | ~600 | ~549 |
| B: Blush | Outer rose petals | ~160 | ~146 |
| C: Rose | Rose centres | ~120 | ~110 |
| D: Sage | Leaves (Colorway B only) | ~60 | ~55 |
These estimates include a small buffer. If you’re making Colorway A, you can skip colour D entirely. I’d recommend buying one extra ball of the lilac main colour just to be safe. Dye lots vary, and running out partway through is frustrating.
Suggested Yarn Brands
Lion Brand 24/7 Cotton is mercerized with crisp stitch definition that makes the rose petals really pop. Best choice for a polished, professional look.
Paintbox Yarns Cotton Aran offers a huge colour range, making it easy to match lilac, blush, rose, and sage. It’s also budget-friendly.
Bernat Handicrafter or Lily Sugar’n Cream gives you a matte, sturdy finish that’s widely available. This creates a cosier, more rustic aesthetic.
Any smooth #4 worsted/aran 100% cotton that meets gauge will work. Mercerized cotton shows the 3D petals best. A cotton-acrylic blend makes a lighter, softer bag but holds shape less crisply. Consider adding a fabric lining if you want more structure with blended yarn.
Hook and Notions
Gauge
17 stitches × 11 rows = 10 × 10 cm (4 × 4 inches) in double crochet (dc).
One finished granny square should measure approximately 11.5 cm (4½ inches) square after blocking.
Always make a gauge swatch before starting. This ensures your finished bag matches the intended size.
Skill Level and Time Estimate
This pattern is rated intermediate. You should be comfortable with working in rounds, changing colours, and seaming pieces together.
Expect to spend 15 to 20 hours completing this project. That’s roughly a weekend or two of dedicated crafting time. The modular construction means you can easily work on individual roses or squares during spare moments.
Abbreviations and Stitch Guide
This pattern uses US crochet terms. Stitch counts appear at the end of each round in italics.
| Abbreviation | Meaning |
|---|---|
| ch | chain |
| sl st | slip stitch |
| sc | single crochet (insert hook, yarn over, pull through, yarn over, pull through both loops) |
| hdc | half double crochet |
| dc | double crochet (yarn over, insert hook, pull through, yarn over, pull through two loops twice) |
| st(s) | stitch(es) |
| sp | space |
| lp(s) | loop(s) |
| MR | magic ring |
| BLO | back loop only |
| RS/WS | right side/wrong side |
| rep | repeat |
| ( ) | work instructions in same stitch or space |
| **\* \*** | repeat section as directed |
Special Techniques
Layered petals: Each rose is built in graduated petal layers. After completing a petal round, you fold the petals forward and work the next loop round into the posts of an earlier round, sitting behind the petals. This creates that beautiful dimensional effect.
Magic ring (MR): Used to start each rose. This technique keeps the centre hole closed tight. If you’re not familiar with the magic ring, there are many video tutorials available online.
Whip-stitch join: Seams are worked with a tapestry needle through the outer loops of two pieces held together. This creates a neat, nearly invisible join.
A Note for Left-Handed Crocheters
Everything in this pattern works left-handed. Simply reverse the direction of each round by working right-to-left instead of left-to-right. Read "clockwise" as "counter-clockwise." All stitch counts, layers, and assembly instructions remain identical. A helpful tip: hold a small mirror beside any photo and the orientation will match your hands.
Part 1: The 3D Layered Rose
Make 18 roses total, one for each square. The rose is worked from the centre outward in three petal layers, then sewn to a square later. Leave a long tail when you fasten off.
For Colorway A: Work Rounds 1-4 in C (Rose), then Rounds 5-7 in B (Blush).
For Colorway B: Work the entire rose in B (Blush). You can add a rose-coloured centre if you prefer.
Round 1: With first colour, MR; ch 1, 6 sc into ring; join with sl st to first sc. Pull ring closed. *(6 sc)*
Round 2: Ch 1, sc in same st, ch 3; \*sc in next sc, ch 3; rep from \* around; join to first sc. *(6 sc, 6 ch-3 loops)*
Round 3: In each ch-3 loop work (sc, hdc, 3 dc, hdc, sc); sl st to first sc. *(6 small petals)*
Round 4: Ch 1. Working behind the Round 3 petals, \*sc around the post of the next Round 2 sc, ch 4; rep from \* around; join. *(6 ch-4 loops)*
Round 5: (Change to B for Colorway A.) In each ch-4 loop work (sc, hdc, 5 dc, hdc, sc); sl st to first sc. *(6 medium petals)*
Round 6: Ch 1. Working behind the Round 5 petals, \*sc around the post of the next Round 4 sc, ch 5; rep from \* around; join. *(6 ch-5 loops)*
Round 7: In each ch-5 loop work (sc, hdc, 7 dc, hdc, sc); sl st to first sc. Fasten off, leaving a 30 cm (12 inch) tail. *(6 large petals, 18 petals total)*
Pro tip: Keep the "behind" rounds (Rounds 4 and 6) a touch tight so the petals cup forward and stay raised. A light steam block after finishing opens the layers beautifully.
Part 2: The Sage Leaf (Colorway B Only)
Make 2 leaves per square (36 total) for the leafy version. Skip this section entirely for Colorway A.
Leaf: With D (Sage), ch 7.
Pass 1: Starting in 2nd ch from hook: sc, hdc, dc, dc, hdc; then (sc, ch 1, sc) in last ch for the tip.
Pass 2: Continue along the opposite side of the foundation chain: hdc, dc, dc, hdc, sc; sl st to base. Fasten off, leaving a tail. *(one pointed leaf approximately 4 cm long)*
Part 3: The Lilac Granny Square
Make 18 squares with A (Lilac). This is a solid granny square with double crochet in every stitch, creating a sturdy, smooth tote fabric.
Round 1: MR; ch 3 (counts as first dc), 2 dc in ring, ch 2; \*3 dc in ring, ch 2; rep from \* twice; join to top of ch 3. *(12 dc, 4 corner spaces, 3 dc each side)*
Round 2: Sl st to a corner ch-2 space; ch 3, (2 dc, ch 2, 3 dc) in same space; \*dc in each of next 3 dc, (3 dc, ch 2, 3 dc) in next corner space; rep from \* twice; dc in last 3 dc; join. *(9 dc per side including corners)*
Round 3: Sl st to a corner space; ch 3, (2 dc, ch 2, 3 dc) in same space; \*dc in each dc to next corner, (3 dc, ch 2, 3 dc) in corner space; rep from \* around; dc in remaining dc; join. *(15 dc per side)*
Round 4: Repeat Round 3. Fasten off. *(approximately 21 dc per side, square measures approximately 11.5 cm / 4½ inches)*
Sizing note: Work more or fewer rounds to hit the 11.5 cm measurement at your tension. The corner is always (3 dc, ch 2, 3 dc) and the sides are always 1 dc in each dc. Note your final per-side stitch count because you’ll match it when joining.
Part 4: Building and Joining the Panels
4a: Attach a Rose to Each Square
1. Centre a rose on the right side of a lilac square. For Colorway B, slip 2 sage leaves under opposite edges of the rose so the tips peek out.
2. Thread the rose tail on a tapestry needle and sew through the back of the rose centre into the square, catching a few inner petals so the rose sits raised but secure.
3. Tack the leaf bases down. Weave in ends. Repeat for all 18 squares.
4b: Join Into Two Panels (3 × 3)
Arrange 9 squares into a 3 × 3 grid for the front panel. Repeat for the back panel.
1. Hold two squares with right sides facing up, edges aligned. Using A (Lilac) and a tapestry needle, whip stitch through the outer loops only, one stitch per dc, across the seam.
2. Join squares into 3 rows of 3, then join the rows together the same way, matching corners neatly.
3. Make a second identical 3 × 3 panel. Block both panels flat to 34.5 × 34.5 cm.
Diamond variation: The photographed sample sets the squares on point for a diamond look. To achieve this, simply rotate every motif 45° before joining and even the top and side edges later with the scalloped border. The straight-set join described above gives the same finished size and is easier. Both approaches are correct.
Part 5: Scalloped Top Edge
Work this along the top edge of each panel before joining the panels together. Count your top-edge stitches first. The repeat uses multiples of 6, so add or skip a stitch at the ends to fit.
Row 1: Join A (Lilac) to the top-right corner of a panel; sc evenly across the top edge. Turn.
Row 2: Ch 1, sc in first st; \*skip 2 sts, 5 dc in next st, skip 2 sts, sc in next st; rep from \* across. Fasten off. *(one shell equals one scallop)*
Repeat for the second panel.
Part 6: The Straps (Make 2)
These firm ribbed straps are worked in back loops for nice texture. The length creates a 24 cm (9.4 inch) drop.
Set-up: With A (Lilac), ch 8.
Row 1: Hdc in 3rd ch from hook and in each ch across. Turn. *(6 hdc, approximately 4 cm wide)*
Row 2 and beyond: Ch 2, hdc in BLO of each st across. Turn.
Repeat Row 2 until the strap measures 54 cm (21¼ inches). Fasten off, leaving a long tail.
Want a longer drop? Add approximately 5 cm of strap length for every extra 2.5 cm of drop you’d like. For a crossbody feel, lengthen to 70-80 cm.
Part 7: Assembly and Finishing
1. Hold the front and back panels with wrong sides together, scalloped edges aligned at the top, roses facing out.
2. With A (Lilac), whip stitch or slip-stitch join down one side, across the bottom, and up the other side. Leave the scalloped top open. Keep tension even so motifs stay aligned.
3. Position each strap centred on a panel with the ends 8 cm (3 inches) in from each side edge, just below the scalloped border. Pin so the strap drop is even front and back.
4. Sew each strap end firmly to the inside of the top edge, stitching through several layers in a small square or "X" pattern for strength. Reinforce by going around twice.
5. Weave in all ends. Steam or wet block the finished bag, shaping the corners and opening the rose petals. Lay flat to dry.
6. Optional lining: Cut fabric to the bag’s inner dimensions plus 1 cm seam allowance. Sew into a pouch and hand-stitch inside the top edge for extra structure.
Colour Placement Quick Reference
| Part | Colorway A | Colorway B |
|---|---|---|
| Squares, edge, straps | A: Lilac | A: Lilac |
| Rose centres | C: Rose | B: Blush |
| Rose outer petals | B: Blush | B: Blush |
| Leaves | None | D: Sage (×2) |
Care Instructions
Your finished tote will stay beautiful with proper care:
100% cotton softens and relaxes a little with use. Reblocking after washing brings the petals and scalloped edge right back to crisp.
Final Thoughts on the Lavender Rose Granny Square Tote Crochet Pattern
This Lavender Rose Granny Square Tote is one of those projects that looks incredibly impressive but breaks down into manageable pieces. Each rose, each leaf, each square is its own small accomplishment. Before you know it, you’re sewing together a bag that looks like it belongs in a boutique window.
The modular construction makes this perfect for busy crafters. Work on a rose while waiting at an appointment. Finish a granny square during your lunch break. The individual pieces are small enough to carry anywhere, and watching your pile of completed motifs grow is deeply satisfying.
Whether you choose the romantic depth of Colorway A or the garden-fresh charm of Colorway B, you’ll end up with a truly special handmade bag. One that sparks conversations, earns compliments, and makes you proud every time you carry it.
Thank you so much for choosing this pattern. I truly hope your Lavender Rose Tote brings you as much joy to make as it did to design. Happy hooking!
If you loved this pattern, I’d be so grateful if you saved it to your Pinterest boards so you can find it easily later. And please drop a comment below when you finish yours. I absolutely love seeing your finished projects, and your photos genuinely make my day!
Want a Quick & Easy Printable Version?
Get a clean, beautifully formatted PDF of this pattern — easy to follow step by step, ready to print or save on any device. No scrolling, no distractions, just the pattern.
Get the Printable PDF →You Might Also Like
- Lavender Purple Dreamy Tassel Clutch Free Crochet Pattern
- Blush Pink Tiered Baby Romper Free Crochet Pattern
- Sage Green Woodland Baby Dress Free Crochet Pattern
- Midnight Blue Floral Bell Sleeve Top Free Crochet Pattern