
I don’t know about you, but I’ve always wanted a cardigan that feels like wearing a garden. Something romantic, a little whimsical, with enough texture to make people stop and ask, "Did you really make that?" This Berry Blossom Lace Cardigan is exactly that kind of project. All the cozy elegance of a handmade heirloom piece, with clear construction that won’t leave you pulling your hair out.
Get the Ad-Free PDF Pattern
You can find the free pattern below, or you can purchase the ad-free printable PDF from my shop.
Get the Printable PDF →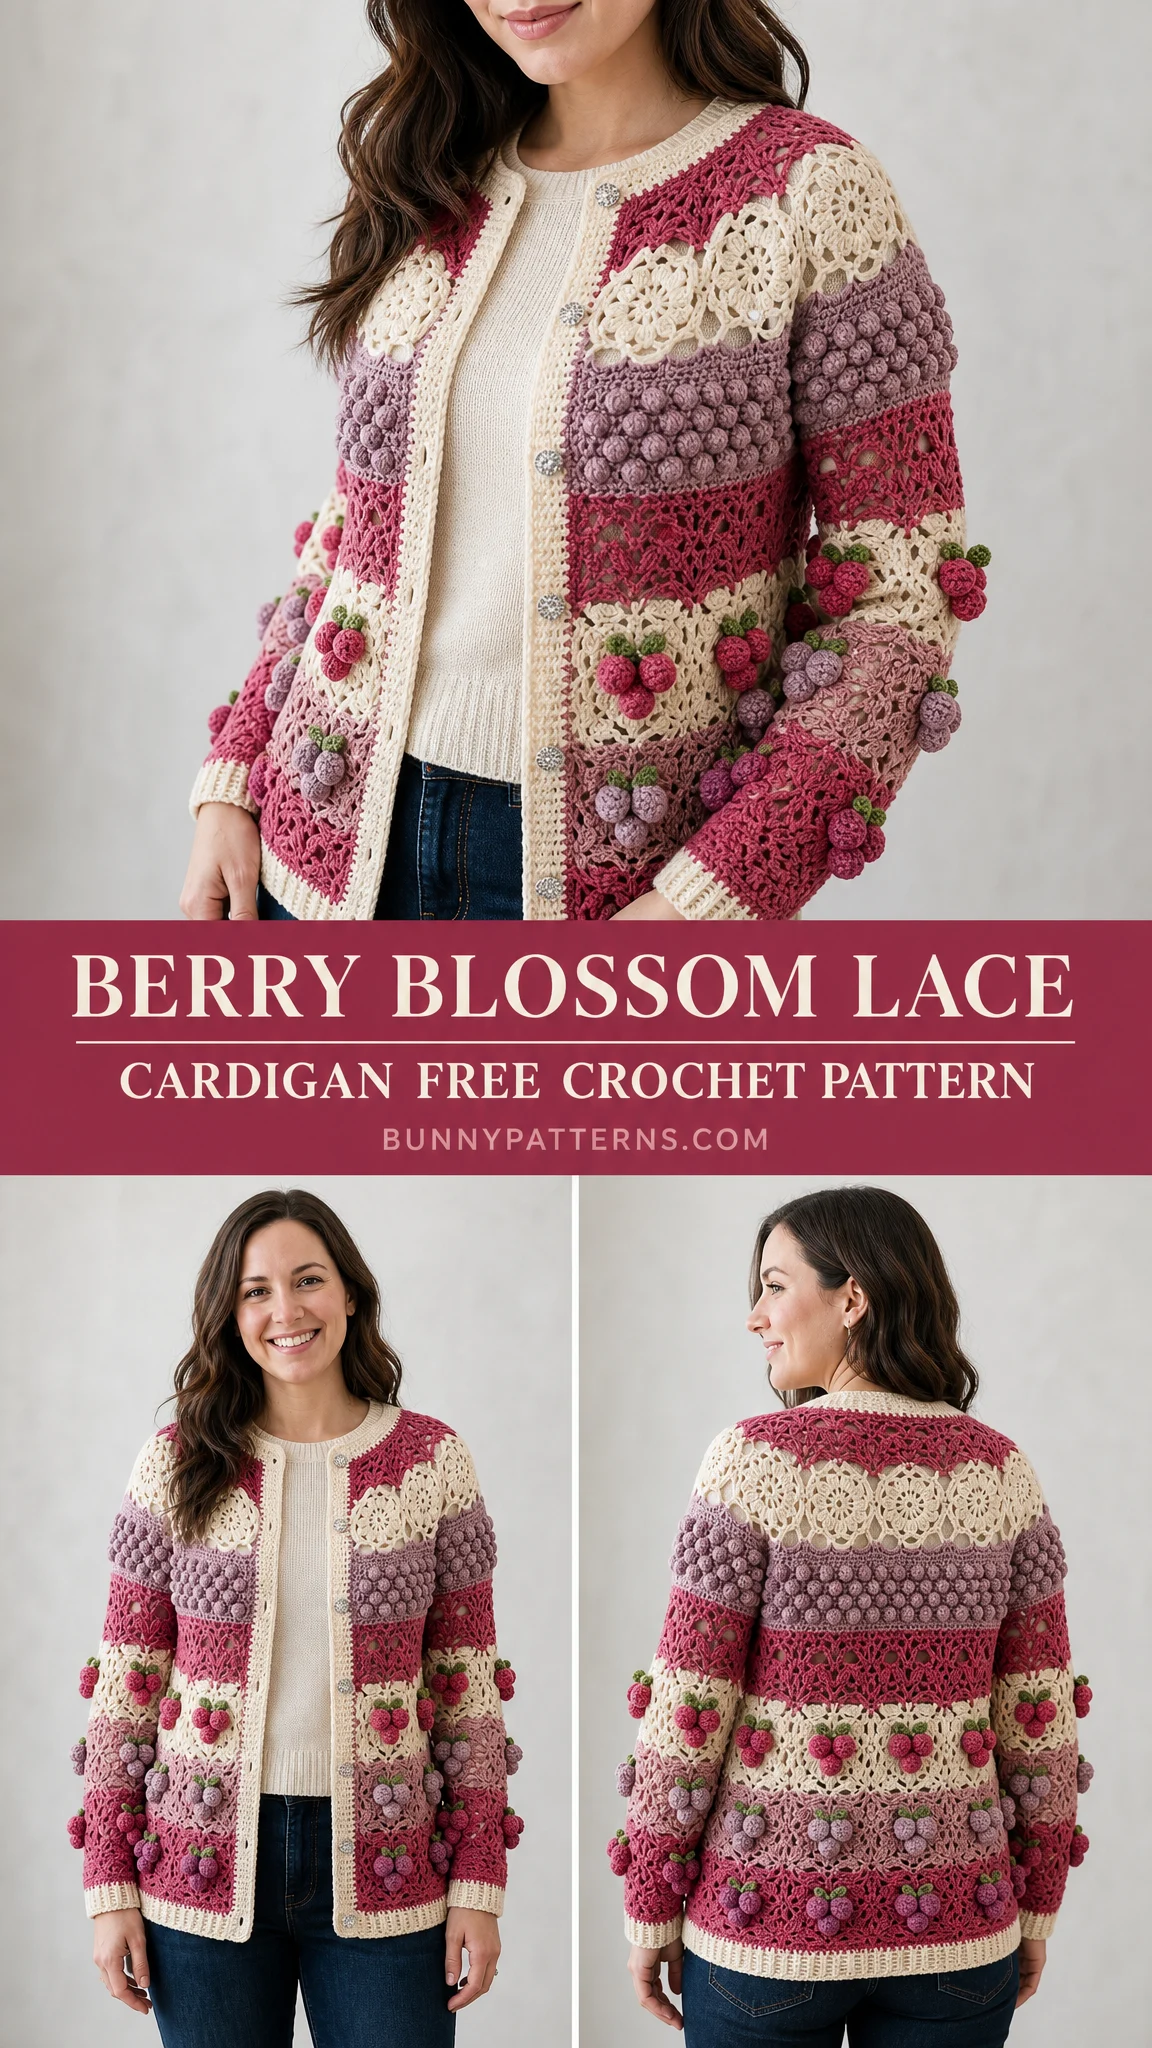
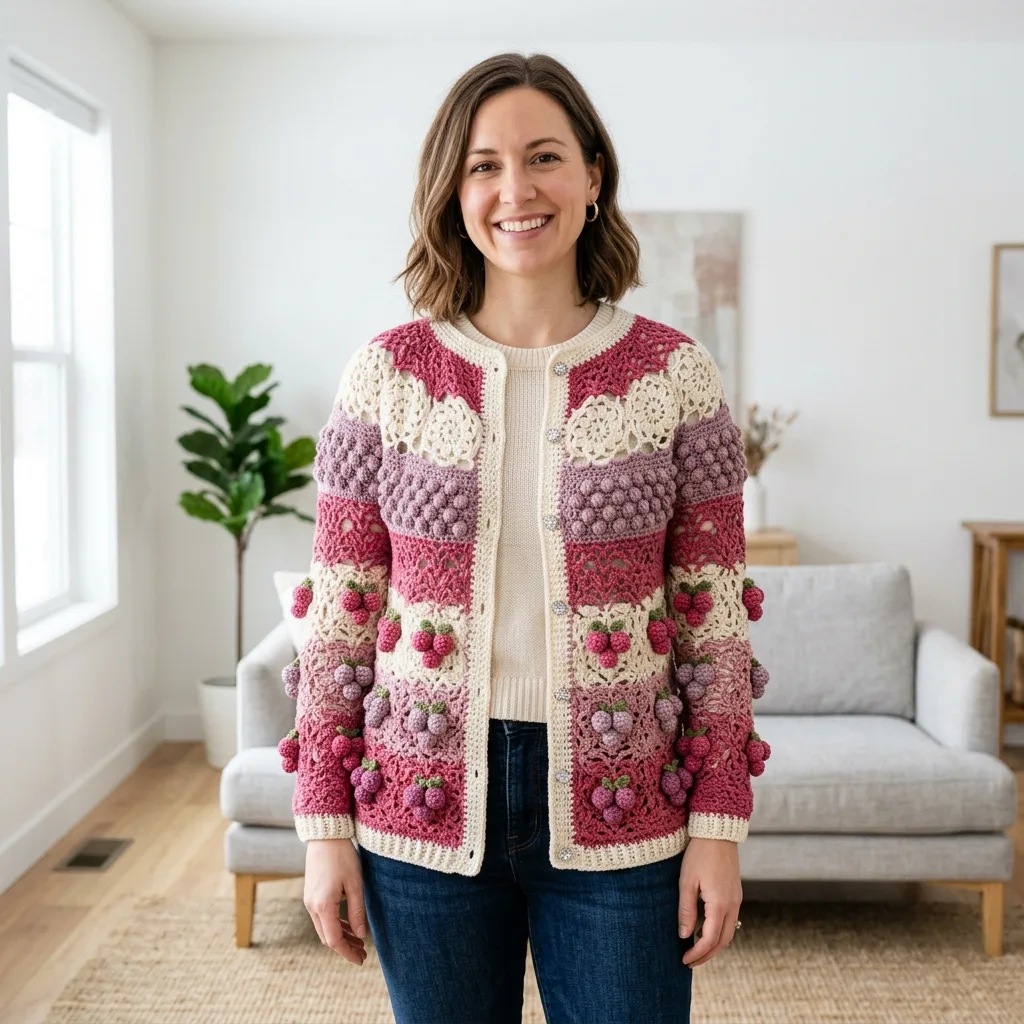
This romantic crochet cardigan combines lace stripes, raised berry bobbles, and scalloped blossom texture into one stunning garment. It’s worked flat in five panels, then seamed together for a polished finish. The color rhythm creates beautiful horizontal stripes that flow from cream to berry to dusty rose to mauve, giving you a finished piece that looks far more complicated than it actually is.
About This Berry Blossom Lace Cardigan Pattern
This cardigan is designed for intermediate crocheters who feel comfortable with counting, color changes, and basic seaming. The shaping itself is simple, but the lace repeat, bobble placement, and picked-up bands require confident stitch counting. If you’ve made a few blankets and maybe a simple sweater, you’re ready for this.
Construction method: You’ll crochet flat in 5 panels. That’s one back panel, two front panels, and two sleeves. After blocking, you seam everything together, then work the bands and collar directly onto the finished body for a neat cardigan finish.
Time estimate: Plan for 24 to 32 hours of work, depending on your speed and how much attention you give to the finishing details.
Intended ease: 4 to 6 inches (10 to 15 cm) of positive ease. The pattern is written for a finished bust measurement of 42 inches (106.5 cm). Choose this size if you have a 36 to 38 inch (91.5 to 96.5 cm) bust and want the relaxed, comfortable fit shown in the photos.
Finished Measurements
Before you begin, here are the final dimensions after blocking:
These measurements give you a lovely relaxed fit that layers beautifully over tanks and tees.
Materials You’ll Need for This Crochet Cardigan
Gather these supplies before you start:
– Cream: 520 yd
– Berry: 430 yd
– Dusty rose: 270 yd
– Mauve: 220 yd
– Small amounts of green for leaves
Yarn Suggestions
Looking for specific yarn recommendations? Here are three excellent choices:
Knit Picks CotLin DK gives you a crisp cotton/linen drape with beautifully defined lace stitches.
Lion Brand Coboo offers a soft bamboo-cotton blend with gentle drape that feels wonderful against the skin.
Paintbox Cotton DK provides a bright color range and sturdy stitch definition that makes those bobbles really pop.
Substitution note: Choose a smooth DK yarn that blocks open without growing more than 8%. Avoid bulky halo yarns because they hide the berry texture, and that texture is the star of the show.
Gauge
14 stitches and 8 rows = 4 in / 10 cm in the lace repeat after blocking, using the larger hook.
Make a 28-stitch by 16-row swatch. Block it fully before measuring. I cannot stress this enough: matching both stitch and row gauge is essential for garment fit. Your cardigan pieces need to match the target measurements, so take the time to swatch properly.
Stitch Abbreviations and Definitions
Let me walk you through every stitch you’ll use:
Special Stitches for This Pattern
These special stitches create all that gorgeous texture:
Berry bobble: Yarn over, insert hook in stitch, pull up loop, yarn over and pull through 2 loops. Repeat 4 more times in the same stitch. Yarn over and pull through all 6 loops on hook. Chain 1 to close. This counts as 1 stitch. Don’t worry if your first few bobbles look wonky. They get easier with practice, and blocking helps even them out.
Blossom shell: Work 3 double crochet (dc) in the indicated stitch. Counts as 3 stitches. This creates those lovely scalloped sections.
Leaf: Chain 5, slip stitch (sl st) in 2nd chain from hook, single crochet (sc) in next chain, half double crochet (hdc) in next chain, double crochet (dc) in last chain. Slip stitch to base to finish one leaf. These get added during finishing.
Lace Repeat Pattern (Multiple of 7)
The lace repeat forms the backbone of this cardigan. Here’s how each row works:
Row A: Chain 1, single crochet (sc) in each stitch across. Turn. Same stitch count.
Row B: Chain 3, *double crochet (dc) in next stitch, chain 1, skip 1, double crochet (dc) in next stitch, chain 1, skip 1, 3 double crochet (dc) in next stitch, skip 2; repeat from * across. Turn. Same stitch count, counting chains as stitches.
Row C: Chain 1, single crochet (sc) in each double crochet (dc) and chain-1 space across. Turn. Same stitch count.
Row D: Chain 3, *3 double crochet (dc) in next stitch, skip 2, double crochet (dc) in next stitch, chain 1, skip 1, double crochet (dc) in next stitch, chain 1, skip 1; repeat from * across. Turn. Same stitch count.
Bobble Row: Chain 1, *single crochet (sc) in next 3 stitches, berry bobble in next stitch, single crochet (sc) in next 3 stitches; repeat from * across. Turn. Same stitch count.
Left-handed note: Work the same written rows. Your fabric mirrors horizontally. Place front buttonholes on the side that is most comfortable for you.
Color Rhythm Chart
This color sequence creates those beautiful stripes. Follow it for the back and front panels:
| Rows | Color / Texture |
|---|---|
| 1-4 | Cream seed rows |
| 5-8 | Berry lace |
| 9-12 | Cream blossom lace |
| 13-16 | Mauve bobble band |
| 17-20 | Berry lace |
| 21-24 | Cream berry motif band |
| 25-28 | Dusty rose lace |
| 29-32 | Berry lace |
| 33-36 | Cream blossom lace |
| 37-40 | Mauve bobble band |
| 41-44 | Berry lace |
| 45-48 | Cream hem rows |
Join new colors at the end of the previous row. Carry yarn only when the next stripe begins within 2 rows. Otherwise, fasten off and weave in ends as you go.
Panel Instructions
All pieces use the 7-stitch lace repeat and the color rhythm above.
Back Panel
Foundation: Chain 71. Row 1: Single crochet (sc) in 2nd chain from hook and across. (70 sc)
Work 48 rows following the color rhythm.
After blocking: 20 x 24 in / 51 x 61 cm
Left Front Panel
Foundation: Chain 36. Row 1: Single crochet (sc) in 2nd chain from hook and across. (35 sc)
Work 48 rows following the color rhythm.
After blocking: 10 x 24 in / 25.5 x 61 cm
Right Front Panel
Repeat left front instructions exactly. (35 sc)
Work 48 rows following the color rhythm.
After blocking: 10 x 24 in / 25.5 x 61 cm
Row-by-Row Instructions for Back and Front Panels
| Rows | Instruction | Count |
|---|---|---|
| 1-4 | Row A in cream | 70 back / 35 front |
| 5 | Row B in berry | same |
| 6 | Row C in berry | same |
| 7 | Row D in berry | same |
| 8 | Row C in berry | same |
| 9-12 | Rows B, C, D, C in cream | same |
| 13 | Row B in mauve | same |
| 14 | Bobble Row in mauve | same |
| 15 | Row D in mauve | same |
| 16 | Row C in mauve | same |
| 17-20 | Rows B, C, D, C in berry | same |
| 21-24 | Rows B, Bobble Row, D, C in cream; make bobbles in berry or mauve where desired | same |
| 25-28 | Rows B, C, D, C in dusty rose | same |
| 29-44 | Repeat Rows 13-28 once | same |
| 45-48 | Row A in cream | same |
Checkpoint: Back measures 20 x 24 in / 51 x 61 cm. Each front measures 10 x 24 in / 25.5 x 61 cm. All rows keep the same count.
Sleeves (Make 2)
Foundation: Chain 57. Row 1: Single crochet (sc) in 2nd chain from hook and across. (56 sc)
| Rows | Instruction | Count |
|---|---|---|
| 1-4 | Row A in cream | 56 |
| 5-32 | Follow Rows 5-32 from the panel rhythm | 56 |
| 33-36 | Row A in cream for cuff edge | 56 |
After blocking: 16 x 18 in / 40.5 x 45.5 cm
Assembly and Seaming
Block all pieces first. This step is crucial for lace to open up properly and for seams to align correctly.
Seaming Map
Shoulder seams: With right sides (RS) together, seam each shoulder by joining the outer 21 stitches of each front to 21 stitches of the back. Leave the center 28 back stitches and inner 14 stitches of each front open for the neckline/front opening.
Side seams: Measure 8 in / 20.5 cm down from the shoulder and mark the armhole. Seam from lower hem to marker on both sides. Leave the top 16 rows open for armholes.
Sleeves: Seam each sleeve long edge into a tube. Pin the sleeve center to the shoulder seam. Seam the 56 sleeve stitches/edge rows evenly into the 16 in / 40.5 cm armhole.
Front Bands and Neckline
Using cream yarn and the smaller hook, join at lower right front. Pick up 3 single crochet (sc) for every 4 rows along right front, 1 single crochet (sc) in each back neck stitch, and 3 single crochet (sc) for every 4 rows down left front.
Target count: 36 right front + 28 back neck + 36 left front = 100 sc
Rows 2-4: Chain 1, single crochet (sc) in each stitch. Fasten off on left band only.
Buttonhole row on right band: Chain 1, single crochet (sc) 4, *chain 2, skip 2, single crochet (sc) 5; repeat from * 5 more times, single crochet (sc) to end.
Next row: Single crochet (sc) in each single crochet (sc) and 2 single crochet (sc) in each chain-2 space.
Sew 6 buttons opposite the holes.
Hem and Cuffs
Hem: Join cream at front edge, single crochet (sc) evenly around lower edge. Work 3 rows of single crochet (sc). Keep corners flat with 3 single crochet (sc) in each lower-front corner.
Cuffs: Join cream at sleeve seam, single crochet (sc) evenly around 56 stitches. Work 3 rounds of single crochet (sc), slip stitch (sl st) to join each round.
Berry Motifs and Finishing
The raised berry clusters are added after seaming so placement stays balanced across the finished cardigan. This is where the magic happens.
Berry Cluster Placement
| Piece | Clusters | Placement |
|---|---|---|
| Back | 5 | Centered over repeat groups 2, 4, 6, 8, 10 on Rows 22 and 38 |
| Each front | 2 | Centered over repeat groups 2 and 4 on Rows 22 and 38 |
| Each sleeve | 3 | Centered over repeat groups 2, 4, and 6 on Rows 14 and 30 |
Making Berry Clusters
Make 3 berry bobbles in berry or mauve yarn, leaving 8 in / 20 cm tails. Arrange them in a triangle and sew down through the panel fabric.
Add 2 leaves in green at the top of each cluster using the Leaf stitch. Weave tails inside the fabric layers without pulling the lace closed.
For the blossom look, add small cream surface slip stitches (sl sts) around selected shell spaces on cream rows.
Customization Options
Want to adjust the fit? Here’s how:
Width: Add or subtract 7-stitch repeats. Each repeat changes width by approximately 2 in / 5 cm at gauge.
Length: Add or remove rows in groups of 4 to preserve the stripe rhythm. Four rows change length by approximately 2 in / 5 cm.
Sleeve width: Add or subtract 7 stitches. The sleeve must still fit the armhole circumference. Adjust the armhole opening by the same blocked amount if needed.
Button spacing: Keep 4 single crochet (sc) before the first buttonhole and 4 single crochet (sc) after the last. Distribute remaining holes evenly.
Blocking and Care Instructions
Blocking: Soak in cool water for 15 minutes, press gently in a towel, and pin panels to measurements. Open the lace gently. Do not stretch bobbles flat.
Washing: Wash the finished cardigan cool by hand or on gentle cycle in a mesh bag. Lay flat to dry. Store folded, not hanging, to prevent stretching.
Troubleshooting Common Issues
| Issue | Fix |
|---|---|
| Fabric too narrow | Your stitch gauge is tight. Move up a hook size and swatch again. |
| Rows too short/tall | Match row gauge before adding length. Row gauge affects armhole and sleeve fit. |
| Band ruffles | Pick up fewer stitches along fronts, closer to 2 stitches for every 3 rows. |
| Band pulls | Pick up more stitches, closer to 4 stitches for every 5 rows. |
| Bobbles sink | Use firmer tension for bobbles and tack each berry at two points. |
| Sleeve feels tight | Add one 7-stitch repeat to sleeve and open armhole by 2 in / 5 cm. |
Final Thoughts on This Berry Blossom Lace Cardigan Pattern
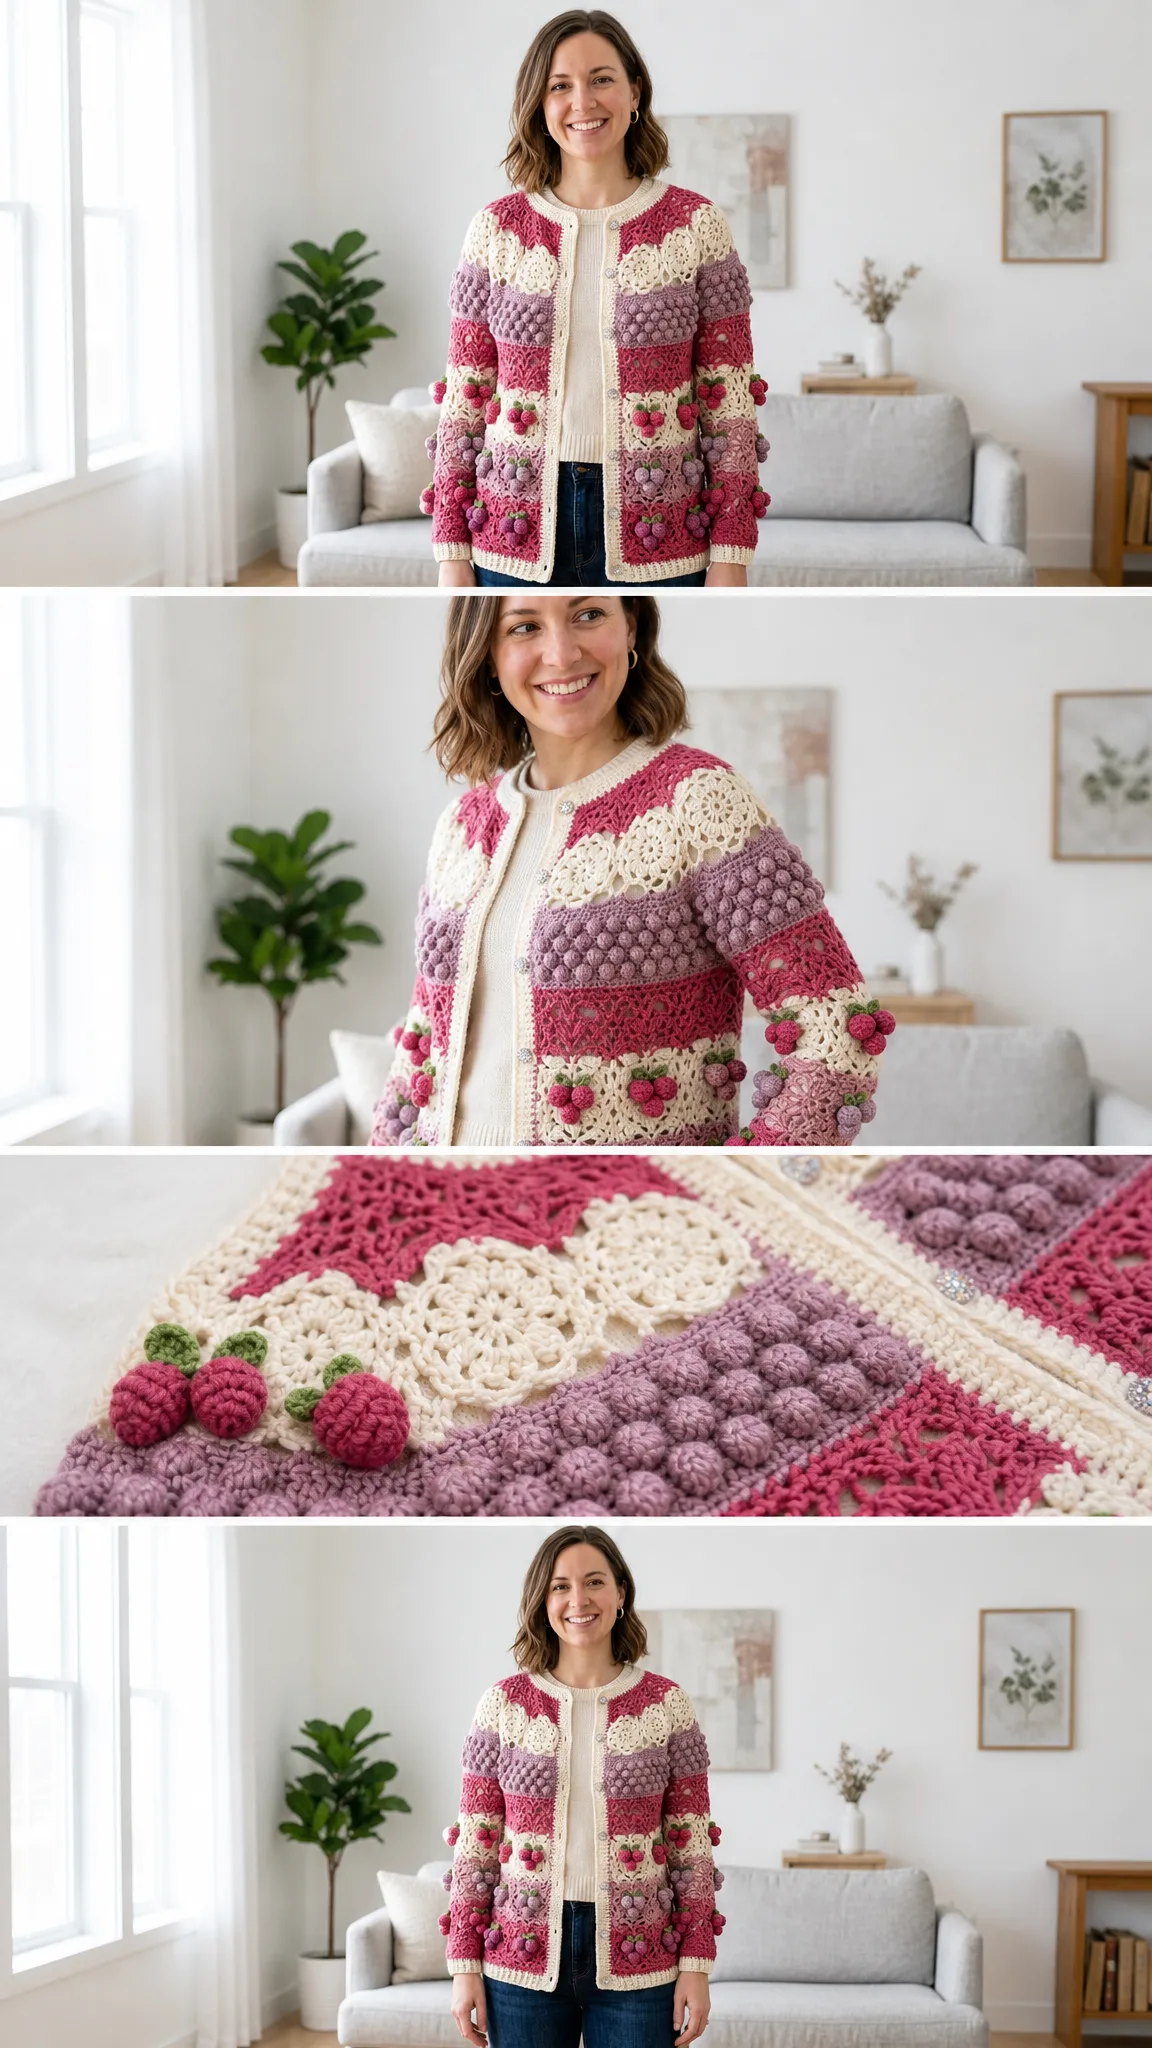
This cardigan is truly a labor of love, but the finished result is absolutely worth every stitch. The combination of lace, bobbles, and colorwork creates something that looks like it belongs in a boutique window. When you slip it on for the first time, you’ll understand why this design is so special.
Take your time with the gauge swatch. Trust the blocking process. And don’t be afraid to reach out if you get stuck on a particular section.
I hope you love making this Berry Blossom Lace Cardigan as much as I loved designing it. If you found this pattern helpful, please save it to your Pinterest boards so you can find it easily when you’re ready to cast on. And I would absolutely love to see your finished cardigans, so drop a comment below or tag me when you share your photos. Happy crocheting!
Want a Quick & Easy Printable Version?
Get a clean, beautifully formatted PDF of this pattern — easy to follow step by step, ready to print or save on any device. No scrolling, no distractions, just the pattern.
Get the Printable PDF →You Might Also Like
- Ocean Blue Ripple Moon Clutch with Gold Tassel Free Crochet Pattern
- Boho Monstera Crochet Plant for Bedroom Shelf Decor
- Tinkerbell Green Fairy Baby Dress Free Crochet Pattern
- Mint Chocolate Daisy Granny Square Blanket Free Crochet Pattern