
I set out to design a backpack that looked like something you’d find in a boutique, not a craft fair. My goals were specific: structured enough to stand on its own, minimal hardware fuss, and that satisfying textured panel on the front that catches the light just right. After testing different cord weights and tweaking the flap shaping more times than I’d like to admit, I am SO pleased with how this turned out!
Get the Ad-Free PDF Pattern
You can find the free pattern below, or you can purchase the ad-free printable PDF from my shop.
Get the Printable PDF →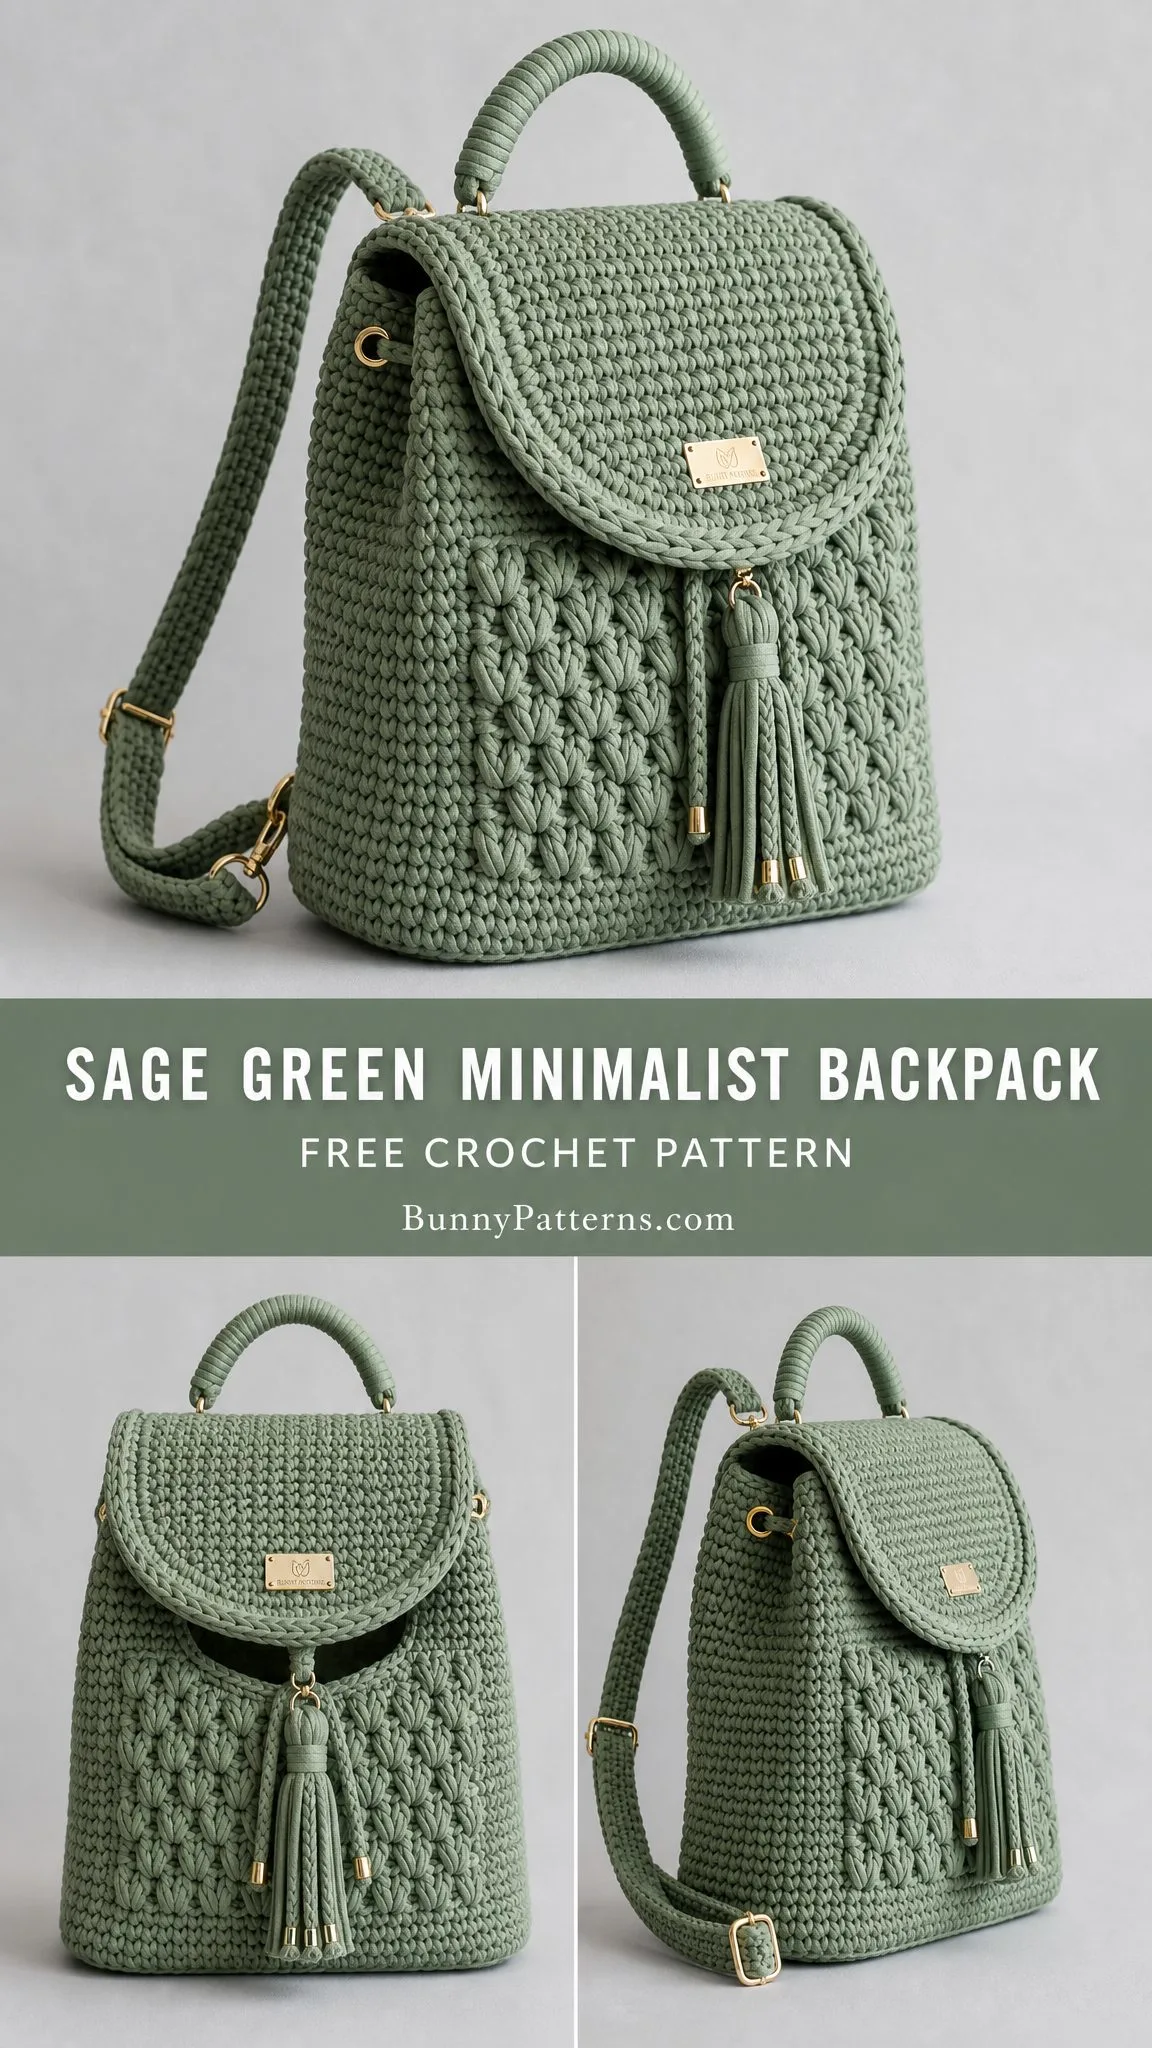
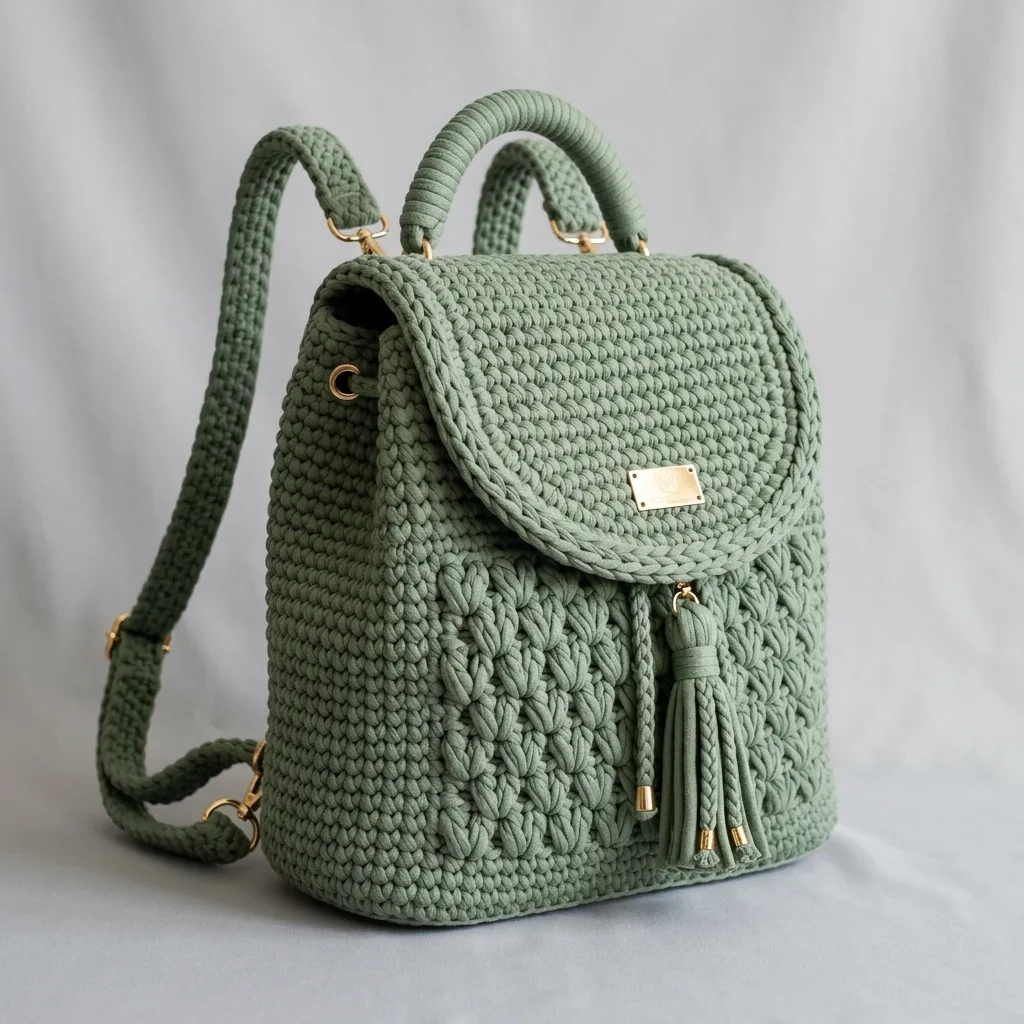
This sage green minimalist backpack combines clean lines with just enough visual interest to make it special. The puff stitch panel adds dimension without overwhelming the design, and those gold accents? Chef’s kiss. Whether you’re making this for yourself or as a gift, you’re going to love how professional it looks when finished.
About This Crochet Backpack Pattern
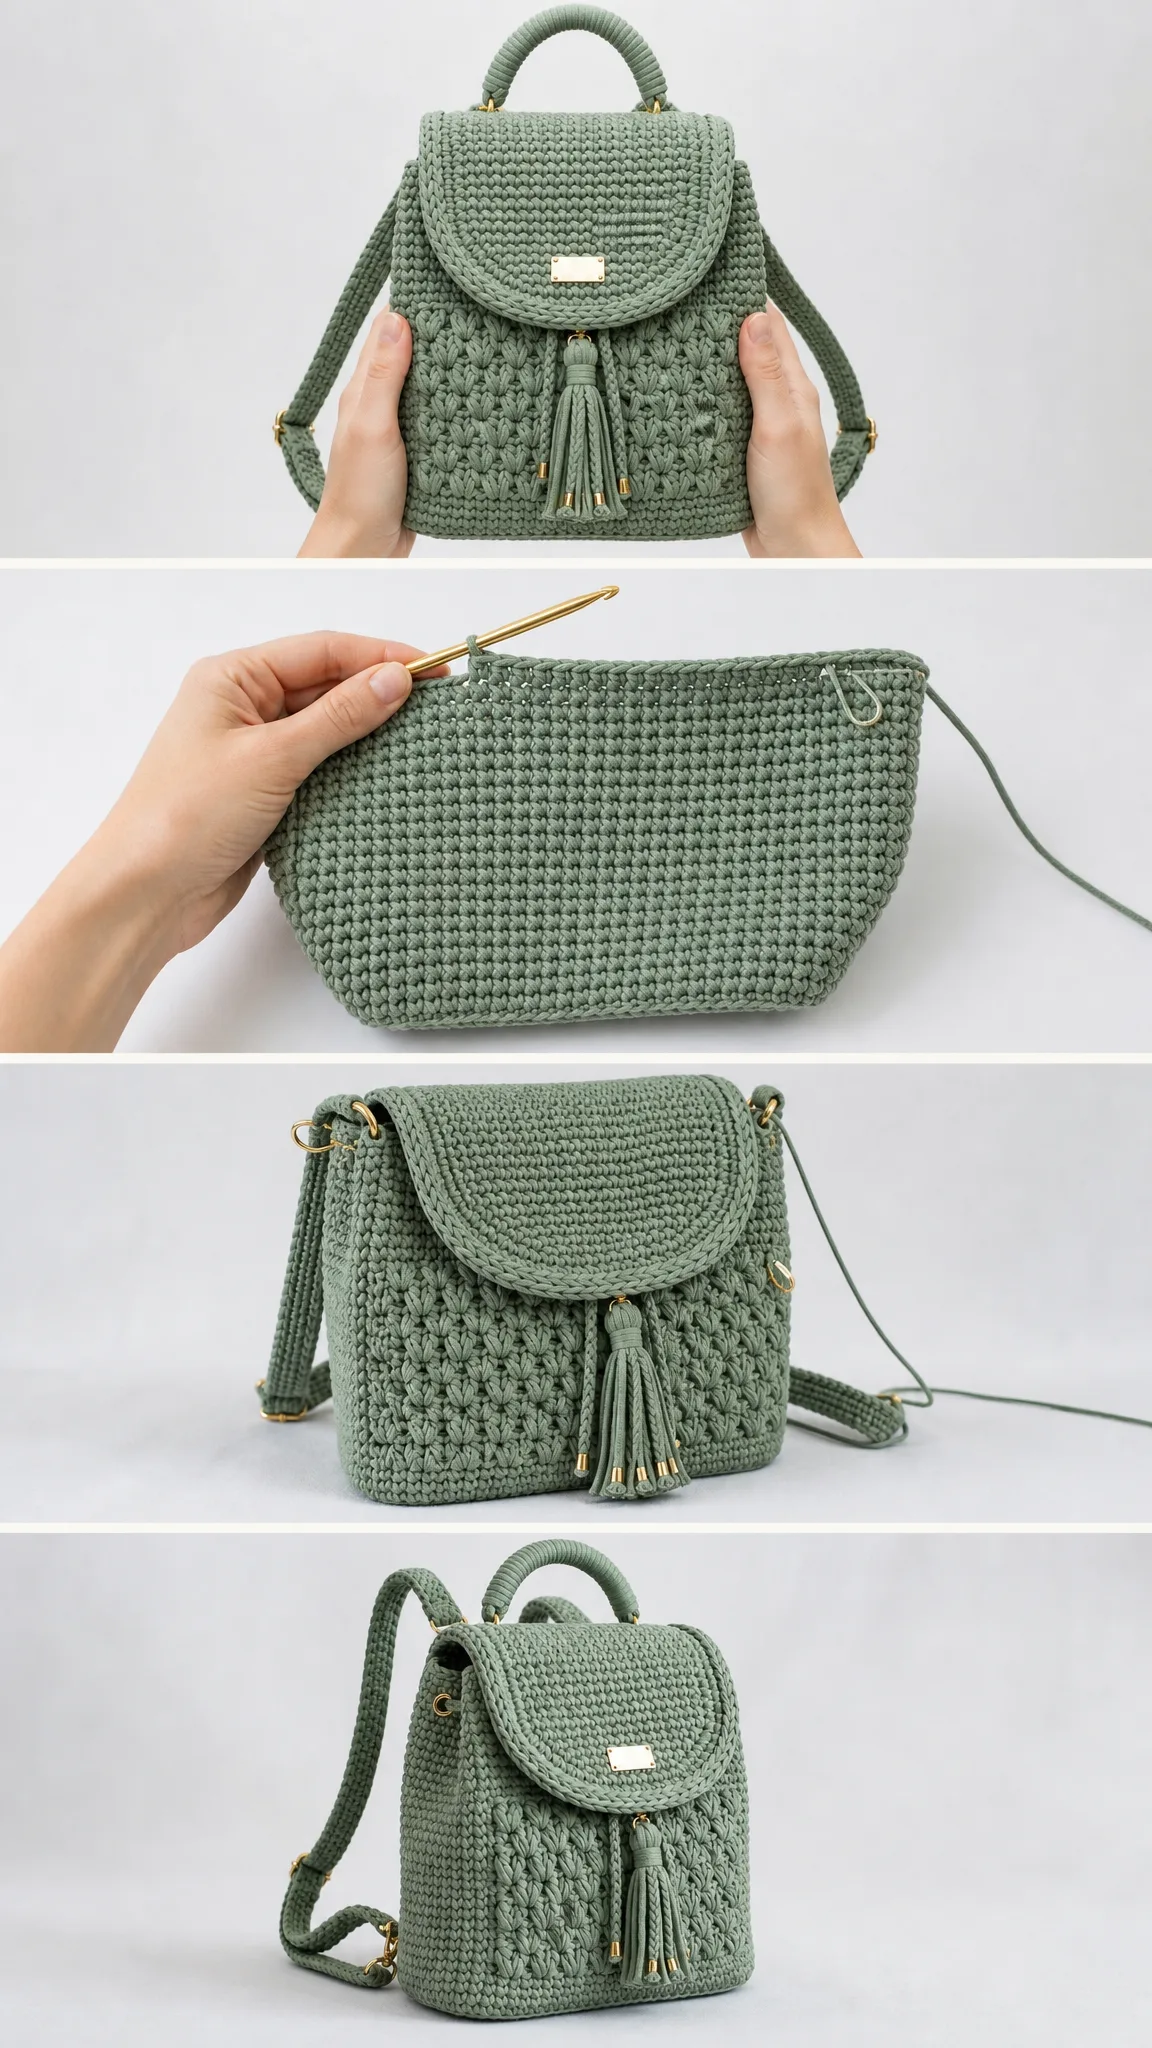
This structured cord backpack features a rounded flap, textured front panel, braided trim, tassel closure, top handle, and adjustable shoulder straps. It’s the kind of bag that makes people ask, "Wait, you MADE that?"
The construction is straightforward once you understand the flow. You’ll start with a firm rectangular base, work the body upward in joined rounds, then create the decorative elements separately before assembling everything at the end. Think of it like building blocks, one piece at a time.
Skill Level: Confident intermediate. If you’re comfortable with single crochet in the round, basic shaping, and you’ve made at least one structured project before, you can absolutely tackle this.
Finished Size: Approximately 9 inches wide x 10.5 inches tall x 4 inches deep (23 x 26.5 x 10 cm). Perfect for everyday essentials like your phone, wallet, keys, a small water bottle, and maybe a paperback.
Time Estimate: 10 to 14 hours, plus blocking and hardware placement. I’d suggest spreading this across a few evenings rather than trying to marathon it.
Materials You’ll Need
Gathering your supplies before you start will make this project so much smoother. Here’s everything you’ll need:
Yarn:
Suggested Brands: Bobbiny Premium Braided Cord 5 mm, Ganxxet Braided Cotton Cord 5 mm, or Hobbii Ribbon XL used firmly with a slightly smaller hook. Choose a cord that creates a dense, self-supporting fabric. This is key for that boutique look.
Hooks:
Hardware:
Notions:
Optional but Recommended:
If you’re substituting yarn, match gauge in single crochet (sc) and choose a cord that doesn’t stretch heavily under weight. Softer yarns will need a lining and firm base insert to maintain structure.
Gauge
Getting gauge right matters a lot for this pattern. It’s what gives the backpack its upright, structured shape.
Main Gauge: 9 sc and 10 rounds = 4 inches (10 cm) in joined sc rounds with 6.5 mm hook
Texture Panel Gauge: 8 stitches and 8 rows = 4 inches (10 cm) after light blocking
Please swatch first and match both stitch and row gauge before beginning. A firmer gauge gives the backpack its professional appearance. If your swatch is too loose, drop down a hook size.
Abbreviations and Stitch Guide
Let me walk you through every stitch you’ll use. Even if you know these, a quick refresher never hurts.
Abbreviations:
UK crocheters: US sc = UK dc
Stitch Definitions
Joined SC Round: Chain 1, single crochet in each stitch around, join with slip stitch to first sc. The ch-1 does NOT count as a stitch.
BLO SC (Back Loop Only Single Crochet): Insert your hook through the back loop only (the loop furthest from you), yarn over, pull up a loop, yarn over and pull through both loops. This creates that nice ridge at the base where the body meets the bottom.
Puff Stitch: This creates the beautiful texture on the front panel. Yarn over, insert hook in indicated stitch, pull up a loop to the height of the row. Repeat that sequence three times total (so you have multiple loops on your hook). Yarn over and pull through ALL loops on hook, then chain 1 to close. Counts as 1 stitch.
Surface Slip Stitch Braid: Hold your yarn on the wrong side. Insert hook from the right side through the fabric, pull up a loop. Insert into the next spot, pull up a loop and pull through the loop already on your hook. Work loosely so the fabric doesn’t pucker. This adds that gorgeous braided trim detail.
Left-handed note: Work the same stitch counts and shaping. Your rounds will move in the opposite visual direction. Mirror the trim and strap placement if you prefer.
Pattern Instructions
Base
With your 6.5 mm hook, you’ll create a firm rectangular base.
Row 1: Ch 19, sc in 2nd ch from hook and each ch across. Turn. (18 sc)
Rows 2 through 9: Ch 1, sc in each st across. Turn. (18 sc)
Edging Round: Ch 1, sc 18 across top, 2 sc in corner, sc 7 down side, 2 sc in corner, sc 18 along foundation edge, 2 sc in corner, sc 7 up side, 2 sc in corner, join. (58 sc)
Checkpoint: Your base should measure about 8 x 3.75 inches (20.5 x 9.5 cm) before blocking. If it’s significantly off, check your gauge.
Backpack Body
Now comes the satisfying part. You’ll watch this bag grow round by round.
Round 1: Ch 1, BLO sc in each st around, join. (58 sc)
Working in the back loop only for this first round creates a clean angle between the base and the body. You’ll see a nice defined edge.
Rounds 2 through 20: Ch 1, sc in each st around, join. (58 sc each round)
Just keep going. Put on a podcast, settle in. These rounds build up quickly.
Round 21 (Eyelet Round): Ch 1, sc 6, ch 1, skip 1, [sc 8, ch 1, skip 1] 5 times, sc 6, join. (52 sc + 6 ch-1 spaces = 58 positions)
These eyelets are for your drawstring. If they seem too small for your cord, replace ch-1 with ch-2 and skip 2 stitches, then restore the count on the next round by working 2 sc into each ch-2 space.
Rounds 22 through 23: Ch 1, sc in each sc and ch-1 space around, join. (58 sc each round)
Round 24 (Top Rim): Ch 1, reverse sc or firm sl st in each st around, join and fasten off. (58 sts)
Checkpoint: Your body should stand about 10.5 inches (26.5 cm) tall from base to rim. Top circumference should be approximately 25.5 to 26 inches (65 to 66 cm).
Front Texture Panel
This is what gives the bag its character. The puff stitches create a raised diamond-like pattern.
Row 1: Ch 25, sc in 2nd ch from hook and each ch across. Turn. (24 sc)
Row 2: Ch 1, sc 2, [puff in next st, sc 3] 5 times, puff in next st, sc 1. Turn. (24 sts)
Row 3 and all odd rows through Row 15: Ch 1, sc in each st across. Turn. (24 sc)
Row 4: Ch 1, sc 4, [puff in next st, sc 3] 5 times. Turn. (24 sts)
Rows 6, 8, 10, 12, 14: Repeat Rows 2 and 4 alternately, ending with a Row 2 repeat on Row 14. (24 sts)
Border: Sc evenly around the entire panel, placing 2 sc in each corner to keep it flat.
Set this aside for assembly. You’ll sew it centered on the lower front, beginning 1.5 inches (4 cm) above the base.
Rounded Flap
The gentle curve on this flap is achieved through simple decreases.
Row 1: Ch 33, sc in 2nd ch from hook and each ch across. Turn. (32 sc)
Rows 2 through 8: Ch 1, sc in each st across. Turn. (32 sc)
Row 9: Ch 1, sc2tog, sc 28, sc2tog. Turn. (30 sc)
Row 10: Ch 1, sc in each st across. Turn. (30 sc)
Row 11: Ch 1, sc2tog, sc 26, sc2tog. Turn. (28 sc)
Row 12: Ch 1, sc in each st across. Turn. (28 sc)
Row 13: Ch 1, sc2tog, sc 24, sc2tog. Turn. (26 sc)
Border: Sc evenly around, placing 2 sc at upper corners. Add a surface slip stitch braid around the curved edge for that elevated finish.
Top Handle
Row 1: Ch 31, sc in 2nd ch from hook and each ch across. Turn. (30 sc)
Work 3 more rows of sc for a total of 4 rows.
You can fold this around a 7 inch (18 cm) cord for extra structure, or leave it flat and seam the long edges together. Attach to two D-rings at the back top edge.
Shoulder Straps (Make 2)
Row 1: Ch 87, sc in 2nd ch from hook and each ch across. Turn. (86 sc)
Work 2 more rows of sc for a total of 3 rows.
Attach through sliders and lower side D-rings. Final strap length should adjust between 24 to 34 inches (61 to 86 cm).
Drawstring
Make a 34 inch (86 cm) cord using one of these methods:
Thread through the eyelets you created in Round 21.
Tassel
Wrap your cord around something 8 inches (20 cm) long about 10 times. Tie securely at the top, wrap the neck to create that classic tassel shape, trim the ends evenly, and attach to your drawstring or flap hardware.
Assembly and Finishing
1. Block the body lightly over a box or folded towel form so the sides dry straight. This step really makes a difference.
2. Center the front texture panel on the lower front and sew invisibly around all edges using matching cord and your tapestry needle.
3. Sew the flap across the back top edge. The curved edge should fall over the front panel by about 2.25 inches (5.5 cm).
4. Add your magnetic snap or turn-lock under the flap, placing the receiving side above the tassel line.
5. Attach upper D-rings for straps near the back corners and lower rings 1.25 inches (3 cm) above the base on each side.
6. Add braided surface trim around the flap edge, side-front seams, bottom edge, and top handle for that raised minimalist finish you see in the photos.
Blocking and Care Tips
Blocking: Steam lightly from a distance or mist and shape by hand. Don’t over-steam polyester cord as it can lose its texture.
Care: Spot clean with cool water and mild soap. Reshape and air dry flat. Avoid machine washing if hardware, lining, or a snap is installed.
Pro tip for structure: For that true boutique finish, add plastic canvas to the base and a simple fabric lining with pockets before tightening the final strap hardware.
Troubleshooting Common Issues
Body leans or twists: Join each round and turn the work every 4 rounds if your stitches bias strongly.
Bag is soft: Go down a hook size, use firmer cord, or add lining and a base insert.
Flap curls: Work the border looser and block over the bag shape. Avoid tightening the surface braid.
Panel puckers: Sew with small, even stitches and don’t pull the sewing strand tight.
Customization Options
Want to adjust the size? Here’s how:
I really hope you love making this sage green minimalist backpack as much as I loved designing it. If you give it a try, please save this pattern to your Pinterest boards so you can find it easily later. And I would absolutely love to see your finished bags, so drop a comment below or tag me on social media when yours is complete!
Want a Quick & Easy Printable Version?
Get a clean, beautifully formatted PDF of this pattern — easy to follow step by step, ready to print or save on any device. No scrolling, no distractions, just the pattern.
Get the Printable PDF →You Might Also Like
- Sage Green Textured Clutch Bag Free Crochet Pattern
- Lavender Sunflower Granny Square Tote Free Crochet Pattern
- Coral Sunset Crochet Summer Boots Free Pattern
- Sage Green Tiered Wall Planter Free Crochet Pattern