
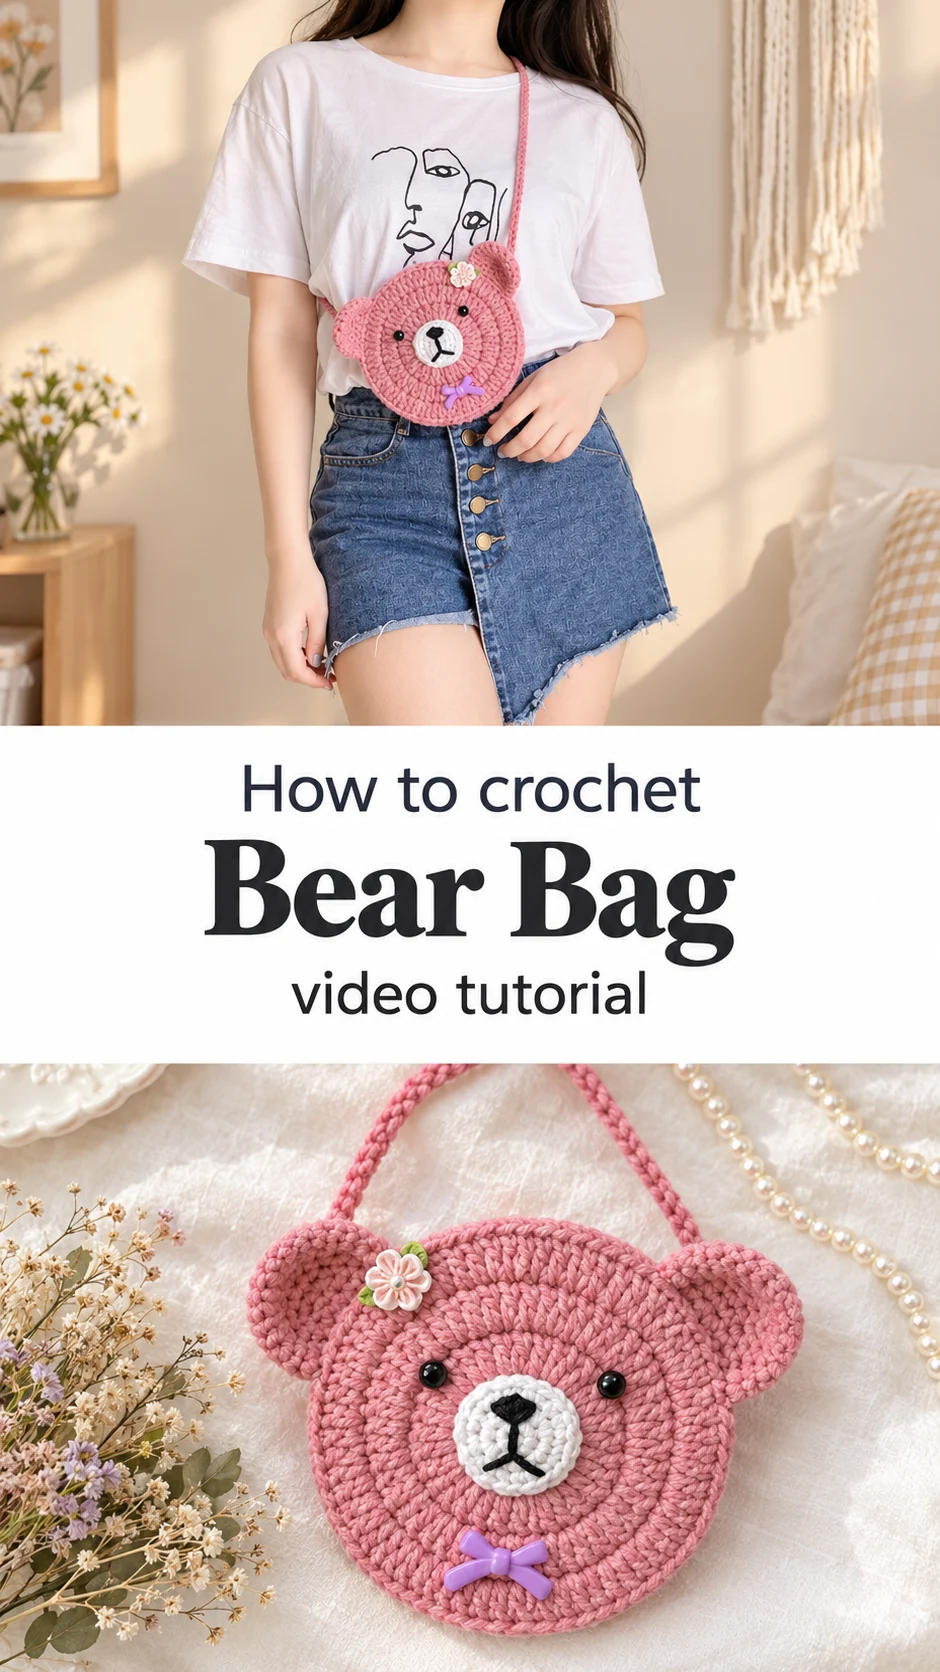
The crochet bear bag is a small round crossbody in dusty rose, with rounded ears, a cream muzzle and a tiny purple bow, and it turns a plain white tee and denim into an outfit with personality.
The Crochet Bear Bag
The crochet bear bag is a circular purse shaped like a teddy face, and the shape does most of the charm. A flat round body in dusty rose carries two half-moon ears, a lighter muzzle patch, black bead eyes and a stitched nose and mouth. A skinny crocheted cord forms the strap, and in one photo it is tied into a loose bow at the top. The tiny details are what give it character: a satin flower on one ear and a bright purple bow at the chin. It is sized for a phone, a lip balm and a few cards. That makes it ideal for a casual day out, a festival, or a child who wants a bag of her own.
Think of it as three projects in one: a small bag, a little amigurumi-style face and a bit of embellishing. Each part is quick on its own. Together they make a gift that looks far more complicated than it is. Fast to finish. Easy to personalise.
Bear Bag Related Posts:
- Crochet Baby Blanket: A Soft and Timeless Treasure
- Crochet Floral Motif: A Timeless and Versatile Classic
- Crochet Crocodile Stitch Bag: A Textured Elegant Treasure
- Crochet Ribbed Blanket: A Timeless and Cozy Classic
Materials
For a crochet bear bag like this one, choose a smooth, medium-weight cotton or cotton-blend yarn in a dusty rose, plus a small amount of cream for the muzzle and black for the nose and mouth. The fabric in the photos is dense and clearly ridged, so work with a hook slightly smaller than the yarn label suggests. Tight stitches keep the circle flat and stop the bag from stretching under the weight of a phone. Cotton is the safer fibre here because it holds its shape, while a fluffy acrylic would sag and hide the stitch definition. You will also need two black safety eyes or small black beads, a yarn needle, stitch markers and a few embellishments. A satin flower and a small plastic bow, as used on the original, work well. Fabric lining is optional but helps small items from poking through the stitches.
Understanding the Structure
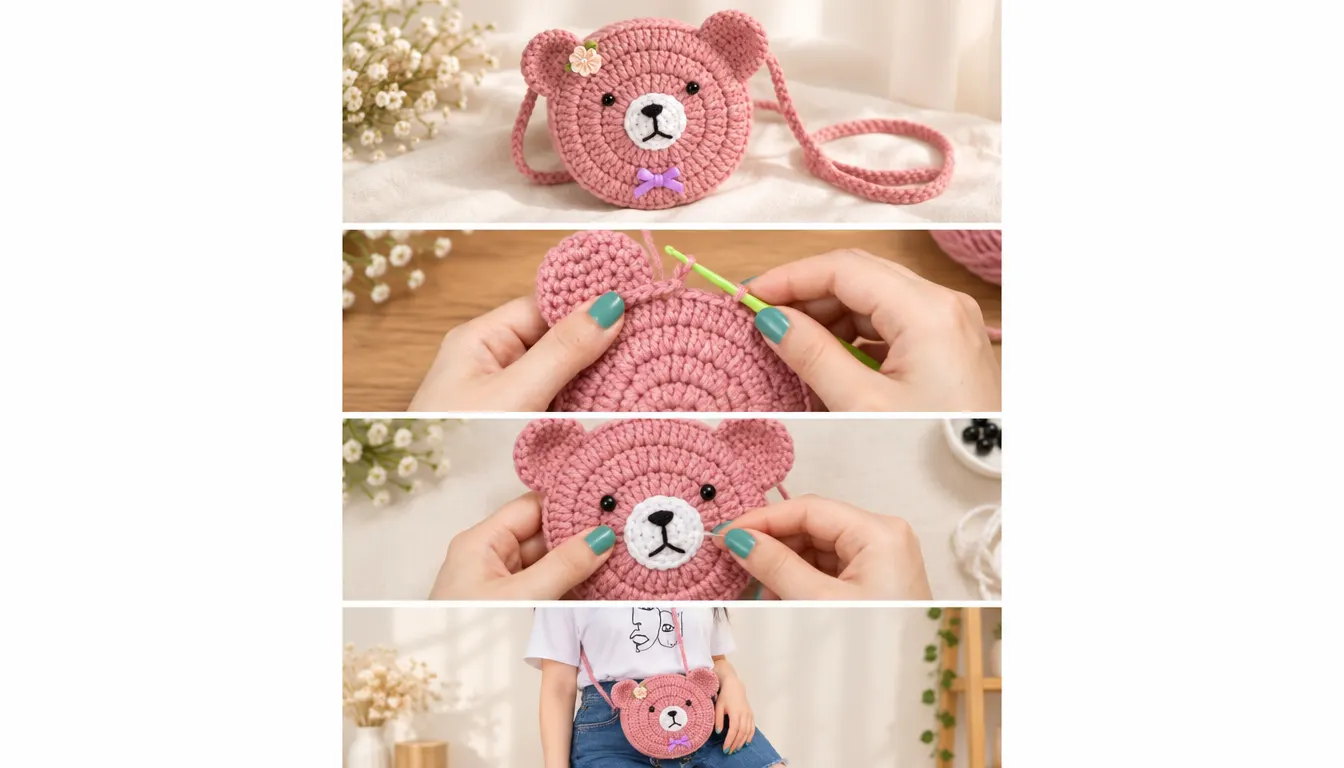
The bag is built from a few simple parts. Two matching circles form the front and back, and each looks to be worked from the centre outward in spiralling rounds, which gives the radiating texture you can see on the face. The muzzle is a small separate circle sewn on top. The ears are two small half-rounds attached at the top edge. The strap is a long, narrow cord.
Because the ears sit on the outer edge, they are likely sewn or joined along the seam where the two circles meet. That is worth watching closely in the video tutorial. Pause when the creator positions the ears, since their angle changes the whole expression of the bear.
Work the circles flat and check them often. If a circle starts to ruffle, there are too many stitches in the round, so pull back a few rounds and ease the increases. If it cups like a bowl, you have too few. A flat circle matters here because the bag is sewn closed along the edge, and any warping will show.
Best Stitches for a Sturdy Bag
The photos show a tightly packed fabric with clear concentric ridges, which suggests dense single crochet or something similar worked in a spiral. This is the right choice for a bag. Close stitches leave no gaps for keys or coins to slip through, and the fabric stays firm without any stiffener.
The outer rings on the face look slightly raised compared with the centre, which gives the bear a soft, sculpted look. That texture probably comes from working into the back or front loop only on certain rounds. Check the video for hand position at that step.
Open stitches would work against you here. A lacy fabric would stretch with use and the circle would turn oval. Keep your tension steady, and if the fabric feels floppy, drop down a hook size rather than adding stiffener later.
The Face: The Detail That Gives It Life
The face is what sells this bag. The cream muzzle, the black nose and the straight stitched mouth create a gentle, slightly sleepy expression. The eyes are small and set wide on the face, which reads as cute rather than fierce.
Place every facial feature with pins before you commit. Eyes set too close look startled, and a muzzle sitting too low makes the bear look sad. Hold the piece at arm’s length and compare it to the photos.
If you are making this for a young child, swap safety eyes for embroidered ones in black yarn. Beads and plastic eyes can come loose, and a bag handled by small hands is better with stitched features. For the mouth, use a short stitch down from the nose and two angled stitches out to each side, pulled just snug enough to dimple the fabric.
Ears, Flower and Bow
The ears are small half-circles and need to be stitched on securely, since they will be tugged every time the bag is picked up. Sew them along their full base, not just at two points. The satin flower and purple bow are pure decoration, so attach them with a few firm stitches or a dab of fabric glue, and keep them away from the zip line or opening.
Straps and Closing the Bag
The strap in the photos is a slim crocheted cord, long enough to wear across the body and rest the bag at hip level. It is a good length for a teen or adult, but you can shorten it for a child. Measure against the person who will wear it before you stop.
A cord strap holds up best when worked tightly, since a loose chain stretches over time and the bag will drop lower and lower. If the strap seems to grow, turn it into a doubled cord by working a second one alongside, or sew a strip of ribbon along the back to hold it steady.
For the opening, the original appears to be closed along most of the edge. If you want a practical bag, leave a gap at the top and add a small button and loop, or sew in a snap. A button closure with a chain loop is simple and keeps the face uninterrupted. Lining the inside with cotton fabric also stops coins from catching in the stitches.
How to Style a Crochet Bear Bag
In the photos, the bag rests at the hip over a white graphic tee and a button-front denim skirt. The dusty rose stands out against the neutral outfit and gives it a playful note. Keep that formula in mind. Let the bag be the only bright thing.
It also works with a pale linen dress for a picnic, or with a striped shirt and white jeans on a weekend walk. For a child, pair it with a simple cotton dress and sandals.
As a gift, it suits a birthday or a first day at school. Choose the yarn colour to match the person. Soft lilac, cream and mint all give the bear a new personality, and a bow in a contrasting shade ties it together.
Tips for a Neat Finish
Weave in every end before you close the bag, since the dense fabric makes later weaving awkward. Use the tail of each colour change to fill the gap between the muzzle and the face so no gap shows.
When joining the two circles, match the stitches one for one and pin at the four quarter points first. If the edge looks wavy after joining, steam it lightly and press with your palm while it is damp. This relaxes the cotton and flattens the ridge.
If the bag feels stiff, the tension was likely too tight, so go up half a hook size next time. If it feels floppy, go down. Test with a small swatch before you commit to the full circle, because this is a project where tension decides whether the bag stands up or slumps.
Following the Tutorial
Work through the video in one sitting if you can, then go back and start again with your yarn in hand. Pause whenever the creator shows the start of the circle, since the first rounds set the size of everything that follows.
Watch closely how the muzzle is attached, how the ears are placed and how the pieces are joined. These three moments are where most mistakes happen. Replay them until the movement feels natural.
Make the small parts first, the muzzle and ears, so you can test the face before the big circles are done. A sensible order is the face circle, the back circle, the muzzle, the ears, the strap, then assembly and decoration.
A Sweet Handmade Companion
This crochet bear bag is a small round purse with a big personality, built from simple circles and finished with a few careful details. What decides the result is firm tension, even circles, well-placed features and secure ears. Get those four right and the rest falls into place.
Choose your colours, take your time on the face and let the little bow be the finishing touch.
Small bag. Big smile.
Video tutorial for the crochet bear bag by Vivi Crochet. Watch the full video below.
VIDEO
Follow us on Pinterest and subscribe to the Newsletter so you don’t miss a thing!
Tutorial and photos of this bear bag by: Vivi Crochet 🌷.