
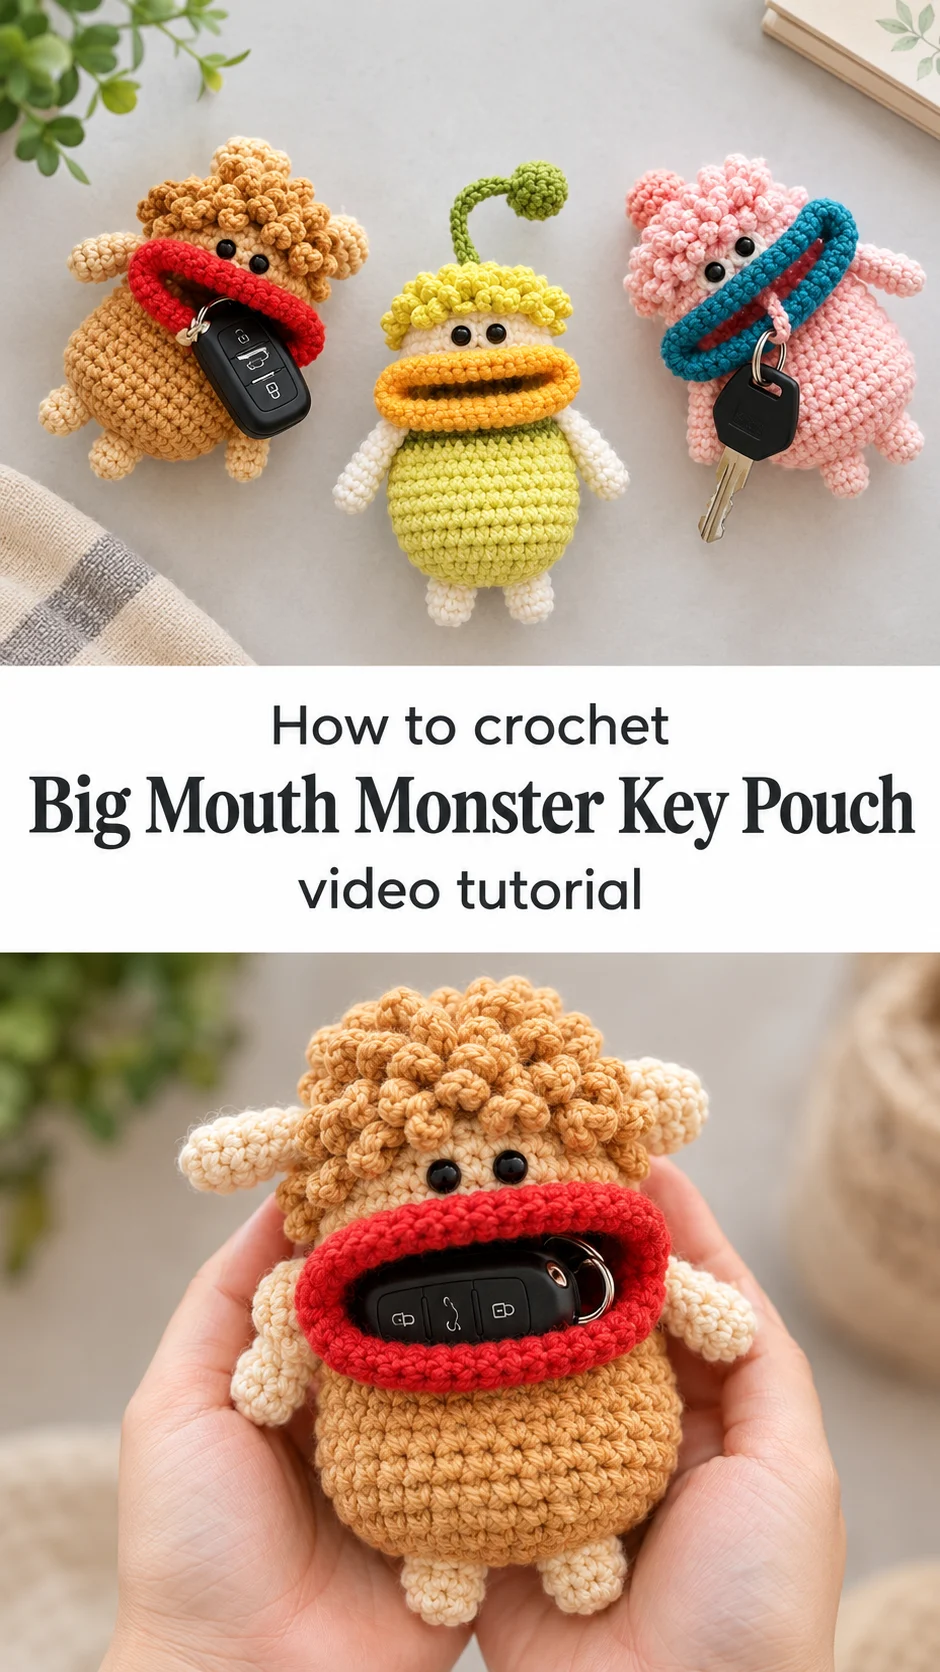
This crochet big mouth monster key pouch is a tiny, chubby creature with wide-set eyes and a lipped mouth that swallows your keys whole, a small bag with a big personality.
The Crochet Big Mouth Monster Key Pouch
The crochet big mouth monster key pouch is a plump little character that doubles as a storage bag. Its round body is worked in dense single crochet, so it holds its shape and protects whatever goes inside. The mouth is the star. A thick, rounded ring of contrast colour sits across the face like a pair of oversized lips, and the keys slip in through the opening. Black bead eyes, a curly cap of hair and stubby arms and legs give each monster its own mood. A little stalk with a ball on top lets it hang from a bag strap or a belt loop. It suits car keys, a fob, earbuds or a lipstick.
Make one in butter yellow with a sprout on top, another in caramel with red lips, a third in pink with teal. Each looks like a different personality. They are quick enough to batch, which makes them popular small gifts for friends, coworkers and new drivers. Making them also builds useful skills: working in the round with tidy colour changes, shaping a three-dimensional body, and attaching small parts neatly.
Key Pouch Related Posts:
- Crochet Daisy Flower: A Delicate Floral Accent
- Crochet Bag Dispenser: A Clever and Practical Home Staple
- Crochet Sunflower Bloom: A Bright and Cheerful Accent
- Crochet Net Tote Bag: A Chic Bohemian Essential
Materials
For a crochet big mouth monster key pouch, choose a smooth cotton or cotton-blend yarn in a medium weight, with a hook that is a little smaller than the label recommends. The monsters in the photos have tight, firm stitches with no gaps, and that density keeps the body standing up and stops keys from poking through. Cotton is the safest choice because it is sturdy and has a matte finish that shows stitch definition. You will need a main body colour, a contrast colour for the lips, a cream or white for the arms, legs and face, and a third shade for the hair and the hanging stalk. A hook around 3.5 mm suits this kind of fabric, but let your gauge decide. Add a pair of black safety eyes or bead eyes, polyester fiberfill, a yarn needle, stitch markers and a small keyring or clasp. Skip fuzzy yarn. It hides the stitches and makes the mouth edge look blurry.
Understanding the Structure
Think of this project as a small body with a lined mouth, plus four limbs and a topknot. The body is worked in the round from the base up, like a rounded egg, and the shaping happens at the bottom and again near the top, where the piece narrows toward the face.
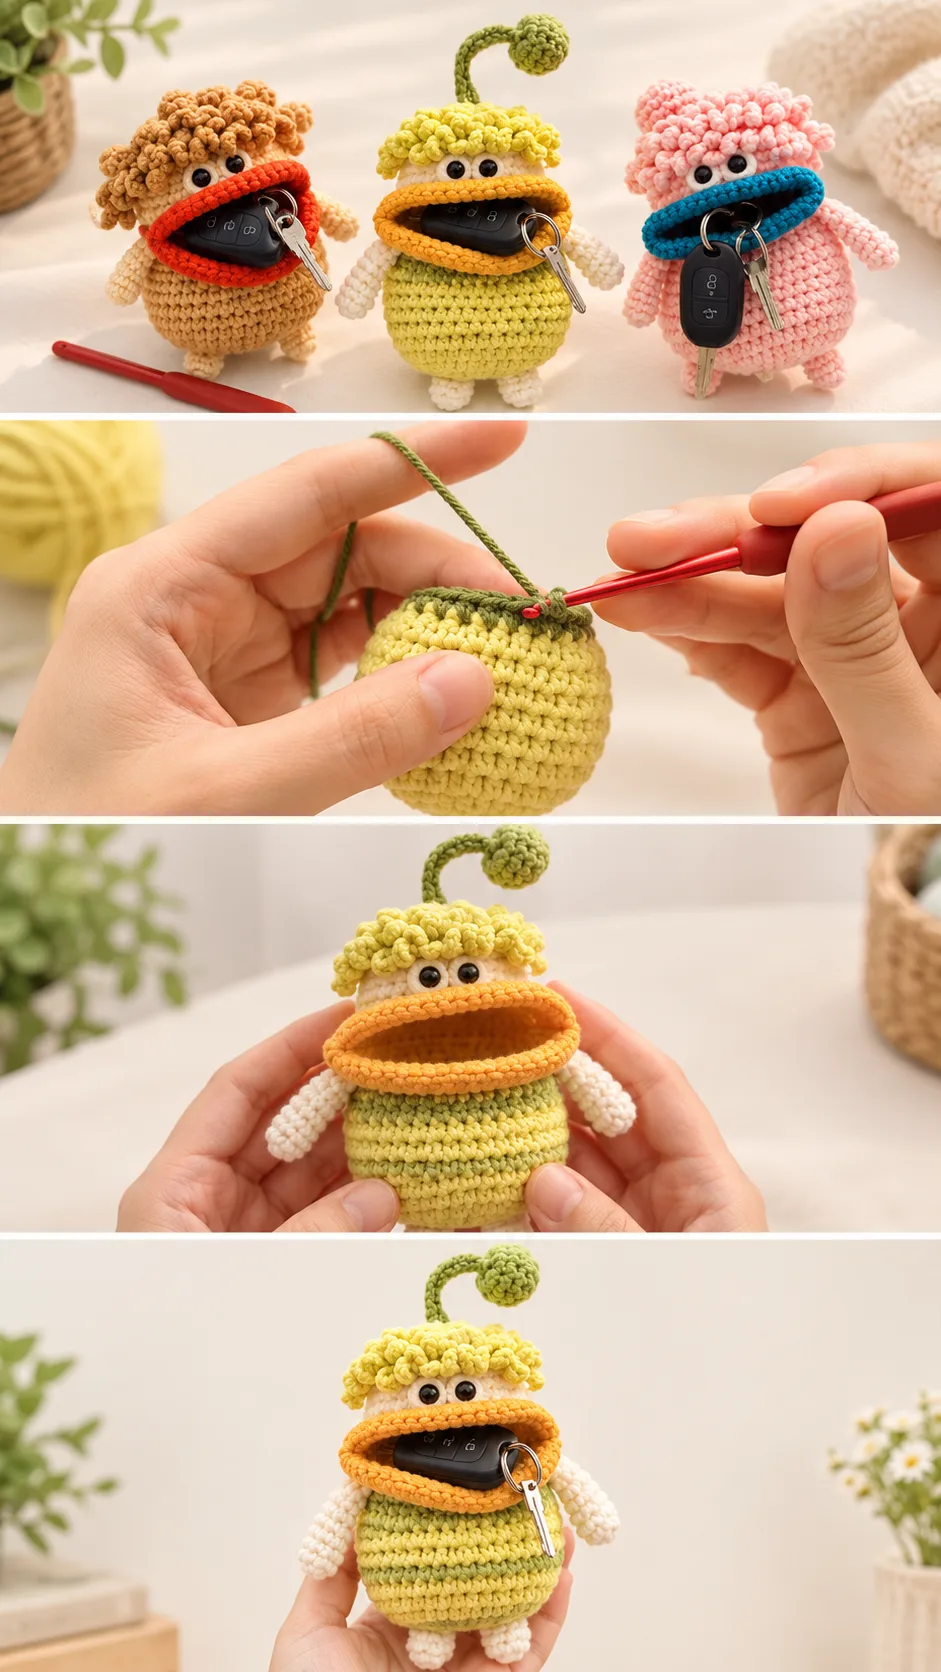
The yellow monster has a green band just below the mouth, which looks like a collar or a striped shirt. That stripe is simply a short colour change in the body, and it marks where the shaping changes. On the caramel one, the same spot carries an orange band.
Because the pouch has to open, the front is not a solid wall. The mouth ring is a separate, thick oval that frames an opening into the body. Arms and legs are small tubes, attached after the body is finished. The hair is a cap of raised, bumpy stitches that sits above the eyes.
Work the parts in a sensible order: body first, then limbs, then mouth, hair and finally the stalk. Stuff only where the shape needs it, such as the head area, and leave the pouch space hollow. That is the sentence worth remembering: stuffing the whole body leaves no room for the keys.
The Mouth: The Detail That Makes It a Pouch
The lips are what turn a doll into a bag. In the photos the ring is thick and rounded, almost like a padded tube, and it stays open on its own. That stiffness comes from dense stitches worked tightly around the opening, not from wire or lining.
Pick a contrast colour that pops against the body: red on caramel, teal on pink, golden orange on yellow. Strong contrast makes the mouth read clearly as a feature, while a close shade makes it look flat. The tutorial shows how the ring is shaped and joined to the body, so watch that stretch closely and pause as the opening takes form.
The common mistake is a mouth that is too small. Test the opening with your actual key fob before sewing it down. The large black fob in the photos is a good size reference, and a bulky car remote needs a wider mouth than a single house key.
If the lips flop inward, your stitches are too loose. Drop down a hook size for that section, or pull each stitch snugly as you go. If the ring curls awkwardly, check that you are working into the same loop of every stitch.
Eyes and Hair
The eyes sit just above the mouth, close together, with small white circles behind the black beads. That white backing gives the googly look, so do not skip it. Place the eyes before closing the head, and pin them first to judge the expression. A slight tilt gives the monster a sleepy or suspicious air.
The hair is a cap of raised, nubby stitches in a single colour, and it looks like tight curls. Sew it on after the eyes so you can set the hairline where you want it. A wavy hairline tucked low over the eyes gives the grumpy look in the photos.
Choosing the Best Colours and Yarn
Cotton gives the cleanest result because it stays crisp and does not stretch. A cotton-acrylic blend works too and is a little softer in the hand. Avoid slippery or very stretchy yarn, because the body will sag under the weight of keys and the mouth will lose its shape.
For colour, start from the trio in the photos. Warm caramel with red lips feels cozy. Soft pink with deep teal is playful and a bit retro. Lemon yellow with orange lips and a green sprout looks fresh and spring-like. Pick one body colour, one bold lip colour and a neutral for the limbs, then keep the hair close to the body shade.
Pale limbs against a coloured body make the character read well from a distance. If you use a very dark body colour, choose light lips so the face does not disappear.
Assembling the Monster
Assembly is where the character appears, so take your time. Pin every piece before sewing, and check the monster from the front. Symmetry matters most for the arms and legs, since a mismatched pair is the first thing the eye catches.
Sew the arms high on the sides, just under the mouth, so they rest against the body like small stubby wings. Legs go at the base, close enough to let the pouch sit upright on a table. Use the tail of yarn from each limb to attach it, and sew through both layers for a firm hold.
The hanging stalk is a thin chain or cord ending in a small ball, attached at the top of the head. It acts as a loop, so make sure it is strong. If you plan to clip the pouch to a bag, anchor it with several passes of yarn through the head and knot it well inside.
If the head tilts forward, you have stuffed it unevenly. Pull a little fiberfill out of the front and add it to the back until it sits straight.
How to Style a Crochet Big Mouth Monster Key Pouch
In the photos the monsters lie flat on a pale surface, one holding a key fob in its mouth and another with a metal key peeking out. That is the simplest use: a charm that doubles as storage. Clip it to a tote strap and the sprout swings as you walk.
Other ideas follow naturally. Hang one from the zipper of a backpack, loop it over a car mirror, or tuck it into a coat pocket so keys never get lost at the bottom of a bag. A set of three makes a cheerful desk display, and a pink one is a sweet gift for a student starting at a new school.
Match the colours to the person. A caramel monster suits someone who likes warm neutrals, and a bright yellow one brings a spark to a plain black handbag.
Tips for a Neat Finish
Weave in every tail well, especially inside the mouth, where a loose end could snag on a key. Trim the ends flush and tuck them into the stuffing area, away from the opening.
Keep your tension even through the body. If the fabric looks gappy, switch to a smaller hook, since fiberfill and metal keys show through loose stitches. If the body looks lumpy, remove some stuffing and reshape it with your hands.
Check that the pouch closes enough to protect its contents. If keys slide out too easily, narrow the mouth slightly or add a small loop for a button. If the lips look uneven, brush them gently into shape while the piece is still new.
Follow the tutorial with your own pieces beside you. Pause when the body shaping starts, and replay the part where the lips are attached, since that join is the trickiest in the project. Work in a sensible order and avoid rushing the face, which gives the monster its character.
A Cheerful Handmade Companion
This crochet big mouth monster key pouch is a small, round character with a lipped mouth that holds your keys safely. Three things decide how it turns out: a firm cotton yarn worked at a tight gauge, a mouth opening sized for what you carry, and a neat, symmetrical assembly.
Pick your colours, give each monster a mood, and enjoy a handmade bag that is as useful as it is funny.
Small, soft and a little silly.
Video tutorial by 小师妹手作, who shows how to crochet this big mouth monster key pouch step by step. Watch the full tutorial on their channel.
VIDEO
Follow us on Pinterest and subscribe to the Newsletter so you don’t miss a thing!
Tutorial and photos of this big mouth monster key pouch by: 小师妹手作.