
The Crochet Shell Stitch builds itself in gentle arcs, each fan of double crochets fanning outward like petals pressed into a row of lace. From cozy blankets to delicate shawls, this single pattern opens up a whole world of handmade pieces waiting to be born from your hook.
The Shell Stitch
The Crochet Shell Stitch carries with it a particular kind of grace, the sort that looks intricate at a glance but settles into your hands with surprising ease once you understand its logic. Each shell is formed by working multiple DC stitches into a single base stitch, creating a soft, scalloped texture that is airy yet structured at the same time. It is the stitch for anyone who wants their work to look considered and beautiful without spending weeks mastering technique. Whether you are crocheting your very first blanket or adding a new pattern to a well-worn repertoire, this one will stay with you.
Shell Stitch Related Posts:
- Crochet Shell Stitch Blanket: A Vibrant Cozy Wrap
- Crochet Net Tote Bag: A Chic and Airy Summer Essential
- Crochet V Puff Stitch: A Textured and Timeless Treasure
- Crochet Tassels: A Charming Decorative Touch
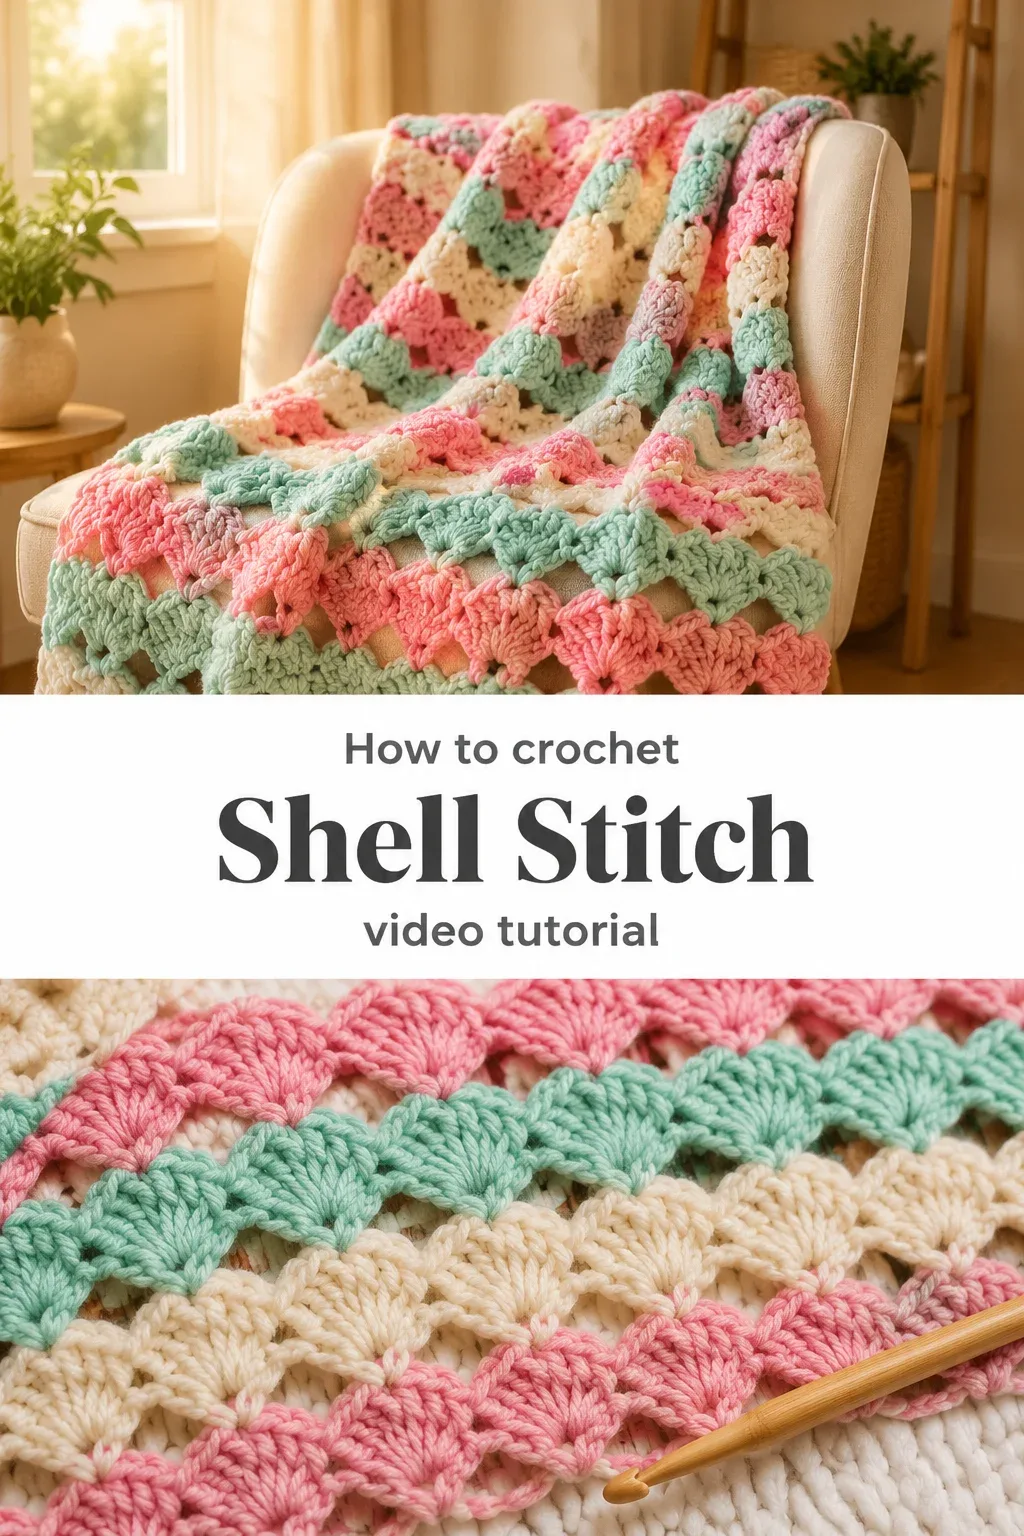
Color is where the Crochet Shell Stitch truly comes alive, and the reference images say everything you need to know about its versatility. Rows of hot pink, mint green, and soft cream stripe their way across the fabric like a slice of summer, each color separated cleanly within the natural rhythm of the shells. You could go bold and striped for a baby blanket, or choose a single tonal yarn in sage or dusty rose for something more understated and grown-up.
Materials and Tools
For a project with warmth and good drape, reach for a worsted weight yarn in a smooth cotton or cotton-acrylic blend, both of which show the shell definition beautifully without obscuring the stitch detail. A 5mm crochet hook is the sweet spot for worsted weight, giving you fabric that is neither too stiff nor too loose. If you prefer something lighter and more delicate, a DK weight yarn paired with a 4mm hook produces a finer, more refined shell that works beautifully for shawls or table runners. Keep a yarn needle close by for weaving in your color-change ends neatly as you go.
Stitch by Stitch
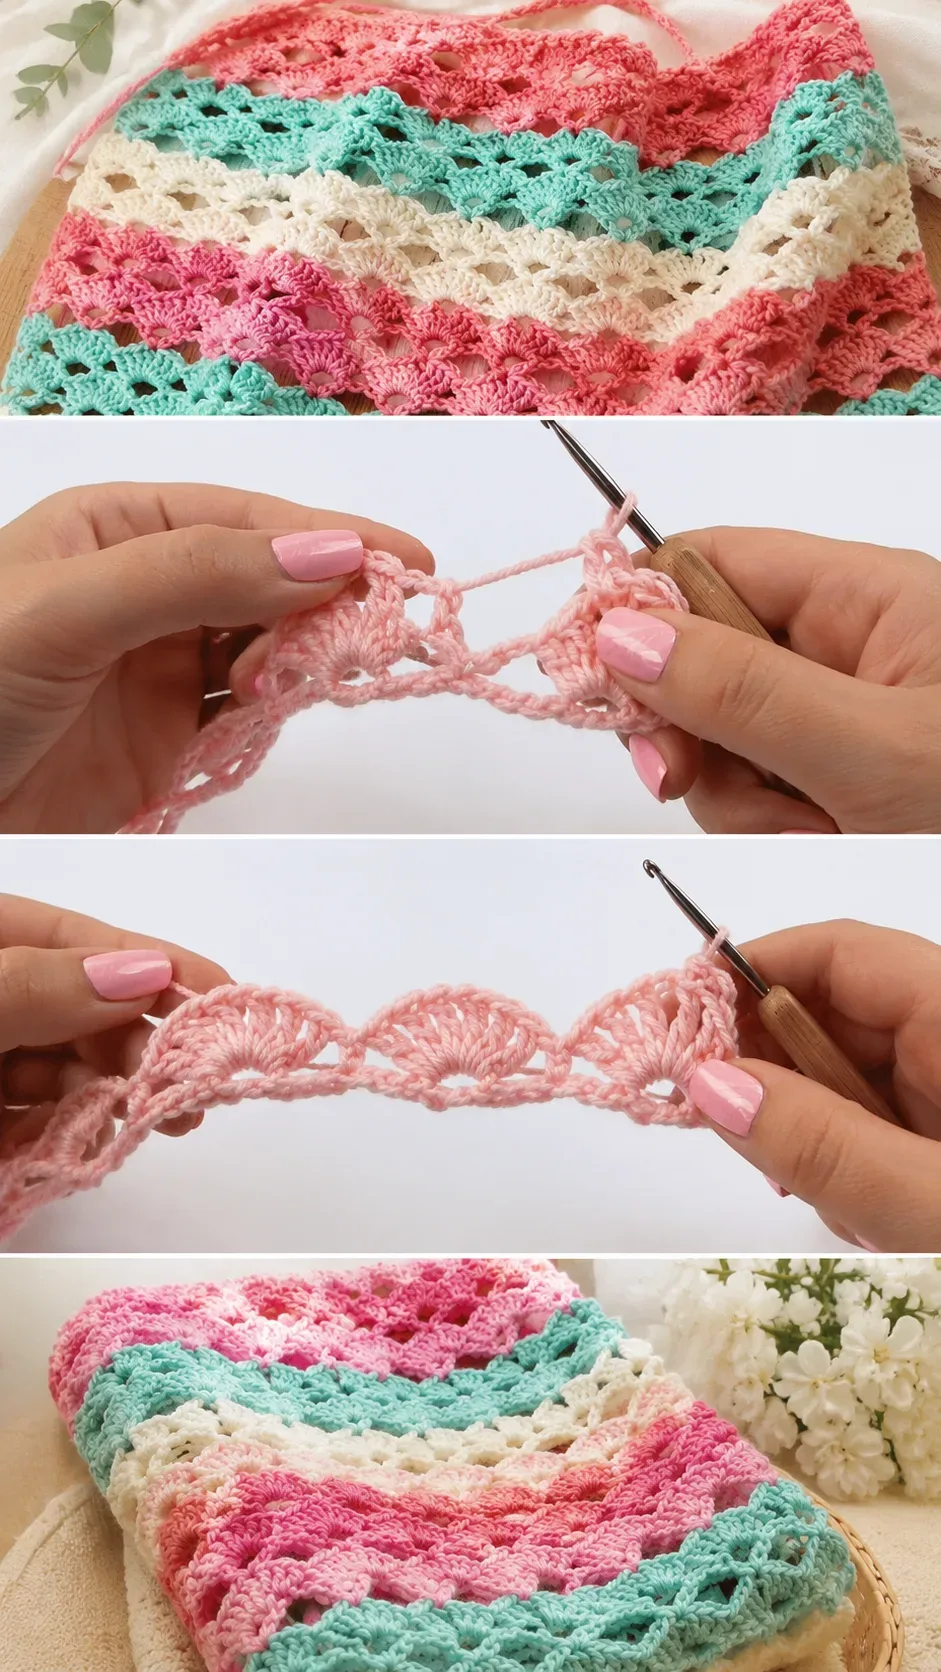
The Crochet Shell Stitch draws on a small but satisfying collection of foundational stitches.
BULLET:CH (Chain) The foundation of every row and the starting point from which your shells will grow.
BULLET:SC (Single Crochet) Used to anchor and separate each shell at the base, giving the pattern its clean, rhythmic structure.
BULLET:DC (Double Crochet) The workhorse of the shell itself, worked in multiples of five into a single stitch to create each fan.
BULLET:YO (Yarn Over) The essential motion repeated through every DC, giving you control over tension and height.
Once your hands find the repeat, the Crochet Shell Stitch settles into a meditative rhythm that is genuinely hard to put down. There is something deeply satisfying about watching each fan of stitches bloom into place, row after row.
Construction
The shell stitch is worked in flat rows, making it wonderfully accessible for beginners who are not yet comfortable crocheting in the round. You begin with a foundation chain in a multiple of six stitches plus any turning chains required, and from there the pattern alternates between rows of shells and rows of SC to build up that signature scalloped texture. The full row-by-row breakdown is demonstrated clearly in the video tutorial from Naztazia, which walks you through every step with real yarn in hand so you can follow along at your own pace. If you want to adjust the width of a blanket or the length of a scarf, simply add or subtract multiples of six to your starting chain.
Wearing Your Shell Stitch
A shell stitch shawl draped over a linen shirt on a cool autumn evening has a particular quiet elegance that no shop-bought piece ever quite achieves. Work it as a wide, striped table runner to bring handmade warmth to a dining table, or stitch it into a baby blanket layered with soft pastels that will be kept long after the child has grown. Finishing a project like this makes you want to cast on the next one before the yarn is even put away.
Keeping Your Shell Stitch Projects Looking Beautiful
Cotton and cotton-blend shell stitch pieces respond wonderfully to wet blocking, which opens up the stitch definition and lets those scalloped edges lie flat and even. Hand wash gently in cool water with a mild detergent, then press out excess water between two clean towels without wringing, which can distort the shells. Lay the piece flat to dry on a blocking mat, pinning the edges lightly if you want a particularly crisp finish. Store folded rather than hung to prevent any stretching across the width of the fabric.
Every row of shells you complete is a small, real act of making something with your own hands, and that will never go out of style. Save this article to your Pinterest boards and share your finished shell stitch projects so others can find the inspiration to pick up their hooks too.
Follow us on Pinterest and subscribe to the Newsletter so you don’t miss a thing!
Tutorial and photos of this shell stitch by: naztazia.