
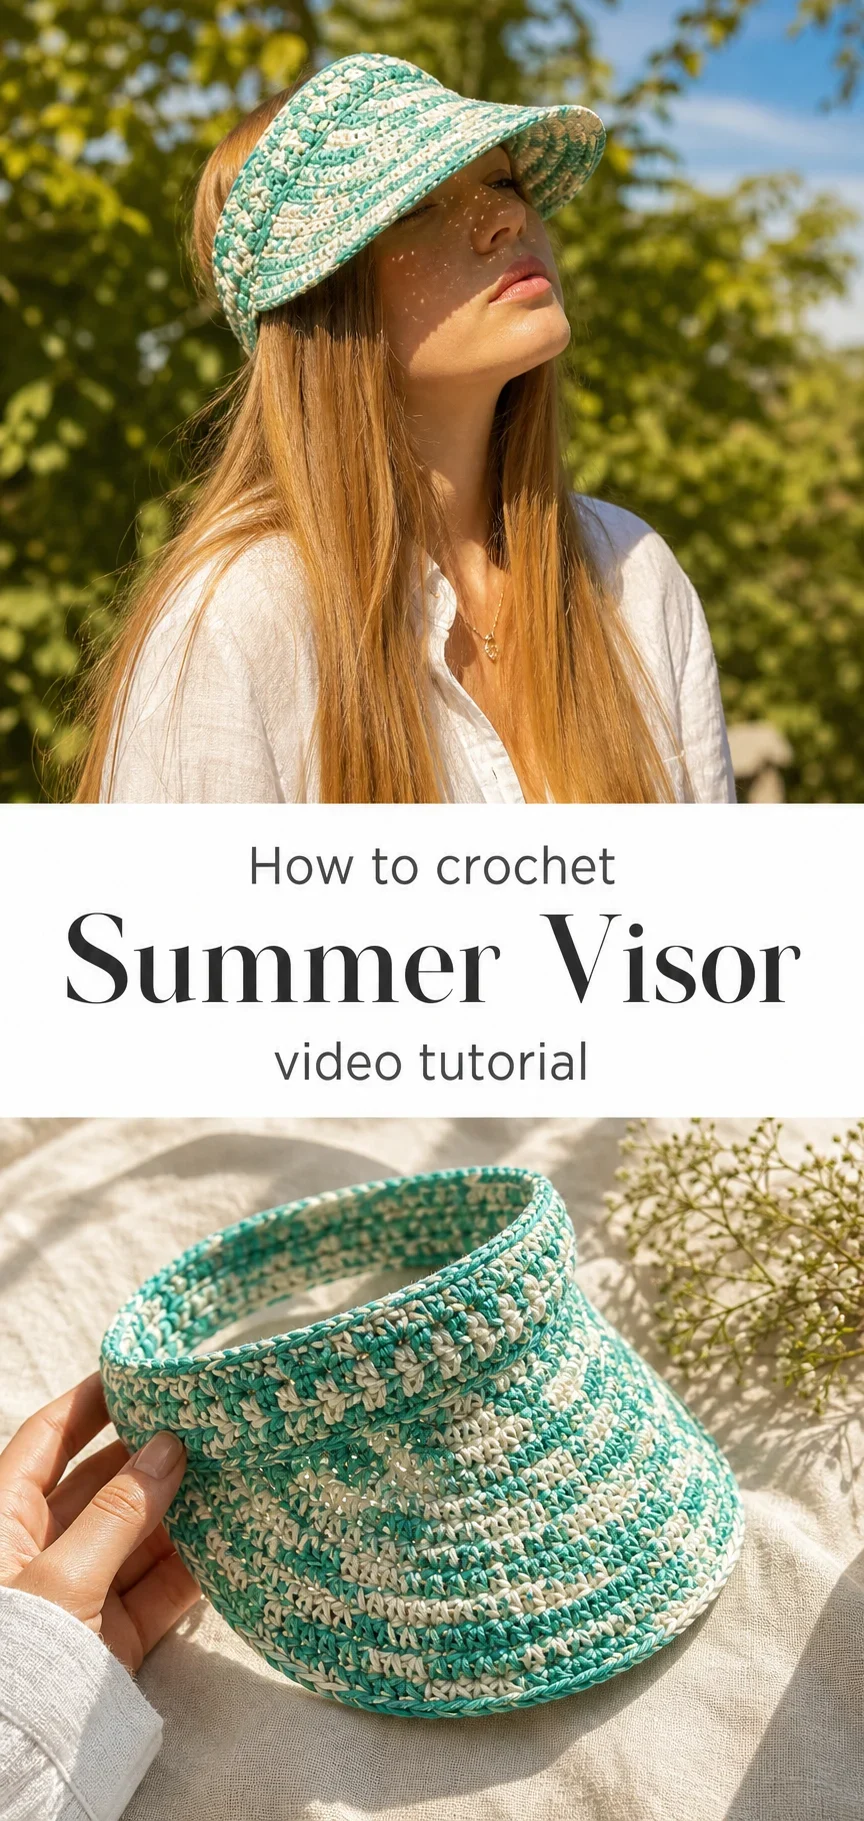
Learn to crochet a Crochet Summer Visor that sits open-topped and breezy on your head, with a wide brim that catches the light like woven sea glass. Wear it to the farmers’ market, tuck it into a beach bag, or pair it with a linen dress for an afternoon that feels entirely unhurried.
The Summer Visor
The Crochet Summer Visor is one of those rare accessories that manages to feel airy yet structured at the same time, holding its shape through warm afternoons without ever feeling heavy or stiff. It is designed for anyone who has ever wanted a handmade hat that looks considered and polished rather than rustic, something that earns compliments rather than quiet glances. The wide brim casts a soft shadow across the face, the open crown lets the breeze move through freely, and the whole piece carries a whisper of elegance that store-bought visors simply cannot replicate. Whether you are a newer crafter building your confidence or someone with a few finished hats already on your shelf, this pattern will feel like a true reward.
Summer Visor Related Posts:
- Crochet Drawstring Bag: A Chic Handcrafted Essential
- Crochet Zigzag Blanket: A Bold and Vibrant Treasure
- Crochet Checker Baby Blanket: A Vibrant Cozy Treasure
- Crochet Bag Base: A Structured and Timeless Essential
The colorway shown in the tutorial uses a variegated raffia-style yarn that swirls between cream, mint, and seafoam green, and the result is something that genuinely looks like summer itself. You could easily work the same pattern in a single natural ecru tone for something more minimal, or choose a bold sage or dusty coral to make it feel more personal. The Crochet Summer Visor works beautifully with everything from a simple white tank to a floral wrap skirt, and that versatility is a large part of what makes finishing it so satisfying.
Materials and Tools
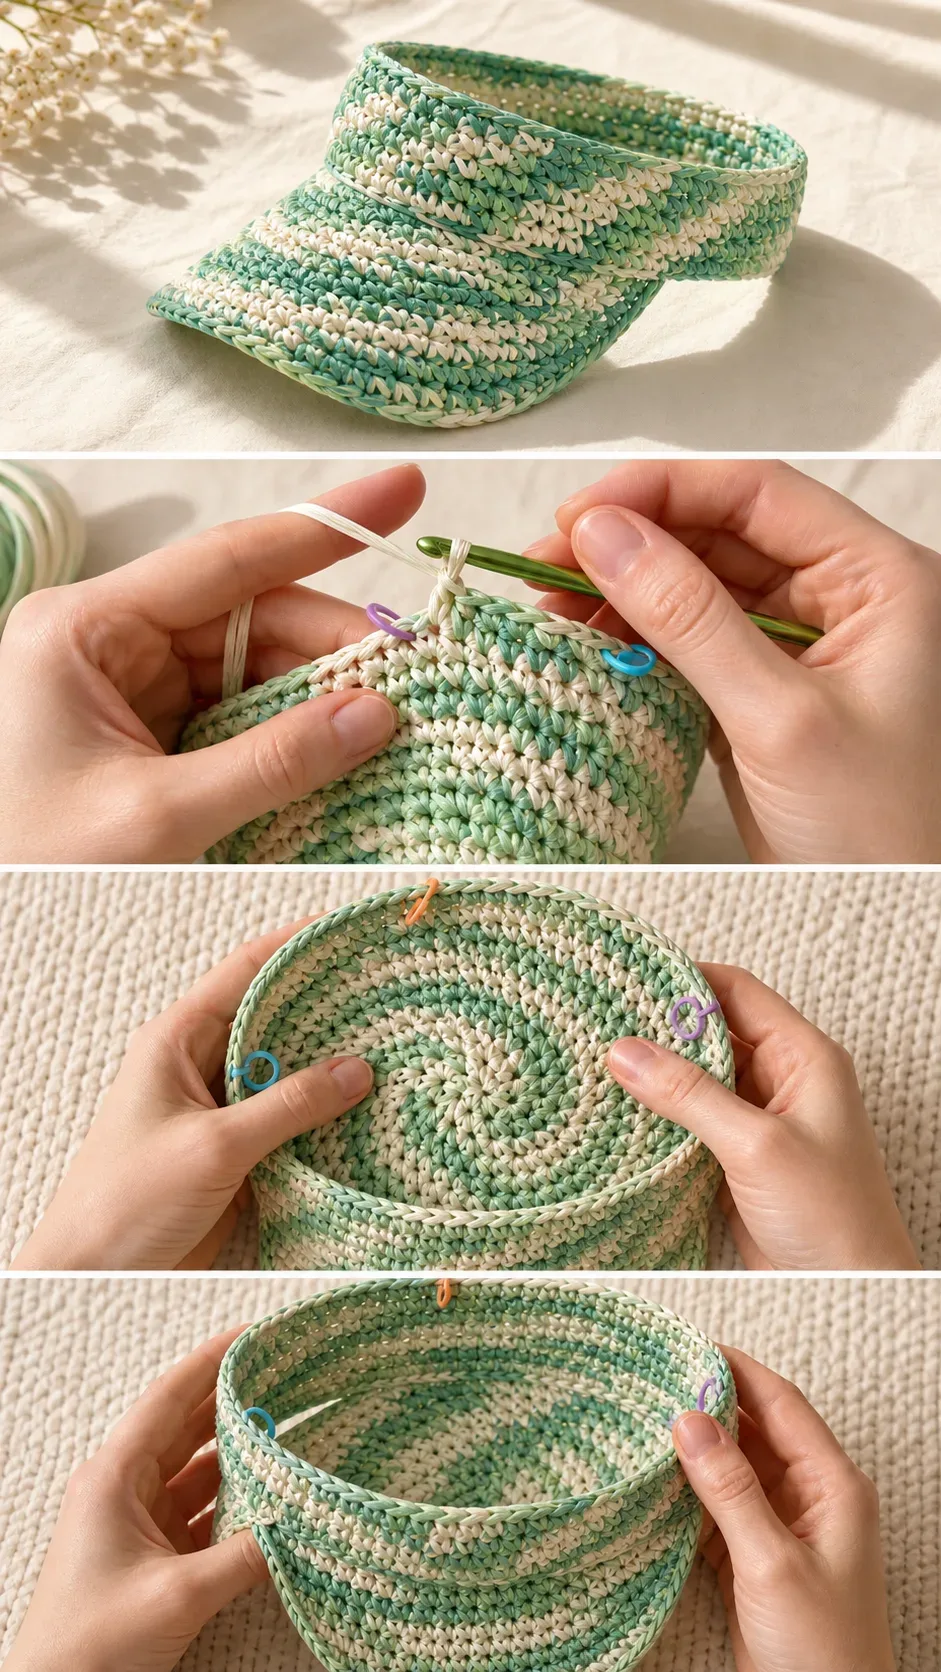
To recreate the Crochet Summer Visor shown in the tutorial, you will want to reach for a sport weight or light DK weight yarn in a raffia, cotton, or cotton-blend fiber, as these materials give the brim that firm, sun-hat quality that makes the visor actually functional outdoors. The yarn used in the video has a lovely flat, ribbon-like quality that produces crisp stitch definition, and a similar result can be achieved with mercerized cotton or a raffia alternative in 100% plant fiber. A 3.5mm or 4mm crochet hook is recommended depending on your personal tension, and working a small gauge swatch before you begin will save you from any sizing surprises later. You will also want a handful of locking stitch markers on hand, as the pattern uses them at specific intervals to track your increases and they genuinely make the construction process far more intuitive.
Stitch by Stitch
The Crochet Summer Visor draws on a small, approachable collection of stitches that reward even a beginner’s hands.
BULLET:SC (Single Crochet) The foundational stitch of the crown and brim, worked in the round to build a dense, structured fabric that holds the visor’s shape.
BULLET:DC (Double Crochet) Used in select rows of the brim to open up the fabric slightly and add that characteristic summer-hat drape without sacrificing structure.
BULLET:Inc (Increase) Two stitches worked into the same stitch at marked intervals to gradually expand the crown and shape the brim outward in a smooth, even curve.
BULLET:SL ST (Slip Stitch) Used to join rounds invisibly and to finish edges with a clean, tailored line that keeps the brim lying flat.
There is a meditative rhythm to working in the round with these stitches, each row building quietly on the last, and many crafters find that a project like this one settles the mind in a way that few other things can.
Construction
The Crochet Summer Visor is worked entirely in the round from the top of the crown downward, which means there are no seams to sew and no panels to join at the end. The crown begins with a magic ring and grows through evenly spaced increases, with stitch markers rearranged at specific intervals to guide the shaping, as shown clearly in the video tutorial where Row 9 is demonstrated without any new increases but with a deliberate marker repositioning. Once the crown reaches the correct circumference for your head size, the brim is worked outward with additional increases to create that wide, sun-shielding flare. If you would like a slightly more dramatic brim, simply work one or two additional brim rows before fastening off, and the structure of the pattern allows for that kind of easy personalisation.
Wearing Your Summer Visor
Slide the finished Crochet Summer Visor on over loose waves for a market morning, or wear it low over the brow with a swimsuit cover-up and sandals for a beach afternoon that feels effortlessly put-together. It also layers beautifully over a ponytail or bun, which makes it practical for outdoor activities where a full hat might feel too warm. Every time you reach for it, you will feel that particular satisfaction of wearing something made by your own hands.
Keeping Your Visor Shapely All Season Long
Because the Crochet Summer Visor is worked in a stiff plant fiber or raffia-style yarn, it benefits from a light hand-wash in cool water with a gentle soap, pressed carefully between two clean towels rather than wrung or twisted. To preserve the brim’s curve and the crown’s open shape, reshape the visor while it is still damp and allow it to dry flat or over a rounded bowl that approximates the crown’s circumference. If your visor begins to lose a little of its crispness after several wears, a light misting of water and a gentle reshaping will usually restore it without any fuss. Store it on a shelf or in an open basket rather than folded or squashed, so the brim holds its structure between uses.
Making something for your head, something that frames your face and travels with you through warm months and slow afternoons, is one of the most personal things a crafter can do with a hook and a length of yarn. The full pattern and video tutorial are available to guide you through every row, so cast on with confidence and let the work begin. If you make your own Crochet Summer Visor, share a photo on Pinterest and tag it so this community of makers can admire what your hands have brought into the world.
Follow us on Pinterest and subscribe to the Newsletter so you don’t miss a thing!
Tutorial and photos of this summer visor by: WONDER NETTING.