
This is one of those patterns that looks SO much harder than it actually is. Seriously, you’re going to impress everyone at your next dinner party, and they’ll never guess how straightforward it was to make. The honeycomb texture, the adorable little bee, the scalloped border with those golden picots. It all comes together in a 15 inch round placemat that works up faster than you’d expect.
Get the Ad-Free PDF Pattern
You can find the free pattern below, or you can purchase the ad-free printable PDF from my shop.
Get the Printable PDF →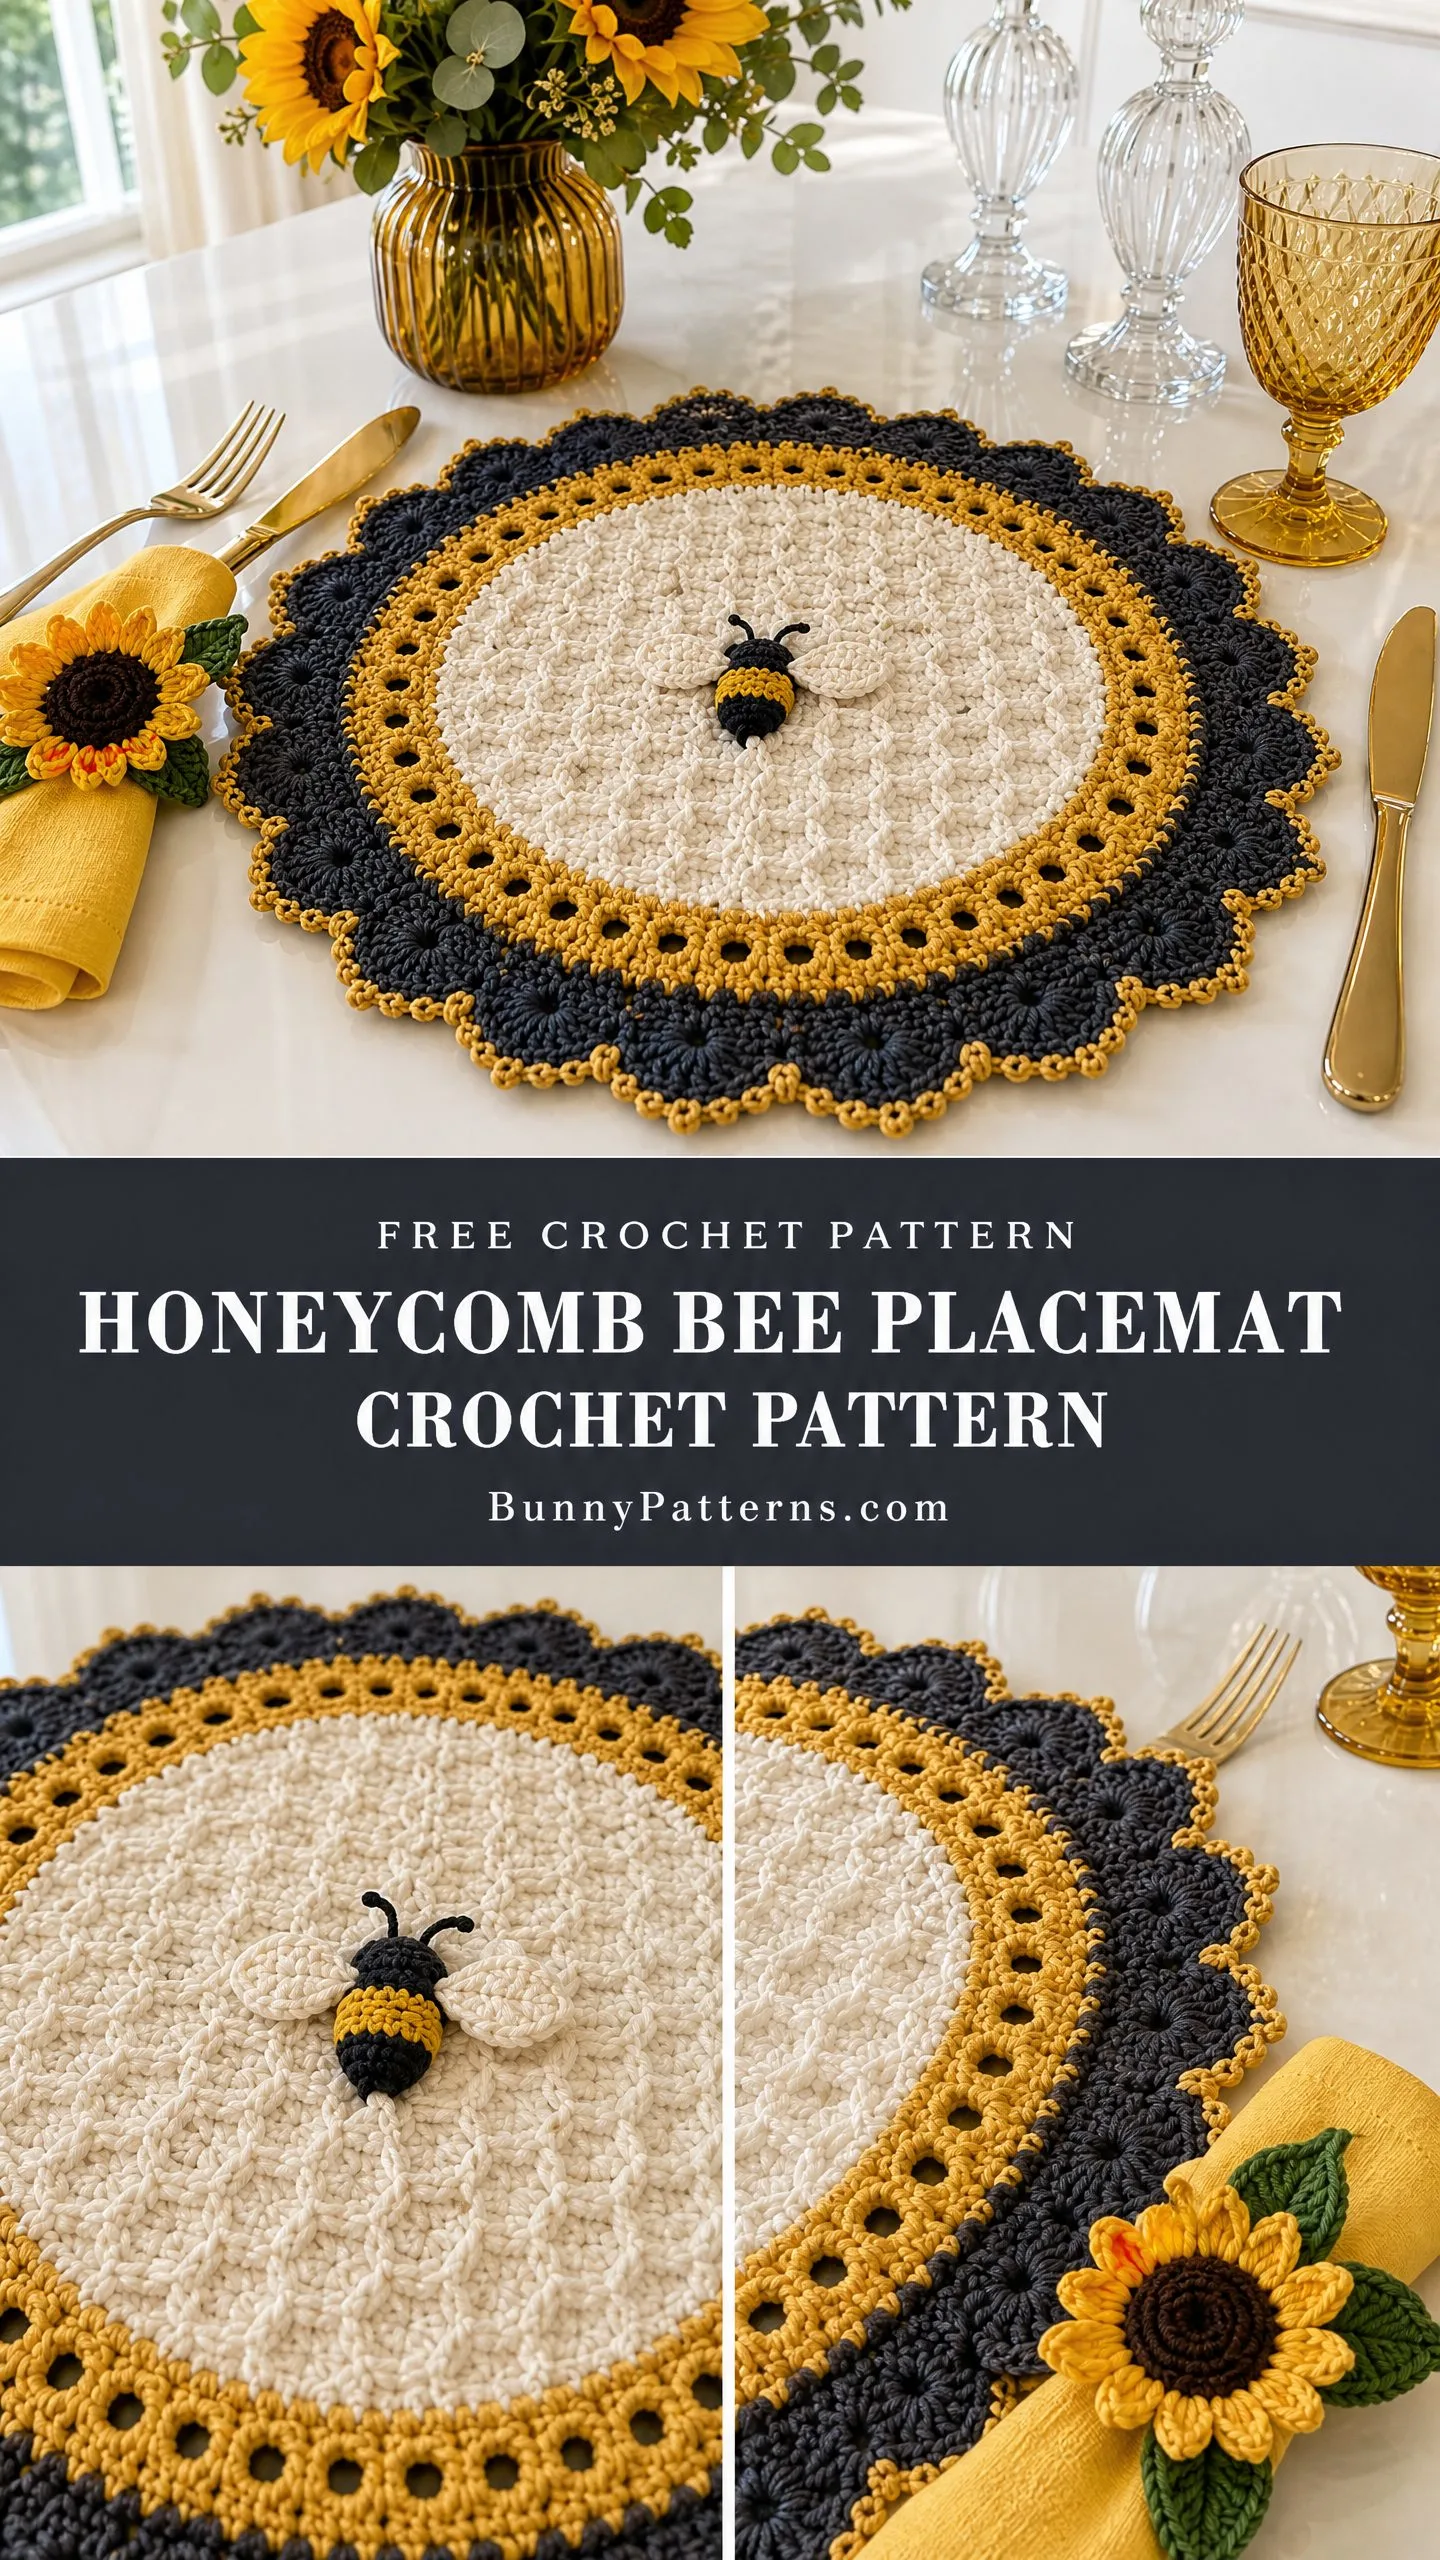
I’m talking about a project that hits that sweet spot between "interesting enough to keep you engaged" and "relaxing enough to make while watching your favorite show." Plus, these make INCREDIBLE gifts. Think housewarming presents, bridal showers, or just treating yourself to a whole matching set for your own table.
If you’ve been wanting to try front post and back post stitches but felt intimidated, this is your sign. The honeycomb texture is created with a simple alternating pattern, and once you get the rhythm, it practically works itself.
About This Honeycomb Bee Placemat Pattern
This round placemat features several beautiful elements working together. You’ve got an ivory center with that gorgeous honeycomb texture, a sweet crocheted bee right in the middle, a mustard yellow eyelet band that adds visual interest, and a charcoal gray scalloped border with golden picot details.
The finished size comes out to approximately 15 inches (38 cm) in diameter. That’s the perfect size for a standard dinner plate with a little breathing room around the edges. The modern farmhouse style makes these placemats versatile enough for everyday use or special occasions.
Skill level is intermediate. You should be comfortable with basic stitches and ready to try some texture work. If you’ve never done front post or back post stitches before, don’t worry. I’ll explain exactly what those mean.
Materials You’ll Need
Gather these supplies before you start:
Yarn:
Tools:
Cotton yarn is the best choice here because it’s durable, washable, and lies flat beautifully. It also holds up well to the wear and tear that placemats inevitably face.
Gauge Information
Your gauge should be approximately 18 double crochet stitches and 10 rows equals 4 inches.
Now here’s the good news. Gauge is not critical for this project. Your placemat might end up slightly larger or smaller than 15 inches, and that’s perfectly fine. The important thing is to keep your stitches firm so the placemat lies flat on your table without curling or cupping.
If you notice your work is ruffling or curling, try going down a hook size. If it’s too stiff and bowl-shaped, try going up a hook size.
Abbreviations and Stitch Definitions
Let me break down every stitch you’ll use in this pattern:
ch = chain: This is your foundation stitch. Yarn over, pull through the loop on your hook. That’s one chain.
sl st = slip stitch: Insert your hook, yarn over, pull through both the stitch and the loop on your hook in one motion. This is used for joining rounds.
sc = single crochet: Insert hook into stitch, yarn over and pull up a loop (2 loops on hook), yarn over and pull through both loops. This creates a short, tight stitch.
hdc = half double crochet: Yarn over, insert hook into stitch, yarn over and pull up a loop (3 loops on hook), yarn over and pull through all 3 loops at once.
dc = double crochet: Yarn over, insert hook into stitch, yarn over and pull up a loop (3 loops on hook), yarn over and pull through 2 loops, yarn over and pull through remaining 2 loops. This creates a taller stitch.
tr = treble crochet: Yarn over twice, insert hook into stitch, yarn over and pull up a loop (4 loops on hook), yarn over and pull through 2 loops three times until one loop remains.
st = stitch
sp = space
sk = skip
Front post stitches: Instead of inserting your hook into the top of a stitch, you insert it from front to back around the post (the vertical part) of the stitch below, then back to front. This pushes the stitch forward, creating texture.
Back post stitches: Same concept, but you insert your hook from back to front around the post, then front to back. This pushes the stitch backward.
Pattern Instructions
Center Honeycomb Circle (Ivory Yarn)
Round 1:
Make a magic ring. Chain 3 (this counts as your first double crochet). Work 11 double crochet into the ring. Join with a slip stitch to the top of the beginning chain 3. (12 dc)
Quick tip: If you’re not comfortable with magic rings, you can chain 4 and slip stitch to form a ring instead.
Round 2:
Chain 3. Work 1 double crochet in the same stitch. Work 2 double crochet in each stitch around. Join with slip stitch. (24 dc)
Round 3:
Chain 3. Work 1 double crochet in the next stitch. Work 2 double crochet in the next stitch. Repeat this pattern around. Join with slip stitch. (36 dc)
Round 4:
Chain 3. Work double crochet stitches evenly around, increasing every third stitch. Join with slip stitch.
Round 5 (Creating the Honeycomb Texture):
Chain 2. Work alternating front post and back post stitches around the circle to create the raised woven texture. Join with slip stitch.
This is where the magic happens! The alternating front and back post stitches create that beautiful honeycomb effect. Take your time on this first texture round until you get the rhythm.
Rounds 6 through 10:
Continue the honeycomb texture while increasing evenly every round. Keep working until your circle measures approximately 10 inches across.
The key here is maintaining that alternating pattern while also adding stitches to keep your work flat. If you notice your circle starting to ruffle, you’re increasing too often. If it’s cupping or curling, you need more increases.
Bee Motif
The bee sits right in the center of your placemat, adding the perfect finishing touch.
Body:
Using black yarn, make a small oval:
Surface crochet is when you work stitches on top of your finished fabric. Just insert your hook through the work, pull up a loop of golden yellow yarn, and chain across where you want your stripe. Alternatively, you can use a yarn needle to embroider straight lines.
Wings:
Using cream yarn, make two small oval loops with chain stitches and attach them beside the bee body. A simple method is to chain 8, slip stitch to form a loop, and attach. Make two wings.
Antennae:
Using black yarn and your yarn needle, stitch two small curved lines above the bee head. These are just simple embroidered curves.
Attach your completed bee to the center of the ivory honeycomb section.
Mustard Eyelet Band
Round 1:
Attach mustard yarn to any stitch. Chain 3. Work double crochet evenly around the entire piece. Join with slip stitch.
Round 2:
Chain 3, skip one stitch, double crochet in the next stitch, chain 1. Repeat this pattern around to create the eyelet holes.
These eyelets add beautiful visual interest and help transition between the honeycomb center and the border.
Round 3:
Work double crochet into each stitch and into each chain space. This fills in the round and prepares you for the border.
Charcoal Scalloped Border
Round 1:
Attach charcoal yarn to any stitch. Work single crochet evenly around the entire piece. Join with slip stitch.
Round 2:
Chain 3. Work 4 double crochet into the same stitch. Skip 2 stitches. Work single crochet into the next stitch. Repeat this pattern around to create the scalloped edge.
Count your stitches before starting to make sure your scallops will end evenly. You may need to adjust slightly.
Round 3 (Picot Edge):
Work single crochet into each scallop. Add small golden picots by changing to gold yarn and making:
These golden picots add that gorgeous finishing detail you can see in the photos.
Finishing Your Placemat
Once all your crochet work is complete, it’s time for the finishing touches.
Weave in all ends using your yarn needle. Cotton yarn can sometimes work loose, so weave each end through at least 2 inches of stitches and in different directions.
Block the placemat lightly using steam or a damp blocking method. Lay your placemat flat on a blocking mat or clean towel. Spray it lightly with water or hold a steam iron a few inches above the surface. Shape the scallops evenly with your fingers.
Allow the piece to dry completely before using. This usually takes several hours, depending on humidity.
Care Instructions
Your finished placemat will stay beautiful with proper care:
Cotton placemats are wonderful because they can handle everyday use, but a little gentleness goes a long way in keeping the colors vibrant and the texture intact.
Tips for Success
For the honeycomb texture: Practice the front post and back post stitches on a swatch first if you’ve never tried them. Once the motion clicks, you’ll fly through those rounds.
For the bee: Don’t stress about perfection. A slightly wonky bee has character! The stripes and wings make it recognizable no matter what.
For blocking: Cotton really benefits from blocking. It relaxes the stitches and helps everything lie flat. Don’t skip this step.
Making a set: If you’re making multiple placemats, consider working them assembly line style. Do all the ivory centers first, then add all the bees, then all the mustard bands, and finally all the borders.
Why You’ll Love This Pattern
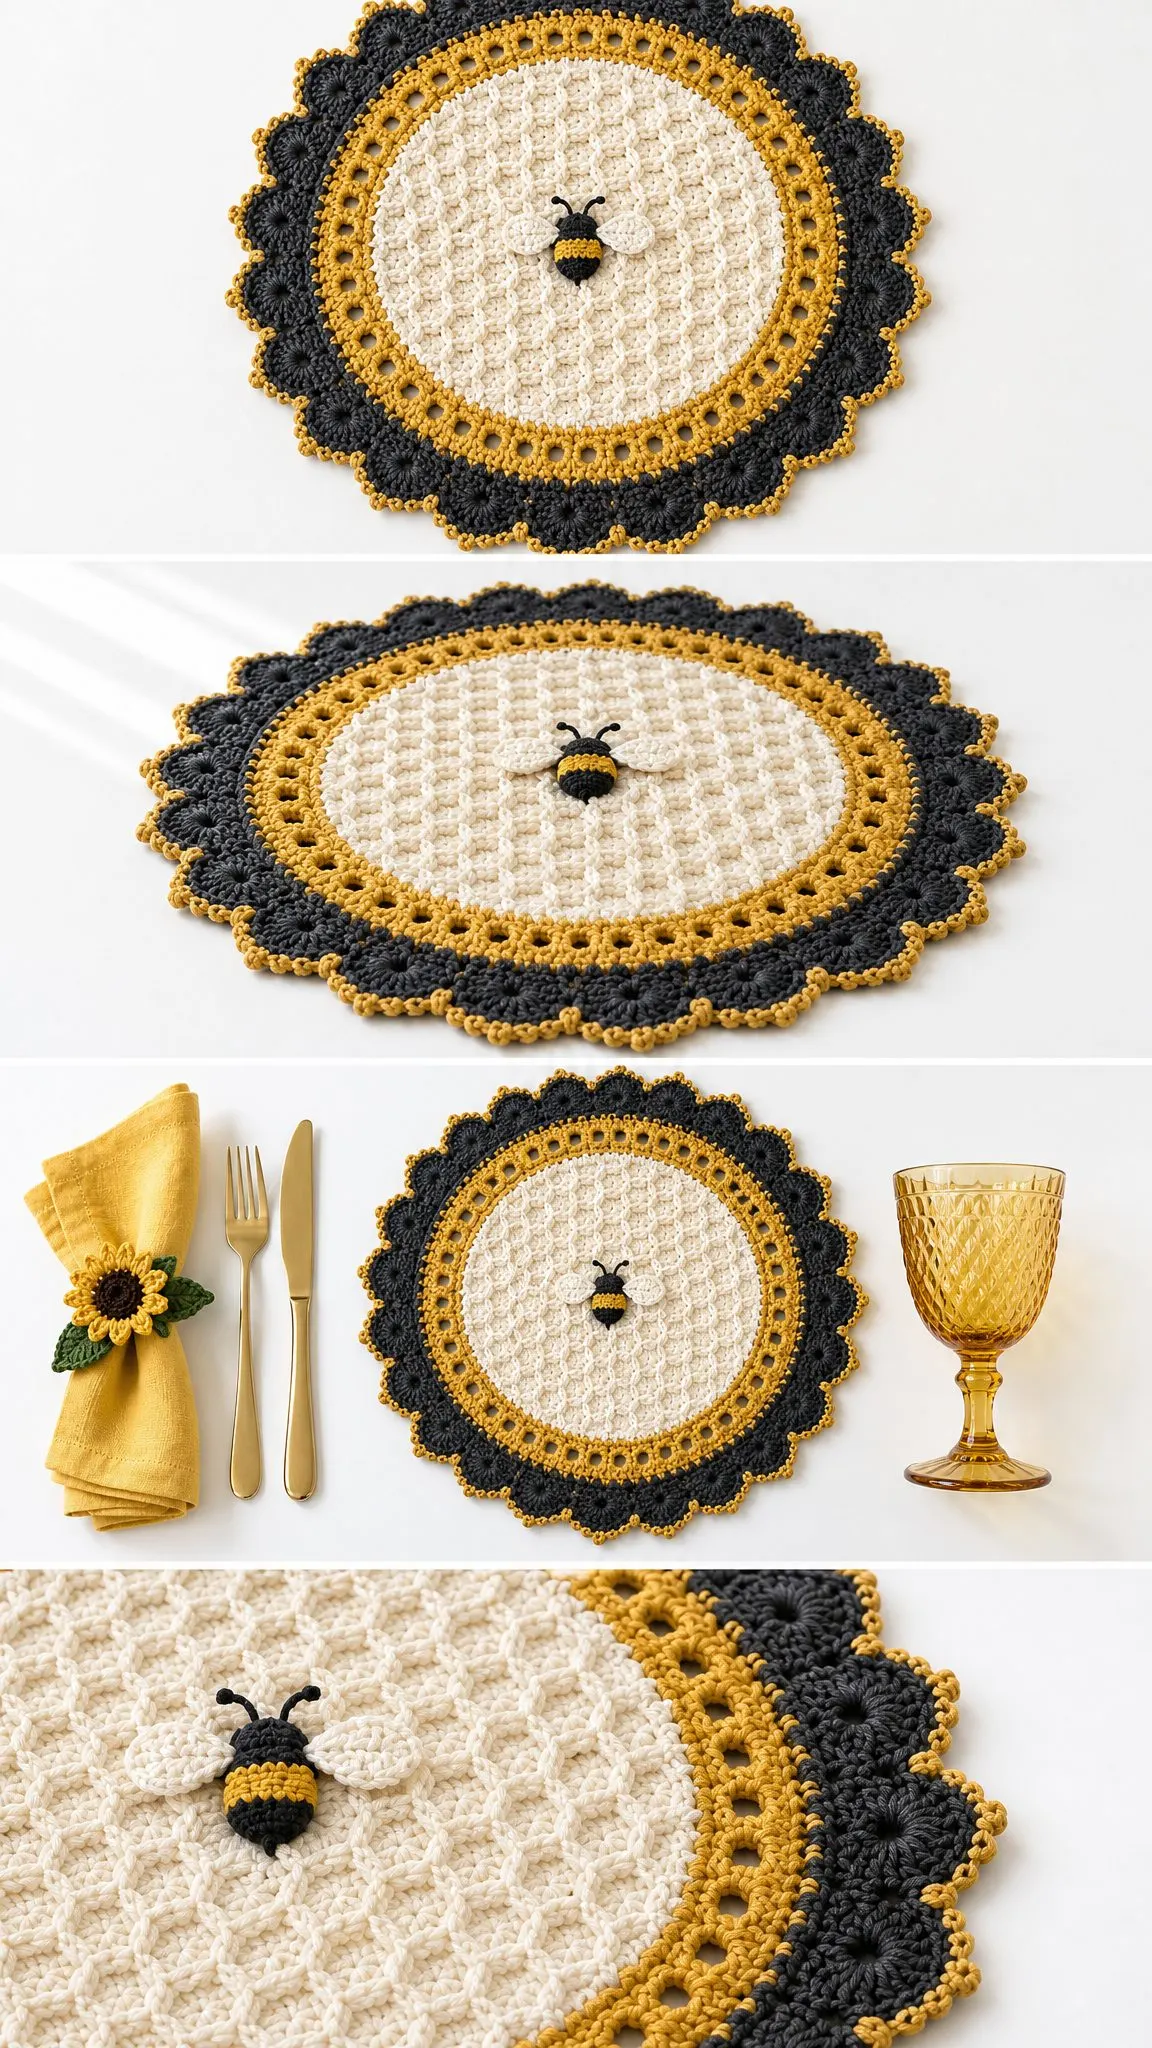
The finished placemat combines an ivory honeycomb texture, a raised bee centerpiece, mustard eyelet detailing, and a charcoal sunflower-inspired scalloped edge for a coordinated dining table set. It’s the kind of project that looks impressive displayed on your table but doesn’t require months of work to complete.
These placemats also make thoughtful gifts because they show you put real time and care into creating something handmade. Pair them with matching napkin rings or coasters for an extra special presentation.
I hope you love making this Honeycomb Bee Placemat as much as I enjoyed designing it. The combination of textures, colors, and that sweet little bee creates something truly special for your home.
If you make this pattern, I’d love to see your finished placemats! Share your photos on Instagram or Facebook and tag me so I can admire your work. Save this pattern to your Pinterest boards so you can find it whenever you’re ready to start, and drop a comment below to let me know how yours turns out. Happy crocheting!
Want a Quick & Easy Printable Version?
Get a clean, beautifully formatted PDF of this pattern — easy to follow step by step, ready to print or save on any device. No scrolling, no distractions, just the pattern.
Get the Printable PDF →You Might Also Like
- Lavender Butterfly Shawl Crochet Pattern
- Mint Green Popcorn Stitch Baby Jumpsuit Free Crochet Pattern
- Dusty Rose Granny Square Summer Dress Free Crochet Pattern
- Sage Green Minimalist Backpack Free Crochet Pattern